If you are new to the game there is a lot to take in, sometimes you might run into a quest to capture a monster, but how will you know it is the right time to capture? This is what this guide is supposed to explain.
A bit of introduction
Welcome to this guide, here I’ll try to give you a little insight on what to keep in mind when you decide you want to capture monsters. I personally capture the vast majority of Monsters, not only because it rewards me more materials, saves a bit of time, but also because it is what I like to do. (afaik if you cut off the tail and have a specific thing for it you can carve the same amount)
There is a persistent rumor that capturing will give you less chance of getting some loot rewards, the official Japanese guide book mentions that the chances are exactly the same for both.
So you might ask what are the benefits?
In general you will get a few more materials by capturing the monster due to the payout in general and the second reason is it saves time at the expense of extra resources.
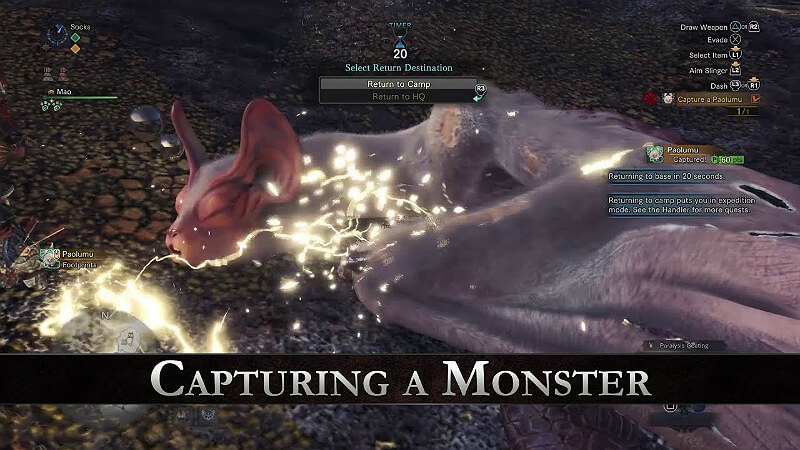
A monster is capture able on certain HP %, after which you can do it and after such there is a 20 second timer before you are sent back to the HQ (Versus not only depleting the HP of the monster for the kill but also a 60 second timer after).
The equipment
Before you could start capturing you need a few essential things, capturing monsters can be a drain on your resources (be it money or craft materials).
The essentials:
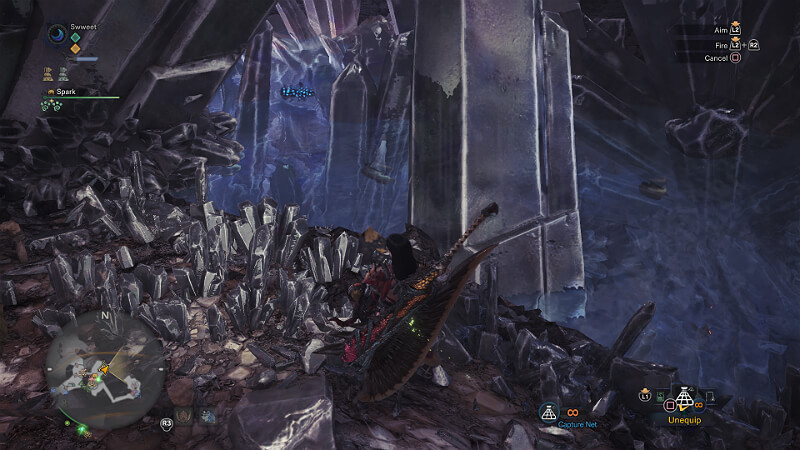
Traps these come in two forms:
Shock trap (yellow trap), this is pretty normal, will incapacitate the monster for a short time.
Pitfall trap (green trap), immobilizes the monster, but unlike the shock trap some monsters are able to still cause trouble (Deviljho)
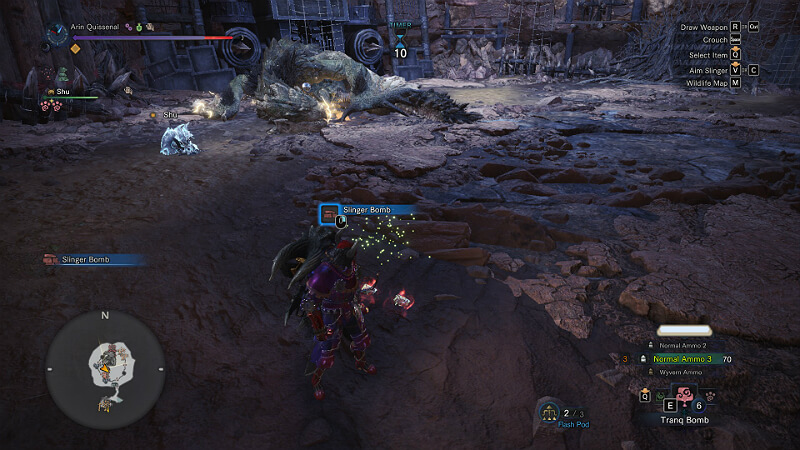
You want to preferably keep one of each in your inventory in case you make a mistake during the capture process. Simply because you can only have 1 in your inventory at a time. Even with those you also need to have Tranq bombs, normally 2 is needed for a capture but if the monster is especially low on HP the trap can be enough by itself (use at the head of the monster)
Alternatively if you are using a Heavy Bow Gun or a Light Bow Gun than you can shoot the head of the monster with Tranq Ammo while it is entrapped.
Materials needed
Here is where things get a bit annoying, especially since you start out you might not have the needed materials to do this right away. Let us look at what you need:
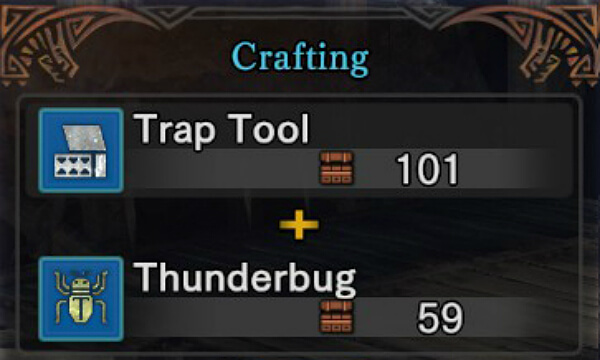
Shock trap:
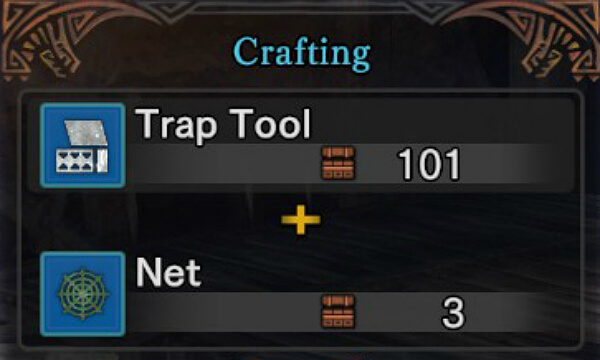
Pitfall Trap:
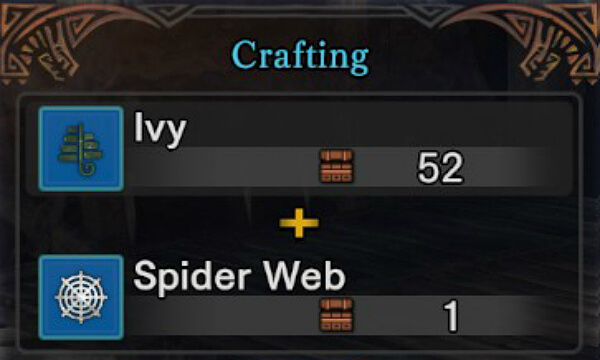
Nets:
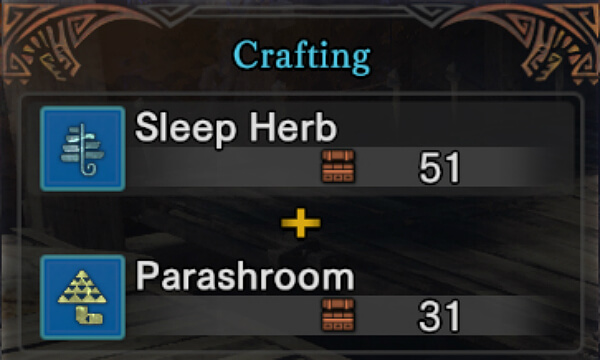
Tranq Bombs:
Tranq Ammo:
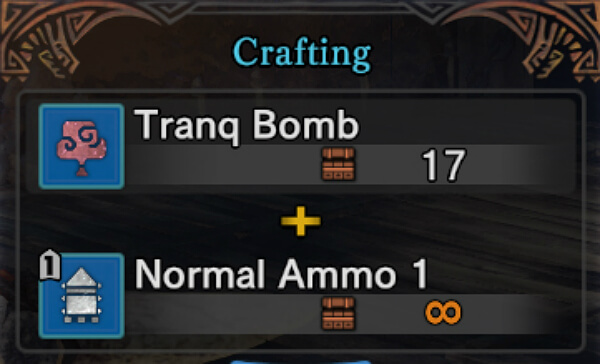
Note: it is worth buying this than crafting in my opinion, it costs 45z at the Vendor
Now some of these items can be bought from the vendor near the entrance to the camp, trap kits costs like 200z a piece, some you will get from daily log in rewards or quest rewards.
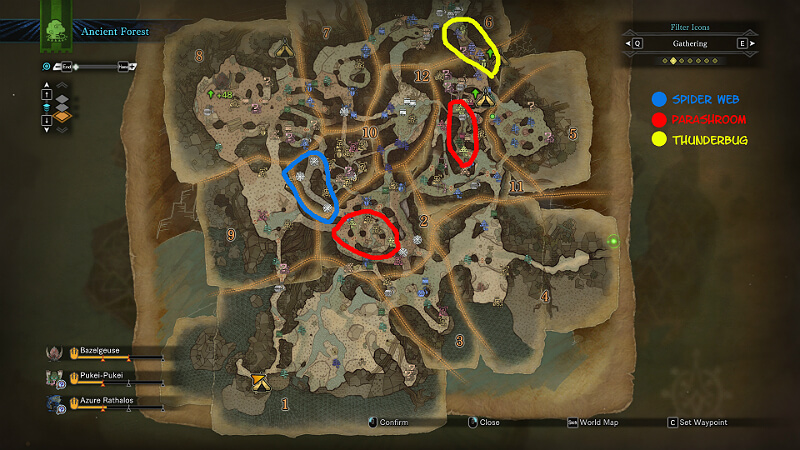
Until you can cultivate enough in the City you will need to grab some quick locations, for the example I’ll use Ancient forest, but there are different spots good for farming (Wildspire waste is great for Sleep Herb+Para shroom).

Capture Mechanics
Monster Hunter World got many signs to suggest to you that a monster is ready for capture, some are more obvious than others and some might not show up depending on a few factors (like doing damage so fast they don’t get to limping stage). Let us go over some of these.
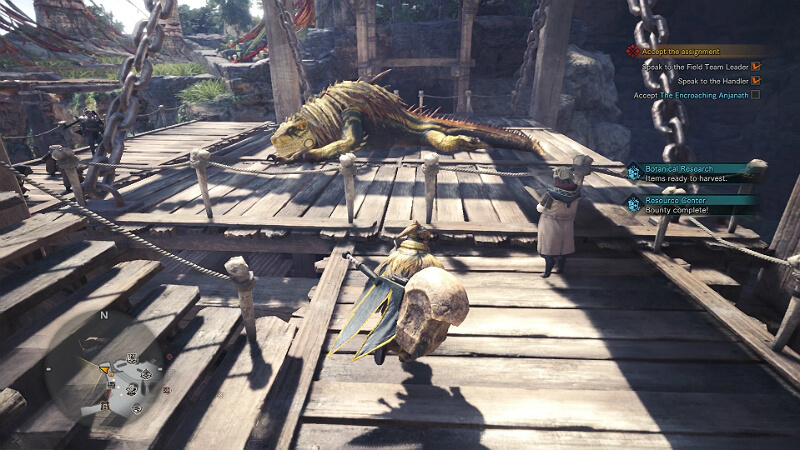
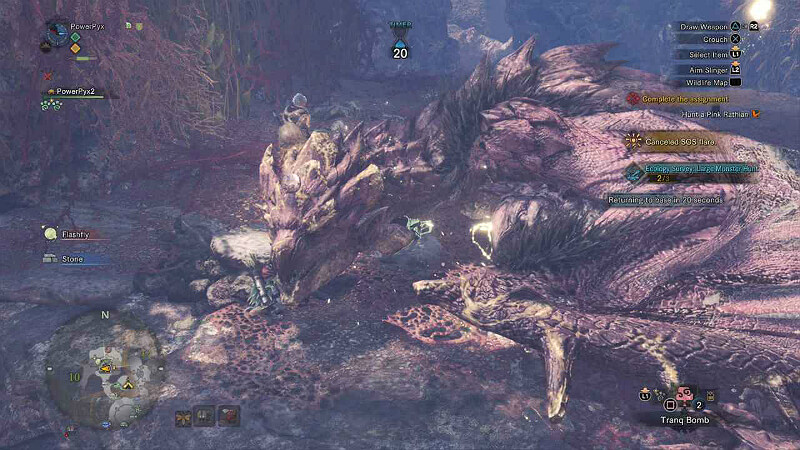
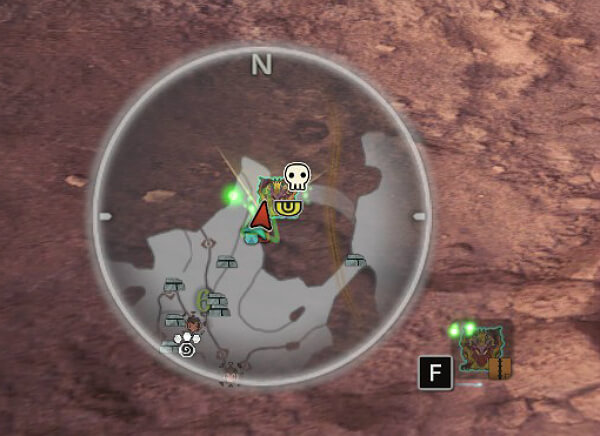
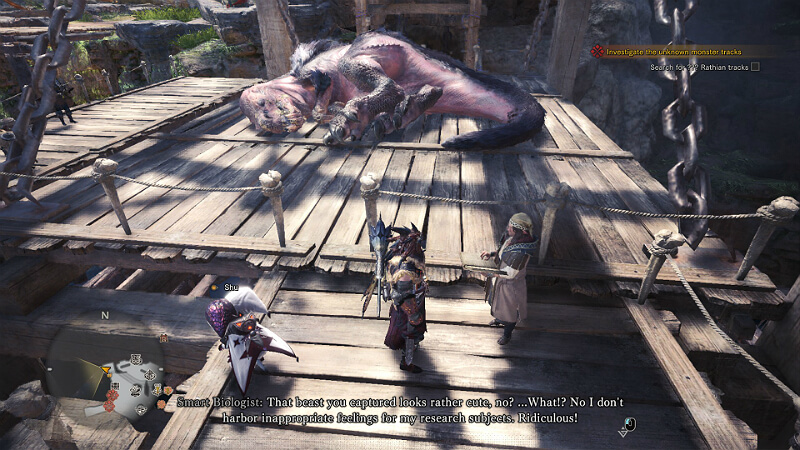
Perhaps the most obvious sign that a monster is ready for capture is that they start to limp away, often to their lair to get a bit of snooze. However if you deal damage too fast they might not get to this stage, but that is end game stuff, in general this is your most obvious sign.
Whenever a monster gets to a certain stage of their health they drop “pods”, generally they drop two (some three like Deviljho) that signals that they can be captured. Rarely I experienced some monsters not dropping pods, this is why it is important to watch every sign!
This can be found next to the minimap and shows the Monster’s status and exhaustion, the closer it is to flatlining the closer it is to be captured. When enraged usually the Vitals flash rapidly between Orange and blue, some monsters enrage before dropping the last pod.
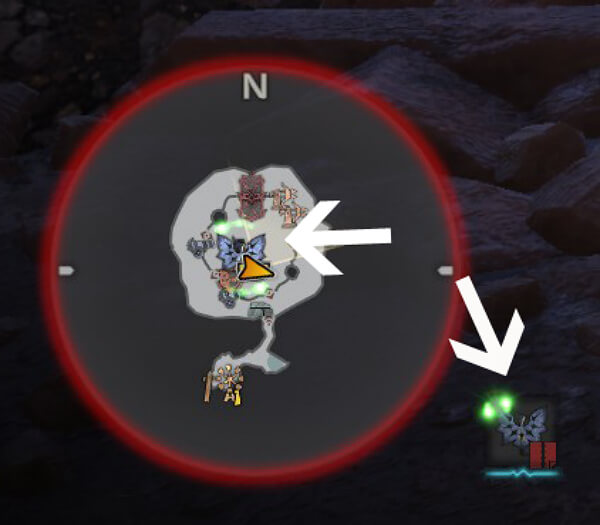
This shows up on the minimap once a monster is in a capturable state, but only if you have fought the monster before, Monster you hunt for the first time will not have this.
You can do this if the monster retreated and is sleeping, the tranq debuff stays on them for a bit making it easier to capture if you did not set up your loadouts yet (More on this on tips and tricks). Thank you for booths and the G Mann for bringing this to my attention.
There is actually a resistance buildup for Monsters against traps, but I myself never had an issue with them even if I used a few traps during the hunt, but it is good to keep in mind!
Loadouts
This is in general an important thing for everyone and not just specifically for captures. Loadouts allow you to quickly restock and change gear setup depending on the hunt, making your job so much easier during a Hunt. Let us get started.
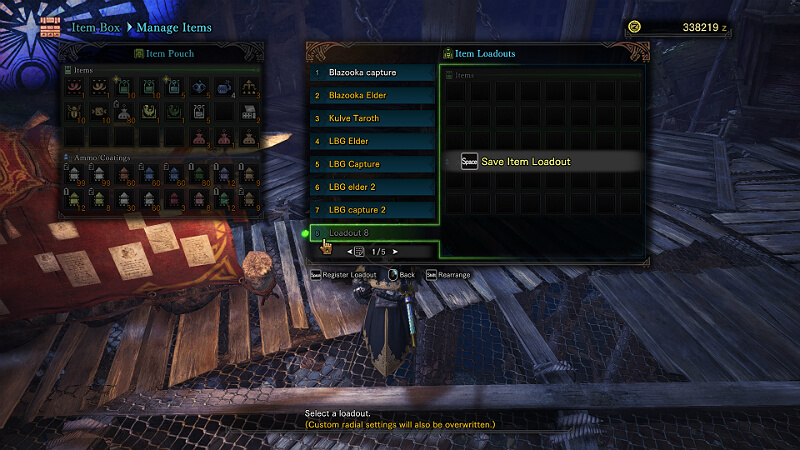
It is actually pretty easy, I am going to cover the way you do it with Mouse and Keyboard (alas I don’t use a controller). First you want to go over to your stash, either in Astera or in your own room and the topmost option will be “Manage items”. In there put in all the items/ammo you wish to use for a capture hunt, once you feel you packed all the goodies press ESC.
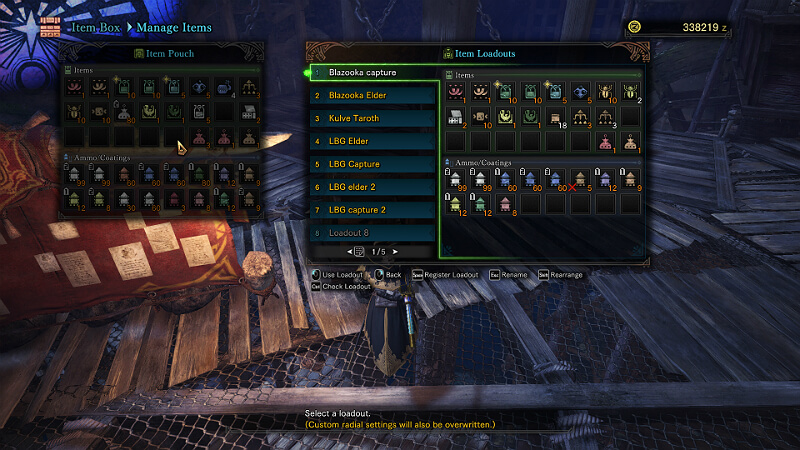
Move over to an empty slot and select it, pressing space will save the loadout you have in your inventory to that slot. Pressing ESC again on said loadout will allow you to rename it, as you can see I have a few set up, if the text is WHITE it means you got all the stuff to restock your inventory. If it is YELLOW it means you cannot restock everything.
Clicking the mouse two times on the loadout will restock that loadout in your inventory.
Setting up your quick bar
Now this is the most important part to increase a hunt’s efficiency as you can set up your quick bar to make things organized and near each other.
Select the loadout first and then press CTRL to check loadout, once there pressing space will let you change your quick bar!
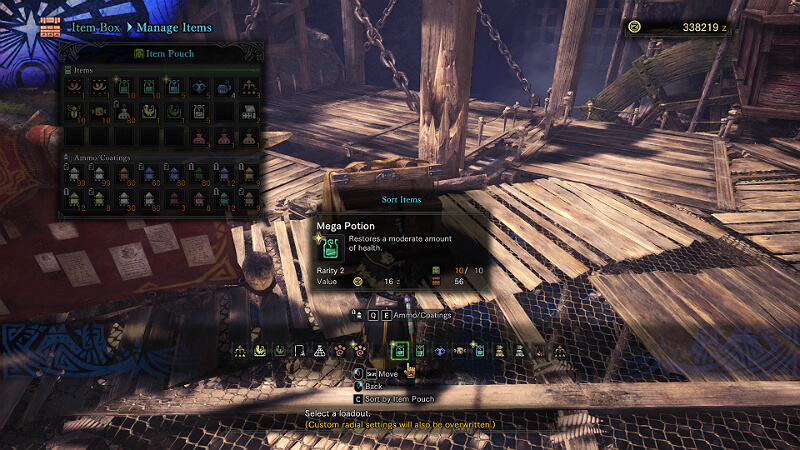
As you can see you can put all the trap related things near each other for easy access, it is a bit finicky in how this works and the important note is: don’t worry if it does not work right away, once you are back from a hunt and use the loadout again to restock it will change the quick bar the way you set it up.
Will expand this section a little bit later for now I hope it helps make the game a bit more easier to get ahold of!
Final Tips
While you can bring along one of each trap that does not mean you are limited to that, as with any other consumable you can bring along the basic ingredients to craft them in the field. In the case of traps that means you can bring an extra two trap kits max so taking 2 Thunderbugs and 2 trap kits will save you a bit of space in your inventory.
Some Monsters have strange habits of throwing away their pods (Odogaron comes to mind). Sometimes taking a glance around the battlefield is a good idea to do.
Elder dragons cannot be captured, they must be slain.
Hope this guide helps understand the art of monster capturing, you can now rest well that after their capture the monsters will be taken care of to be released back into the wild!
…damn it.
PS: I apologise if there are glaring Grammar mistakes, tried my best to avoid them. I’m also a newbie to the series so it is possible I am missing some obvious essentials, tried to be as thorough as possible.
Original Link – Continuation of discussion


Add comment