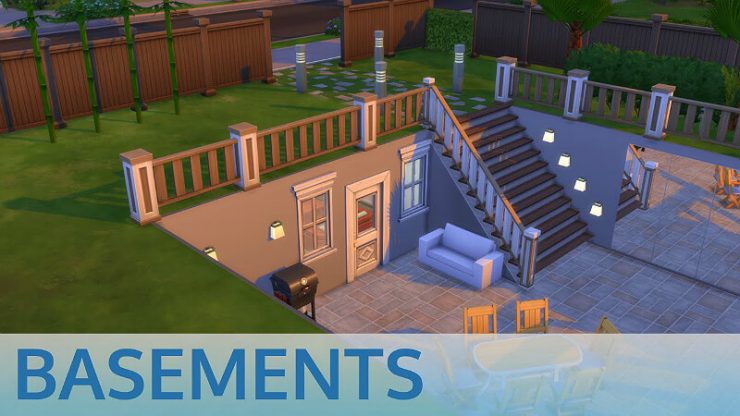
A simple guide to build realistic basements…
Basements Tool
After the release of The Sims 3 Worlds Adventures patch, the Basements tool was added to the building section of the game. Which made building basements possible and a lot easier.
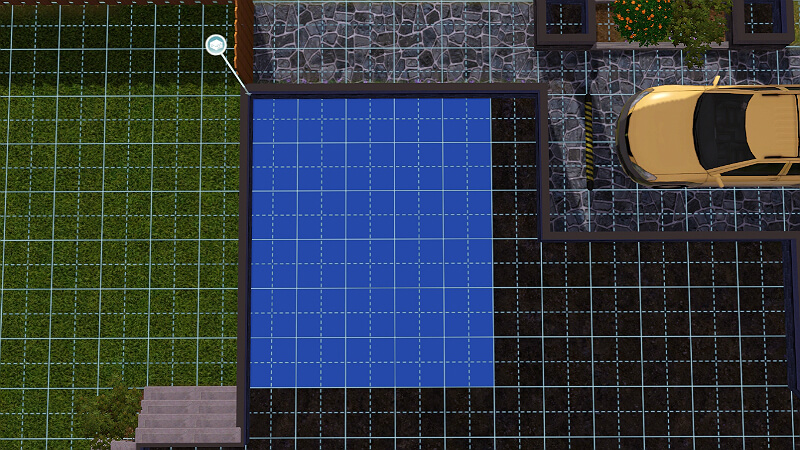
You simply go to the Build Mode and click the Basements tool. Click on the ground level of your lot, and drag out the size you want. It will be displayed as a blue area. Then you can go down a floor level and you will see your basement. To place the stairs, you can either remove floor tiles from the upper floor, or simply place the stairs on the basement floor, but make sure no objects or walls are blocking it on upper floor. But that’s in case your house doesn’t have a foundation. So I will explain later on how to build one in details.
The tool allows you to go down 4 levels underground. But personally, I dislike it. It may be simple, but the underground levels are creepy and I prefer to have surroundings instead of an isolated room.

Using the Foundation as a Basement
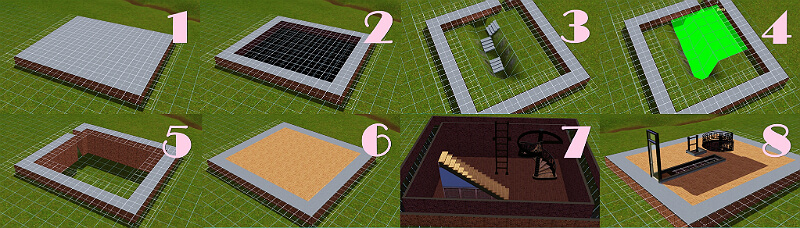
Best way to build a basement in my opinion, is by using the foundation itself. It might not be as easy as the Basements Tool, but it’s a very rich method and the results are very rewarding. It can be done in a few steps that I’ll try to keep as simple as possible.
- Build a foundation in any size you want, you can still edit it after.
- Use the Sledgehammer and remove the foundation leaving only the outer edges.
- Place 3 sets of stairs, to go down 3 stairs levels as they’re equal to the standard level height.
- Remove the stairs and use the Terrain Tools, select level terrain, click on the lowest ground point and drag out to adjust the inside ground level.
- Make sure you drag to into between the foundation walls.
- You can now place floor tiles on your foundation, that is your normal ground level.
- Go down a level and place any type of stairs anywhere you wish.
- Go back to the ground level to place walls or railings around your stairs.
I had to remove a block from the foundation because the inside was dark due to the sun direction. But I re-added it after I was done with the basement.
Building a Basement under the Foundation
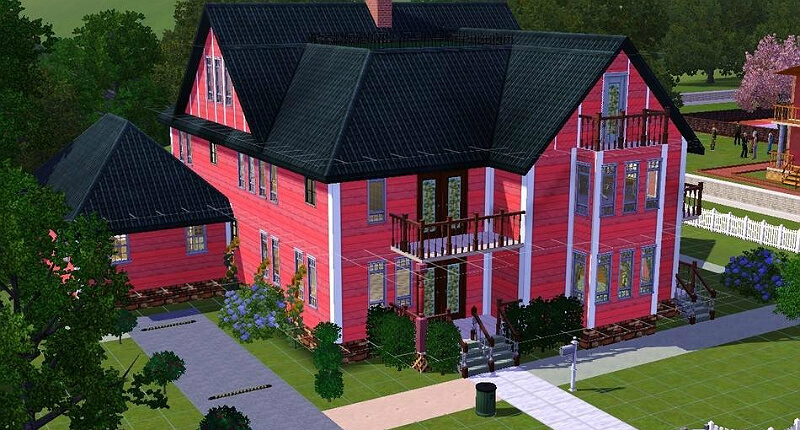
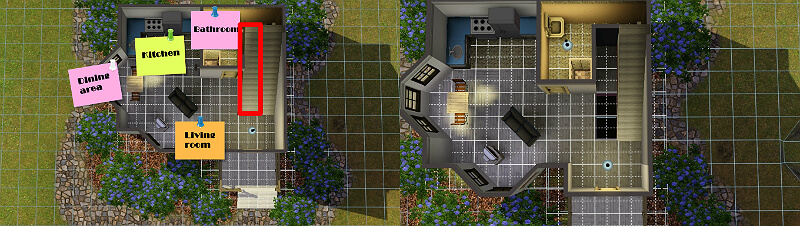
Building a basement in an already-built and furnished house with a foundation can be complicated. But I’ll explain how to do it in very simple small steps. And I’ve chosen a pre-existing house from Appaloosa Plains for this example.
Basements tool
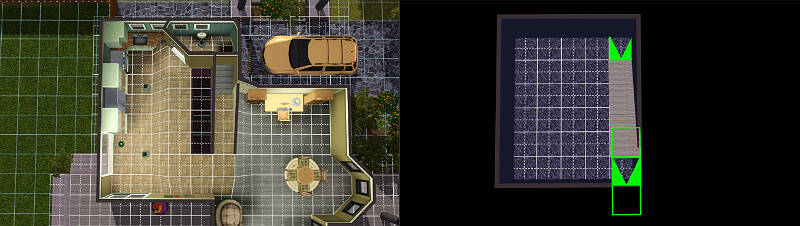
- Best way to start, is to look for a good spot in your house to place the stairs without demolishing it. Just look for a spot where you only need to move a few objects to make some room. What you will need is 5 squares, but for now mark only 4, I will explain later on why you will need a 5th. So I decided to delete the double stairs and replace them with singular to make some room. It seemed like a good spot for me.
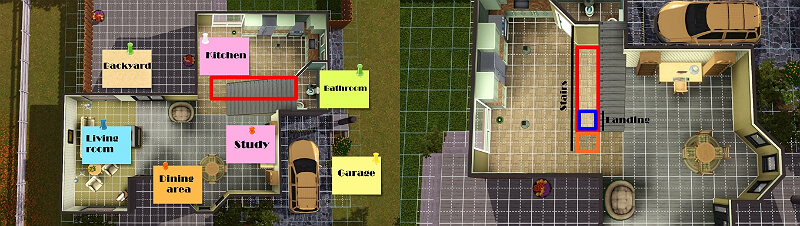
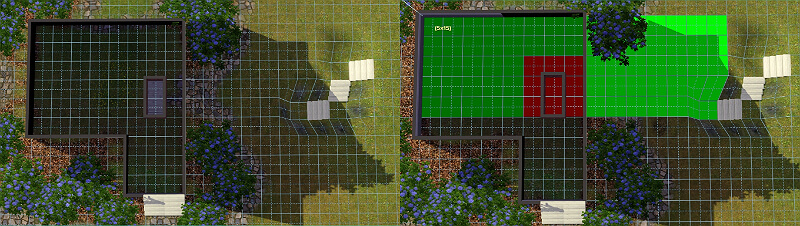
- Move to the ground level and draw a basement using the Basements tool where you located the stairs, with at least 6 squares length.
- Open the console using Ctrl+Shift+c and type ConstrainFloorElevation false.
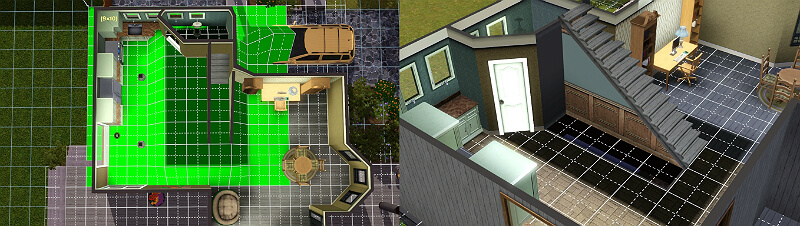
- Move back to the foundation level and remove the 4 squares using the Sledgehammer. The floor level will “lift” up, Don’t worry it’s normal. It only turned the foundation into walls height, since placing the stairs inside a foundation is not possible, while it is possible inside walls.
- So go to the basement level and place your desired stairs in the right spot.
- If your work area is away from the garage or doesn’t affect the outer foundation like in the pictures, skip this step. If not, select the Wall tool and draw over the missing wall separating the stairs and garage, to replace the deleted foundation wall. I did another example here using spiral stairs. The principal is still the same.

- Go back to the foundation level. Go to the Terrain Tools and select Level Terrain. Click and hold on an edge area with the correct floor height, then drag it beyond the raised floor section to adjust it back to its correct height.
- Turn off the CFE cheat by typing, ConstrainFloorElevation True.
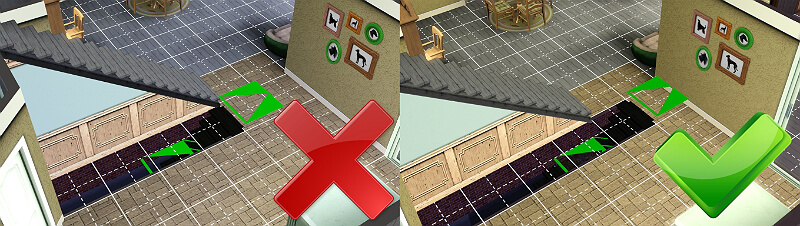
- Now you have one more free square to place the stairs to the foundation level. Although, all the stairs require a landing square at the bottom and top. So your Sims will not be able to use the stairs if there is no landing square between them. So you will have to remove one more square to place the rest of the stairs.
- And you’re done, you can now place the landing tiles and correct the paint. The appearance might not be great though like you could see in my screenshots above. But there are infinite ways to make use of it and make your place look way more appealing than it already was. I recommend using the <MoveObjects on> cheat, to place objects and doors freely. I made a few designs to show you.

Realistic Basements
Now like I said, I don’t like using the Basements tool, it might be easy and appealing in the interior of the house. But you cannot use it on the exterior. I know what you’re thinking, basements are underground, what exterior… Well, the Basements tool, allows you to build only a room(s) underground, where having windows will make no sense, as there is only complete darkness outside, yet they still magically light up the room. It’s creepy!
But if you build a basement without the tool, the results will be very rewarding and more realistic. The Method is the same as I mentioned in the Using the Foundation as a Basement section. But I will make another quick tutorial for already built and furnished houses. I’ve chosen another pre-existing house, in Appaloosa Plains as well.
- Again I started by looking for a good spot instead of demolishing the house and crying. I dislike double stairs, so I changed them to single and used the remaining space for the basement stairs. Now if you follow the steps 3-8 in the “Using the Foundation as a Basement” section, placing the stairs will be a piece of cake, no cheats required or anything. But I’m going to try something different here. I’m going to start with removing two squares. Then I’m going to cover them with tiles on the ground level.
- Now I’m going to move outside of the house, and place 3 sets of stairs to go down 3 stairs levels for a standard wall height. Then go to the Terrain Tools in the Build Mode, select the Level Terrain and click and hold on the lowest point and drag to the desired basement location.
- Back to the foundation level, I removed 4 more squares horizontally starting from the bottom landing square of the previously removed foundation. Then back to the ground level, and placed the stairs. Must place the basement stairs before the foundation stairs.
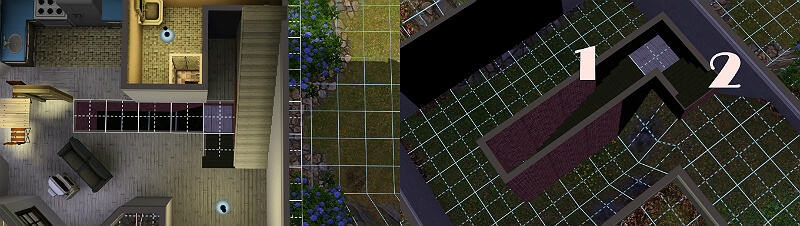
- On the ground level start removing the foundation walls to get the size of the basement you want. If you have a small house like I do in the pictures, I recommend removing the foundation all the way to edge, including the outer foundation. Then cover the open area with walls instead. And that’s your basement.

- But that’s still about the interior, I’ll move now to the outside and show you what you can do with the basement. I’ll keep it simple. You basically have walls now, which means you can do whatever you want with them. And with using the Level Terrain tool you can set the path to turn the basement to a garage if you wish. Or make a balcony, and even build another basement underneath it and many more ideas you can try.

I built a couple of quick small houses without the tool to demonstrate the various methods to use and build real basements.

Original Link – Continuation of discussion


Add comment