This guide helps out with some base building tips as well as the orientation issues you may have had with the Moonpool, docking, and ladders.
Ladder Orientation
There are three orientation issues when building in Subnautica. If you’re like me and somewhat obsessive with builds, then these issues will be a major drag. However, you can still deal with them once you understand the mechanics. We’ll start with ladders.
The direction you face when placing the first compartment of your base determines which side of the hatch the ladder gets placed on. The ladder will align with the forward most part of the hatch when facing the same direction that you were facing when placing the compartment. This also means that the direction you face when placing the first compartment determines the ‘front’ and ‘rear’ of the base. This cannot be emphasized enough because it ties with all of the other orientation issues below.
In this first screenshot, I’m about to lay down a X compartment.

In this next screenshot, I’ve added a hatch and upper level but I’m still in the same position. I will need to enter in order to build a ladder to reach the 2nd level.
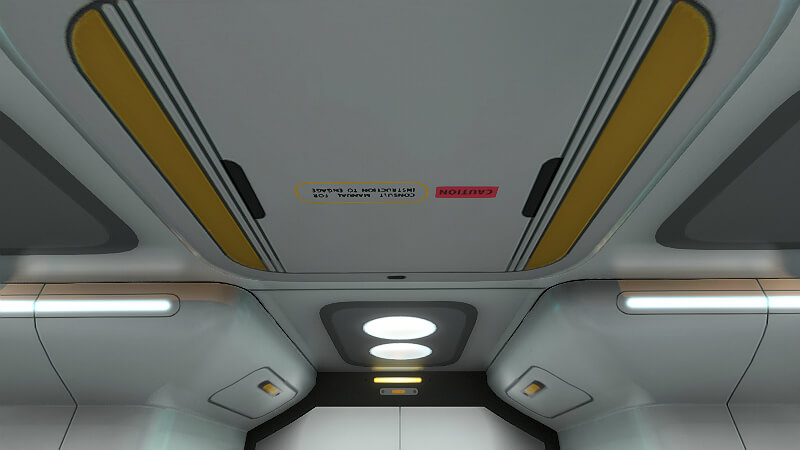
By entering the base from the same side it was facing when I built it, it’s easier to see the alignment. Note the unused hatch, which happens to always have text that appears upside down when facing the same direction of the compartment placement.
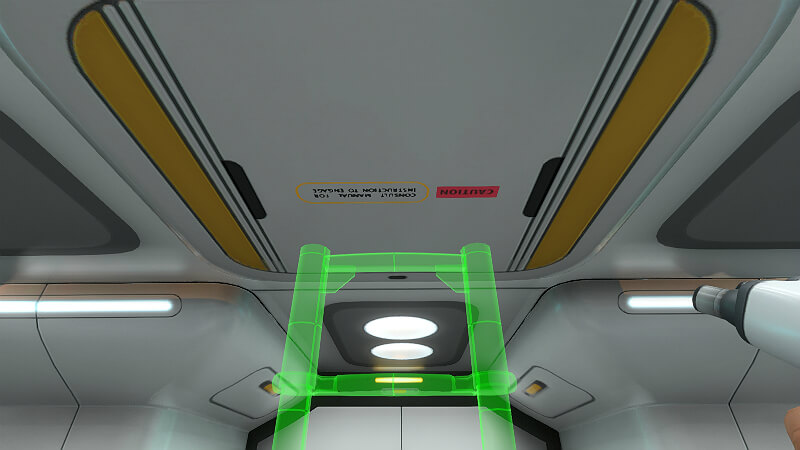
Now note which side of the lettering the ladder gets placed. If you ever get turned around while inside of a base and forget which direction your station is facing, this lettering will get you orientated.
Keep in mind that this only effects ladders placed in the connector compartments such as the I, L, T, and X. Ladders placed in the multipurpose room will always align with the ladder along the outer circumference of the compartment to give you as much foot room as possible, the exception being a centered placed ladder – this will follow the same ladder rule mentioned above.
Moonpool Orientation
Once the first compartment is placed, the Moonpool will always align along it’s long side (The side with two connections) compared to the first compartment placed. This means that you can’t rotate the Moonpool by repositioning yourself unless it’s the first item you place. The ladder rule still applies which means ladders will always align perpendicular to the long side of the Moonpool.
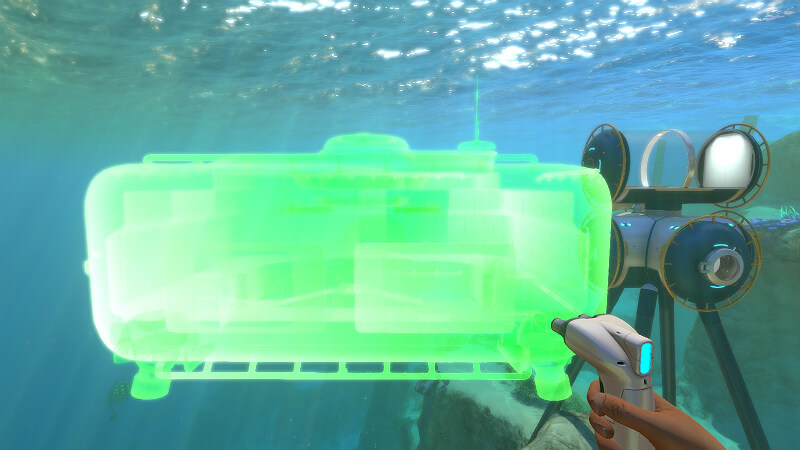
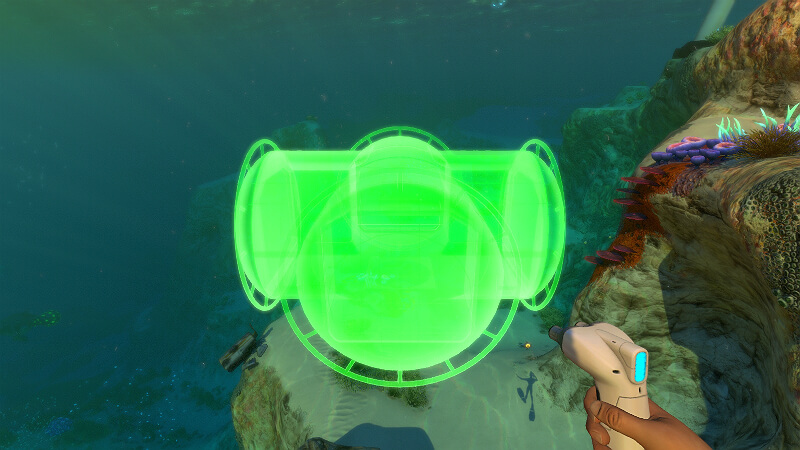
Getting ready to place the Moonpool. Relative to your position, the Moonpool will always appear perpendicular to you along the long side and if attaching it to an existing compartment, there is no way to rotate it.
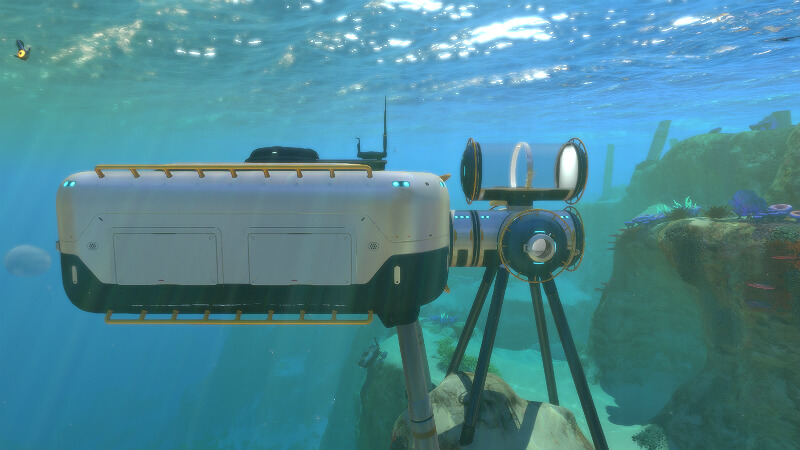
Once placed, it’s easier to see the orientation.
If I wanted the Moonpool to align with the smaller side on the front of the small base, then I’d have to change my own orientation when laying down the initial compartment. Saldy, this would also change the orientation of the Ladders. For this reason, most of my base builds have the Moonpool orientation seen above, otherwise I have to deal with awkwardly placed ladders that seem to get in the way. Hopefully one day the game will let us rotate those ladders.
Seamoth Docking Orientation
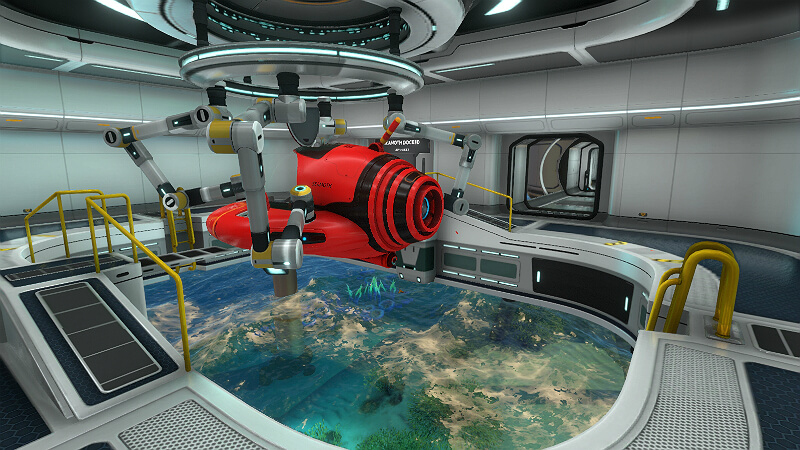
The Seamoth will always dock facing left when looking directly in the same direction as when the Moonpool was placed (I.E. ‘front’ to ‘rear’). Your character will also always exit to the left after docking. This will help you to decide on tube placement when connecting the rest of your station to the Moonbay.
As a general rule, just remember this: When placing your first compartment, the direction you face during placement determines the ‘front’ and ‘rear’ of the base, how ladders get placed, and the direction your Seamoth faces when docking, as well as the side you exit your Seamoth on once docked. So the spot you choose for that first compartment is important, but *YOUR* position relative to that placement is even more important. Luckily, you can always deconstruct to get your materials back and restart your build if needed. You can also start a new base and change the orientation of the new base compared to the first, assuming the first new piece you place is about 30 meters or further away from the nearest compartment attached to any other base.
Moonpool Vertical Placement
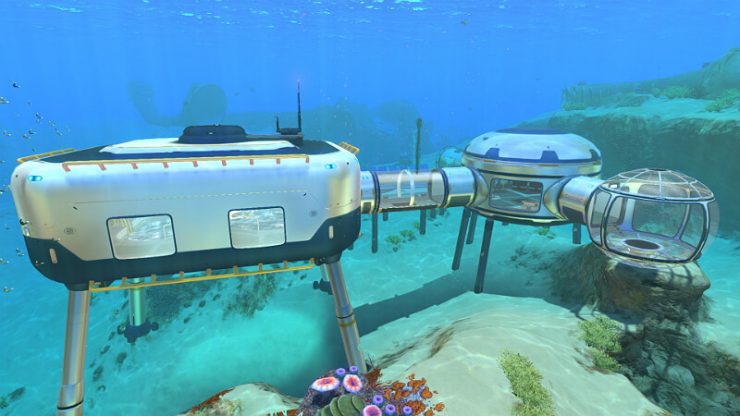
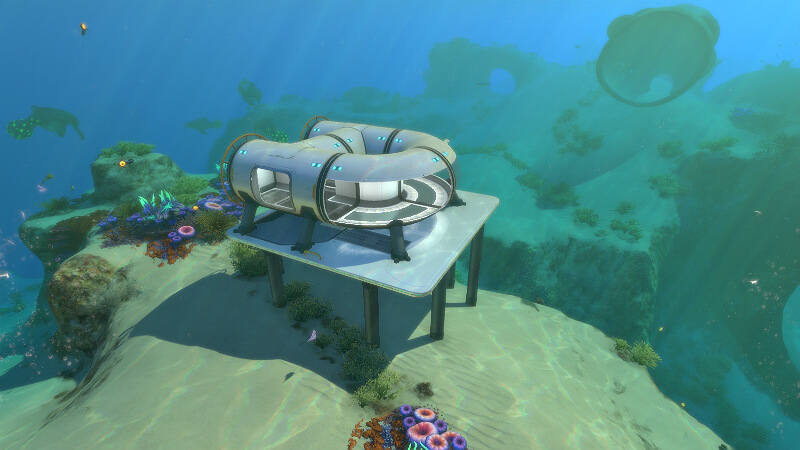
The Moonpool can be placed above the water line so that you can see the surface of the water. As long as it’s not too high up, you can still dock and use the ladder… it looks cool from the inside too. To get this just right, your Moonpool will need to be above the water line with a bit of a gap between the lowest spot of the Moonpool and sea level. This is helpful if you want to build on or near those high points in the shallows. Just be sure that you have enough room to pilot your Seamoth in the shallow water or you won’t be able to auto dock.
In this shot you can see that the level of the water is low enough that you are looking down over the water line, rather than being submerged enough to create a new waterline just for the Moonpool.
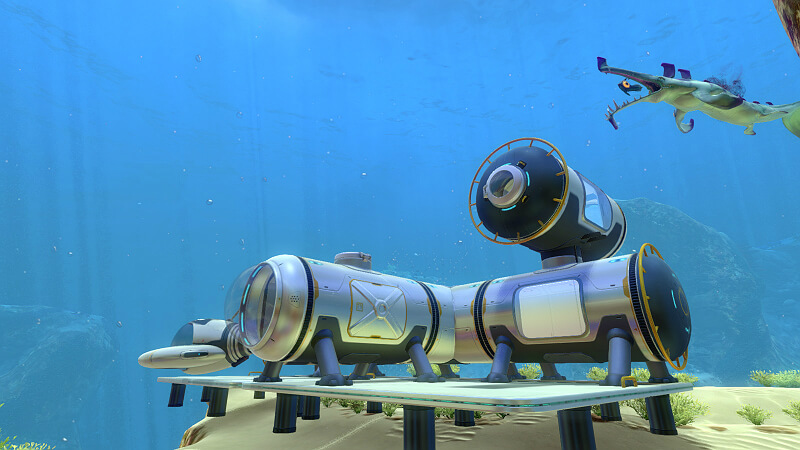
As a side note, if you want a bay for both your Seamoth and your Prawn, then it may interest you to know that you can build more than one in a single base.
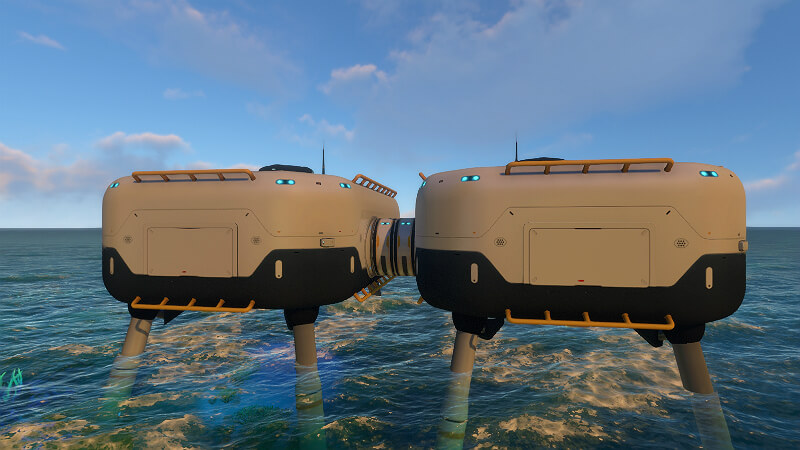
Two Moonpools attached.
Lag Warning
Depending on where you place your moonpool when placing it above sea level, you may experience lag. On a PC with higher specs you won’t notice it much unless you are doing a live stream or recording video at the same time. In order to avoid issues of lag while at your base, you may want to completely submerge the moonpool. Lag can happen when the bottom of the moonpool is above the water line. You can also experience lag when the moonpool is half under water, and half above water in which case, the water as seen from inside the moonpool will look… odd.
If you like to have a view above the water line, you can still build a compartment higher up, while keeping the moonpool under water.
Partially Submerged Base
One of my favorite builds includes a base design that has segments that are both above and below the water line. When carefully placed, you can get this beautiful effect of watching the water crash against the windows as the waves toss about as seen in the screenshot below:

A base that is partially above water and partially below water can be fun. Especially when you have a multi-purpose room set so that the water line is seen half-way through the windows; the effect looks super cool. However, since writing this guide it seems that there have been changes, some of which might interfere with this type of build. Namely, the water filtration device. When the water filter is placed in a multi-purpose room that is above water, it will produce water at only 1/8 the speed. This means that instead of requiring 15 minutes to produce a bottle of water, it will take 2 hours. Additionally, the water filter will produce no salt. So you may want to choose a different compartment for the water filter, one that is below the water level.
Floating Base
Using Vertical connectors, you can build up above the waterline and then remove the connectors below and you will end up with a floating base. This works in survival. I did this to create a cheap observatory above lifepod 5 that easily fits 4 – 6 lockers without crowding. This is handy as a storage solution early on and the tiny base is out of way of more important builds you have in mind. To mount a solar panel on top, create a temporary roof hatch to gain access topside, place your solar panel, then deconstruct the hatch, or leave it up if you want a ‘patio’.

In this example, I can enter the base through the top of the lifepod. Of course you can get far more creative than this and combine both underwater and above water elements without using islands.
Use Smaller Compartments
It seems that the multipurpose room gets used the most, but it also offers the least bit of flexibility. Four smaller compartments can give the same amount of working and storage space as the larger room. I like to use the smaller compartments in creative ways using windows whenever I can and handling stability with foundations instead of bulkheads. In fact, the foundations don’t work very well with the multipurpose room because they simply don’t snap-to in a way that is useful. But the foundations are perfectly suited for the smaller compartments.
This little build takes up the same amount of space as a multipurpose room and can be reshaped. Though you have to get inventive when trying to make room for larger work stations so that they don’t block passages.
The foundation adds +2 stability. The bulkhead with doors add +3. And the reinforced bulkhead adds +7.
Custom Art
Using the digital picture frame, you can use any image taken with your PDA as art. However, if you upload an image directly to the screenshots folder for your saved game, then you can use any image you want, real life or otherwise. Just be sure to use the same dimensions as the other screenshots.
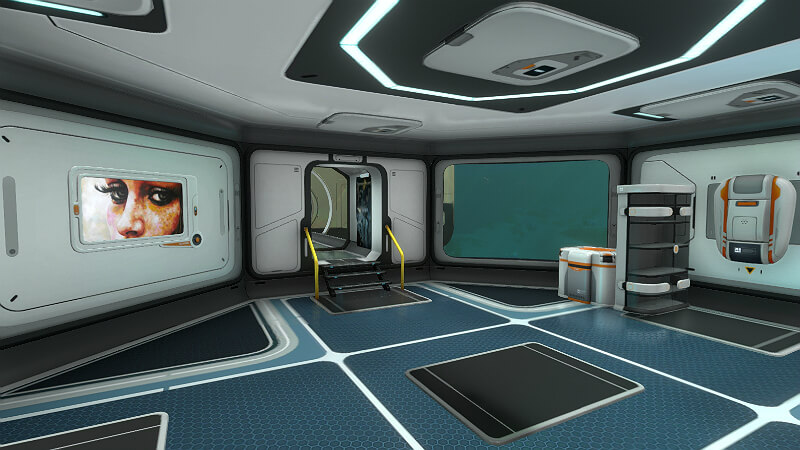
Adding a familiar face. I only wish that the frame was thinner so that I could control the look a little better. But this is still nice.
Video Version of this Guide
For anyone that might prefer to watch this guide rather than read it, I’ve created a video version that is embedded below, or you can click to watch it.
Original Link – Continuation of discussion


Add comment