Subnautica is an amazing game, certainly one of my favorites in the last few years. However, it’s also been in early access and isn’t perfectly polished. This guide is my attempt to share the information that I wish I knew while I was playing.
Introduction
Welcome to the definitive guide to Subnautica! In this guide we hope to lay out the key information you’ll need to know to progress through the game efficiently.
We love Subnautica but sometimes found it frustrating to have to travel to an area multiple times, only because we learned (through out-of-game information) that a critical resource existed in an area that we had missed the first time (and did not know to look for). We’ll try to explain what is helpful to know without ruining the beautiful sense of discovery that Subnautica evokes.
Spoilers
This guide will generally avoid spoilers.
We are not generally considering the mere fact that a technology or tool exists in the game to be a spoiler (especially when that tech is shown in trailer videos), though how or where to find that technology may be a spoiler.
The Basics of Progression

Before diving into the crafting system, it’s helpful to have a mental model of how progression works in Subnautica — the way in which the player becomes more effective.
Subnautica is all about progression. Its primary reward loop is finding resources and blueprints; crafting them into tools and vehicles, and then using your newly improved character and tools to discover new areas and even more powerful tools. This progression loop in Subnautica is very satisfying.
While there is no explicit “research” in the game, your ability to acquire technologies is locked behind player capabilities. For example, some technologies might be discoverable only below a certain depth in the game, such as 100m or 200m, to which the player cannot descend without another technology. Others might be hidden inside a room that requires a special tool to reach (such as the plasma cutter or repair tool).
Key Progression Constraints
Progression in Subnautica proceeds along certain dimensions – how long a limited resource lasts, and how much or how long you can withstand a limiting aspect of the hostile environment.
- Hunger and Thirst. To survive, the player needs to eat and drink. Since you can initially only cook food and create water in base, Hunger and Thirst are effective constraints on how long you can explore without returning.
The basic game loop involves departing base, finding resources, bringing them back to base, crafting/upgrading, eating/drinking, and then departing base again. Food and water gate how long you can be away from base. You can choose to bring these resources with you to extend your trip, and you can eventually create more bases or mobile bases to extend your range even further.
- Oxygen (breathable air). When you’re free diving, the more oxygen you can carry, the deeper and longer you can dive. Oxygen length can be improved by equipping oxygen tanks. There are multiple tiers of oxygen tank available. While away from base, the basic free-diving game loop involves descending below the surface, exploring, gathering resources, and then returning to the surface (or another oxygen resources), then diving again. Other oxygen resources commonly include player constructed bases, vehicles, or pipe systems. The player’s personal oxygen supply gates how long you can free-drive away from an oxygen source.
- Pressure. The deeper you descend into the ocean, the greater the pressure is. Although the player can free-dive at any depth (to our knowledge), all vehicles have limited “crush depths,” beneath which, they will take periodic damage. Finding better vehicles or improving vehicle crush depths with vehicle mods is required to progress further.
- Radiation. Some areas of the game are polluted with radiation. You will need protection against radiation in order to enter these areas.
- Heat. Some areas of the game are extremely hot, and the temperature of the water can reach near-boiling. You’ll need protection against heat to enter these areas.
Technology Tiers
Progression in Subnautica can informally be divided into the following technology tiers.
Note that you don’t start out with all technologies immediately. Some items need to be discovered within the game before they’ll show up in your menus as constructible. Indeed, some of the technologies in this list are endgame technologies, so don’t expect to obtain them too soon; and even after you do, every previous technology tier will remain useful.
- Free diving. The player character free-dives in the ocean depth. The player’s oxygen may be augmented by Oxygen Tanks, and their ability to swim can be improved with Fins. The player recovers their oxygen for free whenever they’re in an environment with air (the surface or a breathable air vehicle).
Fins and Oxygen Tank.
The player swims about 5.7 meters per second underwater at base. Fins enhance the player’s swimming speed by 15% initially (+1 m/s), and 30% later on (+2/ms) with an upgrade.
- Seaglide. The first significantly improved form of transportation, the Seaglide is a handheld underwater propulsion system. The Seaglide allows you to swim more quickly, and therefore reach deeper depths and places further away from your spawn reasonably. The Seaglide is battery powered and needs to be recharged, which limits how long you can travel with it without returning to base or swapping its battery.
Since you frequently free-dive even when assisted by vehicles, the Seaglide remains useful the entire game. The Seaglide also provides a built in flashlight and small 3D map of the area. The Seaglide’s top speed is 9.5 meters per second (regardless of fins).
- Seamoth. The Seamoth is a true underwater vehicle, a one-person submarine. With an oxygenated environment and significantly better speed than the Seaglide, your first true ability to range and explore will be when you acquire the Seamoth. The Seamoth is the fastest vehicle in the game, with a maximum speed of just under 13 meters per second. Its speed makes it possible to travel out to distant areas, gather resources, and return without wasting too much time on transit.
Since the Seamoth has an oxygen atmosphere interior, you can park it at a significant depth and then free-dive away from and back to it to acquire resources – a gathering tactic that’s substantially faster than returning to the surface. The Seamoth can initially dive to 200 meters underwater (crush depth) and can be upgraded to dive deeper. You can also add storage space to the vehicle in order to increase the yields of each foray.
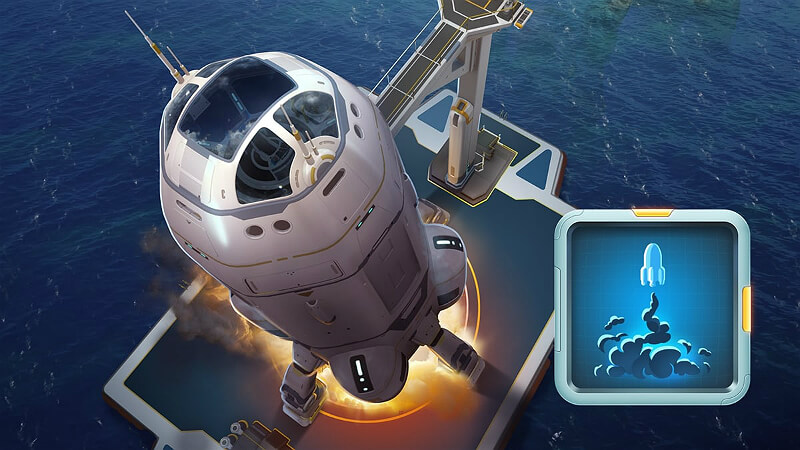
- Cyclops Submarine & Prawn Suit. The Cyclops submarine is a true marvel. While Seamoth is the size of a single seat and has no bonus inventory, the Cyclops is massive and has a large, multi-level interior space in which you build base facilities and store items. The Cyclops is so large that you can dock another whole vehicle inside it, such as the Seamoth or Prawn suit.
These are endgame technologies, so on your first playthrough don’t expect to acquire them very soon! We hesitated to mention them at this point in the guide, but decided to keep them in because they’re a fun technology to look forward to.
The Cyclops functions as a traveling base, with not only storage but other base facilities. It can dive to 500 meters prior to upgrades.
Although the Cyclops can briefly sprint to just over 10 meters per second (still slower than the Seamoth), its fastest indefinite cruising speed is just under 9 meters per second, or about 70% as fast as the Seamoth. Even though the Cyclops is slower than the Seamoth, the fact that it has a massive interior for base facilities and storage means the player can take it on extended trips that would not be practical in the Seamoth alone. A docking station means you can bring a vehicle (e.g. the Seamoth) with you, and its internal storage means you can gather multiple player-inventory-sized resource hauls and stash them inside before returning to a stationary base.
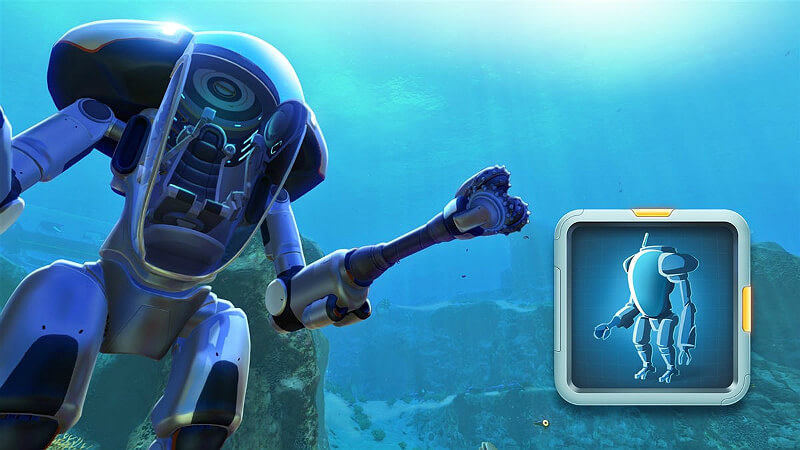
The Prawn Suit is an exosuit vehicle. Like the Seamoth, it’s electrically powered and has an atmosphere. Unlike the Seamoth, it walks along the ocean floor. It is armored to resist damage from hostile predators, immune to heat, and can dive to 900 meters initially.
Note about tech tiers: Each of the vehicles above can be upgraded or augmented to further improve its capabilities, so merely acquiring a vehicle does not mean that you’ve reached the end of its progression. For example, while the Seamoth can initially dive to 200m, one of its first upgrades allows it to dive to an additional 100m, which opens up entire new areas that can be explored. Although I consider these the basic tiers, each tier is really a band; all of the technology tiers work together.
Subnautica’s great gameplay design means that none of the technology upgrades will obsolete the previous: they all work together to make the player more effective.
Getting Started: The Basics
This section provides advice for what to do in the very beginning of the game, as well as other basic tips & tricks.
Biomes
Subnautica has multiple biomes – areas in the game with their own set of terrain, resources, and creatures. When you first spawn, you’ll be in a biome called the Safe Shallows. The exact location your life pod lands is random, but it will be somewhere in the Safe Shallows near the center of the world.
Biome: The Safe Shallows:
The Safe Shallows is populated by multiple basic resources and fish. Swim out and collect some! We’ll introduce other biomes as they become relevant. There isn’t a whole lot to threaten you in this area, though you should pay attention and watch out for things that sound threatening.
Escape Pod
The Escape Pod or Lifepod that you crash in provides several crucial capabilities right from the start. It has storage that includes food and water. It also has a Fabricator, which is a crafting station that converts resources into useful items via recipes called blueprints. You can see all of the blueprints that you know by pressing tab to pull up your PDA and looking in the blueprints menu. The Lifepod also includes a Radio (which you’ll need to repair) and a Medical Kit Fabricator. The Radio periodically notifies you about points-of-interest, and the Medical Kit Fabricator produces a free medical kit periodically.
Fabricator, Radio and Medical Kit Fabricator.
Survival: Hunger and Thirst
One of the first things you’ll want to do is satisfy your hunger and thirst. You can wait for later, but it’s handy to have a stash of resources ready so that you don’t end up hunting frantically while starving.
The first few survival resources are fish that you’ll want to catch in the Safe Shallows. Some of them are:
Resource – Description:
- Bladderfish – Bladderfish are the easiest way to quench your thirst. They can be turned into a water bottle at the Fabricator. Like all fish, you can swim up to them and click on them to catch them and add them to your inventory.
- Peeper – Peeper have the highest food value of any of the early game fish. They are also easy to identify with their giant eyes.
- Boomerang – A small edible fish. Turn it into cooked fish at the Fabricator.
- Garyfish – Another edible fish.
Fish behave differently at different times of day. The Bladderfish are relatively defenseless at night, so consider using the nighttime to catch a nice haul of Bladderfish. Many of the fish and creatures that you find in the environment can be eaten. Catch them and find out!
Catching fish for food and water is the essential periodic activity that you’ll need to undertake to survive in Subnautica.
Tip: Live fish, cured fish (fish combined with salt), and water bottles keep indefinitely in storage. However, cooked fish and other foods quickly rot. Thus, we recommend you catch fish as needed, or keep them in an uncooked or cured form until you’re hungry. (Don’t forget that your Lifepod has built-in storage under the status menu!). Salt for curing is not very plentiful early on as you need it to make other items, but you will be able to manufacture it quite easily later in the game.
Once you feel comfortable keeping yourself alive by making food and drink, continue on to our Basic Crafting Guide.
Day 1 & 2: Basic Crafting

Day 1: Oxygen Tank & Scanner
One of the first pieces of equipment that you’ll want to craft is the Standard Oxygen Tank. You can craft it at the Fabricator using three pieces of Titanium which comes from Metal Salvage.
On your first day in the game, search the ocean floor around your lifepod. When you find your first salvage, head back to the lifepod to convert it into Titanium, and then into an Oxygen Tank. You want to do this immediately because the bonus oxygen will substantially extend your diving time, making everything else that you need to do easier.
Oxygen Tank, Made From: 3x Titanium and Made From: Metal Salvage.
After making the Oxygen Tank, equip it on your character using your PDA (or it may equip automatically). Now you can dive longer and to deeper depths!
Scanner
Next, you’ll want to craft the Scanner. This crucial tool allows you to scan items in your environment to learn more about them. You can also acquire technologies by scanning fragments of items in the environment. Scanning items in the game is the primary way by which you progress through the technology tree.
You can make the Scanner at your Fabricator using one Battery and a piece of Titanium. The Battery is a fairly basic recipe, and an item that you’ll likely be crafting a lot of in the game. Batteries are made with two Acid Mushrooms and one Copper Ore.
Scanner, Made From: Battery, Titanium and Made From: Acid Mushroom, Copper Ore.
Tip: Whenever your screen is centered on a scannable object, an icon will pop up in the bottom.
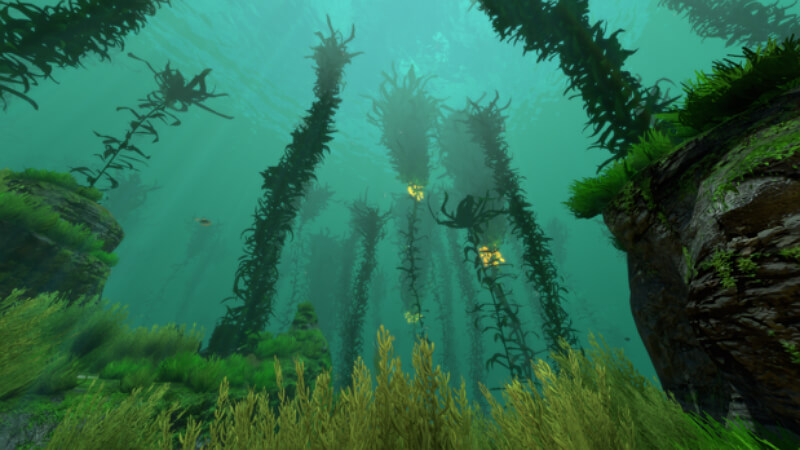
These resources can be found all throughout the environment around you. Swim around and explore! Resources are commonly found on the seafloor, especially caves and tight places. Look for coral tubes and cave systems nearby — these are where you can find Limestone Outcroppings that yield Copper Ore. as well as Quartz and other valuables.
Figure: Coral tubes and cave systems in the Safe Shallows are an excellent place to find resources such as Limestone:
Beware: An aggressive fish lives in the caves that may chase you. You’ll hear it if it notices you. It makes a beeline toward you and denotes in a tiny explosion. If you hear it chasing you, dodge and swim away. Once it’s gone, check where it came from to discover an important resource, Cave Sulfur.
Limestone Outcrop and Cave Sulfur.
Tip: As the light wanes on your first day, and it becomes difficult to explore, consider taking the time to hunt for fish in the area around you. Since they glow, fishing is an easy and safe activity to perform at night.
Day 2: Survival Knife & Repair Tool
Once you’ve made your Scanner, it’s time to continue making crucial tools. Next on our list are the Survival Knife, Repair Tool, and Fins. To continue making progress, we’ll need to travel to a new nearby biome called the Kelp Forest. You can typically find this by swimming any direction away from your Lifepod.
Biome: Kelp Forest:
The Kelp Forest is filled with tall kelp and thick with other plants. The water can be murky and more difficult to see through.
Beware: This biome has predators who may chase you. They aren’t very aggressive however, and should leave you alone in short order if you dodge or swim away. If they do attack you, the damage is fairly minimal.
In this biome you’ll want to harvest a resource called Creepvine Seed Cluster. These are the yellow glowing bits attached to the long, tall kelp stalks. They’re especially easy to spot at night. Using the Fabricator, we can refine these seed clusters into Silicone Rubber, a crucial ingredient for our next tools.
Fins – Made From: 2x Silicone Rubber and Made From: Creepvine Seed Cluster.
Survival Knife – Made From: Silicone Rubber, Titanium.
You’ll want to make Fins as soon as possible after collecting the Creepvine Seed Clusters necessary for its Silicone Rubber. Like the Oxygen Tank, Fins provide an important and significant boost to your ability to explore and collect resources, so it’s wise to prioritize them. Fins allow you to swim about 15% faster, making everything you do just that much more efficient.
Next, we need to make the Repair Tool. This tool is used for repairing the systems in our Lifepod (required to begin the storyline and progress through the game), as well as anything else that we need to repair (like our vehicles and base facilities).
Repair Tool – Made From: Battery, Cave Sulfur, Titanium.
To make your Repair Tool, you’ll need Silicone Rubber, Cave Sulfur, and Titanium. You know how to make Silicone Rubber already, and you can find the rest of the ingredients throughout the Safe Shallows.
Once you make the repair tool, use it to repair your Lifepod’s systems, including the Radio and Secondary Systems (to the left of the Fabricator).
Tip: You may discover secret areas that require repairing equipment to get into, so you may want to consider carrying a Repair Tool with you at all times. It’s either that or come back to them later.
Going Foward
Now that you have Fins, an Oxygen Tank, a Repair Tool, and a Survival Knife you should be ready to start the next phase of your adventure!
Tip: The radio will periodically give you messages about places or other lifepods that you should investigate. As a general rule, the purpose of these missions is not just the story progression of finding the objective, the missions also lead you to new biomes which will likely contain key new resources and blueprints (as well as dangers). Try to look around a bit whenever you get to a new place.
Work in Progress
That’s all we’ve written so far. The sections below are outlines of content yet to be added.
Do you like what we have so far? Should we write more? Please let us know in the comments.
Day 3: Seaglide (WIP)
- Flashlight
- Laser Cutter
- Finding the Seaglide fragments
- Collect resources for High Capacity O2 Tank and Rebreather
- Mobile Vehicle Bay
- Habitat Builder
- Lifepod 17
WIP: Basic Exploring
Work in progress. Outline:
- Where to explore safely
- What to look for (wrecks, blueprints, fragments)
- Finding the Seaglide
WIP: Basic Seabase Construction
This section is a Work in Progress. Outline:
- Making the Habitat Builder
- Collecting the necessary resources for that
- Basic seabase construction (no multiroom yet)
- Powering the seabase
Tips and Tricks
- You find a lot of technology (tools, vehicles, base buildings) by scanning objects in the environment. If you see an interesting doodad while swimming around, scan it to look for technology.
- Don’t spend too much time collecting random materials. Have a blueprint in mind that you’d like to make, and collect the resources needed to make it.
- If it’s too dark at night to explore effectively, use that time to go fishing. Fish are easy to see at night since they glow.
Original Link – Continuation of the discussion

Add comment