A guide for anyone looking to try the Calamity Mod! Provides a general outline of progression while being open ended enough to change as you see fit. Note that this guide will not provide any information on a boss’ attacks or tips for their fights as I feel that removes some of the fun of learning the fight! Of course, if you’re struggling I advise looking for tips, just a warning that this is not a place where you will find that.
Bosses

The bosses in the mod are the core of progression. While the bosses in each segment of the game can be beaten in any order, I suggest following an order similar to what is suggested by Boss Checklist and the Calamity Mod wiki.
Pre-Hardmode
- King Slime
- Desert Scourge
- Eye of Cthulu
- Crabulon
- Eater of Worlds/Brain of Cthulu
- Queen Bee
- The Hive Mind/The Perforators
- Skeletron
- Slime God
- Wall of Flesh
Hardmode
- Cryogen
- The Twins
- Brimstone Elemental (Drops little of value for non-melee builds until Providence is dead and can be skipped until then)
- The Destroyer
- Aquatic Scourge
- Skeletron Prime
- Calamitas
- Plantera
- Siren and Leviathan
- Astrageldon Slime
- Astrum Deus
- Golem
- Plaguebringer Goliath (Drops little of value for melee, mage and summoner builds and can be skipped)
- Duke Fishron
- Ravager (Drops cores which are useful but otherwise has no drops of value and can be skipped)
Post Moon Lord
- Profaned Guardians
- Providence the Profaned Goddess
- Sentinels of the Devourer (Order of the Sentinels doesn’t matter)
- Polterghast (Can be done before Sentinels)
- Devourer of Gods
- Bumblebirb
- Jungle Dragon, Yharon
Post Yharon
- Supreme Calamitas (Optional Superboss. Mod is considered complete after Yharon is defeated)
Equipment
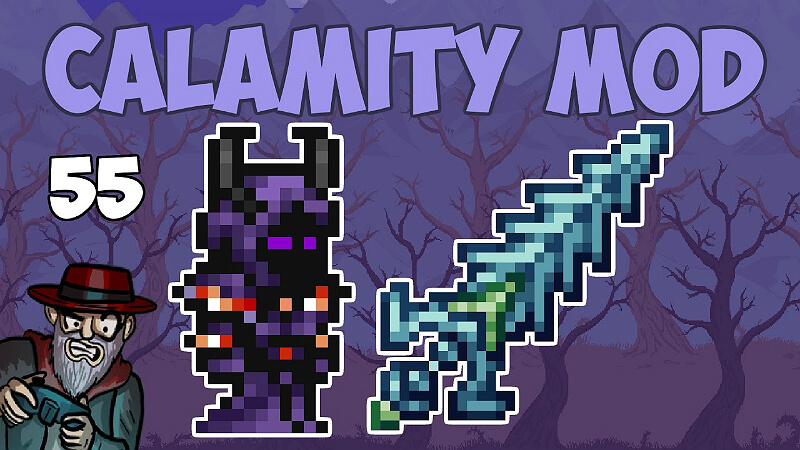
Armors
You obtain various armors throughout the game.
Pre-Hardmode
- Wulfrum Armour (Obtainable from the moment you spawn in. Shards used in crafting are dropped by Wulfrum Slimes and Wulfrum Drones on the surface.)
- Victide Armour (Obtainable from the moment you spawn in, although it’s incredibly grindy. Bars are crafted using Seashells, Starfish and Coral along with Victory Shards. All of these are dropped by the Cnidrion and Desert Scourge.)
- Aerospec Armour (Obtainable after defeating the Hive Mind or Perforators which causes the ore to spawn in your world.)
- Statigel Armour (Obtainable after defeating Slime God. Crafted from the Purified Gel dropped by Slime God. Serves as the final Pre-Hardmode armor.)
Hardmode
- Daedalus Armour (Obtainable after Cryonic ore spawns from defeating Cryogen. Until Cryogen is defeated, you will only have access to the vanilla hardmode armors. Worth noting that defeating Cryogen also yields a Frost Core which allows access to easy Frost armor if you prefer.)
- Reaver Armour (Obtainable after defeating Plantera in which Perennial ore spawns.)
- Astral Armour (Obtainable after defeating Astrum Deus in which Astral ore becomes minable. Easy to skip armor tier due to only being useful on mage or summoner as well as similar to Reaver armor in stats.)
- Ataxia Armour (Obtainable after defeating Golem by mining Chaotic ore from the Abyss using a Picksaw. Serves as the final Hardmode armor set.)
Post Moon Lord
- Xeroc Armour (Obtainable right after defeating Moon Lord. Crafted using Meld bars and Luminite bars.
- Tarragon Armour (Obtainable after defeating Providence from Uelibloom ore that spawns as a result.)
- Bloodflare Armour (ObtaInable after defeating Polterghast using Bloodstone Cores and Ruinous Souls.)
- God Slayer Armour (Obtainable after defeating the Devourer of Gods using Cosmilite bars.)
- Silva Armour (Obtainable after defeating Yharon’s first phase which allows Darksun Fragments to begin dropping from Mothrons.)
- Auric Tesla Armour (Obtainable after defeating Yharon in which Auric ore spawns in the world. Serves as end game armor.)
Post Yharon
- Demonshade Armour (Obtainable after defeating Supreme Calamitas. Serves as a bonus armor set.)
The Abyss

The Abyss is a large biome that spawns past the dungeon in any world. It spans the entire height of a world (excluding the small patch of hell at the absolute bottom) and is a source of powerful items at various points of the game.
There are three major points in which you should traverse the abyss.
- The first trip should be made after defeating Skeletron. At this point you should be hunting down the shadow chests that spawn in the islands all over the Abyss. The weapons that can be inside will last until around Cryogen.
- The second trip should be made after defeating Plantera. At this point Depth Cells and Lumenyl will begin to drop from some enemies. These are used to craft some powerful weapons that will last for potentially the rest of hardmode.
- The final trip should be made after defeating Poltergeist. This trip will take you to the absolute bottom of the Abyss where the Eidolon Wyrms, Reaper Sharks and Colossal Squids spawn. All of these drop some amazing weapons that are very strong against the Devourer of Gods and may last until Yharon.
You will also head down to the Abyss after defeating Golem to gather Chaotic ore however, this is a more minor occurrence and so is not considered one of the major points you traverse the Abyss.
In addition to the three mini bosses of the Abyss floor, the Mauler in the Sulphurous Seas above the Abyss will begin to drop a powerful ranged weapon once Polterghast is defeated.
I also recommend you try to craft the Abyssal Diving Suit as it is incredibly helpful for farming Abyss items later in the game.
Weapons and Accessories

There are so many weapons and accessories that I simply suggest you refer to the Calamity Mod wiki for info on them. I’ll still provide a brief overview of core accessories but below will be a link to each page on the wiki for each weapon class and a list of accessories. Sorting these pages by rarity will order them by the point in which they are obtainable.
Core Accessories
- Angel Treads (An upgrade to Frostspark Boots that can be crafted after defeating the Mechanical Bosses.)
- Seraph Tracers (An upgrade to Angel Treads that doubles as wings. Obtainable after defeating Moon Lord.)
- Elysian Tracers (An upgrade to Seraph Tracers. Increases movement speed further and also doubles as wings. Obtainable after defeating the Devourer of Gods.)
- Celestial Tracers (An upgrade to Elysian Tracers. Obtainable after defeating Yharon. Exclusive to Revengeance Mode.)
- Counter Scarf (Provides the ability to dash. Taking damage while dashing will perform a dodge granting temporary invincibility as well as a brief boost to all melee stats. Drops from the Eye of Cthulu. Revengeance Mode exclusive.)
- The Absorber (A powerful defensive accessory that is obtainable from a long crafting tree.)
- The Sponge (A powerful defensive accessory that combines the powers of the Absorber and the Ambrosial Ampoule.)
- Draedon’s Heart (Massively increases health regen rate while standing still as well as passively increases rage meter. Revengeance Mode exclusive.)
- Asgard’s Valor (An upgrade to the Ankh Shield. Grants immunity to a few Calamity Mod debuffs as well as increased health and defense.)
- Elysian Aegis (A powerful shield dropped by Providence on Expert Mode. Provides immunity to fire blocks and knockback as well as extra health and defense. Grants a dash and has a buff that can be toggled.)
- Asgardian Aegis (An upgrade to the Asgard’s Valor and Elysian Aegis. Combines the effects of both while granting further defensive bonuses. Expert Mode exclusive.)
- Astral Arcanum (Useful for mobility and Devourer of Gods fight. Grants immunity to the God Slayer Inferno debuff as well as the ability to teleport to key points in your world.)
- Core of the Blood God (Boost maximum health by 20% and damage resistance by 10%. Halves a single hit of contact damage every 15 seconds.)
- The Community (Grants powerful stat boosts that scale with each boss defeated.)
Original Link – Continuation of discussion



Add comment