The optimal gear, arena, potions, and tactics to triumph over The Destroyer.
Introduction
In this guide, all numeric values are separated into two parts for each gamemode like this: Normal/Expert.
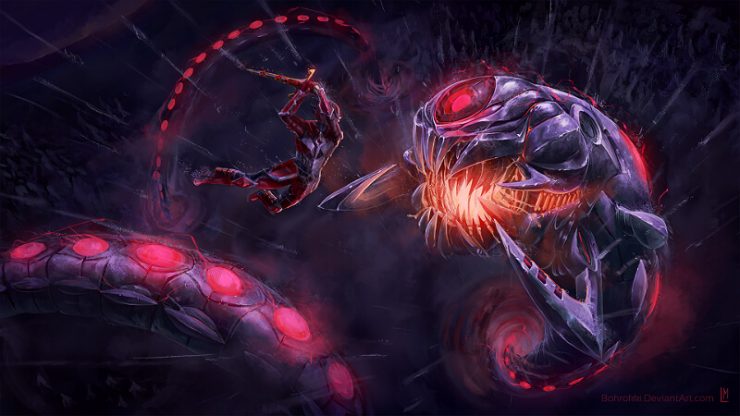
The Destroyer is a long mechanical worm with the capability to kill many Terrarians and their NPCs if not prepared. The boss is, in my opinion, the easiest hardmode boss in expert, and gives you very useful loot which helps you defeat the other two bosses. With the correct preparation, The Destroyer is quite easy to dismantle, despite its insane 80000/120000 health.
Weapons
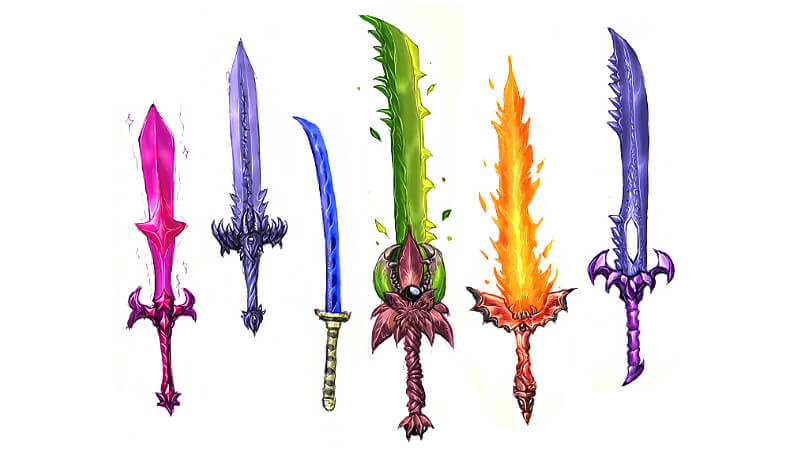
The weapons used during the fight are a very important part of defeating The Destroyer. There are many options, but due to the insane amount of pieces that the destroyer has, any weapon with constant damage, splash, or penetration should be kept as a backup.
These include:
- Shotguns or Uzis w/ explosive rounds
- Clinger Staff
- Nimbus Rod
- Golden Shower
- Any huge sized sword, or Fetid Baghnakhs
- Summoner staves (you might as well have something doing damage)
- Medusa Head
- Crystal Serpent
- Mushroom Spear
The main weapon of choice is the Daedalus Stormbow. This weapon does massive amounts of damage due to its many rounds and high fire rate. This bow is obtained by defeating the Hallowed chest mimics. They look like this:
Hallowed mimics
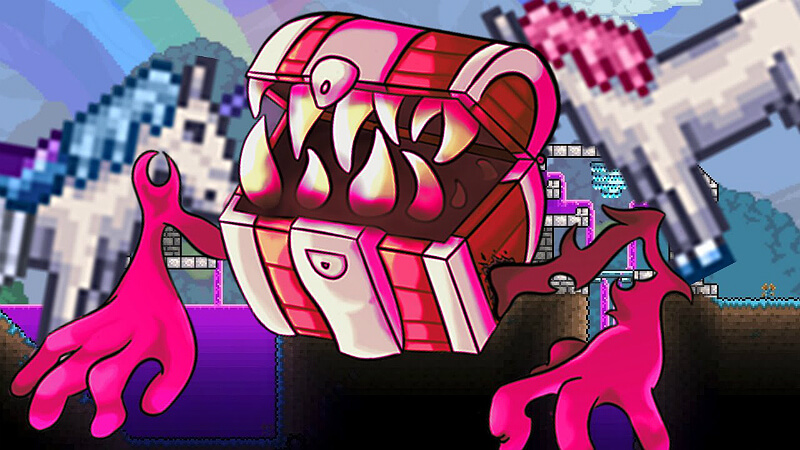
These special mimics can be found naturally in the Hallow, or can be spawned forcefully. If you craft a Key of Light using 15 Souls of Light, and place it in any (nonliving) chest, it will turn into the mimic of which your world can naturally spawn. If you see the chest in the caverns, do not try to open it. Any chest which looks like the one shown above is always a mimic.
The mimics are very difficult to defeat. They have 3500/7000 health, and a whopping 90/180 damage. Knockback will have little to no effect on them, as they have a 90%/91% knockback reduction. Their 34 defense renders them extremely resistant to fast fire rate-low damaging weapons, such as the minishark. I would recommend an open space above ground in order to kill the mimic. Be prepared to fight them more than once, as the stormbow has a small 25% chance to drop.
Note – The special Corruption-Crimson-Hallow mimics CANNOT be trapped for a long period of time. They have an attack which cannot be interrupted by blocks (or anything) and they jump extremely high.
Ammunition
The Daedalus Stormbow, when received, does not do much damage by itself. When used with wooden arrows, the bow is not powerful enough. You will have to craft Holy Arrows.
The Crafting Recipe for 200 Holy Arrows is:
- 200 Wooden Arrows
- 3 Pixie Dust
- 1 Unicorn Horn
Once again, this creates 200 arrows. 200 is basically all you need, for each arrow consumed shoots out 4-6 arrows. Each Holy Arrow shot out by the stormbow sends down 2 stars when used. Each Star deals 7 damage and can hit 2 segments, which results to around 83 damage per arrow, or 249-332 damage per arrow consumed (not subtracted by defense) with the stormbow, along with the large amount of penetration.
The arrows also help dealing with the Probes spawned by The Destroyer. This, in a combo with the insane fire rate of the Daedalus Stormbow, can bring victory to the user in less than a minute if properly used.
Note – The Daedalus Stormbow shoots from the sky. If you seal the top of your arena, the arrows will be ineffective.
Armor
The Armor you use is mostly built off of preference. Orichalcum, Adamantite, or Titanium armor is definitely needed, however. You could either use the helmets or masks, depending on if you feel you need more protection or more damage. Also, if you want even more damage, you can use Orichalcum over Adamantite if you want the extra petals from the armor set bonus. However, doing so will turn your potential armor from 50 to 42, which is in the long (but potentially short) run a big leap, saying the head of The Destroyer does 70/280 damage.
I recommend the Orichalcum Mask set, as you get a satisfying 42 defense, along with very helpful extra petal damage. Each petal deals around 30 damage and can pierce enemies multiple segments of The Destroyer, which is much better than the Adamantite’s 6% damage boost. However, if you spawned with Mythril in your world, the 37 defense and no petals make it much less viable. I would suggest sticking with Titanium or Adamantite if you got Mythril in your world.
Potions and Other Buffs

Potions
A wide variety of potions is at your disposal for this fight. A definite need are the following:
- Ironskin
- Regeneration
- Swiftness
- Archery
- Endurance
- Well Fed (Any food item)
- Wrath
If you would like to add the following to your list, it would be useful, but it is not necessary:
- Calming
- Featherfall
- Heartreach
- Hunter
- Inferno
- Rage
- Ammo Reservation
- Flask of Party (’cause like, “ayyy”)
- Ale (if using melee items)
Note – Getting all of these will take a long time! Only get ones you feel like you would need.
Don’t forget to get Greater Healing Potions!
Other
Anything else that is beneficial will help, at this point. Place down campfires and heart lanterns to cover your whole battle area. Be sure to get the buffs from the Ammo Box (Travelling Merchant), Bewitching Table (found in the dungeon), and the Crystal Ball (Wizard). If using a sword, get a sharpening station (found in underground structures). Place down Sunflowers where you can to get the “Happy!” buff, place Peace Candles if necessary, and “Star in a Bottles” down if using a magic item for your main damage.
Accessories
Accessories. Yay. List please. (All accessories listed are pre-plantera)
- Frostspark Boots (Greatly preferred)
- Charm of Myths (Greatly preferred)
- Celestial Emblem (not to be confused with WoF drops)
- Obsidian Shield or even Ankh Shield if possible (Actually Necessary)
- Frozen Turtle Shell
- Flesh Knuckles (Prefered)
- Shield of Cthulhu (*Situational, see below, Expert)
- Worm Scarf (Expert, Prefered)
- Magic Quiver (Greatly Prefered)
- Star Veil (Slightly Prefered)
If you have any other preferences, let me know 😀
Try to get defensive prefixes on all your accessories, or you can get damage and critical strike chance, but I have to recommend some defensive prefixes as they are extremely useful. If this is too expensive, you can always fight a lot of “Eye of Cthulhus” and sell all the rewards (don’t fight more than 1 at a time) for about 10 gold each fight.
If you have gotten too accustomed to the Shield of Cthulhu, you may use it. However, it can be traded out for something much more useful, and the dash can be interrupted constantly by The Destroyer’s many body parts, which can be very frustrating.
Arena
The most important part of the whole fight, the Arena. There are two optimal arena designs which are both quite useful. One, which is optimal for normal, and one, optimal for expert. The normal arena involves raising yourself high above the air, where the destroyer cannot physically hit you, but you can hit it. The expert is a very large square hole in the ground which can optimize all the damage of the stormbow, as well as a large space to roam and dodge around. You can use either for normal/expert, but I prefer them the way they are.
The Normal Arena
The Arena built for normal mode is essentially a large wooden platform in the sky. At 100-200 blocks in the sky, place a long line of at least 200 platforms (the more, the better!). That’s basically the arena. However, the imprecise measurement of 100-200 blocks really just depends on the surface’s blocks. If you fight The Destroyer once, and it can rise above the platforms to the point where it can hit you, raise it up an estimate of how many tiles higher it rose above your platform.
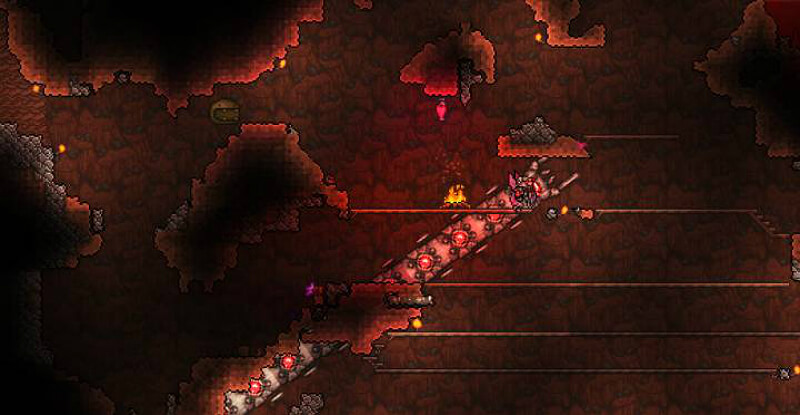
The Expert Arena
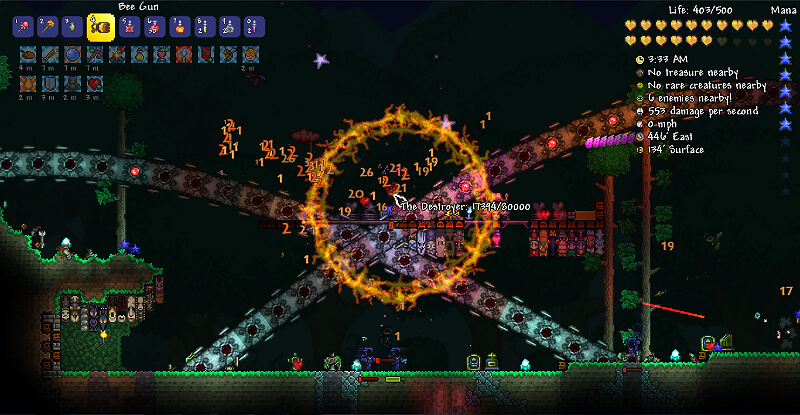
The Arena for Expert is just a large hole with platforms.
Dig an at least 150×50 tile hole in the ground. This takes a long time to do, so have something else to do while holding CTRL + Mouse1
Place a line of platforms every 5 tiles.
Finally, place campfires and Heart Lanterns into the arena.
Why this arena design? In Expert mode, the lasers of The Destroyer do 72 damage. The probes do even more, with lasers dealing 80 damage, and physical contact doing 80 damage. The hole design prevents off-screen lasers from The Destroyer body parts because any Destroyer body parts inside a block cannot shoot, due to the lasers not being able to go through walls. If the body parts are in the many walls and blocks around the hole, they will be inactive.
Also, having a small, compact 50-tile wide hole compresses the probes into a small area, for they also cannot pass through obstructions. Because the probes deal even more damage than The Destroyer parts with their lasers, killing them as soon as possible will be very beneficial. The Daedalus Stormbow can shoot all of your visible screen, and the 50-tile width can fit onto your screen, thus making quick work of the probes.
Strategy
The Destroyer surprisingly needs little strategy to defeat. Because the stormbow does a ridiculous amount of damage to The Destroyer, you just need to be careful not to die. The Destroyer cannot despawn, so if needed, you can magic mirror your way home and heal up to the nurse. Be careful not to lead the boss too close, as he easily slaughters whole NPC groups. This “cheese” strategy is most of the time unnecessary, however.
All you need to do for the fight is focus on the damage of your Stormbow, not interrupting the damage to summon a sentry minion or replace a despawned nimbus storm, and barely switch your weapon during the fight. When The Destroyer’s head is unseen, you can pull up your minimap during the fight to see where his head is, which can save you from the 70/280 damage that he can deal. If it is coming from below, just strafe to the side and use your boots to rocket upwards, while still shooting your bow.
Original Link – Continuation of discussion


Add comment