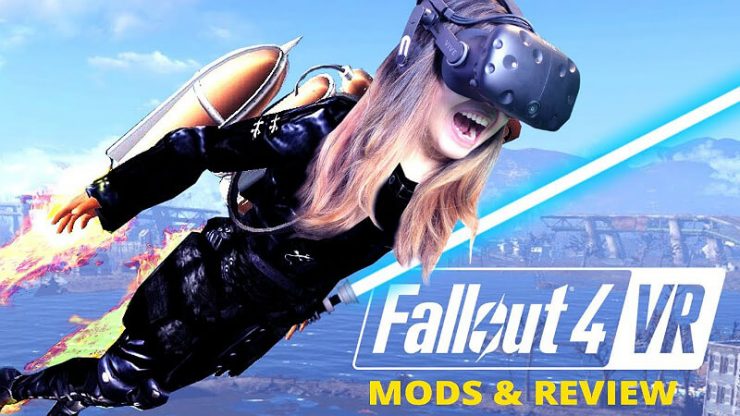
A list and guide of essential modifications and ini tweaks that are needed to make the game (in my eye) feel acceptable.
This will be updated as I find more things that I feel are very important to implemented into the game.
Introduction
So after messing around with FO4 VR a bit and doing much reading on Reddit, I have found quite a few fixes to absolutely infuriating issues. Some of which are ini tweaks and others are mods. But between them both, I feel that these are things that should have been done/implemented from the get-go to make this a more pleasant VR experience. I will be updating this as I find more tweaks or mods to make screwy things functional/more acceptable.
Please note all these are for the “release” branch of the game, not the beta branch as some mods are not tested/updated to work on the beta branch, I will also do my best to keep this updated to things you still need as patches fix things.
If steam blocks any of these links, search the name of the item on Google or Nexus Mods and hopefully that’ll sort the issue.
Lastly, before we start, MAKE SURE YOU BACKUP ANY FILES YOU MESS WITH/MAKE SURE YOU CAN REVERT CHANGES.
I am not responsible for any issues/undesirable effects you create.
I did not find any of these tweaks myself, these are all sourced from various places online, if you want credit for a particular tweak please let me know.
In Game Settings
Okay, so a few of the things that were highly recommended to be done within the FO4 VR config tool (mentioned later,) we can now do in FO4 itself. (In game options? What a novel idea!) We will start here with our tinkering since we should run the game first anyways to generate any additional files/folders the game & or mods need.
(Note you can do all these with a keyboard and mouse, just launch the game and use the mouse and keyboard in the window that pops up if you wanna adjust this while following along rather than do it all from within VR)
First off is Anti Aliasing, TAA is generally recommended by most, you can do FXAA if you wish or run disabled, but we can tinker TAA later on to make it less fuzzy while still providing AA (which we will be doing later on.)
We also probably wanna turn off Character lighting, this will remove an unnatural “godly glow” that is on NPCs and rather make them look like they are in the proper lighting for their environment.
The last thing we may wanna do, this is subjective entirely but I could not STAND the green flashlight. Unfortunately, the flashlight is tied to your pipboy light. We can still make the pipboy have a green tint while making its flashlight fairly white though. If you wanna check this out in under “Display” Go to Pipboy colour RGB values, (NOT the HUD colour.) and max out all values to the far right and below are the number of left key pressed from the right side.
(Please note, the way the Vive and Oculus work there are more green pixels then there are red and blue, by altering the colour of the pipboy screen it will be like effectively lower the resolution of the pipboy, with that said we are going to be adjusting pipboy resolution in a later step to make it much more legable. But if you want the absolute sharpest pipboy I would leave this alone.)
- R: 7
- G: 0
- B: 9
And that should be it, the preview will have a very pale green. You can consult the below image if need be.
The other options are highly subjective based on the performance of your computer so I can’t help with that, but I do HIGHLY recommend trying your best to set up the in-game settings how you want now, any alteration to in-game settings MAY screw with the manual file tweaks we are about to do. For the time being though we can shut the game down, that’s all we need to be doing here.
Utilities
- Vortex
For this guide I am recommending people move onto Vortex Mod manager, it is the “new version” of NMM and comes built in with LOOT, and more importantly built in support for FO4 VR. I am still in the process of learning Vortex myself, so if you come across a better way to do this, or have a lil write up on how to properly utilise it, please feel free to let me know, if you want further education on the manager there are likely youtube tutorials around for it.
Once download, run and install the utility and login to your Nexus account. It should auto handle Nexus mods. Once installed go to the “games” tab on the sidebar and then to “discovered” and allow Vortex to manage FO4 VR. If done correctly it should show up in the “Managed” tab.
- Fallout 4 VR Configuration Tool
As strange as this may sound, I recommend you download this via the Mod Manager link rather than using the manual link because NMM (and I assume Vortex) can tell you when there is an update to this utility. Once installed right-click the entry in the “Mods” list and select “Open in File Manager” this will take you to the .exe and you can put it on the desktop or wherever else is helpful since we will be using it a fair bit.
While not as useful as it used to be when the old guide was written, there is still a ton of tinkering we can do with this application. For now launch it and make sure you hit the “switch to Fallout4VR” button so we are sure we are editing FO4, (be default it will be editing Skyrim VR.) After that we can shut it down. For the other utilities.
LOOT
As mentioned before LOOT (The Load Order Optimisation Tool) is integrated into Vortex so we don’t need to worry about this.
- Google Drive Fallout 4 VR Mod Compatability List
Not much to say here other then its a Google Doc of pancake FO4 mods that are tested to be working for FO4vr, you won’t need this if you are looking to stick to this guide, this is only if you wanna mode the game beyond what “fo4vr was intended to be.”
Please note the above was written when I first wrote this guide, I don’t know (and can’t figure out) how to see an update history, so I am not sure if this chart is still actively monitored. If I can find out if it is I will omit this.)
INI Tweaks
Okay, so for our first out of game alterations we are going to be starting with ini tweaks. For the most part ini tweaks are a one time deal and things are over and done with and shouldn’t need to be touched again (at least assuming updates don’t screw with em.) So probably a good place to start.
Before we begin, all of these edits are on the files in C:\Users\*usernamehere*\Documents\My Games\Fallout4VR and not in the games install directory. So when I am referring to the below ini files that the location I mean. We good? Some/all of the files we will be tinkering with exist in our install directory as well, we are not touching those ones. This is important because they will not work if you do. With all that said we are going to be editing with the Fallout 4 VR configuration tool and not manually, but if you wanna do backups those are what you wanna backup.
So we are going to start with softening the blurring caused by TAA. (if you decide you want to use FXAA and have a way to soften that to make it less burry let me know!)
Open up the Fallout 4 VR configuration (if you have lost it open up Vortex, find the installed mod “\Fallout4VR and SkyrimVR Configuration Tool” and right click and “open in file manager” make a shortcut to this on your desktop in the event you need to open it again.)
Once open double check you are in FO4VR mode and not SkyrimVR (check title bar.) You will want to search for the entries below mentioned in the “ini paramiters” section of the table, and change the value with the number in the “edited value” section. You are searching using the “Filter” box. (Please note; some of these values are already set but I left them in for completeness sake/in the event they happened to have been screwed with, check “default value” to see if it is a stock setting or not if unsure.)
ini Parameter / Edited Value:
- fTAAPostSharpen – 0.675
- fTAASharpen – 1.0
- fTAAHighFreq – 0.8
- fTAALowFreq – 0.5
- fTAAPostOverlay – 0.675
This should soften the blurring of TAA while not making things obscenely jagged like it would be with TAA off.
First one we will start with is fixing the HUD for Power Armor. By default it felt like I was having to shove my eyes out of their sockets to read anything or look down at my feet, This will hopefully fix that. (Take note, if a value has a – in front of it, it matters. Furthermore some of these values might already be set by default, but the guide I was reading mentioned them and said defaults were omitted. Being they were not omitted is his guide I figured id include them just to be safe.)
ini Parameter / Edited Value:
- fPowerArmorOverlay_ForwardDistance / 25
- fPowerArmorOverlay_MaxAngleLeft / 13
- fPowerArmorOverlay_MaxAngleRight / 13
- fPowerArmorOverlay_MaxAngleUp / 0
- fPowerArmorOverlay_MaxAngleDown / 33
- fPowerArmorOverlay_Helmet_TranslateX / 0
- fPowerArmorOverlay_Helmet_TranslateY / -10
- fPowerArmorOverlay_Helmet_TranslateZ / -21
- fPowerArmorOverlay_Helmet_RotateX / -30
- fPowerArmorOverlay_Helmet_RotateY / 0
- fPowerArmorOverlay_Helmet_RotateZ / 0
- fPowerArmorOverlay_Helmet_Scale / 1
The next tweak we are going to do is to make it so VATS is not so erratic. the way vats works by default is every tenth of a second it will change if it feels it’s appropriate (based on your head/gun positioning) This tweak will “lock” onto the limb for a second before it changes making it much less annoying.
(The way this entry works is the value is a time, 1 is 1 second. 0.10 is 1/10 of a second, 0.5 is 5/10 or half a second, ect. Feel free to play with this if you want something that gives you more responsiveness or something that gives you more precise aim on body parts. I found that the below was good enough for me though.)
(Unsure if this is currently working, in the process of finding out/finding an alt.)
ini Parameter / Edited Value:
- fVATSTargetUpdateSec – 1.0
Now onto our pipboy, we are going to bump up its render resolution. While initially I heard you can run at any resolution as long as aspect ratio is maintained, while playing with it shortly after release I found I ran into issues when I got too crazy, so I recommend sticking with the below settings. This will also let you make the pipboy scale smaller in game while making it still legible.
ini Parameter / Edited Value:
- uPipboyTargetWidth – 1752
- uPipboyTargetHeight – 1400
This last bit is entirely optional, it was originally to fix an actual problem with the initial release where the stars at night were WAY to close to the player. While this has been fixed I still feel they look to close to the player so this will fix that issue.
ini Parameter / Edited Value:
- fSkyScaleFactor – 2500
And that’s it for this section, if you adjust any in game settings you may wanna double check that the game didn’t overwrite your settings with the defaults. As of testing I have not checked if it does so I don’t know if they are safe or not, but I would recommend double checking if you play with in game settings.
Needed Mods
PLEASE NOTE THE BELOW IS OUT OF DATE AND I NEED TIME TO GO THOUGH THE GAME A BIT AND SEE WHAT NEEDS ADJUSTMENT, PROCEED WITH CAUTION.
So onto needed mods. As mentioned thankfully there is not too much in the way of necessarily mods the game needs, and one of them will be unneeded soon thankfully, also while I feel these are pretty good directions for getting you up and running PLEASE read the mod descriptions for updates, them being no longer needed mods or other various things you might need to know.
- Fallout 4 – Texture Optimization Project
So this is going to be the most complicated of the mods we will have to implement, get yourself a snack as well cause this one will take a while to work.
We all know this title is demanding to run. So I feel that getting all we can out of it for performance is a step we need to be taking. Before we install this mod though we need a few things. The 1st will be a file from Bethesdas creation kit. Sadly that means you will need to get Beth’s Launcher, but what can you do sadly.
So grab the launcher and then download the FO4 Creation kit from it. Once done we are looking for a folder entitled “Archive2” Now this seems it could be in 1 of 2 places. The 1st one is “Bethesda.net Launcher\games\Tools\Archive2” the other potential place is if you have Pancake FO4 installed it will be in “Steam\SteamLibrary\steamapps\common\Fallout 4” and then I THIIIINK the “Data” folder (I backed up this folder and removed it from its original place so I’m not 100% if it was here, but it shouldn’t be hard to find.
The last thing we will want to make this as painless as possible is Bat file installer for Fallout 4 – Texture Optimization Project by torcher. This utility is pretty self-explanatory in its directions. Extract the utility and place “Final2.bat” into your Fallout 4 VR “Data” folder and then extract Fallout 4 Texture Optimization Project, (Final2.bat will refer to this folder/mod as the “T.O.P folder.) Run Final2.bat, after that it will walk you through the process of backing up the old stuff, and what not. A lot of it is simply dragging the requested folders into the cmd window that opened up when you ran Final2.bat. and you should be good to go, but as mentioned it will take a bit of time, my 4770k does it in. I dunno 10-20 minutes?
- FAR – Faraway Area Reform
Not much to say, download it via NMM and install it via NMM
- Vivid Fallout – All in One
I can’t claim to have tested this much but it claims to have performance optimization and use less VRAM then default textures. It seems to work well on my 1070 though, I am using the “Best choice” Download. Once again simply install it via NMM
- FO4VR Mod Achievements Enabler
This isn’t super needed of course but it will reenable achievements disabled from modding. This will need a manual install but it’s not much, simply extract the mod in your FO4vr directory and allow it to overwrite anything it needs to, (I think it needs to overwrite 1 file.)
- More Accurate Weapons
This might not be to everyone’s taste but being FO4 is an RPG, (or as some feel an fps masquerading as an RPG, but I digress.) It does have some RNG built into rounds being shot. This, in my opinion, works fine for pancake FO4 but it certainly doesn’t feel right in FO4vr, so this will change that to make rounds aim truer, I don’t know how dead accurate it is but it is certainly better. And quite frankly aiming in VR is hard enough as is so this could help out. Once again install via NMM. I am using the recoil version.
- Full Dialog VR
Makes dialogue choices less vague. Install via NMM.
- Improved Reflex Sight Reticle Visibility – VR
Simply makes the reflex sighting more usable in VR, install via NMM and pick your options.
- VR Handmade Reflex Sights
This is a bit of a complimentary mod to the above, (though the remainder of these mods will be fairly complimentary to each other.) Once again this makes reflex sights easier to use but this time with the “handmade” guns. Might be noticing a theme here but download it and install it via NMM, and pick your options.
- Pipe Scope Beta
This mod should soon become pointless since scopes are confirmed to be coming into the game very soon.
None the less if you need scopes fixed NOW give this a grab. This won’t give you zoom but it will make scopes see through and give them a “holo” crosshair. As I’m sure you can guess at the point Download and install via NMM. (I recommend uninstalling this BEFORE the scope fix comes out though just to make the update smooth.)
- Pipe guns glow sight fix
This mod fixes a bug that hopefully will be polished up? But I think its a bug still in pancake don’t hold your breath.
It simply makes glow sighing brighter and more reflective. Now if you are using this with the pipe scope beta mod the mod maker recommends you use this mod at 100%, he states that 75% may work on the webpage (the installer says 100% is needed though.) I have not reached a point at which I can test this, but I am running 75%, sadly I have not reached a point where I have any scopes. As you can probably guess, install via NMM and pick your options. (I recommend uninstalling this too before the scope fix comes out though just to make the update smooth, since and then either reinstall it or check NMM/the mod page to see if this mod needs an update before enabling since clearly, it has an effect on scopes in its current state.)
- Fire Support Glitch Workaround
I’m not in the game far enough to know what this fixes, but being it’s a bug fix I figured I would include it. I’d like to include the Unofficial Fallout 4 Patch, but being A) it’s in testing and B) it requires the DLC which is currently not 100% functional I am going to omit it until those issues are sorted. In any case, as before installing via NMM.
That’s all really to fix core (currently) broken things with the game. I will try to keep up to date with this as I mentioned. Don’t forget to sort your mods with LOOT, that being said I don’t know if LOOT is set up to sort the VR specific mods, (which these all are.) so you might wanna read the mod description to see if they have anything specific to state about load order the next section is going to be, mods that I don’t feel are needed to fix core issues with the title, but none the less are quite valuable in my eyes.
Recommended Mods

So as I mentioned in the previous section those are all the needed mods but I still got a handful of very much recommended mods, but they are not deal breakers to not have.
- Darker Nights
Nights are WAY to damn bright by default in this game, this mod fixes that, compensates the AI to balance for that as well as things like NVG and lets you do some NVG colour tweaks. I found anything more then the “Medium” setting was too dark to be playable, so use that as a starting point perhaps and go from there. Install via NMM
- Combat Zone Restored
Again not far enough in the game to know what this is referring too but apparently this mod restores a good amount of content that was cut from the initial title because it didn’t work, this will fix most, (not all,) of that content. Install via NMM.
- Faster Terminal Displays
Computers are way to slow in the default game to the point we just skip the “loading.” That seems silly being we are in VR and the whole point is immersion, but it takes so damn long that we will usually just skip it, this will allow you to speed the loading up, (in variable quantities,) so we can keep that immersion but also not deal with the default slow speed. Install via NMM, I think I’m trying 5x but haven’t had a chance to test it yet.
- Improved Map with Visible Roads
Helps to make your map much more detailed than the vanilla one. Install via NMM.
That’s all I got for now. This section might be expanded upon in the future. Do not forget to sort all your mods via LOOT. If anyone has questions or has some ideas for this guide feel free to let me know.
Original Link – Continuation of discussion
Add comment