A guide that will teach you how to fight the Dungeon Guardian and obtain his Bone Key for the Baby Skeletron Head pet, by utilizing the new mechanics of 1.2. This is an alternative method to the usual ‘gravitation potion’ spam.
Introduction
What is the Dungeon Guardian?
Have you ever tried to enter the dungeon before defeating Skeletron? Normally, a special Skeletron head flies at you from offscreen, dealing over 1000 damage and thus killing you instantly. This head is insanely fast and impossible to combat in the close quarters of the dungeon entrance. It is (or at least, was) nothing more than a mechanic placed in the game to ensure players defeated the Skeletron boss before plundering the depths of the dungeon. It wasn’t originally made to be defeated, as it has 9000 armor and 9999 HP. Player attacks will do, at most, 1 damage per hit, regardless of weapon type. Though it isn’t invincible, it is impossible to defeat without preparations made ahead of time.
Okay, so why should I care?
Prior to the game’s big 1.2 patch, some intrepid and obsessive players found ways to kill the Dungeon Guardian. This served no other purpose than bragging rights, typically embodied in the form of Youtube Videos. However, as of patch 1.2, the game’s creators decided to add a little extra incentive to killing the Dungeon Guardian, in the form of the Bone Key. Now you can be rewarded with an actual trophy you can show off to others.
The Dungeon Guardian does not drop any money, equipment, or items, aside from the Bone Key. The only reasons to kill the Dungeon Guardian is for the bragging rights, and for that key.
What is the Bone Key?
The Bone Key is one of many rare pet items to be added in 1.2. Like all pet items, it summons a companion to follow you around, who serves no purpose beyond doing this. Pets have no effect on gameplay, they’re just there to look neat.
The Bone Key summons a ‘Baby Skeletron Head’, which is one of the biggest (and coolest!) pets available. The Baby Skeletron head will float around you in various patterns, and follow after you if you move. If you get too far away from it, the head will start spinning (much like the attack Skeletron does) and fly much faster at you. Unlike some pets, the Baby Skeletron Head already floats through most objects, even when not in “catch up” mode.
The Bone Key has a 100% chance of dropping from the Dungeon Guardian.
Alright, so how do I defeat this Dungeon Guardian and get a Bone Key?
Read on!
Preparation – Equipment and Items
Defeating the Dungeon Guardian is no easy task. Prior to 1.2, the most surefire way (and probably only way) was to use Gravitation Potions to float through the sky, while shooting at it with a Megashark. Since each bullet only did 1 damage (2 when it crit), this meant a long time flying, and a lot of gravitation potions.
As of 1.2, the Gravitation Potion method should still work (it just may be more confusing since apparently your camera flips upside down now). However, I will be exploring the method I used, which relied upon an arena built mostly of asphalt blocks. Regardless of what method you choose, here are some useful items to bring along.
Equipment and Items

Minishark – If you already have a Megashark, you can use that instead. If you don’t have a Megashark, however, you can simply buy a Minishark. Both guns will do 1 damage per shot regardless, so there is no need to upgrade it unless you plan on using it for other stuff.
(Alternatively, Uzi or Chain Gun will work if you have those instead. The Chain Gun fires twice as fast as the Minishark, so you’ll kill the Guardian faster. The Uzi, on the other hand, is very slightly slower and lacks the ammo conservation stat, so you’ll want to bring more bullets.)
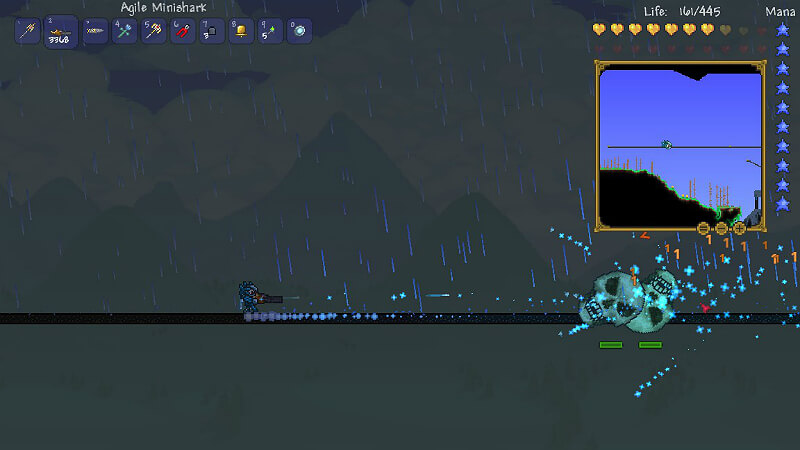
Crystal Bullets – Bring a lot of them. I killed the Dungeon Guardian while only using around 1500 or so bullets, but you will want to bring a lot more to be safe. Crystal Bullets split into shards upon hit, which each have a potential to hit the Guardian for an extra 1 damage, effectively increasing your damage dealt per shot. Alternatively, you can bring Chlorophyte bullets, as their homing will make sure every shot hits. I still recommend Crystal, however, as even when they miss (like hitting the ground), their shards will still probably hit the Guardian head.
Magic Mirror – Will allow you to safely and (relatively) easily pull the Dungeon Guardian to the surface, where you can fight him properly.
Frost Armor – The whole set. The set bonus gives your bullets a chance to put the “frostburn” debuff on enemies. While the Dungeon Guardian is immune to fire or Cursed Inferno effects, he is NOT immune to frostburn. Having this armor, and placing frostburn on the Guardian, increases your damage by about 12 damage per second (as of patch 1.2.3), which is a lot considering your gun won’t be doing much more than this anyway.
Lightning Boots – Hermes or Spectre Boots will probably work as well, but the faster you run, the better. You’ll be outrunning the Dungeon Guardian for most of this fight, so having boots is a boon.

Cobalt Shield (or one of it’s upgrades) – If you’re doing the Gravitation Potion method, this probably will be irrelevant. But for my method, it is a must. Sometimes monsters will spawn on your asphalt road, and their knockback will cause you to stop running, which will get you killed. Equip the Cobalt Shield and just run through the enemies. (The alternative solution would be to enclose your arena with a long, house-like area with background walls, which would prevent enemies from spawning. This is way more time consuming than simply taking a Cobalt Shield along with.)
Wings – Somewhat optional. If one of your teleporters fails (see below), this can help you save yourself by flying up in the air and over the Guardian. If you have a choice, the Jetpack or Fishron Wings are probably most effective, although Ice Wings worked just fine for me.
Rifle Scope – Completely optional, but good to have so you can watch the Guardian and aim better as he slips offscreen. If you have a Sniper Scope instead, it’ll add crit chance in addition to the zoom effect.
Eye of the Golem – Also completely optional, but one of the few accessories that can actually increase your damage by a significant amount. Every crit deals twice as much damage to the Guardian, so you might as well stack for it.
Ammo Box – Optional, but nice if you want to save on bullets. You can place it in your Respawn Hut, and right-click it to gain a buff. This buff will give an extra 20% chance to not consume ammo, so it’s nice for conserving those Crystal Bullets.
Tabi/Black Belt/Master Ninja Gear – Optional, but will make your life a little easier. Tabi allows you to dash, which allows you to change directions and accelerate to max speed instantly, both of which are useful for keeping out of the Guardian’s range. The Black Belt gives you somewhere around an 11% chance to dodge an attack, so you may get lucky and avoid an untimely death if something goes wrong. Master Ninja Gear provides the effects of both Tabi and Black Belt, so you can save an accessory slot. They’re not necessary, and are pretty rare drops, but worth using if you have them.
Modifiers – If you want to spend the money for Reforging, you could stack Critical Strike Chance (Lucky) or Movement Speed (Quick) on your accessories. These won’t make too much of a difference, but they can help. As for your gun, you’ll want attack speed and/or crit (Agile, Rapid or Unreal are probably best).
Preparation – the Arena
Once you have all the gear you need, you’ll want to build a suitable place to fight the Dungeon Guardian, as fighting him in the narrow corridor of the dungeon is basically suicidal.
Here are the components I recommend:
Bed – Build a tiny house that you can set your spawn point to (you’re probably going to die a lot just getting the Dungeon Guardian out of the dungeon). This will also be where you will teleport to when using your magic mirror, so put it right on top of the dungeon. In fact, building it on top of or even intersecting through the dungeon’s entryway room (the area with the Old Man) will make things easier.
Asphalt Blocks – I made about 500 of these, and ended up using somewhere around 350-400 for my setup. They will form most of your arena.
Teleporters – You will use these to safely get around the Dungeon Guardian without needing to get close to him. Bring lots of wire and some pressure plates.
Please note that the color of your pressure plates matter. Green and red pressure plates can be activated by monsters stepping on them, while blue, brown, gray, and Lizhard plates will not. If you use green plates, sometimes enemies will step on them first, get teleported, and thus put the teleporter on cooldown. (Also, avoid using yellow plates, as they can never be triggered by players.)
(Credit to Tesseract for pointing out the color issue to me.)
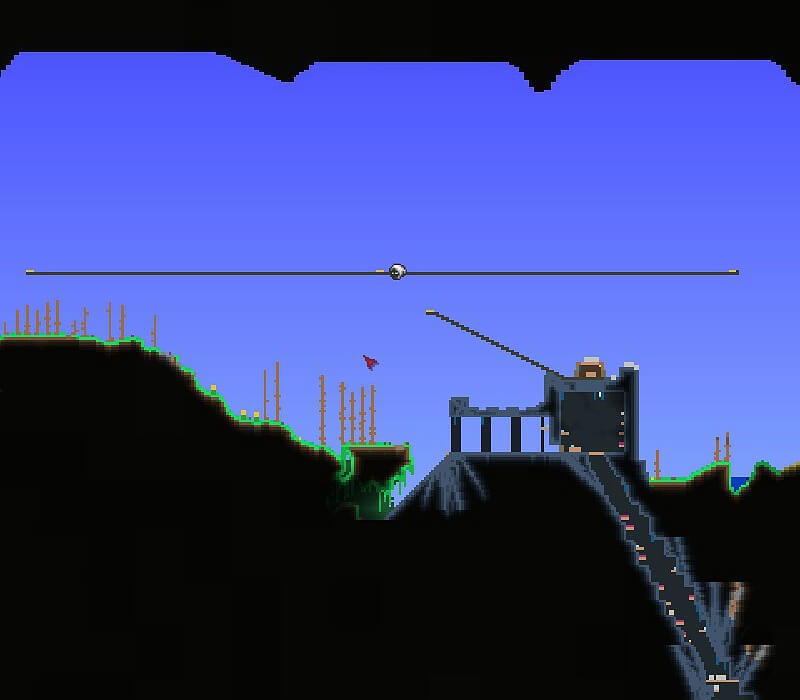
(Overview of my arena)
Start by building your shack somewhere on top of the dungeon, or at least somewhere around the surface level. Make the floor out of asphalt and leave the doors open, so that you can get a running start from the moment you teleport to your bed.

(My respawn shack, also a view of the gear I have equipped)
In my set up, I built the arena high above the shack. I used a staircase of asphalt blocks (2 steps across then one step up) to gradually elevate myself to the arena proper. At the top of the staircase, I put a teleporter to teleport me up to the arena.
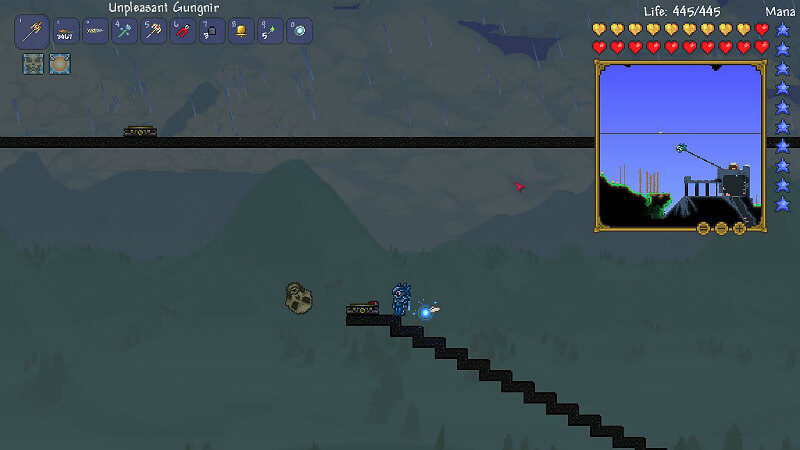
(The top of my staircase, with the teleporter leading up to the main arena platform. If you wish, you can simply have your arena road run through your respawn hut, thus eliminating the need for this staircase. Simply place a destination teleporter in/near/on your respawn hut)
The arena consists of a single teleporter destination in the middle. It branches both east and west about 100-150 blocks, and has a teleporter at each end. These teleporters (activated by pressure plates placed on top of the teleporters themselves) connect to the destination teleporter in the middle. The boss can be fought by running all the way to the left, teleporting to center, running all the way right, teleporting to center, and repeating. This will put you on the opposite side of the boss safely, without having to try to get over him.
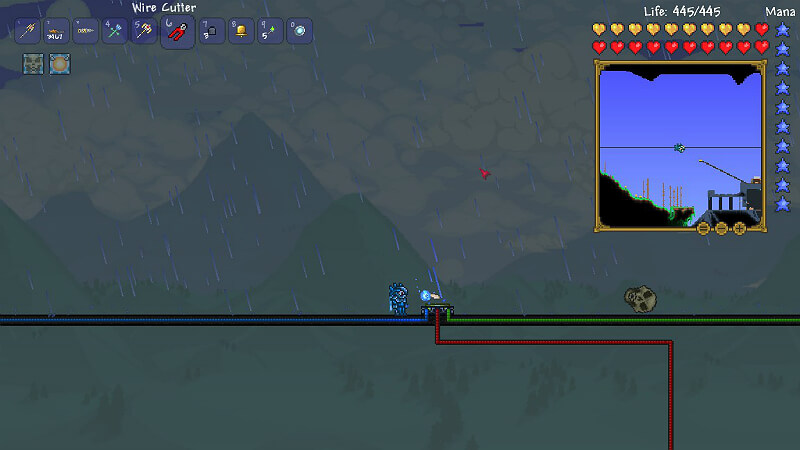
(A view of the wiring in my arena. The blue wire goes all the way left to the left side’s teleporter, while the green one connects to the right. All teleporters connect to the single destination teleporter in the center.)
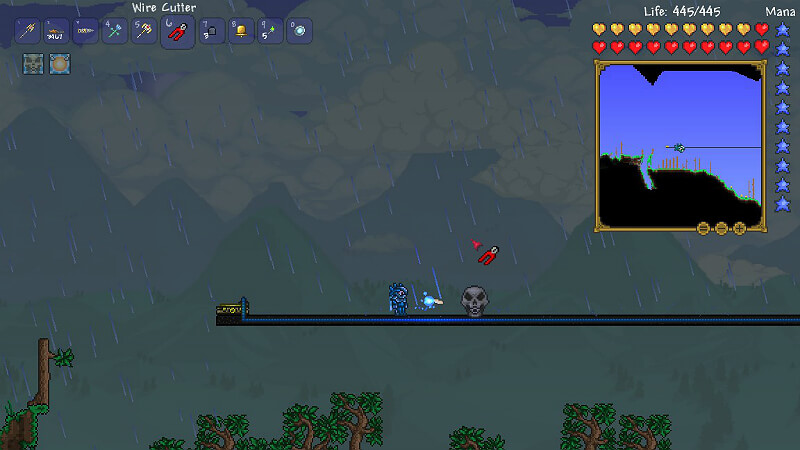
(A view of the left side’s end. The right side basically mirrors this, but with green wire).
Fighting the Dungeon Guardian
Once your arena and items have been prepared, you can begin the fight. Start by descending into the dungeon, slowly. If possible, try and place a torch at about the proper point where he spawns, to make things simple. When the Guardian spawns, immediately use your Magic Mirror.
If you are not too far from the surface when you use the Mirror, the Guardian should follow you upward to your respawn hut. The Rifle Scope comes in handy for peeking below and checking to see if he is following you. Depending on your distance from the surface when you teleport, the Guardian may despawn, rather than follow you, so it may take a few tries to actually get him up there.
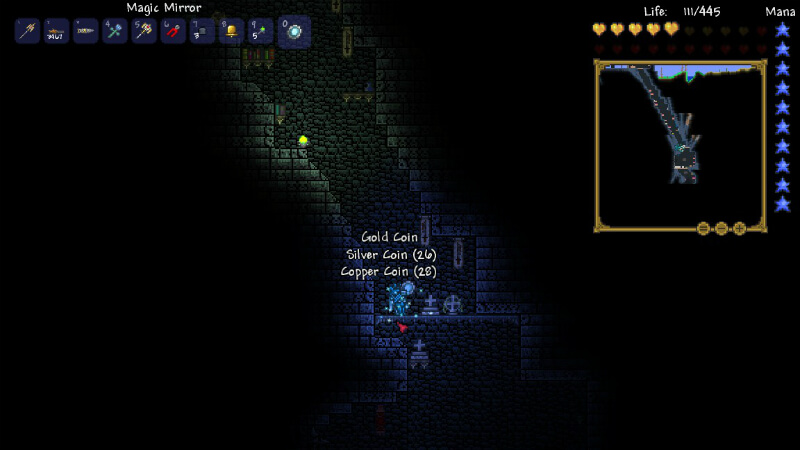
(Me pulling the Guardian. Those coins are from dying after a previous failed attempt, so make sure to put your money in a piggy bank before doing this!)
(A successful pulling attempt, in which I got two Dungeon Guardians. I have already teleported up to the arena. Hope you don’t pull multiple skulls when you do it!)
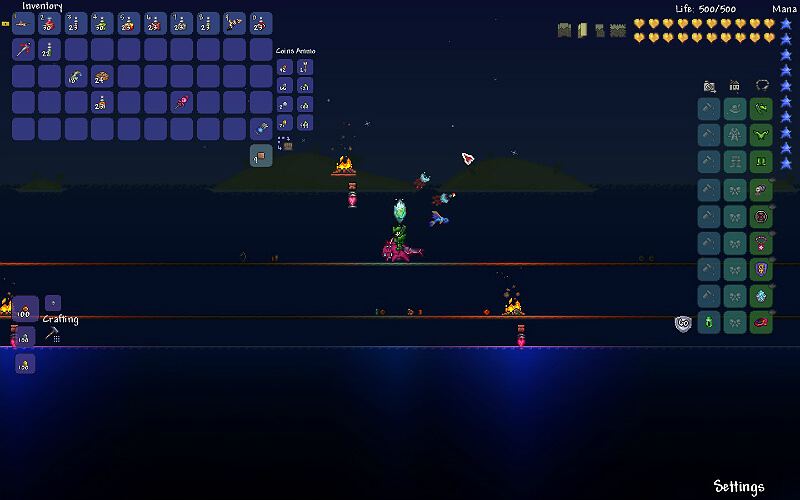
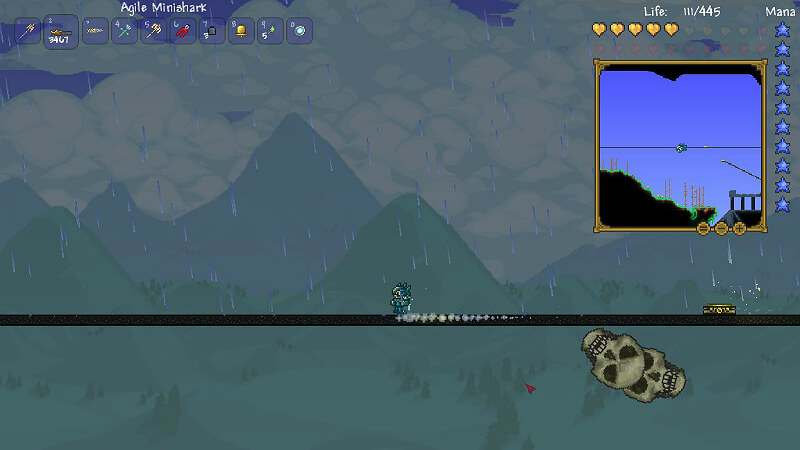
Start running on the asphalt. Once you have teleported up to your arena, begin firing backward at the boss while running toward the end. When you reach there, you will teleport back to the center. Immediately change directions and start running the other way – as he will catch up quickly! Tabi or Master Ninja Gear are good for this, as the dash will allow you to both change directions and reach max speed instantly, thus keeping you safe from the Guardian as he turns around. Fire at the Guardian even when he is off screen, to maximize DPS.
(Credit to Annoth and his Pet Guide for giving me this tip on using Tabi/Master Ninja Gear after you teleport.)
(Pew pew!)
If things go right, simply repeat the process of teleporting back and forth, shooting at him as you go, until he dies. This will take quite a few minutes, but certainly less than it used to (some Youtubers claim it could take up to 15 minutes with old methods). For me, it took somewhere between 5 and 10, on the lower end (I did not time myself).
Troubleshooting, FAQs, and How to Avoid Dying

When things go right, this method works quite well. However, there are at least a couple issues that can mess you up.
“When I use the Magic Mirror, the Guardian keeps despawning!”
This can happen sometimes. It has to do with the distance between the Guardian’s spawn and your bed after you teleport. I think Small worlds have the Guardian spawn closer to the surface than Medium or Large, but I could be wrong. Anyway, try it a number of times. Even when your setup works properly, sometimes he’ll despawn. If he despawns every time, you may need to rebuild your house a little lower, even inside the dungeon if necessary. Just make sure it still hooks up properly with your arena!
Additionally, try to wait a second or two before you start running down your asphalt road. If you go too far too fast, he may despawn. You can try waiting until he appears on screen again before running, although this is risky and may get you killed.
“I got to one end of my arena, but the teleporter didn’t activate!”
This has happened to me a couple times. I suspect it has to do with a cooldown timer on the teleporter, caused by an enemy (zombie or something) stepping on the button and using it before you. I could be wrong. If this is happening to you, check the color of your pressure plates (see the preparation – arena section above). Yellow, Red, and Green plates should not be used, as enemies can trigger them. Gray, brown, blue, and Lizhard plates can only be triggered by the player, so use one of these kinds.
If for whatever reason you still don’t get teleported despite using the proper colored plates, however, you can still save yourself with a Jetpack or Wings. If you run over your teleporter without it transporting you, immediately fly upward as fast as you are able. Try to get up and over the Dungeon Guardian and go back the opposite way of where you were running. The Jetpack is probably better for this, as it’s accelerated boost will allow you to get over him quicker. However, I managed to save myself using Ice Wings.
“Sometimes, after I get to one end and teleport, the Dungeon Guardian despawns!”
This has happened to me a few times as well. Usually, it occurs when the Dungeon Guardian is too close to the teleporter before I get on it. If he is too far away from your destination, he will despawn when you teleport. Try running faster, make sure he doesn’t catch up to you before you teleport. If that still doesn’t work, try cutting a couple dozen blocks off from your arena and then summon him again.
“When I teleport back to the middle, the Dungeon Guardian keeps catching up and killing me!”
I would suspect this is the opposite of the above problem. Try increasing your movement speed, or, more simply, add more asphalt blocks to each side of your road. Tweak it until you find the sweet spot.
“This is great and all, but if you have Master Ninja Gear and Turtle Armor…”
As of 1.2.3, the Dungeon Guardian is finally fixed. Before, it’s AI would reset it’s damage to 9999 even though the game said it should be less than that (from what I know). The patch has finally corrected the issue, and now reflected damage from the Turtle Armor is reduced by the enemy’s defense, in this case down to 1 damage. This strategy will no longer work (unless they made YET ANOTHER oversight).
Alternate Strategies and Items
Gravitation Potions
As I’ve stated multiple times, there is a method that relies upon Gravitation potions to allow you to fly through the air. The idea is the falling speed you get from constantly going up and down will keep you out of the Dungeon Guardian’s range. This method still works, if you’re willing to do it. There are plenty of Youtube videos that can show you how it’s done, so you can look some of those up.
Why don’t I do this method? It relies a lot upon timing. First off, you need to make sure you remember to re-use your potion buff before it runs out, or else you’ll just fall to the ground and die. There’s absolutely nothing wrong with the method; the problem is mostly me. I don’t trust I’ll be able to do it perfectly for the 5-10 minutes it takes to kill the guardian, and wasting all that time when the enemy only had like 5% health left is extremely frustrating. Again, this method still works, so long as you can get used to the camera flip. If you have a lot of alchemical supplies leftover, go for it.
Annoth’s Method
I found this guide sometime after writing mine, and it seems pretty effective. The “arena” platform in this one is somewhat similar to mine, but you only teleport a short distance to get to the other side of the Guardian, as opposed to teleporting directly to the middle. I haven’t tested this method, so I can’t say if it’s any better or worse, but it seems solid, and I did pick up a few pointers from the guide.
Alternative Weapon Choices
The Chaingun is probably the best gun to use to fight the Dungeon Guardian. If you want to mix it up or use a different type of weapon, here are some options, although they are typically less effective.
Alternate Ranged Weapons
All weapons will do 1 damage to the Guardian, so fast-firing bullets really are the best method for maximizing dps. If for whatever reason you don’t want to use a gun, a Chlorophyte Shotbow or Tsunami would be best. Tsunami would allow 5 hits per shot, which may(?) come close to gun dps, and you could use wooden arrows rather than crystal bullets.
Magic Weapons
Magic weapons have one advantage over ranged: mana. Mana regenerates naturally and thus you wouldn’t need ammo (or I guess you would substitute mana potions for ammo). There are also some arguably good magic weapons for killing the Dungeon Guardian: Leaf Blower, Razorpine, Blizzard Staff, Magnet Sphere, Razorblade Typhoon, Bubble Gun, Magnet Sphere, and Crystal Storm.
The main problem with these is their limitations. Some magic weapons, like the Bubble Gun, have a limited range that would be dangerous for fighting the Guardian. Others may be difficult to aim, like the Blizzard Staff. But most importantly, they do not benefit from the Ice Armor’s frostburn debuff, which is a major part of your dps. You could remedy this by taking an Ice Flower along, igniting the boss and then switching to a faster weapon, but the extra time spent switching weapons and waiting for him to get debuffed would lower your dps. In short, magic weapons are not as effective as using guns.
Summoning Weapons
Out of all of them, I’d say Optical Staff would probably give you the best dps… in theory. The problem is something I learned while fighting Duke Fishron: minions are not suited for highly mobile fighting. Your Twins minions will spend more time trying to catch up to you than they will fighting the boss. Sadly, unless they improve minion AI/function, they will not be effective.
However, since you can summon minions even without using summoner armor, you could always bring one or two along to follow you around as you use the frost armor/gun method above.
Melee Weapons
I would only recommend one melee weapon (and it’s hardly even melee): Flairon. It summons bubbles pretty fast, and actually summons more per swing if you are moving away from it as you swing it (which you would be while running away from the Guardian). They home onto the enemy, so you wouldn’t have to worry much about missing. And it requires zero ammo or mana. Since Ice Armor works with melee weapons, it would benefit from the Frostburn set bonus. Finally, and perhaps most importantly, you could use Flask of Party with it to make your fight extra festive.
Unlike the other alternate weapons, Flairon may actually give the Chaingun a run for it’s money, in terms of effectiveness.
Original Link – Continuation of discussion

Add comment