This is the unofficial guide for Bendy and the Ink Machine on most of the things in the game, such as achievements, secrets or just walkthroughs in the game.
Chapter 1 – Moving Pictures

Warning, only listen to this walkthrough if you are completely stuck and have no idea what to do. This game is suggested to be played spoiler-free.
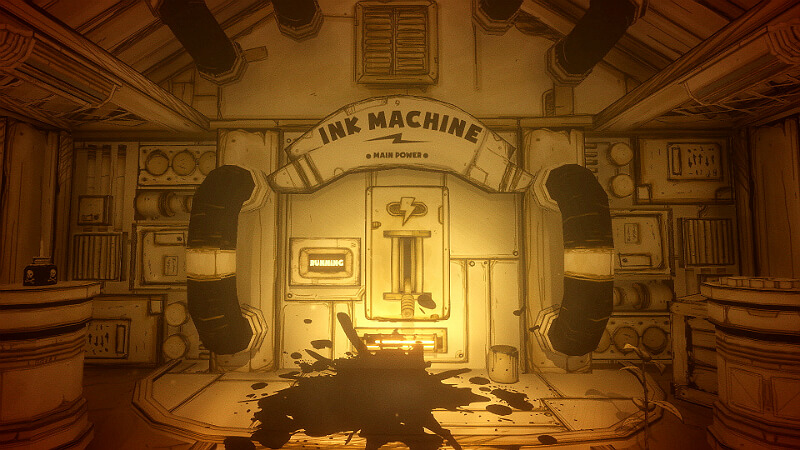
When you start chapter 1, you enter the old workshop. You can explore around, and visit the place. If you want to go forward, visit the ink machine. When you visit the ink machine, you want to try and turn it on. If you wander around enough, you will find an old audio log, speaking the voice of Wally Franks.
He mentions putting items to “Please the Gods” on the little pedastals to turn on the machine. So what you want to do, is search around the workshop and collect these items. The items can be viewed in photo frames above the pedestals. Once you find them, go back to the break room and a line of text will be heard. After that, go down the hallway the opposite of the break room. Careful, a bendy cutout will pop out! After you get past the hallway, enter the projector room and press the big flow button. After that, go back to the break room and flick the switch! After that, go back to the Ink Machine and you will find the Ink Machine entrance is boarded up. Peek through and Bendy will pop out. After that, run to the exit and you will fall down a trap door into the lower parts of the workshop. After that, walk down some stairs and you will find an axe. Pick it up and clear your path. Once you clear your path and enter the room, you will find a pentagram. Walk into the middle of it and you will get see a few flashbacks/visions. Then, you will faint and fall to the floor. Chapter 2 starts from there.
Chapter 1 – Moving Pictures (Wiki Walkthrough)
The chapter starts with Henry entering the studio. Henry is given the first objective after saying his first voice line.
“Discover Joey’s Secret”
Explore the workshop until locating the Ink Machine Room. After getting in the room, Henry needs to find two power cells in order to lift the machine, they are located in the same room where Henry is. After finding the power cells, must put the power cells in a little machinery and lift the machine up.
“Turn On the Ink Machine”
After rising the Ink Machine, Henry must get out of the room and go back to the gate that was closed before, then turn left and go to the break room.
“Fix the Ink Machine”
This is the first and only puzzle in the chapter. Before activating the Ink Machine, Henry needs to find six objects:
- Gear
- Bendy doll
- Book
- Ink jar
- Record
- Wrench
These objects are placed throughout specified locations in the map, after getting all the items head again to the break room and put the items on the pedestals.
“Restore Ink Pressure”
Once Henry has collected all of the objects, go to the projector room and restore the ink pressure.
“Turn on the Ink Machine”
Head back to the Power Room and pull the switch. Then, head back to the Ink Machine. The room will be blocked off due to planks. After getting closer to it, Henry will encounter “Bendy” for the first time via a jumpscare, making Henry fall backwards.
“Escape the Workshop”
After encountering “Bendy” at the Ink Machine, run towards the exit. Henry will then fall through the floor, landing in a secret room.
“Drain the Ink”
The room Henry lands in is flooded with ink, and has to be drained by turning a pipe valve. As Henry goes further down, there will be two more flooded areas that will have to be drained to progress to the next area.
“Clear an New Path”
After walking down from the basement, grab the axe hung on the wall to chop through some wooden planks blocking the path to another room.
Once Henry has reached this room, break three more boards that blocked the door and then approach the pentagram room. Finally, Henry will have quick flashbacks of the Ink Machine, a wheelchair, and “Bendy” before fainting to complete the chapter.
Chapter 1 – Secrets & Easter Eggs
TheMeatly
After you activated the ink machine, instead of going to the ink machine, go to boris’s room and walk right through the wall and meet TheMeatly with a special line of text saying: “What the heck is this?” (See Achievements).
Based on the mascot of the game’s developing company, he is tall with long, skinny black limbs, red rectangular body (even though it is yellowish-brown in color due to the color-style for the game itself), and a circular white head with black eyes.
Youtuber Tunes
There are some doors that have light lit up under the door that are locked, presumably with people inside the room. At some point, the light turns off and you can enter the door. Inside the room theres an old fashion radio that plays an instrumental and shortened version of Kyle Allens “Bendy and the Ink Machine” Song. This Grants you an Achievement (See Achievements).
Chapter 1 – Achievements
- Picking up all the Pieces: Collect all of the workshop items.
- Hello Bendy: Fall through the Trapdoor.
- The Creator: Visit TheMeatly.
To find TheMeatly, you must first turn on the Ink Machine and instead of walking to the Ink Machine, go back to Boris’s room and walk into the wall with the Boris Poster. You will find TheMeatly and get the Achievement.
- Crooner Tuner: Turn on the radio.
There are some doors that have light lit up under the door that are locked, presumably with people inside the room. At some point, the light turns off and you can enter the door. Inside the room there’s an old fashion radio that plays an instrumental and shortened version of Kyle Allens “Bendy and the Ink Machine” Song. This Grants you the Achievement “Crooner Tuner”.
Chapter 1 – Tips & Tricks
Tips & Tricks:
- Press and hold shift to run.
- It is best to go on options and turn on Subtitles.
- Check every inch of any hallway or room for any items to turn on the machine.
- Stick around for the credits of the chapters! There are secrets at the end of them.
Chapter 2 – The Old Song
Warning, only listen to this walkthrough if you are completely stuck and have no idea what to do. This game is suggested to be played spoiler-free.
Finished readin’ chapter one? Good! When you start chapter two, you wake up from fainting. Pick up the axe and get going! Once you enter “Utility Shaft 9”, go over to a voice recorder and listen to it. You will hear the voice of “Sammy Lawrence”.
He claims bendy to be “His lord and savior”. Once the voice log finishes, his voice will appear saying “I said… Can I get an amen?” telling us that Sammy is in the area. After that, continue forward and down the small hallway full of ink. Midway through, you will see some. Strange ink monster passing through. After that, walk over to get him, and you will see that he’s gone. After that, go over to the big gate and then you need to look for 3 switches in the area. Some might be sneaky to find though. Once you’ve done that, go over to the gate and open it. After you’ve done that, go dig yourself through the wood and you will find yourself in the music department. Go over to the stairs and you will learn that you need to power up the ink pump to drain the ink flooding the floor. Press the power switch at the stairs and you will see, all of the lights has gone out. Go out of the stairs and… BOOM! A ton of ink monsters will attack you. Try to kill them with your axe before they kill YOU! Once they all have been defeated, you will see a big gate opening.
Before you go in there, check the audio log next to the music department sign. You are hearing Sammy Lawrence (again) complaining about the ink machine and it leaking, talking about the ink pump. Once that’s done, go through the gate and you will find a big hallway. One of the doors lead to a pipe organ. Play the pipe organ and you will see…Someone calling for help. Another area leads to an infirmary that is blocked off, and ANOTHER door leads to a little office for drawing stuff. At the end of the hallway, you will see Sammy’s office. Peek through and you will see the pump switch, though the door is blocked by some more ink. Near the ink, you will hear someone talking in the voice of “Wally Franks”. He tells you that he lost his closet keys in one of the garbage cans. You know what to do. Go search the garbage cans and look for the key! Once that’s done, go into Wally’s closet and you will see an audio log speaking the voice of Sammy Lawrence (again). He says that he has a sanctuary, joey has his, and he has his own. He will say some instruments to play. We’ll get to that later, okay? Go back to the entrance and then go upstairs.
You will see a projector you can turn on, and an audio log. Using it will play the voice of “Norman Polk”. He complains about Sammy and how weird he is. Now go into the instrument room. In there, you will see alot of instruments and ANOTHER audio log, speaking the voice of “Suzie (or Susie) Campbell”. She talks about how she LOVES voice acting for the character “Alice Angel”, who is a new character introduced in chapter 2. Alright, let’s get back to the sanctuary stuff, okay? So, Sammy will say a row of instruments. Go to the room full of instruments and you will trigger a line. Now go back to the upstairs part and activate the projector.
Then after that, run as fast as you can to the instrument room and play each instrument that Sammy said one-by-one! After that, you will see “The Sanctuary” open. Go in it and activate the ink flow. That will drain the ink from Sammys office! Careful though, once you turn and get out, a cardboard bendy will peek at you! After you get past him back to the instrument room, alot of ink monsters come to have some playtime! Once you defeat them, Go to the infirmary and it will be drained, but the ink valve is missing. Pull the lever nearby and go down the stairs, you will see an audio log with the voice of “Jack Fain”.
You meet Jack Fain if you continue forward. Jack Fain is a Searcher with a Hat on, he has the valve, but hes not gonna give it up. If you walk near him, he will disappear and reappear somewhere else. To get him, you must pull a lever to the left of the entrance, this pulls a lift with a crate on it up. Keep chasing Jack fain until he goes under the lift, then pull the lever to the right of the entrance and he will be crushed by the lift. You can pick up the valve and put it back on the infirmary pipe.
“Sorry I had to do that. Nice hat though.”
Go back to the hallway and enter Sammy’s office. Flick the ink pump switch then get going to the stairs! You’re almost there! Aaand…
“Rest your head, its time for bed…”.
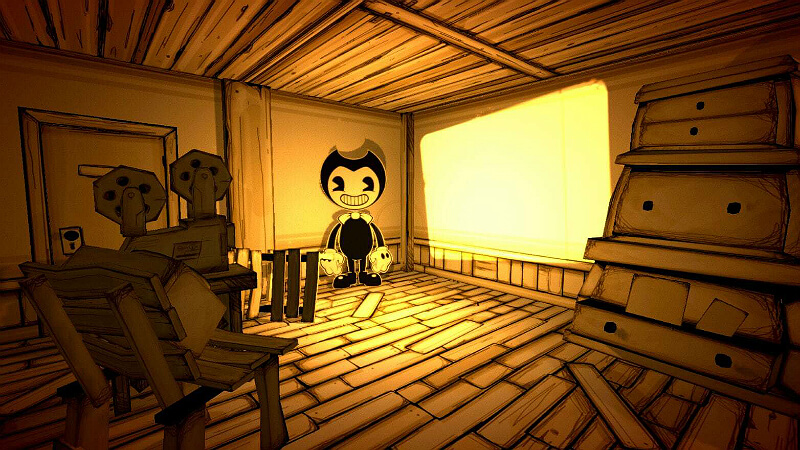
Once the screen loads, you enter a room with you tied up and Sammy right in front of you. About to start sacrificing you to bendy, aka: his lord. Once he finishes his school essay, he gets KILLED by bendy, you manage to escape the ropes. Go get the axe and start running full on Sonic speed!. Cut through the wood and eventually, your axe breaks. You have nowhere to go but forward. Once you step in the ink, bendy will pop out and scare the livin’ daylights outta you! (Again). Do what the game says: RUN AWAY. Once you managed to enter the room, where bendy can’t reach you, go STRAIGHT forward, and a little bottle of Bacon Soup will roll out, implying that someone is there. You ask them to come out and show themself, and Boris will enter the room.
“Boris?”
Chapter 3 starts from here…
Chapter 2 – The Old Song (Wiki Walkthrough)
The chapter starts with Henry waking up in the pentagram room (after he fainted, as seen back from the previous chapter). Then, grab the axe that is next to Henry to unlock the next objective.
“Find a New Exit”
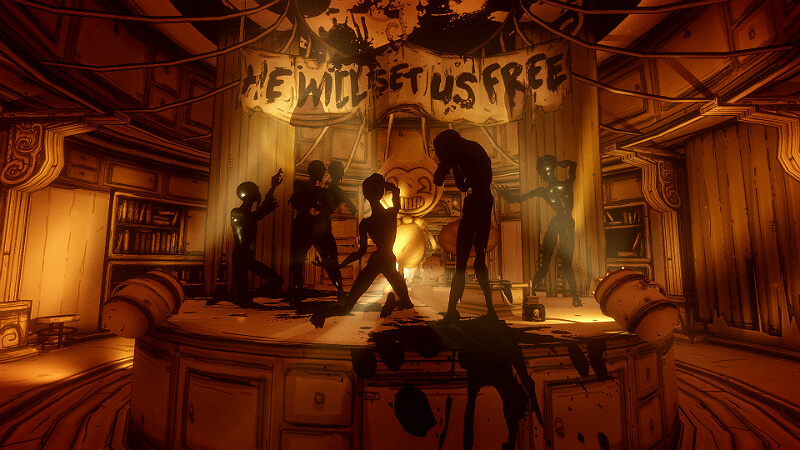
Using the axe, break the wood blocking the door on the left side of the room, and walk through it. Then go downstairs until you reach the Utility Shaft 9 entrance. There Henry will see the quote “HE WILL SET US FREE” written on the wall (presumably by Sammy Lawrence) next to a Bendy cardboard, cans of Bacon Soup, candles and a banjo. Explore the room until Henry finds a tape recorded by Sammy, in which he talks about Bendy as if he was a god, and that he will save him. At the end of the tape, he asks: “Can I get an amen?”, and just when the tape ends, Sammy’s voice echoes: “I said, can I get an amen?”.
Then head to the ink flooded hall, where Henry can hardly walk, and get through it. There, Henry will see a person passing through carrying a Bendy cardboard cutout, and just when Henry reaches him to ask him for help, he´s gone, leaving the cardboard behind. Move to the right corner of the room to unlock the next objective.
“Redirect Power to the Gate”
There, Henry will find a closed gate, and you will have to find 3 switches around the place. Two of them are randomly placed in the Utility Shaft 9 room, but the last one is always hidden behind several Bacon Soup cans on the shelf. These cans are located in the left corner of the room, at the base of a destroyed shelf next to the Bendy cardboard. Find and press the other 2 switches and return to the gate. This will unlock the next objective.
“Raise the Gate”
At the gate, hit the lever next to it to activate it. The gate will open, and a new objective materializes in the corner.
“Find a New Exit”
Once Henry enters the gate, break the wood blocking the entrance to the Music Department. There, Henry will find another tape recorded by Sammy Lawrence, telling Henry that the Ink Machine started to leak, and that Joey Drew installed a pump to drain it periodically, and that the switch to activate that pump is in Sammy’s office. Then head to the flooded stairwell to unlock the next objective.
“Drain the Stairwell”
Next to Henry, attached to the wall, there is a “Power” switch, which Henry has to turn. This will cause the energy to return to the Music Department room, but it will also cause a bunch of Searchers to attack, trying to kill Henry. Hitting them with the axe once will kill them, though. Surviving the attack will activate a gate at the right side of the room, and a “Recording” letter will light up. Entering through this gate will lead Henry to Sammy’s Office, which entrance is also flooded by ink, with a locked closet at the right side of the room. There is a tape recorded by Wally Franks in front of the office. Listening to it will lead Henry to the next objective.
“Unlock Wally’s Closet”
In the tape, Wally will state that he lost his keys and that they may be at one of the garbage cans located all around the place. Doing so may lead you to the recording studio, which features a bunch of chairs, an ecram, microphones hanging from the roof, a recording booth, a tape recorded by Susie Campbell, a banjo, a drum, a bass, a violin and a piano downstairs, and a projecting booth, a projector, and a tape recorded by Norman Polk upstairs.
The tape recorded by Susie tells you that she loves working for Joey and that she really feels a connection with Alice Angel (the character she voices). The one recorded by Norman gives Henry a great hint: It tells Henry that everyday, while the band was recording the songs, Sammy shut down everything and told everyone to wait outside. Then he turned on the projector and ran downstairs to play some instruments. After a long time, he told everyone to return to their activities. Turning on the projector and playing the instruments will not have any effect on the game until the next objective is unlocked. Eventually, Henry will find the keys and, with them, return to Wally’s closet and unlock it.
“Find Sammy’s Sanctuary”
Inside the closet, there are some cans of Bacon Soup and a tape recorded by Sammy. In it, he reveals that he has a sanctuary, just like Joey does, and to enter Henry needs to learn his “favorite song”: The song is always a random combination of the five instruments located in the Recording Studio.
Then, Henry has to go to the projection booth and turn on the projector, then run downstairs and play the combination before the projector turns off. Successfully doing it will open the gate to Sammy’s sanctuary, leading him to the next objective.
“Enter the sanctuary”
Now Henry will have to enter the sanctuary and activate the valve at the bottom of the hall. This will unlock the next objective.
“Find the Second Valve”
After activating the valve on the sanctuary Henry must exit the hall and head to the Infirmary. This will trigger a jumpscare attempt of a Bendy cardboard (Just like what happened during Chapter 1) and several Searchers will try to attack, while a mysterious masked person, who is later revealed to be Sammy, watches Henry from upstairs. After surviving the attack of the Searchers, Henry must go to the infirmary that was blocked by ink before and find the second valve. But when Henry get to the pipe where the valve should be, Henry notices that the valve was gone. Then Henry must pull down the “utility access” lever and go down the flooded sewers. Then Henry wades through the ink coming from an open pipe, and encountering Swollen Jack, whose holding the valve. Once Henry approaches him, he ducks back down into the ink. After walking through the ink further and listening to the recording by Jack Fain, Henry enters a room where Swollen Jack is currently there, a small lift with a crate on it, and two cylinder shaped machines with levers attached to them. Henry then must push the “up” lever on the left machine, which raises the lift, then Henry must walk towards Swollen Jack until he appears under the lift. Then Henry must push the “down” lever on the right machine, which drops the lift on top of Swollen Jack, killing him. Then Henry must pick up the valve, take it back to the pipe, place it on the pipe, and turn it.
“Return to Sammy’s Office”
After activating the second valve, Henry needs to go back to Sammy’s Office and open the door that was blocked with ink and one leak of ink coming from a pipe. Then after opening the door of the office, Henry must activate the pump control.
“Take the Stairs”
Now exit the office and go to the stairwell to exit the place. Attempting to do so will result with Sammy knocking Henry out, and when he wakes up, he’s tied to a wooden beam and Sammy starts to talk to him, telling him that he intends to summon “Bendy” and that he will offer him as a sacrifice, so he can be freed from his ink body. Sammy then exits the room and starts to sing a song about sheep through some speakers. He then summons “Bendy” and orders him to accept the sacrifice, but “Bendy” ends up “murdering” Sammy. This will lead Henry to the next objective.
“Escape Bendy”
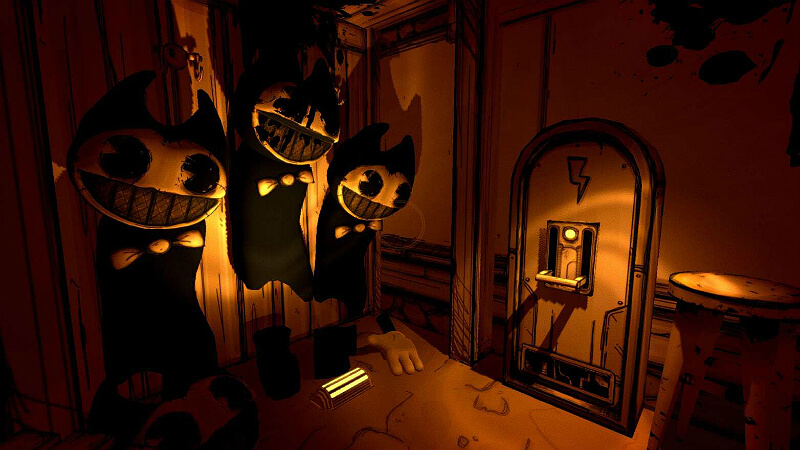
Henry then unties himself, and Henry has to grab the axe to kill the Searchers that will appear. Then, enter the hall in front of Henry and break the wood boards blocking the way. Breaking the last wood board will cause the axe to break, and then Henry has to enter a room completely flooded by ink. Entering will cause “Bendy” to appear from the pond and he will start to chase Henry. Henry has to take the path to the right (the path Henry came from is now blocked by debris) and go through, where the Corridor Maze is, keep on running away as quick as possible in a straight pass and head right, left, right, left, left and right, the door at the end of the hall. The door will block itself after successfully escape from “Bendy”. The room will be filled with Bendy dolls and a couple of machines attached to the wall.
Chapter 2 – Secrets & Easter Eggs
Reappearing Bendy
If Henry (You) breaks one of the Bendy cutouts laying around on a ritual circle and turns away, then back again, they’ll reappear undamaged. Probably for paranormal reasons.
Bendy Band
Up to 9 Bendy cutouts can appear sitting or peeking in from the Orchestra Room, doing so grants the player an achievement.
TheMeatly
Once again, TheMeatly’s Easter Egg returns in Chapter 2 and it is only accessible after the ink pumps are turned on, he is accessed from the Music Writing Room.
Youtuber Tunes
In Sammy’s office, there’s an old fashioned radio that plays an instrumental and shortened version of DAGame’s “Build our Machine” song.
Hidden Area
Right before your axe breaks, in the first ink pool, look above you and you will see some weird attic area.
Chapter 2 – Fanart Contest & Tips

Chapter 2 Fanart Contest Winners
“Train Trouble” By IMAGINATEKATE
“Model Shift” By MAXINKLY
“Umbrella Bendy” By POPPY MAY
Tips and Tricks
- Can’t find the switches? They are in sneaky places, from camouflaging to hiding behind bacon soup: Search wherever you can!
- Having a hard time killing the ink monsters? Click right before they attack you!
Chapter 3 – Rise and Fall

Warning, only listen to this walkthrough if you are completely stuck and have no idea what to do. This game is suggested to be played spoiler-free.
Once Chapter Three starts, you wake up in the “Safehouse”. This is where Boris lives. To exit, you must find the lever to open the door and exit the Safehouse. Apperently, its not that easy. you must find THREE different Bacon Soup cans for him to give you the lever. The Locations are as follows:
On the Shelf
On the Barrel
In Boris’s Chest
Once you have all of the soup cans, pour them into the canister and wait. Once it’s finished, pick it up and give it to boris. He’ll give you a small toolbox with the lever inside of it. Exit the Safehouse and Continue forward. Eventually, you will reach a dark corridor. Get the flashlight on the table and continue. Once you get to the end, your…At the end I guess..? More descriptive: A dead end. Ask boris for help and he will take the flashlight and enter the vents, eventually opening the gate in front of you. You’ll find yourself at the “Heavenly Toys” Center. Get to the toy machine control area and you find yourself with, yet again – Something blocking the door. Press the lever in front of the entrance to the toy machine control room, start the toy machine and remove all Plush body parts from the fans. Once you have done that, press the lever enough times to open the entrance to the door. Before doing that, you have an opportunity to enter a small area, with a bowl with ink forming into a shape of things and an Audio Log. The audio log contains JackSepticeyes voice. What a suprise! Once you enter the room that was blocked, you find yourself in an Alice Angel room. Then the lights shut off. Alice starts to sing. Wait a little bit, then… JUMPSCARE!
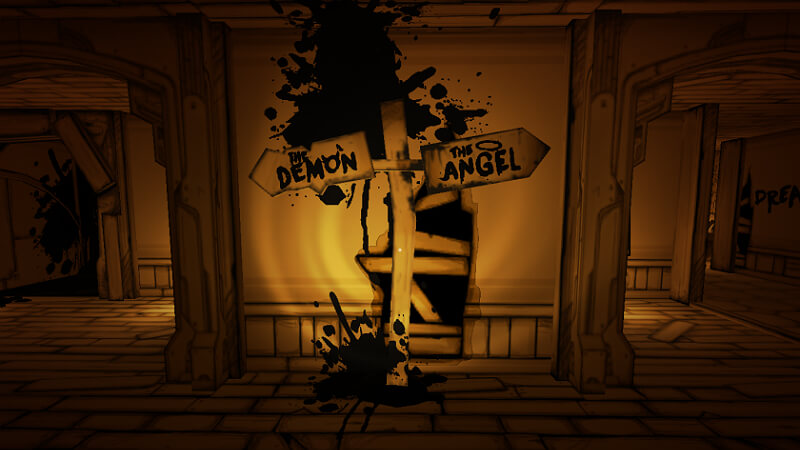
Walk down the stairs into the area with a sign, with two paths. One Way is the Path of the Demon. The other is the Path of the Angel. You can find each path in a different section! Just Scroll Down. This part will continue from the end of those paths.
Walk down the Long and not very suspicious hallway and Boom! Another jumpscare. Find out who it was by being brave enough to walk towards it. And it was…Boris..? Take the Pipe Gent from boris and continue forward in the inky dark room. Continue forward and find an area with two levers required to open a door. If you like jumpscares, then dash to your lever to find a jumpscare from.. Wait, who is that? Just wait a sec, lemme check the wiki. Piper is his name. Really scary, anyways, whack that weirdo down an pull the lever quick! Once you have done that, run through the dark hallways and go down the elevator, to meet alice’s voice. Looks like you have a date with an Angel!
Walk to her door in Level 9 and wait till her door opens. Run through (With Boris running faster.) the hallway and meet about a BILLION Boris clones and Pipers, Strikers and Fishers. Don’t worry, there aren’t any jumpscares. Meet Alice by the end of the room and get ready to listen to an essay. Once she finishes explaining, run back to her door and do what she says.
The Angels “To do” list

- “Spare Parts”
Find all of Alice’s Gears.
- “Feeling the Pressure”
Solve all Valve Panels
- “Anger Management”
Destroy all Bendy Cutouts
- “Ultimate Stomache”
Hunt down all Swollen Searchers
- “Front Lines”
Kill the Butcher Gang
- “Darker Places”
Survive the Ink Abyss
Each Task will grant an Achievement upon Completion.
Once you have completed ALL of the tasks, walk back to the elevator and “Go home”. You can just see what happens from there.
End of Chapter.
Chapter 3 – Secrets & Easter Eggs
TheMeatly
TheMeatly appears yet again. He is found in one of the Boris posters once you have completed all of the Angels bidding. He also has a Tea Party set up. This awards you the achievement “Tea Time”.
Wandering is a Terrible Sin
This is an Easter Egg you can only get by hacking through a wall of interest (Exit Door, Infirmary Door, etc). It reveals a Bendy cutout holding a sign and very creepy eyes. The sign says “Wandering is a Terrible Sin”.
Grant Cohen Audio Log
To find Grant Cohen’s audio log, you must have the axe that you get during the Angels Bendy cutout task. Just go to Level 9 and near the elevator, there will be a door boarded with wooden boards. Break them with your axe and you will find a room with an audio log of Grant Cohen, and another axe you will need for later use. Grant Cohen is voiced by Will Ryan of DAGames!
Before entering the “Inky Abyss”, Alice will give you the Tommy gun…Or that’s what you think. The Tommy Gun instantly melts from ink before you can grab it. Well, there IS a way to get the Tommy gun, but you must do the following:
- In the Heavenly Toys engine area, with the audio log, there is a blob of ink, forming into a Bendy plushie. Click it and it will turn into a Boris plushie. Click it again and it turns into an Alice Angel plushie. Click it one more time and it will turn into the ink machine. Leave it as the ink machine and continue.
- When you encounter the two choices for the Path of the Demon or the Path of the Angel, Choose the Demon path.
- Finally, do NOT die at ALL costs. You die, so does the life or your Tommy Gun.
If you have done all of this, you should be able to kill the Projectionist quickly! This also unlocks the achievement “Blazing Metal”.
To get this secret, you must open the room to Grant Cohen’s audio log. Once you have done that, finish all of the Angels tasks, and once you have finished the final task, go back to Grant Cohen’s room, and you will find an axe. Pick it up and run WAY back to Level K, Heavenly Toys. In the toy machines control room, you will find a small little room blocked off with about a billion boards. Break all of them and you will find THREE levers and a sign. This is the hard part, Pull down the first lever and back in heavenly toys, you will find 999999 Searchers. Defeat them all and then you can pull the second lever. Pull that down and now you have to fight the butcher gang! Once THEY all die, then its finally time to pull the third lever. Once you have finally done that, return to heavenly toys to find a GIGANTIC Searcher. The searcher has alot of hit points, so be sure to hit then run back, hit then run back, keep doing that and you should beat him! Beware of the ink demon though, as he can easily ruin your day. Once the Giant Searcher is defeated, the world will rumble a little bit with, well, a rumbling noise. Congratulations. You have finished.
Sammy Returns! Go to Level 11 and around the stairs, there are some instruments. Play them in this order:
Did you hear it?
“We’ve all been waiting, but now… He will set… us… free…”
Chapter 4 – Colossal Wonders (Section 1)
Warning, only listen to this walkthrough if you are completely stuck and have no idea what to do. This game is suggested to be played spoiler-free.
This walkthrough is taken from the Bendy and the Ink Machine Wiki on Fandom.
“Rescue Boris”
Henry will wake up near the broken elevator. As soon as the chapter starts go straight down the corridor coming to the sign with Grant Cohen’s office pointed right and R&D and the Archives pointed left.
“Enter the Archives”
First the player needs to go left where Henry will find a locked door with a missing valve handle. The player will then have to go back and go right towards the Management Office where the valve is located. Henry will then return to the door and turn the valve entering a room with a Bendy statue and some Lost Ones gathered around it. However, when the player open the archives door, if they turn back to Grant Cohen’s office the player can open the door in front of the office. Inside the player find the Boris poster, walk through it and the player can find theMeatly inside cooking up some sausages on a barbecue.
“Locate the Secret Passage”
From here Henry will go straight into the Archives (A round room with an inner and outer area). Here Henry needs to find 5 books sticking out of the shelves and push them back in lighting up lights above the exit. In the center of the circular room, there’s an audio log of Susie Campbell in the room, in which she remarks how Joey been double-crossing her, and although Joey seem to have an “opportunity” for her, she remarks that she has something special planned for Joey (remarking how Alice doesn’t like liars). After Henry pushes the book next to the private door, the Lost Ones in front of the Bendy Statue will disappear. After Henry pushes in at least three books, he experiences a brief disruption in which a shriek disturbs his vision, and the room appears to be shaking. After several seconds, Henry will snap back to his senses.
“Enter the Darkness”
Once all books are pushed in the door will open and Henry enters the cavern. Henry will then come to a bridge that needs a gear to make it work.
“Repair the Bridge”
To get this gear go down a nearby corridor where Henry will find a level which will reveal a vat of ink turning the valve behind creates a Swollen Searcher with thick ink on it. Take this ink back to the bridge area and put it in the Ink Maker nearby, making sure to select gear on the dial on the right of the machine before activating it. Take the gear put it in the bridge and travel across the pit. The bridge cart will move on its own upon activation, slowly between where Henry is standing, and the platform across. Once the cart is close enough, clicking it will make Henry climb into the Bridge cart. It will proceed to move slowly on its own, before stopping in the middle, with dramatic music playing in the background. The bridge will proceed to move normally afterward. Upon reaching the end, clicking the wood planks will make Henry climb out. He will then enter the Mineshalf, and will experience another disruption in which the walls are covered with inky arms reaching out and strange whispers being heard. Reaching the end of the hall, Physical Alice starts speaking to Henry, calling him “errand boy”, stating she’s watching him, and asking him a series of questions, before concluding that he’s here for Boris. She ends her dialogue, urging Henry to hurry up.
After climbing up the stairs, Henry will enter the Lounge with some background music playing from the record player, and a Lost One mumbling to himself about being tricked and wanting to go home. The next room Henry enters will be full of Lost Ones, which he can walk past and take the flashlight, which will instigate Henry climbing through the vent. If Henry turns around the instance he enters the vent, two Lost Ones will block his way along with the Lounge pitch black. While climbing through the vents, the first corner he reaches will cause Ink Bendy to spawn and jumpscare him, who is unable to reach Henry but seems to be trail his finger on the side of the vent door before walking away. Eventually, Henry will reach an open vent which will drop him in front of the door to Storage 9.
Henry will have to climb up the stairs, which a sign pointing up with the phrase “COME UP AND SEE ME” is painted and an “ALMOST THERE” painted on another part of the stairway. At the top within Bendy’s mouth, there are concept sketches all over the walls, and on the table is an audio log of Bertrum Piedmont, who remarked his skills as a world-famous amusement park builder, but was rather upset in the matter Joey treats him. Bertrum remarks that he will be designing Bendy Land, a theme park dedicated to Joey Drew Studios’ mascot. Past the table, there’s a switch that will unlock the door to Storage 9.
Upon entering Storage 9, the lights kick on. At the bottom of the stairs is a punch card stand, some closed stalls with an audio log from Wally Franks, remarking how the warehouse workers keep getting locked out of rooms and gives a hint about playing the mini-games to unlock a door. Moving towards the entrance to the Haunted House unlocks the next objective.
“Power the Haunted House”
This is a bit elaborate, but simple to do. Next to the Haunted House is a switch box under the face of Alice Angel. There are five switches, with only four them labeled. There are cords sticking out from underneath the power box that leads to four different rooms at different parts of Bendy Land. To unlock the first room, Henry must play two of the mini-games (the stalls will unlock upon receiving this objective) until he gets a passing “ding” sound. After unlocking the first room, Henry must pull the power switch there and then the switch on the Power box next to the Haunted House.
Playing the strength test minigame opens the door to the Research and Design room, but if done before opening the first door nothing will happen. This will be delayed until the first switch of the power box is pulled. After hitting the bell, Physical Alice will remark if Boris minds when Henry takes his time rescuing him. In the room, Henry must distract the Butcher Gang enemies by throwing empty cans of Bacon Soup at necessary spots. The room on the right holds the power switch Henry will need, a Lost One crying in a fetal position, and an audio log of Lacie Benton, talking about how she’s the only employee not complaining about her work condition, and her only concern is the disturbing mechanical demon (in the same room) which bothers the heck out of her. The room on the left holds the switch to the door, which must be used in order to leave the room. Hitting the corresponding switch back at the Haunted House unlocks the next room.
In Attraction Storage, Henry will come across a deceased Striker and an amusement park ride. Playing the audio log on the table nearby will soon trigger the boss fight against Bertrum. Henry must defeat Bertrum, using the axe (that Bertrum left after demolishing the table) within that room in order to unlock the next power switch and to be permitted to leave the room.
In Maintenance, Henry will encounter the Projectionist again, wandering through the inky section of the room. There’s an audio log from Joey Drew in that same room, and a switch Henry needs to access the next part of the room. Upon hitting the switch, however, the Projectionist will be aware of Henry’s presence and will give chase, even following Henry up the stairs. Henry must hit the power switch in the previously inaccessible section of the room. This will cause the lights to go out temporary, making the Projectionist disappear. Once Henry climbs the stairs towards the way out, the Projectionist will immediately pop out and give chase once more. Henry must hide in the Little Miracle Station at the top of the stairway.
Chapter 4 – Colossal Wonders (Section 2)

Warning, This is a continuation of the previous category. Only listen to this walkthrough if you are completely stuck and have no idea what to do. This game is suggested to be played spoiler-free.
Although Henry is safe inside the station, The Projectionist is aware that Henry is inside and will attempt to reach Henry within the station, before the screen distorts one last time: this time, Ink Bendy bursts into the room and engages in a fight with the Projectionist, ultimately winning by decapitating The Projectionist. After tossing the head at the station, Ink Bendy peers at Henry within the station, before dragging The Projectionist’s body away into a wall.
After Henry hits all the switches, the next objective pops up.
“Defeat Boris”
The doors to the Haunted House will open, and upon entry, there will be the words “Turn Back” painted on the wall, and evil laughter playing in the background. Henry must climb into the cart to proceed.
Upon doing so, Physical Alice speaks to Henry throughout the ride, remarking how nobody in the studio controls Joey Drew Studios and asking Henry what his real reasons are for coming back. Near the end of the ride, Physical Alice concludes her speech by telling Henry that she has a surprise waiting for him. The ride will enter the final room (which is the Ballroom), which has a bunch of clutter, a pipe organ, and an Ink Maker. At the last door is a dark room, and the cart is suddenly stopped by Brute Boris, now already transformed into a hulking creature. After he tosses the cart (with Henry in it) away, the final boss battle begins.
Henry must dodge Brute Boris charge attacks, and collect blobs of ink that Brute Boris will drop when resting briefly before the ink disappears. He must put them in the Ink Maker and produce a Gent Pipe to defend himself with. Each Gent pipe has only one hit capacity, forcing Henry to make another each successful hit on Brute Boris. After a couple of hits, additional carts will enter the room, which Brute Boris will use to throw at Henry. To kill him, Henry must hit Brute Boris three times with the pipe. Dying will reset the number of hits, but it is possible for the materials in the Ink Maker to remain functional if Henry has not already used them.
As Brute Boris dies, Physical Alice will shout angrily at Henry and exclaim that he never dies. After watching Brute Boris waste away, Physical Alice will appear from the door where Brute Boris entered and charges at Henry before being stabbed in the back by Allison Angel. After collapsing to the ground, Henry will come face-to-face with Allison and Tom, before the screen cuts to black, ending the chapter.
Chapter 4 – Secrets & Easter Eggs

TheMeatly
Once you put the valve back on the archives door near the beginning of Chapter 4, go back to the door where you found it and go to the other door. It will open. Inside is a Boris poster. Walkthrough it and you will find TheMeatly cooking up some.. meat… wait a minute
Youtuber Tunes
In Chapter 4 at the first Ink converter machine where you need to make a gear, make a radio instead. A radio will pop out and play the old yet awesome Bendy and the Ink Machine song “Can’t be Erased”.
Bertrum Fight Ride
When the Bertrum fight begins, don’t pick up the axe. When one of his hands break, press “E” on one of the rides. You’ll end up riding them and unlocking the achievement “Going to be Sick”.
By the looks of it, you definitely ARE going to be sick.
Chapter 4 – Achievements
Any Achievements that are Blue are completionist achievements and are not required to progress through the game normally.
- Around and Around – Defeat the “Bertrum” Boss
- A Haunting we will go – Restore power to the Haunted House
- Finger Waggin – Find the Radio in Chapter 4 by using Ink on the Ink Converter to convert the Ink into a Radio. Use the Radio.
- Still Listening – Listen to all audio logs in Chapter 4
- Just Like Mom Used to Make – Collect all Bacon Soup in Chapter 4
- Wasting Time – Play the Hammer Minigame
- Bulls Eye – Hit all targets in the minigame “Bull’s Eye Bonanaza.”
- Call the Milk Man – Hit all the bottles in the minigame “Bottle Wallop”
- A Little Souvenir – Take a photo at the cutout in the “Maintenance” section by looking through the cutout hole and pressing “E” with the crosshair at the camera.
- Reunited – Start the Boris Boss Battle
- Barbecued – Find TheMeatly (Go to Secrets & Easter Eggs)
- Going to be Sick – Ride one of Bertrums arms. (See Chapter 4 – Secrets & Easter Eggs for details)
This section is currently WIP
Chapter 5 – The Last Reel
Warning, only listen to this walkthrough if you are completely stuck and have no idea what to do. This game is suggested to be played spoiler-free.
Henry awakes in Allison Angel and Tom’s safehouse, listening to a song that Allison was singing as she paints ink messages on the wall. Henry starts talking to her, that says that doesn’t remember her name and that people call her Alice, and she states that she is not an angel. When Henry wakes up he sees Tom being asked by Allison Angel to keep an eye on Henry as she leaves. After that, he sits on a chair and begins to hit his arm with Axe, threatening him. In the next scene, Allison gives Henry Bacon Soup in a bowl after stating that is the only thing edible that she finds and that she thinks that Henry might be hungry, after she leaves Tom breaks it by throwing it on the floor, beginning to publicly show his dislike for Henry. After that Tom walks away. In the next scene, Allison and Tom seem to be arguing with each other. After that, he is seen sitting on the table, while Allison repairs his mechanical arm, stating that it’s just a matter of time before “Bendy” finds them. After that, he and Allison discuss the Ink Demon outside their base. Allison stated that they can’t just leave Henry there. Allison tries to break the wooden planks that Henry is trapped behind, but Tom places a gentle hand on Allison’s shoulder, reassuring her that she did all she could.
Henry then uses the device that Allison gave to him to find a secret room in the prison and finds a pulp that he uses to break the plates in the door. Henry then escapes his prison, traversing through a series of tunnels where he is attacked by multiple Searchers. Henry then witnesses Allison and Tom departing on a barge across the Inky River. Henry follows suite and boards the second barge. He must then navigate his way through avoiding the giant hand that emerges from the ink and chases him. Henry arrives the Lost One’s Village, where he encounters Sammy Lawrence, who violently attacks him. After knocking off Sammy’s mask, Henry is thrown to the ground by him and is almost killed. Fortunately, Tom sneaks up behind Sammy and digs his axe into Sammy’s head, killing him for good. Henry, Tom, and Allison then proceed to fight a horde of Searchers and Lost Ones. After this intense battle, Allison cuts down a door and the three continue on. Not long after, they come across an unstable looking set of planks, Henry moves to cross them but falls down. He lands in the Administration area. His next objective is to obtain three pipes from the maze of offices and hallways. Within these halls the Butcher Gang are lurking and searching for Henry. He sneaks past them collecting the Ink and bringing it back to the Ink Maker where he constructs three pipe pieces. After he has fixed the ink circulation, Henry proceeds to the Vault.
As he enters the Vault, Allison and Tom arrive after descending the chasm using Allison’s trusty rope. The three of them goes to the Ink Machine to a path that resembles the Chapter 1’s location (with Henry’s old desk) and came across the Ink Demon that walks slowly by a hall with a wall made of glass. Henry then has to enter alone the Ink Machine because of the ink river that surrounds the machine, which maybe causes Allison and Tom be pushed back to it. Henry finds a Throne made with Ink where a Joey Drew audio log to him is located. At the end of this, Henry takes a reel named “The End” and is attacked by “Bendy” that transforms into a Beast version of himself that attacks Henry. Henry then runs from this new form of “Bendy” from all the Ink Machine, turning on switches and breaking tubes where ink flows by. Henry returns to the Ink Throne where he places the reel in a projection that makes all the screens pass the last and lost episode of the Bendy Show. The Beast Bendy is then caught by the reel and is killed by a strange and strong light coming from the projector, killing it once and for all.
Henry wakes up in Joey Drew’s house, where he talks to his old friend that says how Henry has a perfect family and he only has a ruined empire, he states that Henry might see how the studio ended after all those years and Henry opens a door, where he enters the studio, going back to Chapter 1.
Chapter 5 – Passive Achievements
Shadows and Suffering – Discover what’s living below.
Complete the fight with Allison and Tom.
Pipes and Problems – Find a new way through.
Complete the pipe puzzle in the Film Vault.
To Hell and Back – Complete the Main story.
Complete the Main story.
Complete the Main story.
Complete the Main story.
Complete the Main story.
Chapter 5 – Completionist Achievements
Goldbricking – Let the others do the work.
When Allison and Tom are fighting the Searchers and Lost ones, just don’t do anything. Allison and Tom will remember that.
Standing Proud – Find out where you belong.
After completing chapter 5 and unlocking the archives, go to Henry Stein’s Pedestal and stand there for a couple seconds.
A Sweet Discovery – Say hello to an old friend.
After completing the pipes puzzle, open the Vault door but don’t go in. Look for the Boris poster in the Butcher Gang place near Joey’s room and walk through it. Meet TheMeatly.
Valued Employee – Go for a longer walk.
For getting this achievement, you have to complete the pipes puzzle without being seen by any monster of the Butcher Gang. Remember they don’t react to sound, so you can hide inside the Little Miracle Station. Beware of windows or small rooms, they can see you through them. Also, they don’t move like the Projectionist, if you take the ink, they won’t run to the place where you are. Try to take the left way the three times, as it can be seen in the video. (This is because the achievement says “longer walk”, and that’s the left way). You’ll have to try a few times, they say some glitches prevent you to get the achievement.
Aggression – Bathe in Violence.
Don’t die by either Sammy Lawrence or any of the Searchers and Lost ones.
Original Link – Continuation of discussion


Add comment