This guide is an effort to give a complete description of the boss fights in the game, with locations, requirements to access, attack sets, dodging/healing strategies, and rewards. Hunter’s Journal entries for each boss will also be included to give some lore.
This guide will focus primarily on regular nail attack opportunities given that spells and nail arts are optional (except for Vengeful Spirit). Specific charm suggestions for bosses will be mostly excluded from this guide due to how non-linear the game is (i.e. there’s no guarantee you will have a given charm or enough notches to equip said charm when you face off against a boss) and the wide range of playstyles in dealing with bosses (e.g. aggressive, focus on healing, focus on passive damage to the boss). Suggestions will only be made if the spell/charm significantly changes the difficulty of the boss fight by negating one or more attacks.
For specific health values of bosses, please refer to the Hollow Knight wiki.
General Tips
- In areas where there’s ambient background music, the lack of music when you enter a room is a telltale sign of a boss immediately coming up.
- Nail bouncing on bosses is a useful skill to learn for many bosses, especially for ones which have an emphasis on charges along the ground.
- If a boss can get stunned, use those stun periods to heal as much HP as possible since a single hit during those stun periods usually knocks them out of the stun. (Exception: False Knight/Failed Champion – multiple hits during stun required to progress)
- Phases (when attacks used by the boss change) are generally based on the amount of damage dealt to the boss. In contrast, stuns are usually based on how many hits you’ve managed to land on the boss.
- Spells do more damage than nail hits (assuming you get most or all hits per spell use). However, spells deplete soul so nail hits are still required to recharge your soul meter. Furthermore, only the dive spell (Desolate Dive/Descending Dark) offers I-frames upon activation so when casting the other two spells enemies can still hit you.
- Most bosses (excluding dream variants) give 1% completion immediately upon defeat. There are a few exceptions where the boss itself doesn’t affect completion %: Vengefly King, Massive Moss Charger, Soul Warrior, Flukemarm, Crystal Guardian, Hollow Knight, and Radiance.
- Nail: Quick Slash, Longnail, Mark of Pride, Fragile/Unbreakable Strength, Nailmaster’s Glory, Steady Body, Grubberfly’s Elegy
- Spell: Shaman Stone, Flukenest, Spell Twister
- Soul: Soul Catcher, Soul Eater, Grubsong, Dream Wielder
- Healing: Quick Focus, Baldur Shell, Hiveblood
- Mobility: Dashmaster, Sprintmaster, Shape of Unn
- Tank: Joni’s Blessing, Fragile/Unbreakable Heart, Stalwart Shell, Lifeblood Heart, Lifeblood Core
- Passive-damaging: Thorns of Agony, Defender’s Crest, Spore Shroom, Dreamshield, Sharp Shadow, Grimmchild, Weaversong, Glowing Womb
- Once you have the Dream Nail, a spirit will spawn on top of each marker when you get near it. If you interact with the spirit, you get some dialogue and then you can choose to challenge the spirit to a fight. You can also directly Dream Nail the spirit to start the fight immediately.
- All of these fights involve a floating spirit (most of which also occasionally teleport). As a result, the up spell (Howling Wraiths/Abyss Shriek) is particularly useful in these fights.
- All these fights reward essence (100-250) and 1% completion for beating them.
- The health of these bosses actually scales with your nail level, so the number of nail hits it takes to defeat them is about the same for each upgrade. See the Hollow Knight wiki link in the guide description for exact health values.
- Bosses which leave behind corpses or remain alive after their initial defeat often have dream variants. Once you have the Dream Nail, dream effects will appear over their body/corpse which will allow you to enter the Dream realm.
- You will always start these fights with full health, regardless of what amount of health you had when you entered the Dream realm. In contrast, your soul meter will be at whatever level you had in the real world when you entered the Dream realm.
- When you lose all your health to a Dream Boss, you are ejected from the Dream realm and wake up in the real world with full health. However, your Soul amount will be fully depleted regardless of how much soul you had remaining when you died in the fight.
- You cannot “die” in Dream Boss fights, so Fragile charms won’t break and you won’t have to worry about retrieving your Shade. You also respawn directly next to the boss corpse so no walk-back from the last bench is required. (Exception: The Radiance)
- Upon successfully defeating a Dream Boss you will wake up in the real world with exactly the amount of remaining health and Soul as you had when you were ejected from the Dream realm for beating the boss.
- Your reward for completing Dream Boss fights is generally essence (300-400). (Exceptions: Nightmare King Grimm – 1% completion; Grimmchild upgrade / The Radiance – Dream No More ending)
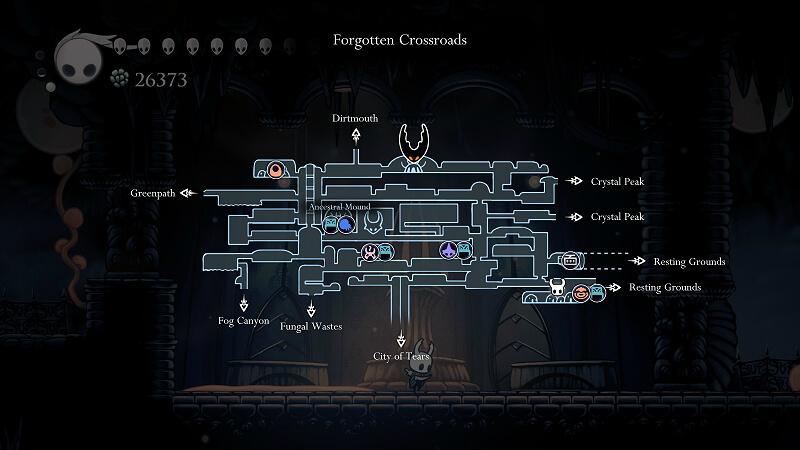
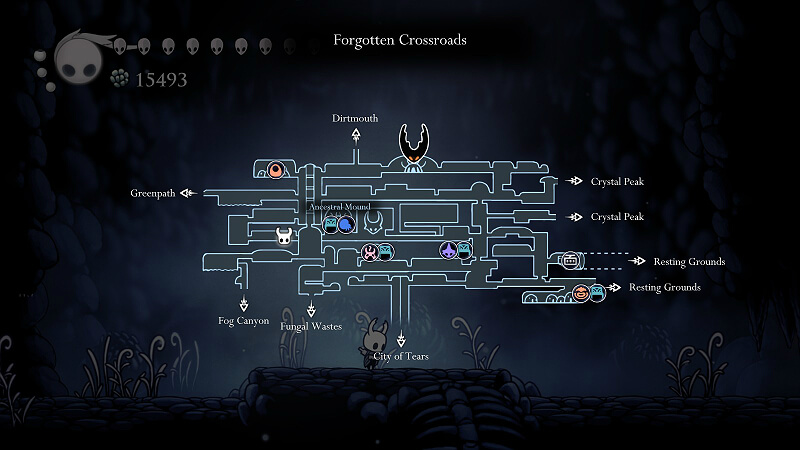
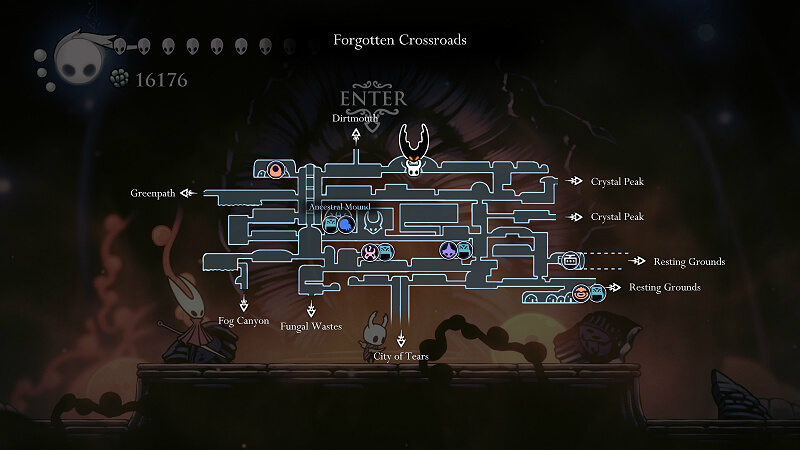
Forgotten Crossroads
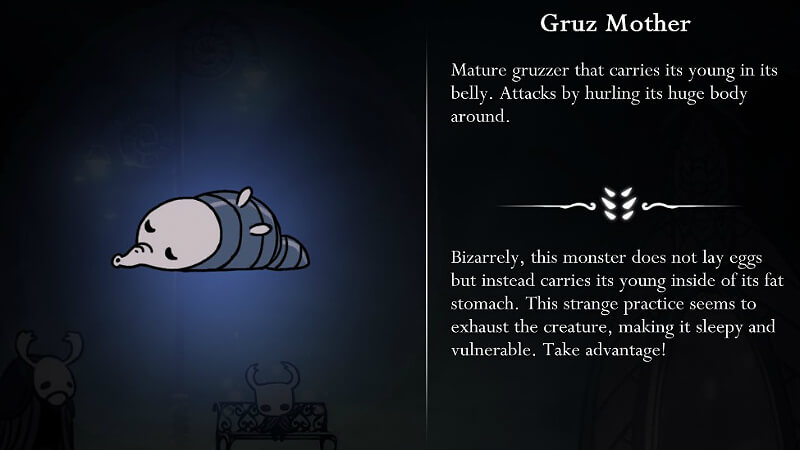
Gruz Mother
Location:
Requirements to access: None
Required to beat game: No
Boss Attacks:
- Series of slams back and forth between ceiling and floor slowly moving towards one side and reversing once it hits a wall
- Straight line charge
Dodging Strategies:
- Walk left or right following the direction the boss is moving until you get trapped near a wall, then carefully time a walk under it right as it starts a slam upwards
- Walk away from your current position or jump up and downstrike to bounce off it
Best Attack Opportunities:
- After any attack, especially when it’s near the ground
Best Healing Opportunities:
- When you’re in the half of the room opposite the direction the boss is moving during its up-down slam attack
- In between attacks
Rewards:
- 50 Geo
- Sly (inside hut) -> Sly’s shop in Dirtmouth
- After you get the Mothwing Cloak:
- Salubra’s shop
- Bench
- Access point to Resting Grounds (above Salubra’s shop, need Crystal Heart to access)
Notes:
- Spawns 7 Gruzs after it dies that need to also be killed before you can exit the room
- Sly sells the Lumafly Lantern (very useful in navigating Deepnest to reach Distant Village), however it is possible (but not recommended) to completely circumvent this boss fight by going the long way around and enter the room from the Resting Grounds via Blue Lake.
- A pair of these serves as the final boss of the Trial of the Warrior (Colosseum of Fools).
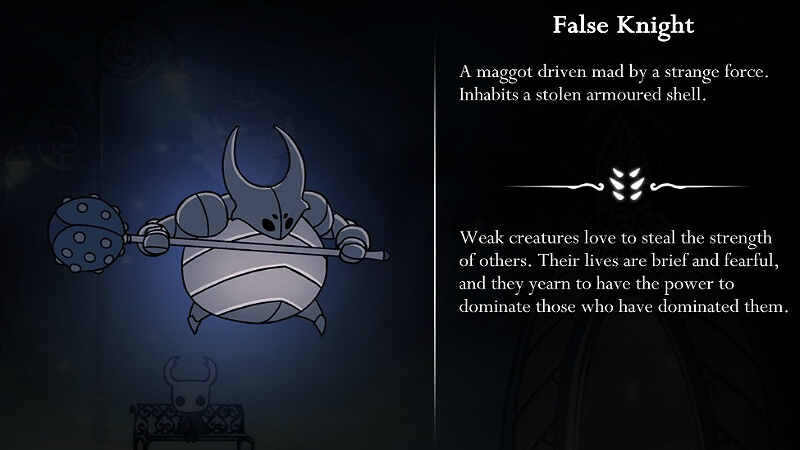
False Knight
Location:
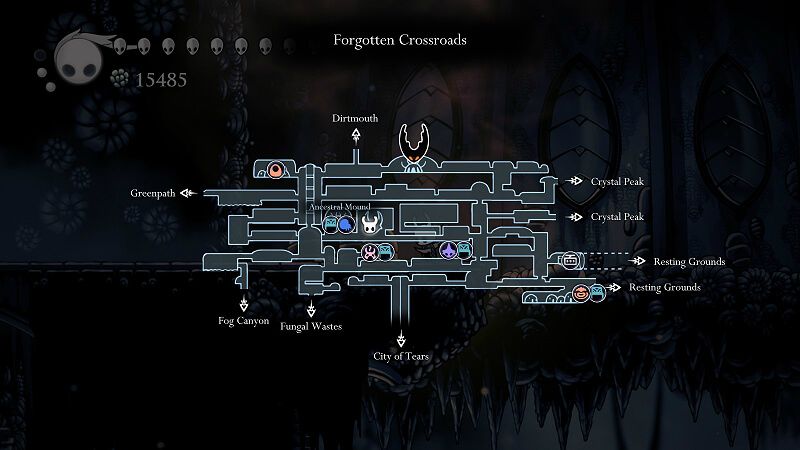
Requirements to access: None
Required to beat game: “Yes” (see Notes)
Boss Attacks:
- Jump with mace attack (followed by random falling rocks starting from after second stagger)
- Mace attack with shockwave (followed by random falling rocks starting from after first stagger)
- After stagger and “real” body damaged maximally during stagger – Mace slamming back and forth in center of room with random falling rocks (must occur 3 times for boss to be beaten)
Dodging Strategies:
- If he’s far away when he jumps and you’re not against a wall: Walk away / Otherwise: Walk under him while he’s in the air
- Get away when he lifts up his mace and jump over shockwave
- Stay near the edge of the room
Best Attack Opportunities:
- During staggers (required to progress battle)
- After jumps
- Between stagger and raging mace slamming
Best Healing Opportunities:
- During stun
- During raging mace slams after stagger at edges of room
Rewards:
- City Crest -> Access point to City of Tears
- Geo chest (200 Geo)
- Access to Ancestral Mound -> Vengeful Spirit -> Access to Greenpath
Achievement: Falsehood
Notes:
- While fighting the boss is required, killing the boss is NOT required. After getting False Knight staggered once and he does his first rage mace slamming, you can actually attack the wall above the left gate and leave the fight early. A big caveat, however, is that you will not get the City Crest and the geo chest if you do not defeat this boss. Additionally, if you come back to the boss later after using this skip the wall will be shored up and no longer breakable.
- If you choose to skip beating this boss, there are two ways to access the City of Tears without the City Crest: the Deepnest -> Ancient Basin tram (requires Tram Pass) or the Resting Grounds elevator via the Blue Lake entrance to Resting Grounds above Salubra’s shop (requires Crystal Heart or bouncing off your shade).
- You only gain soul when attacking the False Knight’s “real” body during his staggers. Furthermore, his “real” body must be attacked during these staggers to progress the fight. Just stunning him is not enough to trigger his raging mace slams.
- The boulders which fall from the ceiling can be hit towards the False Knight with your nail to deal damage to him.
- The original owner of the armor is likely to be Hegemol, one of the five Hallownest Knights.
Dream Variant: Failed Champion
Location: Behind a breakable wall concealing a hidden room above the boss room (wall is in the climbable passage leading up on the right side of the room).
Requirements to access: Dream Nail & Mantis Claw
Differences with normal fight:
- Faster movement
- Mace attack, jumps, and body contact deal 2 damage.
- Longer jump distances – more consistent to dash under him to escape this attack
- Rocks drop from ceiling after every attack (essentially constant)
- Larger shockwave from mace
Reward: 300 Essence
Achievement: Strength
Notes:
- You can skip the dream platforming if you have the Crystal Heart by super dashing to the left immediately upon entering the dream.
- It’s more effective to gain soul from the “real” body during the staggers by using Dream Nail on it once or twice and then attacking.
- If you do not kill the two maggots watching over the body, you can use them to refill your Soul back to maximum before each fight attempt by using the Dream Nail.
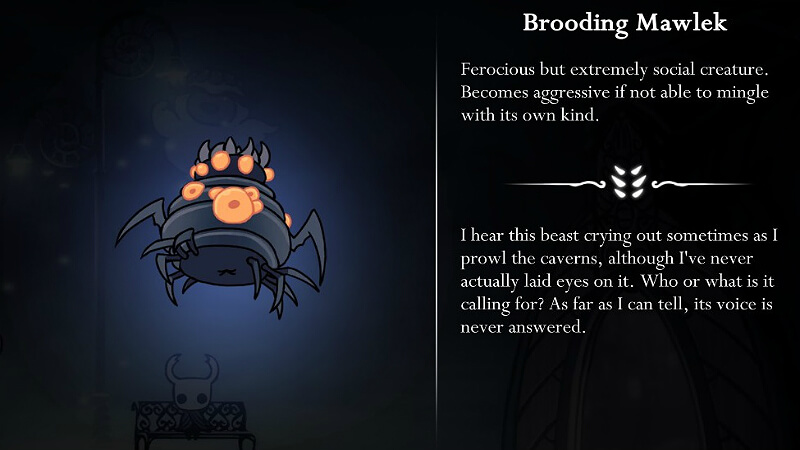
Brooding Mawlek
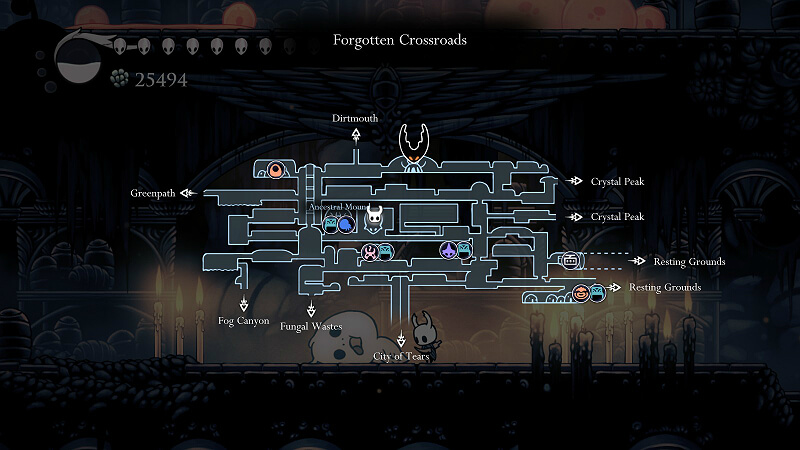
Location:
Requirements to access: Mantis Claw (or None -> See Notes)
Required to beat game: No
Boss Attacks:
- Claw slash
- Steady single spits
- Large number of spits in single attack
- Targeted jump to your position, followed by jump back to original position
Dodging Strategies:
- Don’t stay close to the boss for more than a few attacks at a time
- Walk/dash to avoid the spots where the spit will fall
- Dash or nail bounce over the boss right after the attack is launched
- Dash towards the far wall of the room under the boss when it’s at the height of its jump, keeping in mind the central platform lip
Best Attack Opportunities:
- Walk up and deal a few blows, but make sure to get away before the claw swipe
- After dodging large spit attack, can get a few attacks in
Best Healing Opportunities:
- During steady single spit attacks at edges of room
- After dodging large spit attack
- During jumping attack if the boss is on the other side of the room
Rewards:
- Mask Shard
Notes:
- You can actually nail bounce off the wall spike patches at the entrance to this boss fight, meaning you can access the boss earlier than intended.
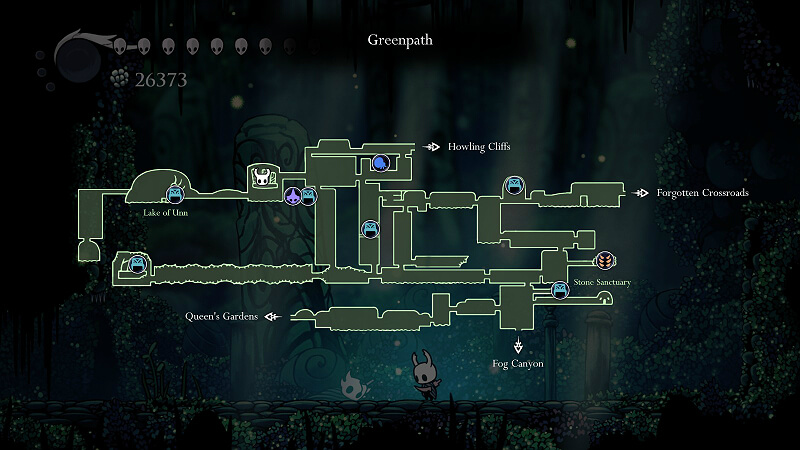
Greenpath
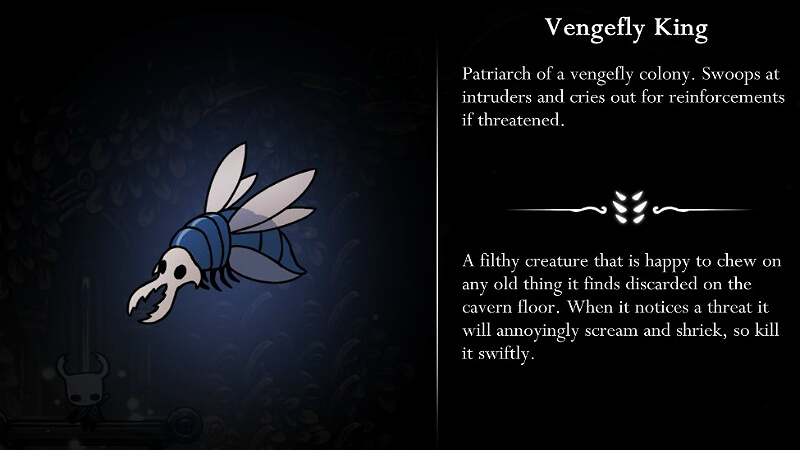
Vengefly King
Location:

Requirements to access: None
Required to beat game: No
Boss Attacks:
- Sweeping dive towards platform followed by rise on opposite side
- Shriek that summons up to two vengeflies (max one on each side of platform)
Dodging Strategies:
- Jump and nail pogo
- Kill the vengeflies as soon as possible
Best Attack Opportunities:
- During the sweeping dive with the nail pogo
- While floating off side and low enough, shoot Vengeful Spirit
Best Healing Opportunities:
- While floating off side
- While performing shriek to summon vengeflies
Rewards:
- Rescue Zote -> Rivalry route progression -> Grey Prince Zote
- 65 Geo
Notes:
- This boss does not add completion percentage for defeating it.
- An alternative location to find this boss is as the mid-boss for the Trial of the Warrior at the Colosseum of Fools (see Colosseum of Fools section below).
- Failing to kill the Vengefly King (and therefore failing to rescue Zote) results in Zote dying once you’ve acquired the Mantis Claw (wall jump). Returning and hitting his head gives the Neglect achievement.
Hornet

Location:
Requirements to access: None
Required to beat game: Yes
Boss Attacks:
- Ground dash (about three-fifths room width)
- Targeted straight-line charge towards your location from her location in air
- Needle throw (almost full room width)
- Radial needle whip while in air and on ground
Dodging Strategies:
- Jump over her
- Walk away from the location she’s targeting
- Jump over the needle and then be prepared to jump again when the needle returns; if she’s on the complete opposite side of the room no dodging is necessary
- Move quickly away from her when she pauses in mid-air
Best Attack Opportunities:
- Every time she lands on the ground after an attack from a location mid-air
- After her ground dash
- Can get a few attacks during her needle throw while the needle is away from her
Best Healing Opportunities:
- During stun
- During needle throw when she’s on the opposite side of the room from you and the needle can’t reach you
- During her needle whip attack while she’s in mid-air
Rewards:
- Mothwing Cloak (Dash) -> Access to Fungal Wastes
Achievement: Test of Resolve
Notes:
- It is harder to dodge while in the air, so stick to the ground during this fight.
- There is a cocoon nearby: two rooms to the right of the boss room, hidden behind a breakable wall on the right side of an upward leading passage to a marker with lore.
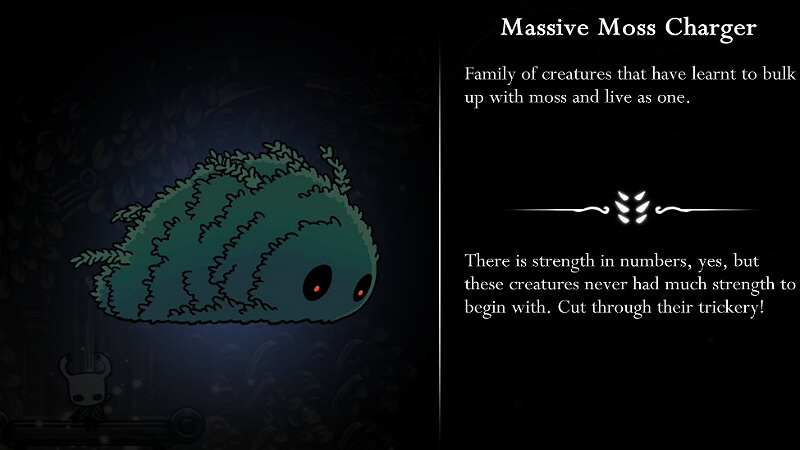
Massive Moss Charger
Location:
Requirements to access: Mothwing Cloak
Required to beat game: No
Boss Attacks:
- Ground charge (almost full room width)
- Arcing jump
Dodging Strategies:
- Jump and nail pogo (or dash to edge of room)
- Walk (or dash) forwards a little bit
Best Attack Opportunities:
- During the ground charge with the nail pogo
- If you walk forwards to avoid the jump attack, you can turn back and land a hit
Best Healing Opportunities:
- Between attacks
Rewards:
- 120 Geo
Notes:
- This boss does not add completion percentage for defeating it.
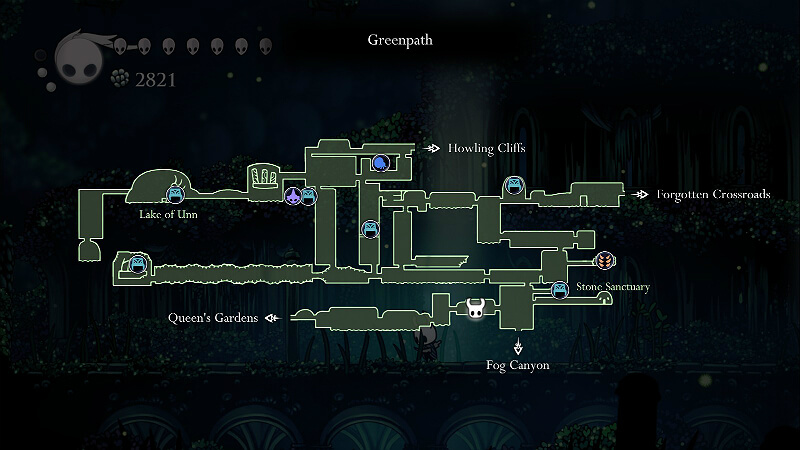
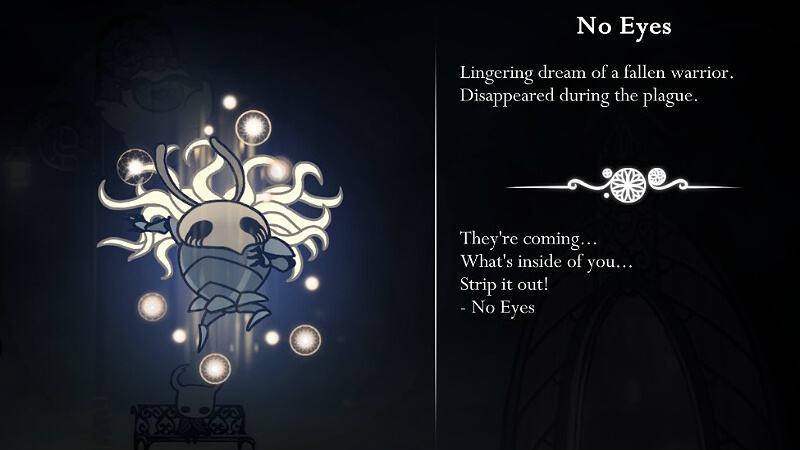
No Eyes
Location:
Requirements to access: Dream Nail & Lumafly Lantern
Required to beat game: No (Warrior Grave)
Boss Attacks:
- Floating spirits that wiggle up and down while traveling across the screen both from the left and right sides (more on screen as fight progresses)
Dodging Strategies:
- Dodge the spirits by jumping up to another platform or falling down, rather than trying to jump over them
Best Attack Opportunities:
- When she teleports to a location near the ground
Best Healing Opportunities:
- On central ground platform when no spirits are floating nearby
Reward: 200 Essence
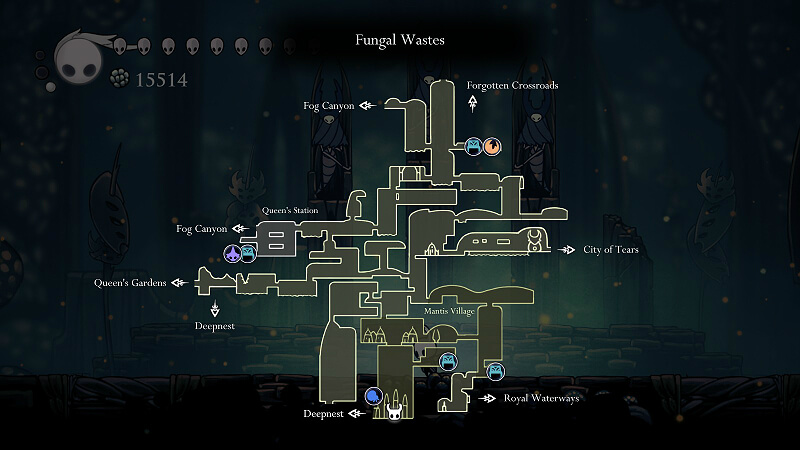
Fungal Wastes
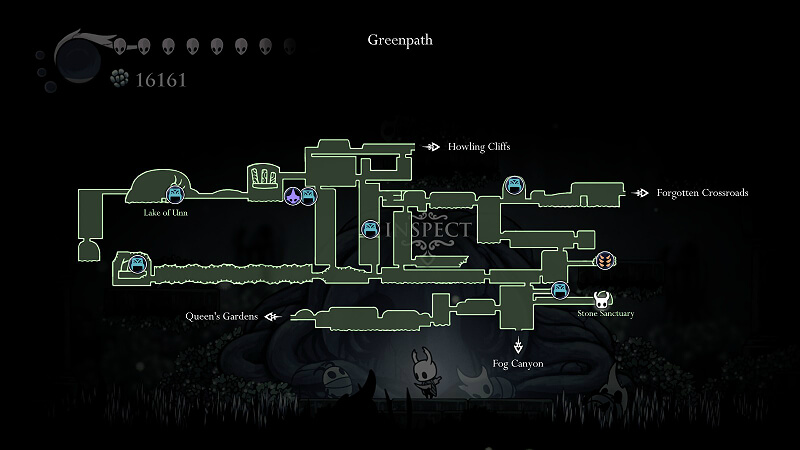
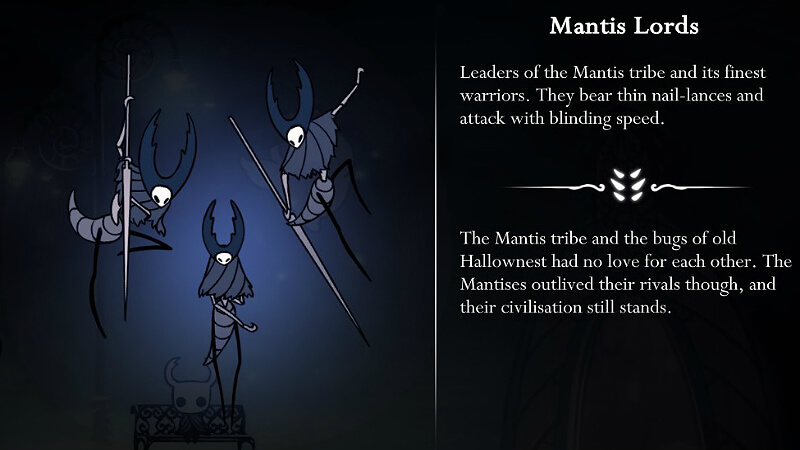
Mantis Lords
Location:
Requirements to access: Mantis Claw
Required to beat game: No
Boss Attacks:
- Ground dash
- Drop attack
- Flying disk throw (high and low throw variants)
- Phase 2 – Same attacks as above, but with two lords at once (disk throw now has fast and slow variants)
Dodging Strategies:
- Jump over the dash (can sneak in a nail pogo)
- Walk/dash to the left/right of where the boss will drop
- If high throw – jump over it on the curve back; if low throw – jump over it when it comes towards you (watch the height of the Lord on the wall as a tell)
- Same, except for disk throws: if fast throw – stand at the center of the room and jump over the disks when they curve back; if slow throw – move to the edge and jump over the disks when they curve out (alternatively, but less consistently – some slow throws will miss if you stand at the exact center)
Best Attack Opportunities:
- If you stick towards the edge of the platform, you can land a hit or two after every attack except the disk throw
Best Healing Opportunities:
- During disk throw attack
- Between Phases 1 & 2
Rewards:
- Access point to Deepnest
- Mantis enemies are pacified
- Room on right side of Mantis Village:
- Bench
- Mark of Pride charm
- Hallownest Seal
- Geo chest (620 Geo)
Achievement: Respect
Notes:
- There is a cocoon behind a breakable wall at the top left of the boss room.
Godhome variant: Sisters of Battle
Location: Godhome (Pantheon of Hallownest, Boss #15)
Requirements to access: All bosses, Pantheon of the Knight, Void Heart
Differences:
- All 3 lords fighting at the same time in second phase
- When two lords simultaneously throw disks, can be any combo of slow/fast throws; one lord will drop attack in middle of attack (dodge by walking to the side when it drops, then jump over disks)
- Sometimes only one lord will throw disk while other two do drop and charge attacks
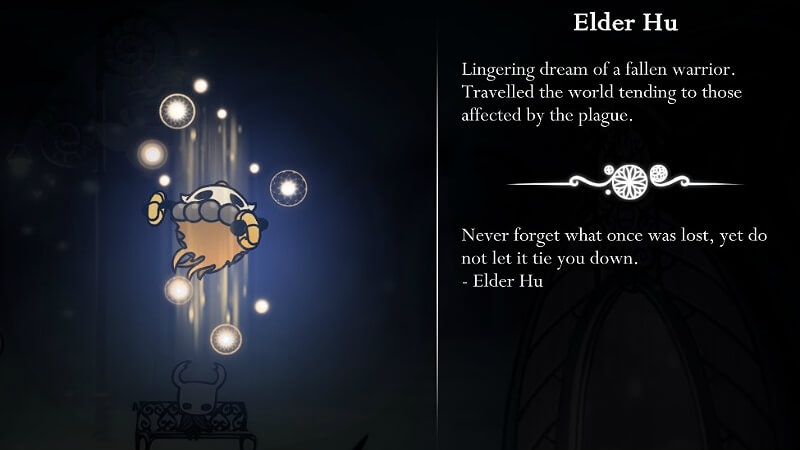
Elder Hu
Location:
Requirements to access: Dream Nail
Required to beat game: No (Warrior Grave)
Boss Attacks:
- Randomly spaced line of drums which slam ground
- Line of drums which sequentially slam the ground starting from edges inward
Dodging Strategies:
- Dash/walk to reach a gap in the line of drums
- Time a dash to get between drum drops (Note: Elder Hu always spawns on the left side of the room after this attack, so dashing towards the left means you can directly attack him after dodging)
Best Attack Opportunities:
- Follow Elder Hu during the randomly spaced line of drums attack
Best Healing Opportunities:
- After getting out of the way of the sequential drum slams
Reward: 100 Essence
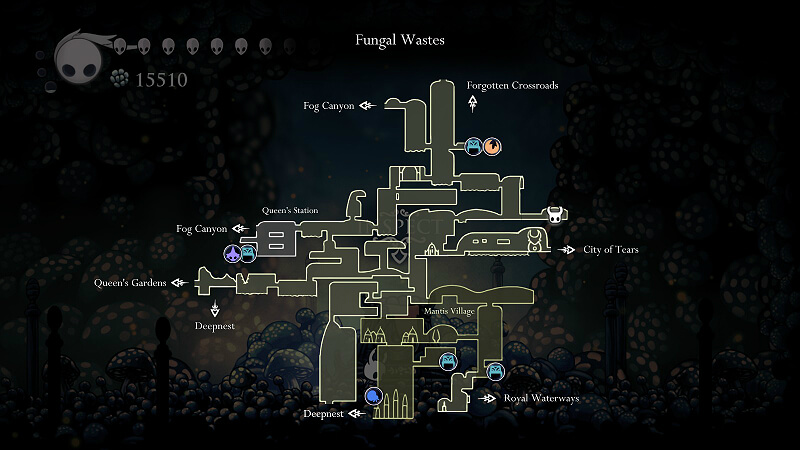
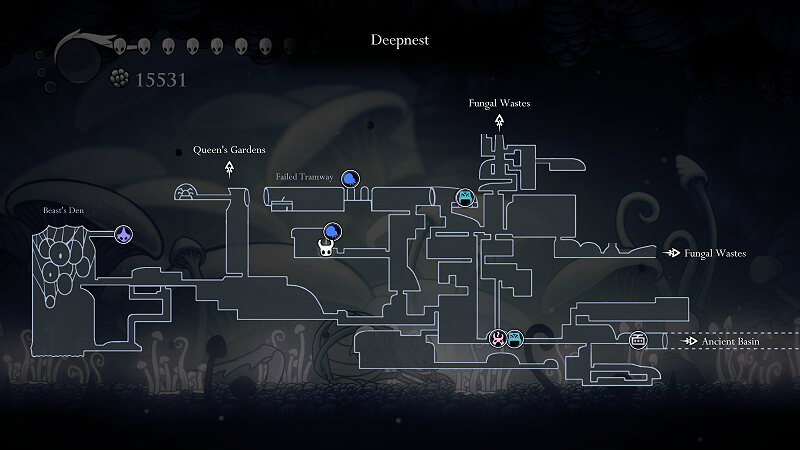
Deepnest
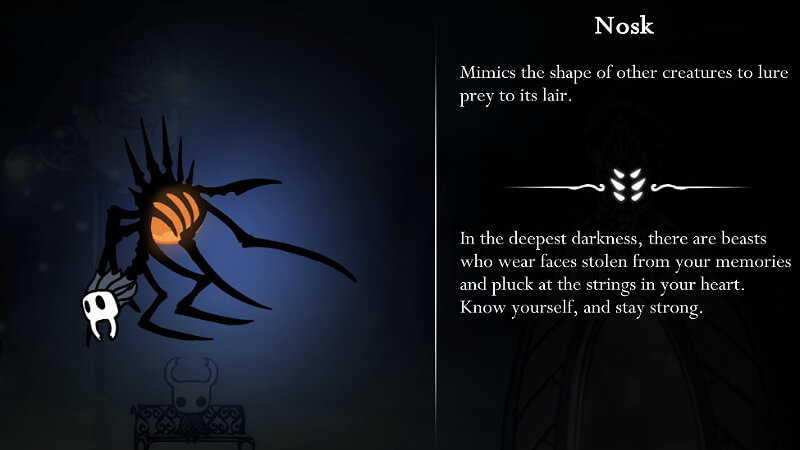
Nosk
Location:
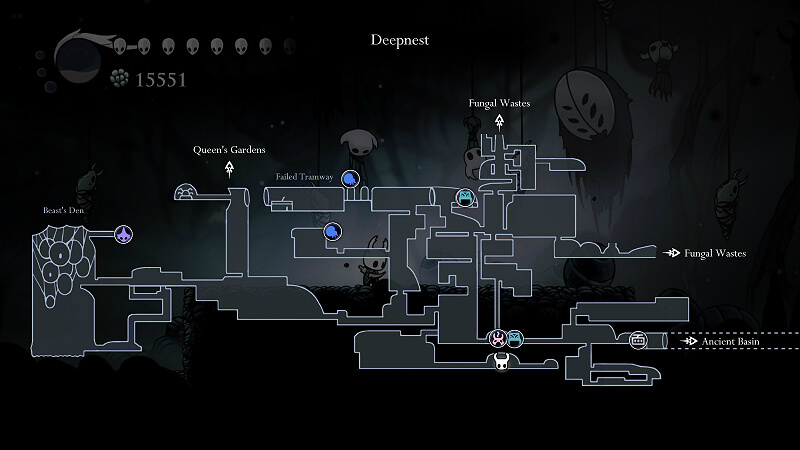
Requirements to access: Crystal Heart
Required to beat game: No
Boss Attacks:
- Ground charge all the way to room edge from where it begins (many times will stop in the middle of the room and do symmetric blob spam that leave temporary damaging patches on ground)
- Consecutive leaping
- Jumps to ceiling and tracks your position, dropping (with pauses) blobs that leave temporary damaging patches on ground. Falls back on the ground after finishing attack
Dodging Strategies:
- Jump and use nail to bounce over Nosk or hide in a corner on the side of the central raised ground platform (must be the side opposite the one Nosk charges from, may still get hit by blob)
- Go to the half of the room away from where Nosk starts jumping and stay off the central platform.
- Leave yourself at least 1/3 of the room to walk in one direction and tap the direction to walk slowly while staying ahead of the dropping blobs. Dash to get out from under Nosk when you hear the screech indicating it’s done with the blobs and is going to drop from the ceiling.
Best Attack Opportunities:
- When jumping over its ground charge, nail attack downwards
- If hiding in corner during ground charge, nail attack upwards when it passes above you
Best Healing Opportunities:
- During leaping attacks
- When in safe corner during ground charge
Rewards:
- Pale Ore
Notes:
- Dying to this boss spawns your shade in the boss room and since the passageway leading into the room locks behind you long before you even see the room, the only way to retrieve your shade without beating the boss is to start the fight, quickly kill the shade, and then quit to menu.
Godhome variant: Nosk (Winged)
Location: Godhome (Pantheon of Hallownest, Boss #28)
Requirements to access: All bosses, Pantheon of the Knight, Void Heart
Differences:
- Now has Vengefly King moves (see Vengefly King above in Greenpath)
- Arcing acid attack now done while flying off side
- Acid dropping from ceiling now occurs over the full room at once (dodge by walking to gap while acid is dropping)
Galien

Location:
Requirements to access: Dream Nail
Required to beat game: No (Warrior Grave)
Boss Attacks:
- Large spinning claw (slightly homing)
- Smaller spinning spirit claws (more added as fight progresses (at < 60% health, then < 30% health) – starts with none, fight ends with 2)
Dodging Strategies:
- Dash when it’s nearing
- Keep track of them and avoid with whatever move convenient
Best Attack Opportunities:
- When large spinning claw is not nearby
Best Healing Opportunities:
- When large spinning claw stops spinning briefly
Notes:
- There is a cocoon hidden above this boss that you can reach if you head past Galien to the left and follow the passage up and around.
Reward: 200 Essence
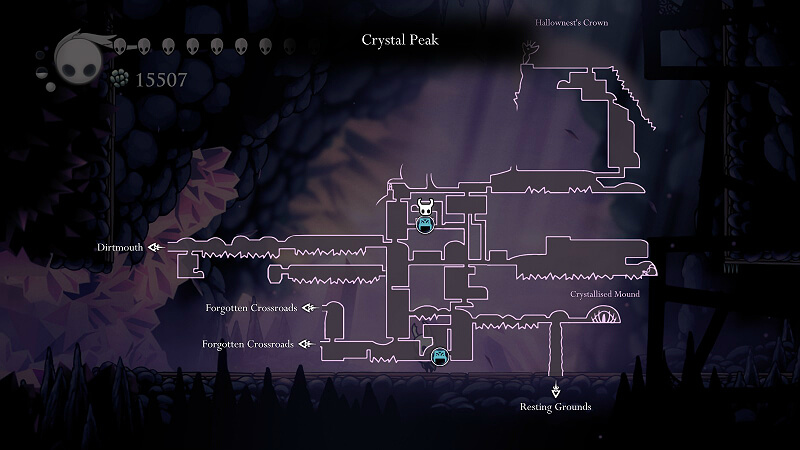
Crystal Peak
Crystal Guardian
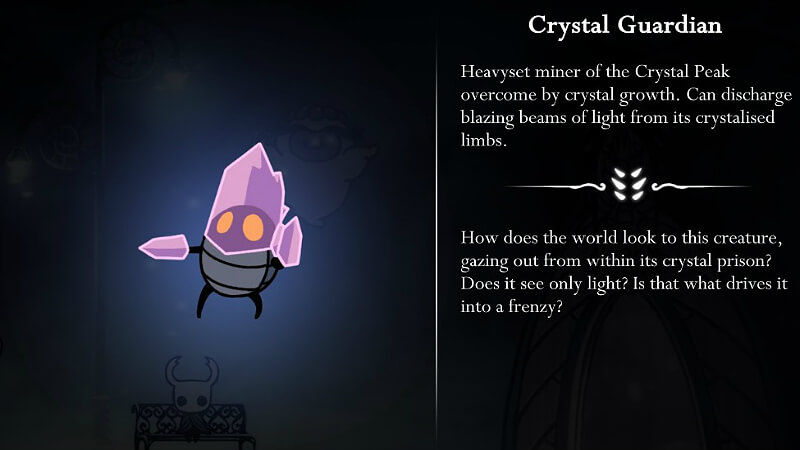
Location:
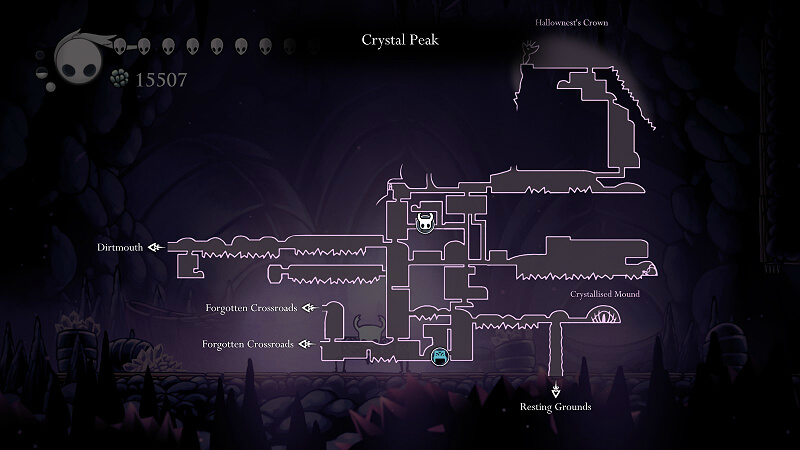
Requirements to access: Mantis Claw (access to upper half of Crystal Peak)
Required to beat game: No
Boss Attacks:
- Single laser from hand
- Multiple random lasers stretching from ceiling to floor at off-vertical slants
Dodging Strategies:
- Jump the moment you see the laser about to be fired
- Use combination of dash and jump to avoid lines which lasers will pass through
Best Attack Opportunities:
- After dodging the single laser attack if you can jump behind it
Best Healing Opportunities:
- During series of leaping
Rewards:
- Bench
- 385 Geo
Notes:
- This boss does not add completion percentage for defeating it.
Enraged Guardian (Crystal Guardian Encounter 2)
Location:
Requirements to access: Monarch Wings
Required to beat game: No
Differences:
- Faster movement
- All lasers and body contact do 2 damage
Rewards:
- Mask Shard
- 550 Geo
Notes:
- Dying in this boss fight spawns the Shade inside the boss room on the left side. In order to retrieve the Shade without starting the boss battle, collect enough soul to fire a Vengeful Spirit and enter the room just enough so you can jump to fire a shot at your Shade without locking the room. The Shade will then follow you outside the room.
- This boss does not directly add completion percentage upon its defeat. Instead, it contributes to completion by rewarding a mask shard.
Resting Grounds
Xero
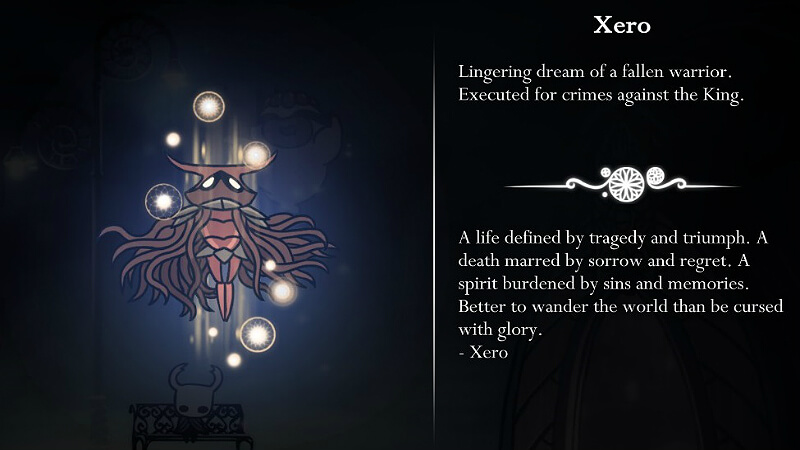
Location:
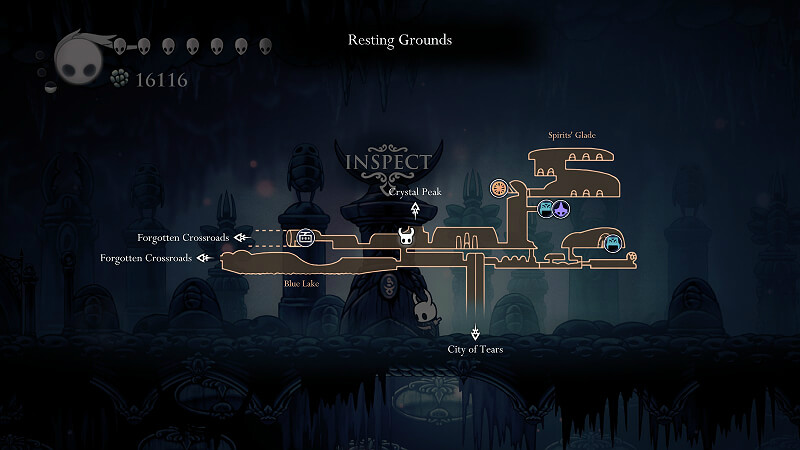
Requirements to access: Dream Nail
Required to beat game: No (Warrior Grave)
Boss Attacks:
- Targeted spear throw and return (faster throws and less down-time between throws at < 50% health – marked by change from 2 to 4 spears floating next to him)
Dodging Strategies:
- Dash to avoid the incoming spear
Best Attack Opportunities:
- While the thrown spear is returning to him
Best Healing Opportunities:
- Get as far away from him as possible and wait until thrown spear has missed you
Reward: 100 Essence
Howling Cliffs
Gorb
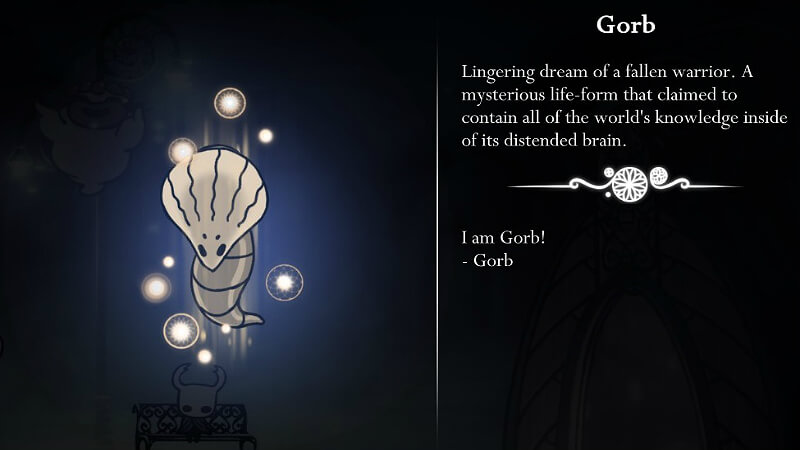
Location:
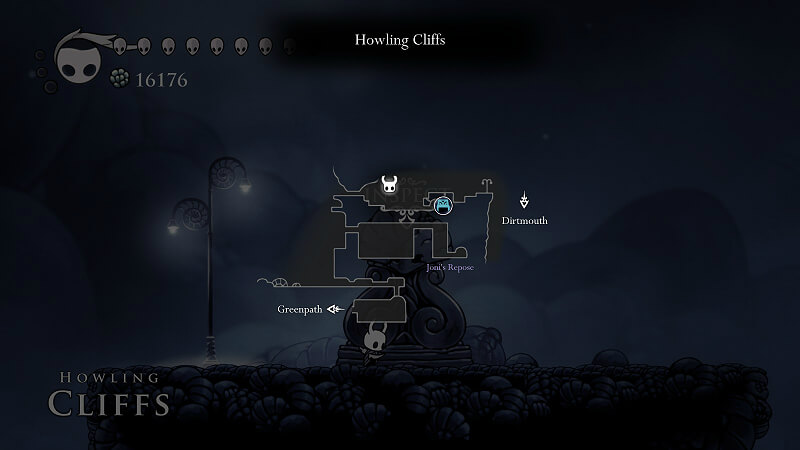
Requirements to access: Dream Nail (Mantis Claw for access to Howling Cliffs)
Required to beat game: No (Warrior Grave)
Boss Attacks:
- Circles of tiny light spears that travel radially outwards (number of circles increases up to 3 with more damage taken by boss (at < 70% health, then < 40% health), with each following circle offset so spears are in the center of the gaps of the previous circle)
Dodging Strategies:
- Stay on the ground or do small jumps to stay in the gaps of the circles. When it does consecutive circles, walk back and forth in rhythm to stay within the gaps.
Best Attack Opportunities:
- Between spear launches
Best Healing Opportunities:
- Get as far away as possible and heal after making sure you’re in the gap of the final circle of spears of the current set of circles.
Reward: 100 Essence
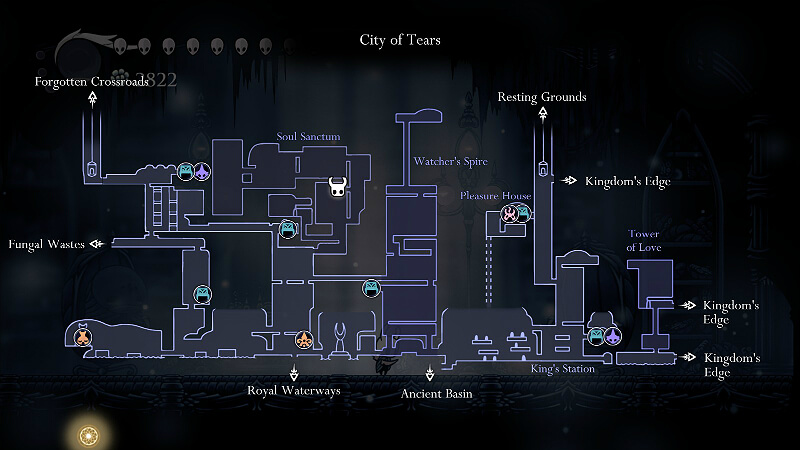
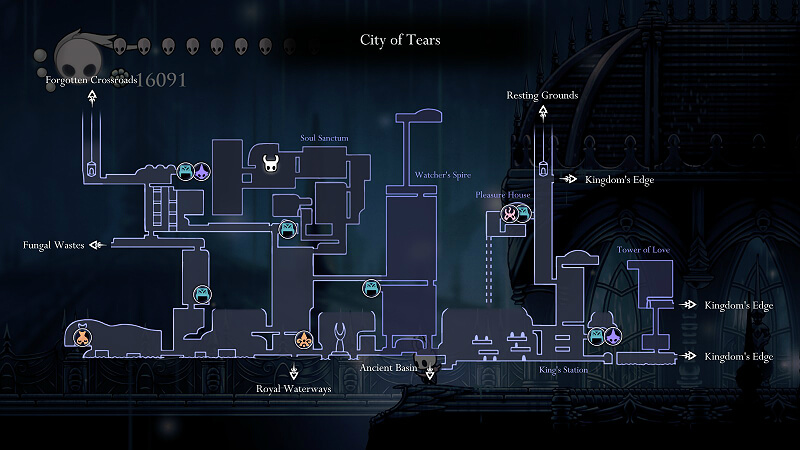
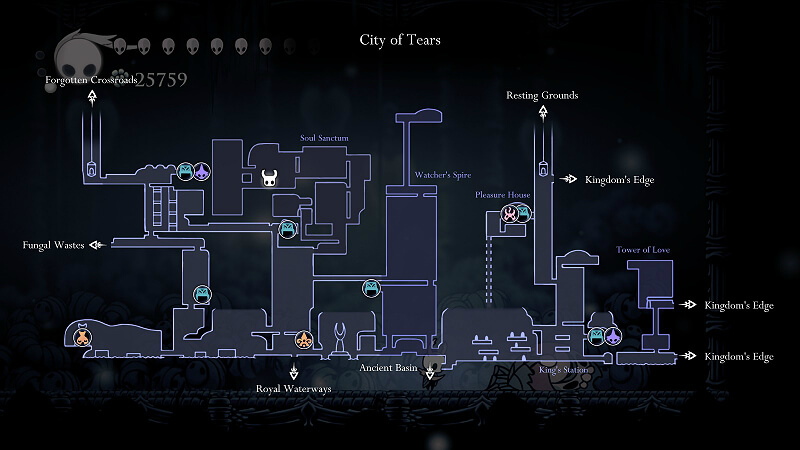
City of Tears
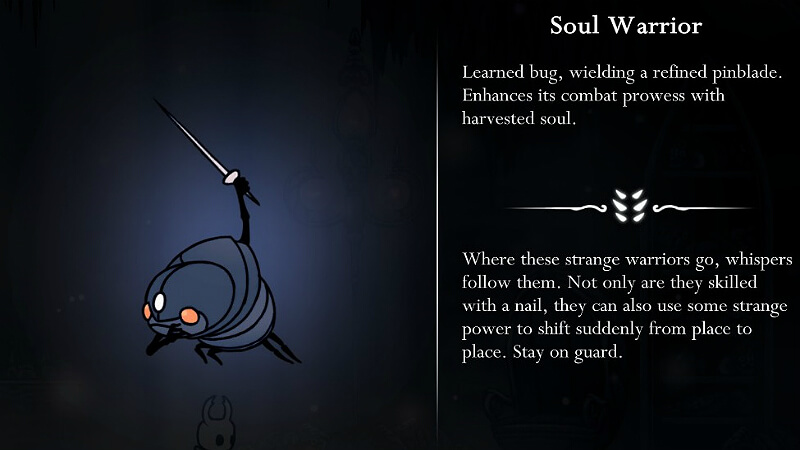
Soul Warrior
Location:
Requirements to access: None
Required to beat game: No
Boss Attacks:
- Lunge attack along ground with nail swipe
- Vertical dive with nail swipe
- Single tracking orb shot
- Randomly spawning Follies (advanced versions only)
Dodging Strategies:
- Jump over
- Dash to side
- Jump around the orb
- Kill as soon as possible
Best Attack Opportunities:
- After each attack
Best Healing Opportunities:
- When it’s on the opposite side of the room
Rewards:
- 200 Geo
- Further access to Soul Sanctum -> Soul Master
Notes:
- This boss does not add completion percentage for defeating it.
- Two advanced versions of this boss can be found elsewhere: 1) Guarding the Shade Soul upgrade (past Elegant Key door in Soul Sanctum) & 2) Trial of the Fool enemies (Colosseum of Fools)
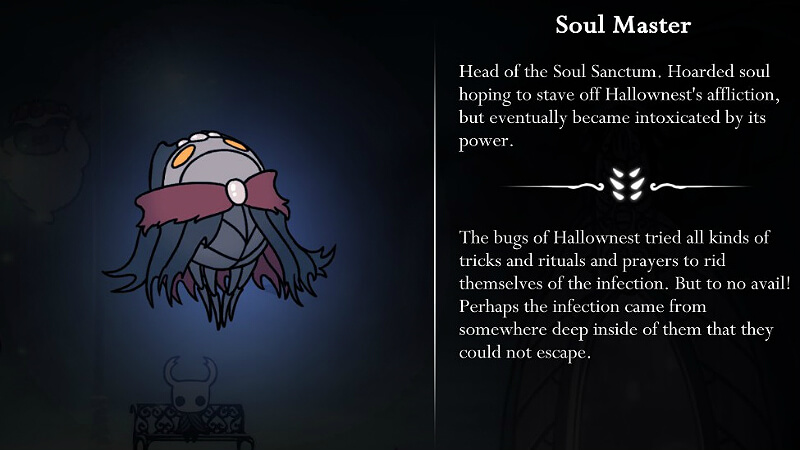
Soul Master
Location:
Requirements to access: None
Required to beat game: No
Boss Attacks:
- Homing spirit orbs while teleporting around room
- 4 spirit orbs that rotate around him as he moves across room. When he reaches other side, he vanishes but the orbs continue to rotate and move back across the room to the side he started on
- Charge across room near ground
- Dive (some with a single fake-out) that creates shockwaves
- Quick succession of dives (Phase 2)
- Quick succession of homing spirit orbs from random locations in room while body remains at fixed location (Phase 2)
Dodging Strategies:
- Stick to the corner, or dash when the orb nears so that it hits the ground or wall and dissipates
- Short jumps directly up so you pass between the orbs and Soul Master’s body (best dodging locations are at center of room and near the edges)
- Jump over him and use nail to pogo
- Dash to the side and jump towards the center when he hits the ground; alternatively go for a diagonal jump that curves out and then back in towards the center.
- Time your dash for when he’s just about to dive (about half a second after the end of his grunting sound effect). If you’re bad at the timing, constantly dashing works less consistently.
- Use a combination of jumps and dashes to try to get the orbs to hit the ground and dissipate (bigger priority during this attack should be to deal damage to the boss)
Best Attack Opportunities:
- Rotating spirit orb attack
- One (or two) attacks when he charges across the ground and you pogo off him
- If he teleports near you when he’s launching spirit orbs at you
- (Phase 2) When he’s launching spirit orbs
Best Healing Opportunities:
- During stun
- During the rotating orbs attack the center of the room and edge of the room which the balls are moving away from are safe to heal in
- Immediately after his dive attack (Note: Do not attempt to heal at this time during the Dream variant fight – Soul Tyrant’s recovery time between attacks is too short.)
Rewards:
- Desolate Dive
- Geo chest (380 Geo)
- Hallownest Seal
- Grub
Achievement: Illumination
Notes:
- To slightly shorten the time to return to Soul Master if you die to him, take a detour by following the left passage immediately after entering Soul Sanctum. There is a breakable wall on the left side of the elevator shaft which opens a shortcut directly to the nearest bench.
- One of the safest spots in the fight is where the floor transitions from glass to metal near the sides of the room. Standing there means most of the orbs Soul Master fires immediately hit the wall after you dodge them, his charging and rotating orbs attacks start from the complete other side of the room giving time to react, and when he does his dive you can dodge to either side safely.
Dream variant: Soul Tyrant
Location: Phase 2 room below main boss room.
Requirements to access: Dream Nail
Differences:
- Faster movement
- 6 rotating orbs in lines of 3 on opposite sides of him
Reward: 300 Essence
Achievement: Mortality
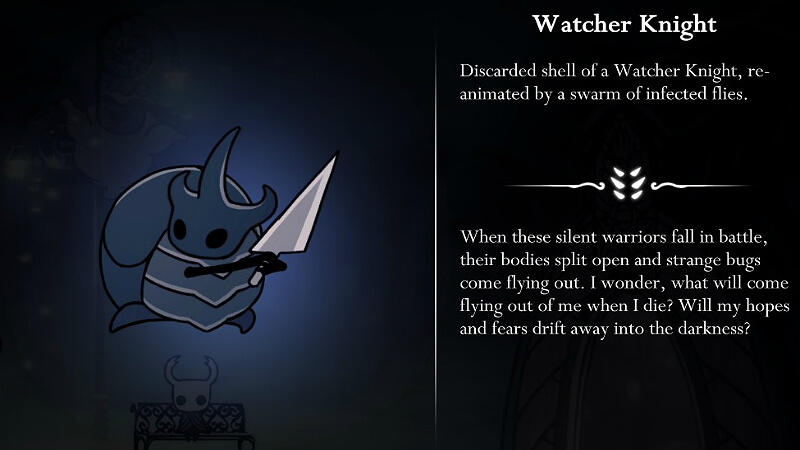
Watcher Knight
Location:
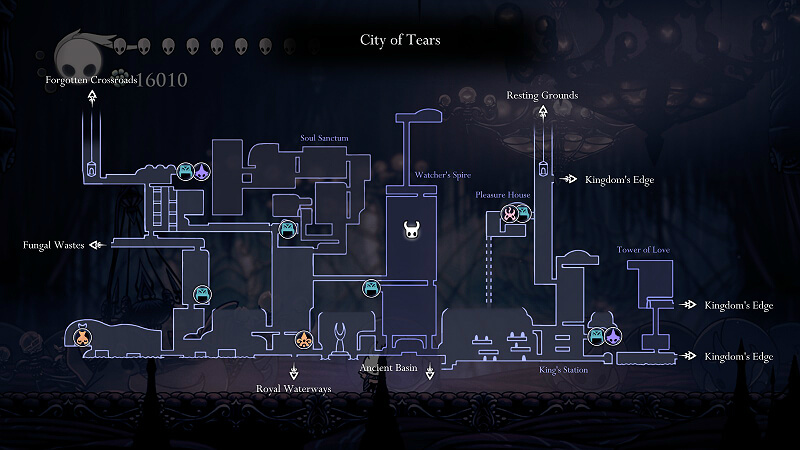
Requirements to access: Monarch Wings (or None -> see Notes)
Required to beat game: Yes
Boss Attacks:
- Double nail swipe
- Rolling attack along ground
- High bounce attack
Dodging Strategies:
- Parry or make sure not to be overzealous in attacking it
- (Double) jump over
- Dash away from his bounce path
Best Attack Opportunities:
- Every time it has just finished a rolling or bounce attack
- Fireball spell (Vengeful Spirit/Shade Soul) when two copies are on the same side of you on the ground
Best Healing Opportunities:
- When both current copies have finished a rolling or bounce attack and are on the opposite side of the room
Rewards:
- Lurien the Watcher (Dreamer)
- Geo chest (655 Geo)
- Hallownest Seal
Notes:
- A downward nail bounce off a background vase in the room one floor above ground level allows you to get into the area with this boss without double jump.
- There are a total of 6 copies of the boss, and you have to fight them in pairs. Initially only the first one spawns in, but the second one spawns into the fight after a certain time (or after killing the first copy). After that, each time you kill one copy another one immediately spawns in until there are no more copies (indicated by the orange fog disappearing from the ceiling).
- You can kill one copy before the battle by finding the breakable ceiling right before you enter the boss room and dropping a chandelier.
- The shells of the boss can be Dream Nailed for Soul before they become active. This trick is useful for recharging the Soul meter before the fight begins and between copy spawns.
- Depending on which half of the room you die in, the Shade will spawn either on the left or right side (easier to retrieve from left side).
The Collector
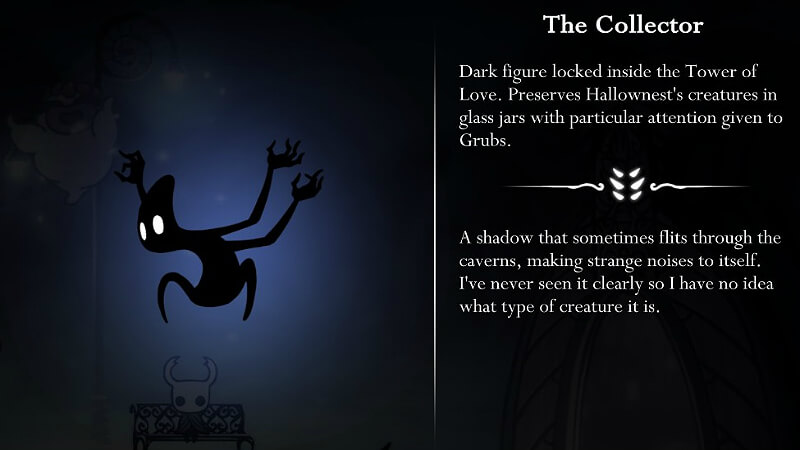
Location:
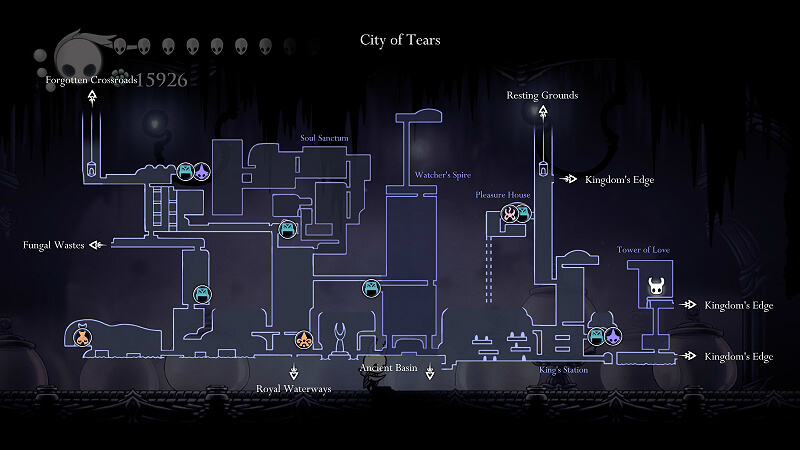
Requirements to access: Love Key (acquired in Queen’s Gardens)
Required to beat game: No
Boss Attacks:
- Dropped glass jars which contain common enemies from the Forgotten Crossroads (# of jars dropped per attack increases up to 3 with more damage taken by boss)
- Grabbing attack
Dodging Strategies:
- Watch for where the jars drop (indicated by slight bursts of dust from ceiling) and kill off the spawned enemies as soon as possible
- Don’t be overzealous with attacking the boss and be prepared to dash away or jump over it when it lunges
Best Attack Opportunities:
- Once all the spawned enemies are cleaned up and the Collector is just jumping around
Best Healing Opportunities:
- During stun
- Once all the spawned enemies are cleaned up and the Collector is just jumping around
Rewards:
- 3 Grubs
- Collector’s Map (shows all imprisoned Grub locations)
Achievement: Obsession
Notes:
- This boss doesn’t give you soul when you hit it. Instead, you refill your soul meter via the common enemies that the boss drops.
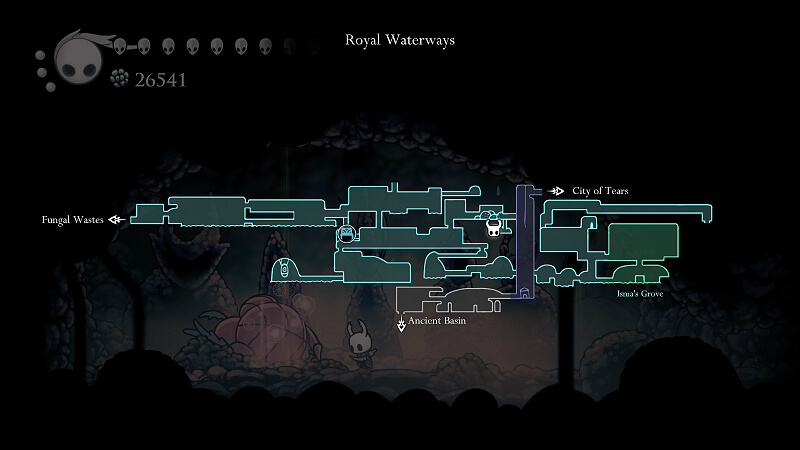
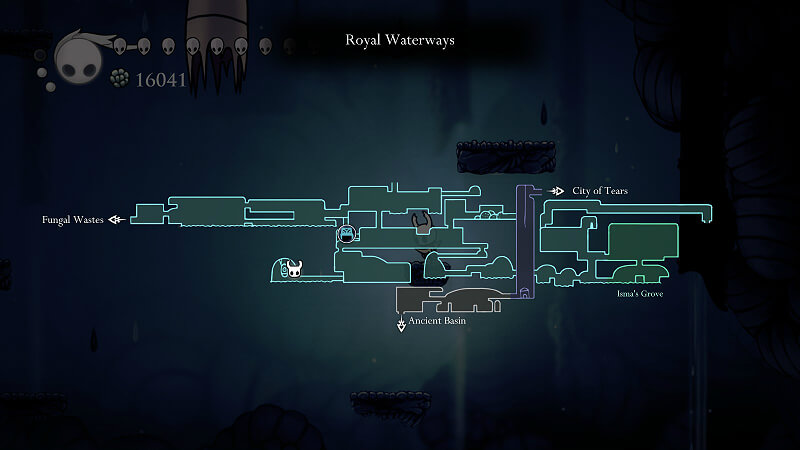
Royal Waterways
Dung Defender
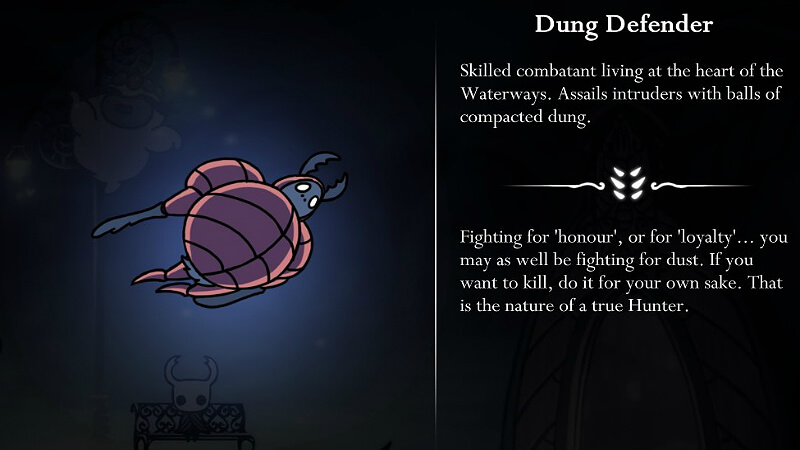
Location:
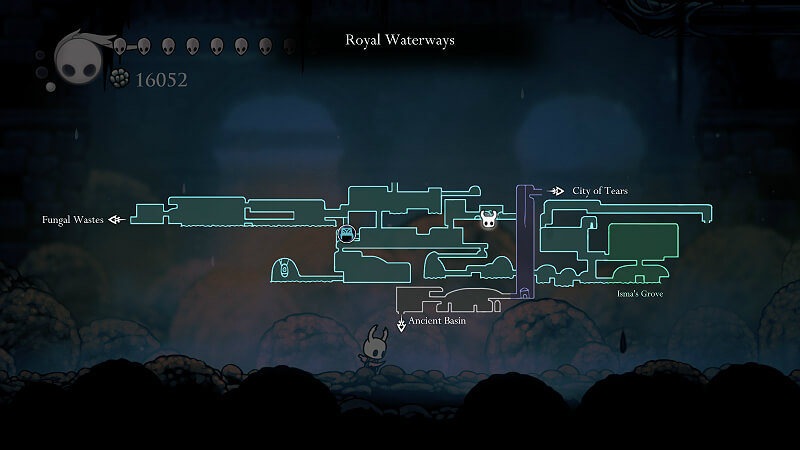
Requirements to access: None
Required to beat game: Either/Or (see Notes)
Boss Attacks:
- Launch from under the ground along with spray of 4 dungballs (2 on each side of him)
- Diving in and out of the ground
- 2 thrown dung balls that bounce around room (occasionally he will roll up and join in)
Dodging Strategies:
- Watch for when the patch of ground indicating where he is stops and stand right next to it
(Alternatively, if you have the dive spell, just use it anywhere and he’ll get popped out and stunned) - Jump over him
- Use dashing and jumping to avoid when you see you’re going to get hit, otherwise stand still
Best Attack Opportunities:
- When he launches out of the ground with the spray of dungballs
- While he’s rolling up dungballs to throw (keep a bit of distance to avoid taking damage from the dungball throw itself)
Best Healing Opportunities:
- During stun
- When he’s doing his diving in and out of the ground
Rewards:
- Switch that drains acid from Isma’s Grove -> Isma’s Tear
- King’s Idol (Desolate Dive the cracked ground under the switch)
- Access point to right half of City of Tears and Ancient Basin
Achievement: Honour
Notes:
- Unless you want to do a somewhat precise super dash off the side of a ledge over acid, you need either Isma’s Tear or Shade Cloak to enter the right side of Fog Canyon. Hence, you need to defeat either Dung Defender or Hornet (Kingdom’s Edge) in order to beat the game.
- The dungballs Dung Defender rolls up can be deflected with your nail. Dung Defender can also be hit with your nail when he rolls up into a ball and bounces around the room.
- If you die in this fight, your shade spawns inside the boss room. The only way to retrieve your shade without locking yourself in the room you need to fire a Vengeful Spirit at the shade to get it to follow you out of the room.
- The Dung Defender’s true name is Ogrim and is one of the five Knights of the Kingdom (the White Lady thinks he’s visiting her along with your character if you wear the Defender’s Crest charm when speaking to her).
- Dung Defender has created models of the five Knights in a hidden room below the boss room (use Desolate Dive under the big switch):
- From left to right, the Knights are Hegemol, Ze’mer, Drya, Isma, and Ogrim (Dung Defender himself).
- From Dream Nail dialogue and the placement of the models shown above, it is heavily implied that Dung Defender and Isma have a close relationship.
Dream variant: White Defender
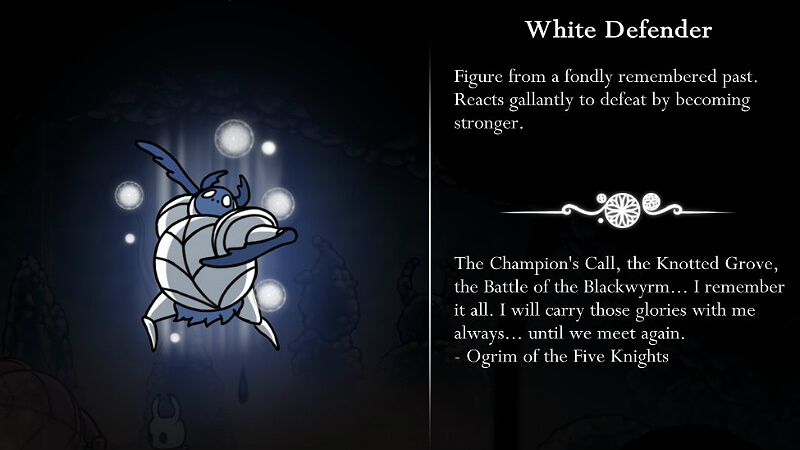
Location: Secret room below boss room with 5 Knight models.
Requirements to access: Desolate Dive, Slay the 3 Dreamers (Lurien, Monomon, Herrah)
Differences:
- Faster movement.
- Launch from ground now has spray of 10 dungballs (5 on each side of him).
- When he rolls up and joins the dungballs bouncing around the room, he finishes with a dive that causes a series of spikes to come out of the ground that go all the way to the walls. (Dodge by double jump or figuring out the spacing between the spikes.) Following that he launches himself out of the ground with the spray attack.
- Dive spell no longer pops him out of ground and stuns him
- Leg slam on ground causes spikes to come out of the ground in a small range around him. (Dodge by dashing away)
Reward: 300 Essence (first clear only)
Achievement: Memory
Notes:
- You can fight this boss up to 5 times.
- Each time you successfully defeat him, the next time you fight him he does one extra damage to you per hit.
- For each of the 5 times you successfully defeat him, he has different dialogue upon defeat.
- After the 5th success, Dung Defender wakes up. He permanently disappears from that room after you rest at a bench, but he leaves behind a surprise for you.
Flukemarm
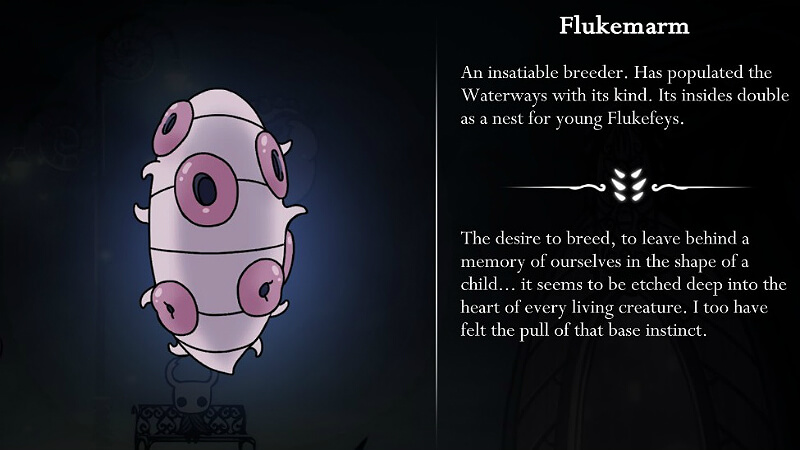
Location:
Requirements to access: Desolate Dive
Required to beat game: No
Boss Attacks:
- Spawn two Flukefeys from random two holes in its body every couple of seconds
Dodging Strategies:
- Stay out of the water and kill off the spawns as soon as possible
Best Attack Opportunities:
- Once spawned Flukefeys are dead
Best Healing Opportunities:
- Once spawned Flukefeys are dead
Rewards:
- Flukenest charm
Notes:
- If you prefer using your nail, it is highly recommended to not fight this boss until your nail does enough damage so that you can one-shot the spawned Flukefeys (i.e. minimum Coiled Nail upgrade or using the Fragile Strength charm with minimum Channeled Nail upgrade).
- This boss does not directly add completion percentage upon its defeat. Instead, the only completion percentage beating this boss contributes is through the dropped charm.
Fog Canyon
Uumuu
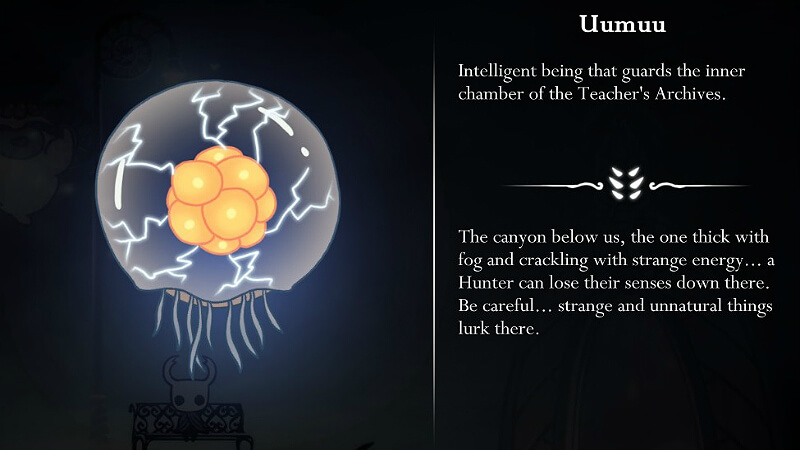
Location:
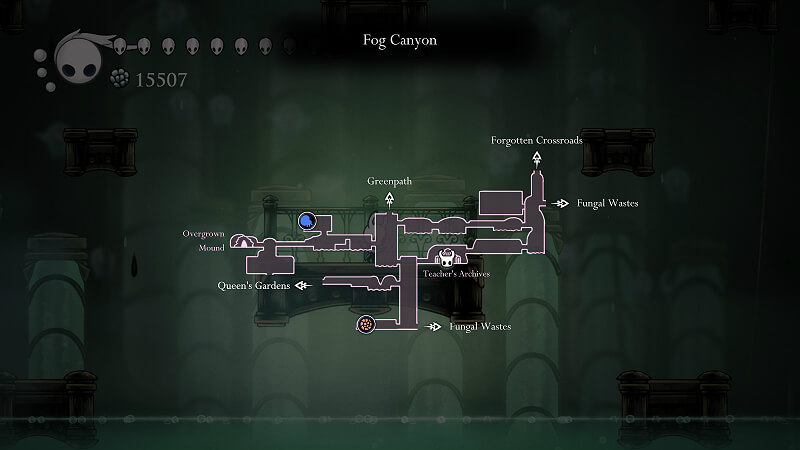
Requirements to access: Isma’s Tear (recommended) or Shade Cloak; (“technically” only need Crystal Heart, see Notes)
Required to beat game: Yes
Boss Attacks:
- Simultaneous electric patches spread across the room
- Tracking series of 7 electric patches
Dodging Strategies:
- Watch for an open spot when the electric patches are about to spark
- Loop around the room, going in a large circle. If you slide down the wall slowly the patches will never hit you. Make sure to never drop in the acid water during this attack as you will likely get hit if you do.
Best Attack Opportunities:
- Must wait for Quirrel to slash open the boss to attack it (occurs after each time Uumuu does a set of attacks)
Best Healing Opportunities:
- After each attack, there’s enough down-time for up to two heals depending on Uumuu’s distance to your platform.
Rewards:
- Monomon the Teacher (Dreamer)
Notes:
- It is possible to enter the right side of Fog Canyon (and reach Uumuu) without either Isma’s Tear or Shade Cloak by performing a super dash off the side of a ledge above acid in the bottom left room of Forgotten Crossroads. However, this super dash is somewhat difficult to pull off and probably not a method which was intended for regular players to use to progress the game.
Godhome variant
Location: Godhome (Pantheon of the Sage, Boss #8 / Pantheon of Hallownest, Boss #27)
Requirements to access: Hive Knight, Elder Hu, The Collector, God Tamer, Grimm, Galien, Uumuu, Hornet (Kingdom’s Edge)
Differences:
- Summons two Oomas which float from bottom to top of room at random horizontal locations
- No Quirrel -> must use Oomas to break Uumuu’s shell
Notes:
- Shade Soul will carry Oomas horizontally across the room, removing the need to kite Oomas into Uumuu after hitting them with the nail.
- Dream Nail use is highly recommended for gaining Soul in this fight (since the amount gained per nail hit on each Ooma is very small and the attack window once Uumuu’s shield is down is short.) Best opportunity to Dream Nail is when Uumuu stops next to a platform right before an attack.
- The Dream Wielder charm helps significantly with Dream Nail use, so it’s a recommended equip.
Ancient Basin
Broken Vessel
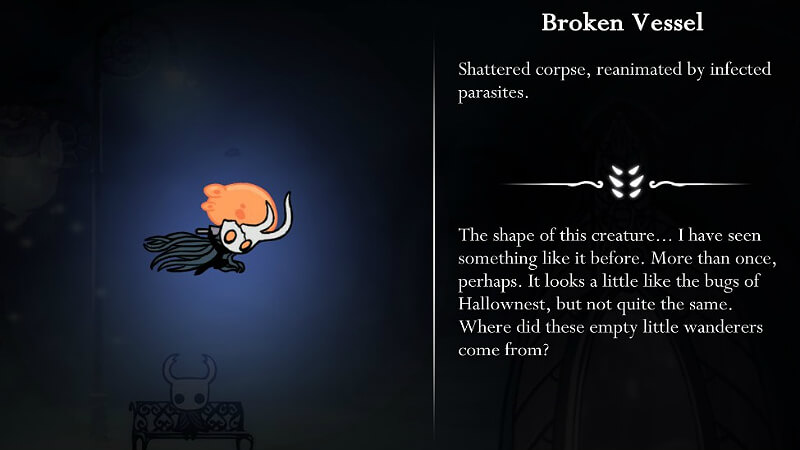
Location:
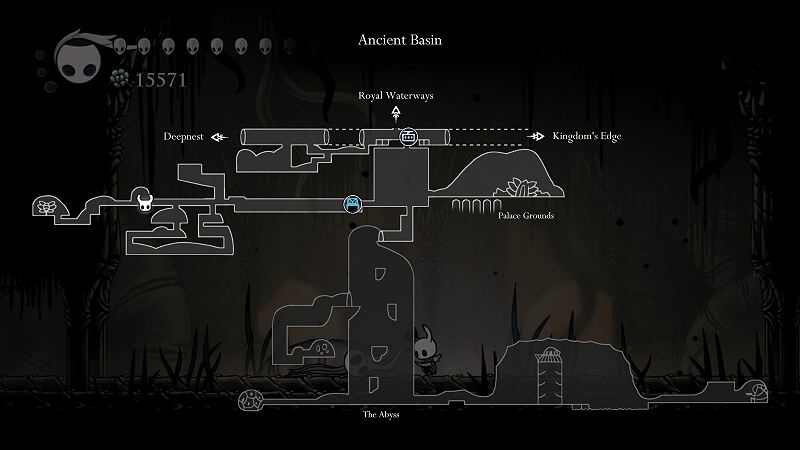
Requirements to access: Crystal Heart
Required to beat game: Yes (“technically” no – see Notes)
Boss Attacks:
- Ground & air dash
- Ground slam that produces 4 blobs (2 on each side of it) which curve down and then up/outwards from where it slams
- Large number of random blobs that move outwards
- Random ghost spawns
- Nail swipes back and forth when in close proximity
Dodging Strategies:
- Make sure to jump or dash so that it’s not on the same level as you when it attacks
- The blobs are always equidistant when they come back out of the ground, so find a gap
- Slow enough that you can probably find gaps as long as you stick to the edges of the room
- Kill them off as soon as possible
- Only take a few swipes at it each time there’s an opening
Best Attack Opportunities:
- After dash attack
- Can upswipe as the boss air dashes over you when you’re on the ground
- After ground slam attack
Best Healing Opportunities:
- During stuns after you’ve killed off all the current ghosts
- At edges of room during one of his blob spam attacks
Rewards:
- Monarch Wings
Achievement: Release
Notes:
- Monarch Wings is the “intended” way to progress towards the Dreamer in City of Tears, but it is possible to skip getting it (see Notes under Watcher Knight).
- Defender’s Crest is a very useful charm to have for this boss. It neutralizes the threat of the randomly spawned ghosts because the aura instantly kills them when they get near you.
Dream Variant: Lost Kin
Location: (Same as above)
Requirements to access: Dream Nail
Differences with normal fight:
- Faster movement
- 6 blobs from ground slam (3 on each side of it)
- More common ghost spawns
- No “large number of random blobs” attack
- More staggers necessary to defeat
Reward: 400 Essence
Achievement: Peace
Notes:
- You can skip the dream platforming by falling down to the left of the platform you enter the dream on and then double jumping or dashing to the right to reach the left entrance of the boss room.
- Two approaches to this boss battle seem to be the most effective: either quickly dealing large amounts of damage (via nail upgrades and/or charms) to the boss to stagger it very quickly or using a charm to deal with the ghost spawns passively so healing is more consistent.
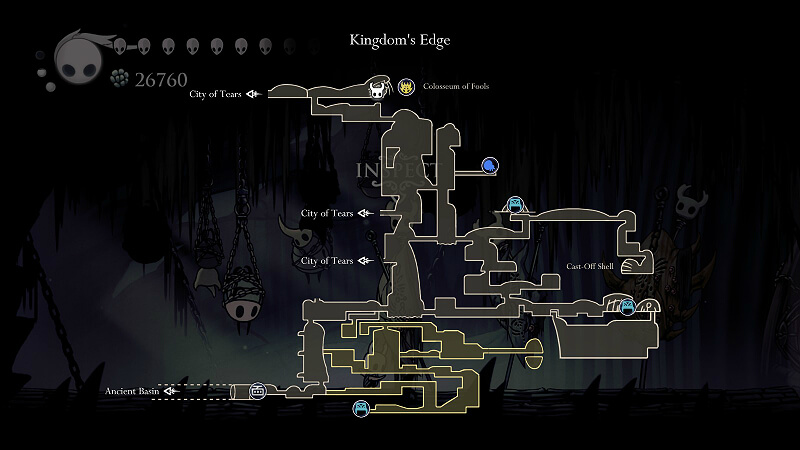
Kingdom’s Edge
Hornet

Location:
Requirements to access: Monarch Wings (can “technically” skip Monarch Wings -> see Notes)
Required to beat game: Either/Or (see Notes)
Boss Attacks (with faster movement compared to first encounter):
- Ground dash (about three-fifths room width)
- Targeted straight-line charge towards your location from her location in air
- Needle throw (almost full room width)
- Radial needle whip while in air and ground
- Multiple spike traps in mid-air (< 70% health; max of 6 at any given time)
- Counter nail swipe after she blocks your nail hit during her defensive pose
Dodging Strategies:
- Jump over her
- Walk away from the location she’s targeting
- Jump over the needle and then be prepared to jump again when the needle returns; if she’s on the complete opposite side of the room no dodging is necessary
- Move quickly away from her when she pauses in mid-air
- Nail attack them to make them go away
- Don’t be overzealous on your attacks
Best Attack Opportunities:
- Every time she lands on the ground after an attack from a location mid-air
- After her ground dash
- Can get a few attacks during her needle throw while the needle is away from her
Best Healing Opportunities:
- During stun
- During needle throw when she’s on the opposite side of the room from you and the needle can’t reach you
- During her needle whip attack while she’s in mid-air
- When she sets up the spike traps
Rewards:
- King’s Brand -> Access to The Abyss in Ancient Basin -> Shade Cloak
Achievement: Proof of Resolve
Notes:
- If you kite a Primal Aspid over to the set of ledges leading up to the bench you can pogo up this boss without needing double jump.
- Unless you want to do a somewhat precise super dash off the side of a ledge over acid, you need either Isma’s Tear or Shade Cloak to enter the right side of Fog Canyon. Hence, you need to defeat either Dung Defender or Hornet (Kingdom’s Edge) in order to beat the game.
- The nearest bench to this fight is hidden behind a breakable ceiling. There is a signpost indicating the bench below and to the right of the breakable ceiling.
- After finishing this battle and claiming the King’s Brand, you will get additional lore dialogue from the Midwife (right from ground level of Distant Village in Deepnest) about Hornet.
- The White Lady and Midwife refer to Hornet as the “Gendered Child” and hint at her being a gift from the King to Herrah for the sacrifice Herrah makes for Hallownest.
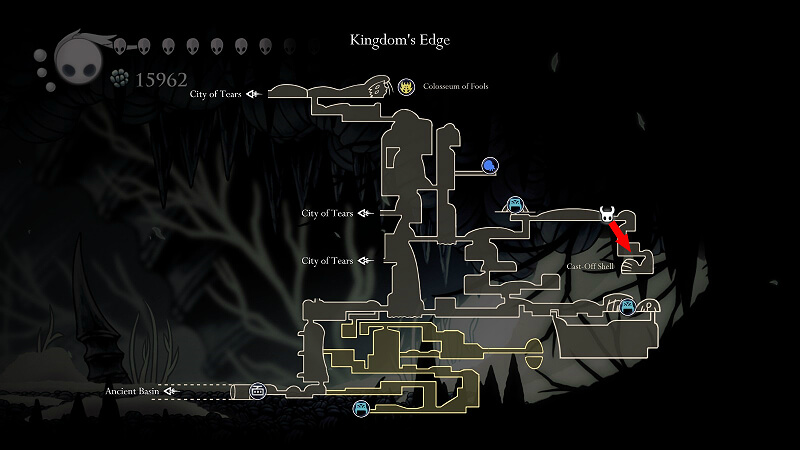
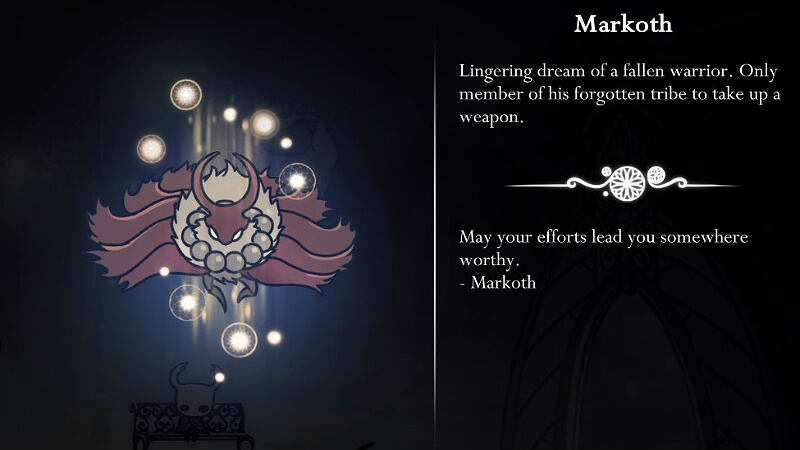
Markoth
Location:
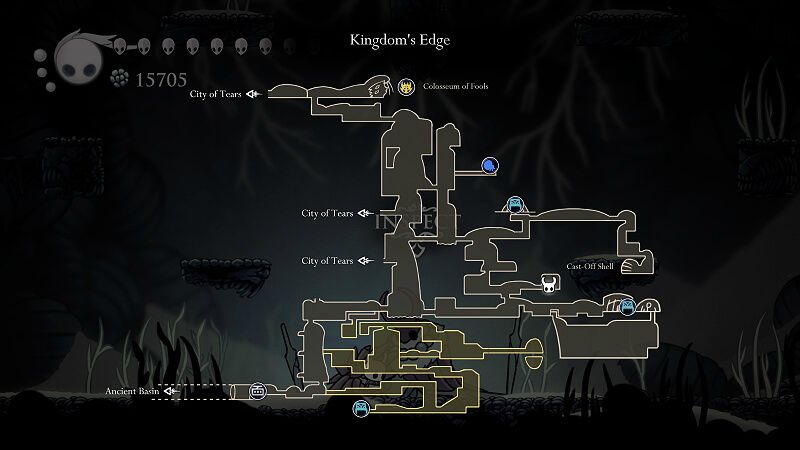
Requirements to access: Dream Nail & Shade Cloak
Required to beat game: No (Warrior Grave)
Boss Attacks:
- Targeted spear throws (more rapidfire in second half of fight), with slowly rotating shield (increases to two shields in second half of fight)
- Shield rapidly circles around him and expands outwards in radius (two shields in second half of fight: one that circles while getting closer to him, one that circles outwards from him)
Dodging Strategies:
- Avoid by moving sideways from the direction the spear is coming at you from
- Get as far away from him as possible
Best Attack Opportunities:
- Get as many hits in during his spear throwing phase, accounting for his shield(s)
Best Healing Opportunities:
- When he’s doing his rapidly rotating shield attack
Reward: 250 Essence
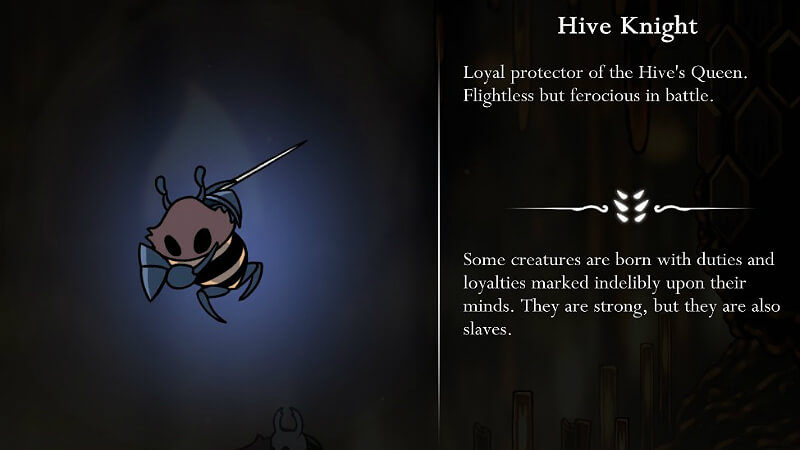
Hive Knight
Location:
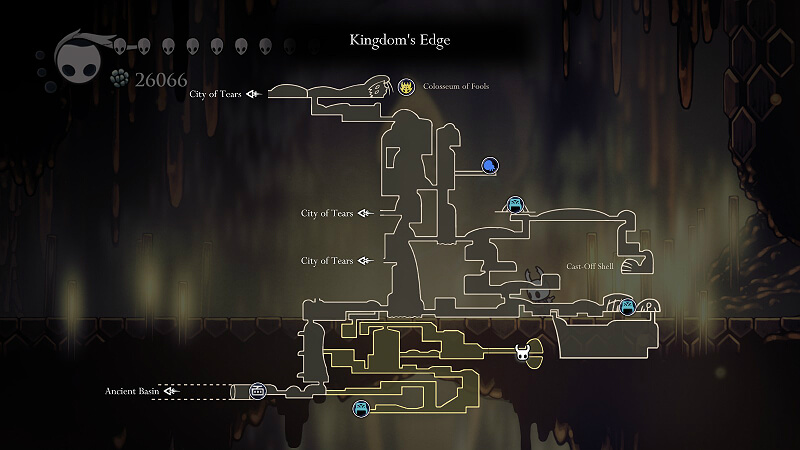
Requirements to access: Tram Pass (acquired in Deepnest; gives access to Hive entrance via lower tramway) & Monarch Wings (can “technically” skip Monarch Wings -> see Notes)
Required to beat game: No
Boss Attacks:
- Horizontal nail swipes on ground and mid-air (long and short distance variations; long one only on the ground)
- Nail swipe at ground that produces 3 randomly placed mid-air balls with spines that launch in the 8 cardinal directions after a short pause
- Screech which launches several Hivelings followed by 7 of the Hivelings curving down towards the ground (mildly tracking; cannot be killed)
Dodging Strategies:
- Use jump or double-jump to get over the swipe
- Position yourself to avoid the launched spines and avoid time mid-air
- Position yourself to avoid the Hivelings; can use nail to knock them back if necessary
Best Attack Opportunities:
- Pogo during the swipe
- During screech producing bees
Best Healing Opportunities:
- During stun
Rewards:
- Hiveblood charm
- Hive Queen Vespa spirit
Notes:
- If you pogo off bees you can progress all the way through the Hive to this boss without needing double jump, but it’s not recommended given the distance from the nearest bench.
- The fight always begins with 7 Hivelings curving down from the ceiling before the actual boss spawns.
Queen’s Gardens
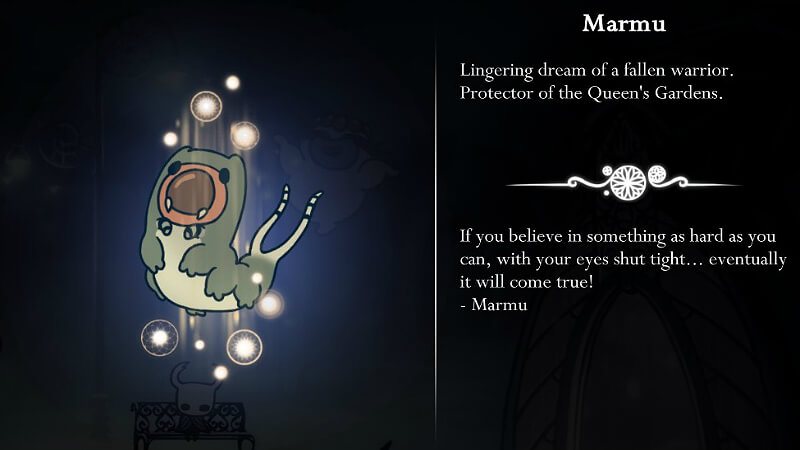
Marmu
Location:
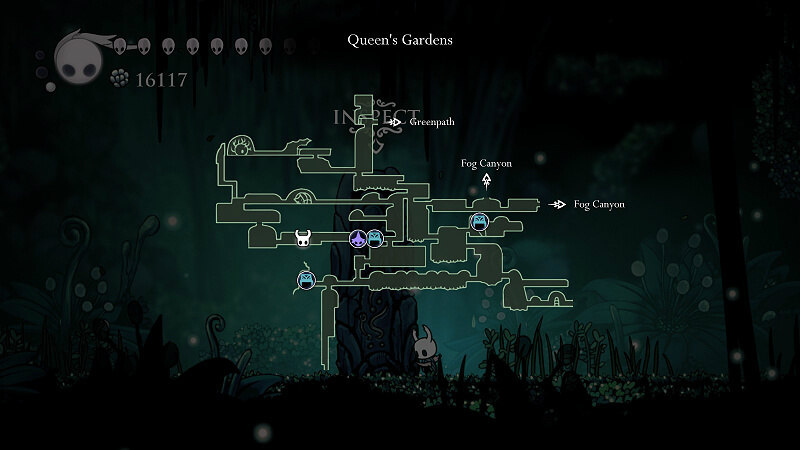
Requirements to access: Dream Nail (see Notes about Queen’s Gardens access)
Required to beat game: No (Warrior Grave)
Boss Attacks:
- Homing bouncing ball
Dodging Strategies:
- Don’t try to move out of the way: time your nail attack to bounce her away from you when she’s about to hit
Best Attack Opportunities:
- Use nail to bounce her away from you
Best Healing Opportunities:
- Pauses when she isn’t rolled up in a ball
Reward: 150 Essence
Notes:
- While acquiring Isma’s Tear or Shade Cloak allows for easy access to Queen’s Gardens from Fog Canyon, it is also possible to enter Queen’s Gardens from Deepnest by destroying a hidden plank of wood above the entrance to the Mask Maker’s chamber.
Traitor Lord
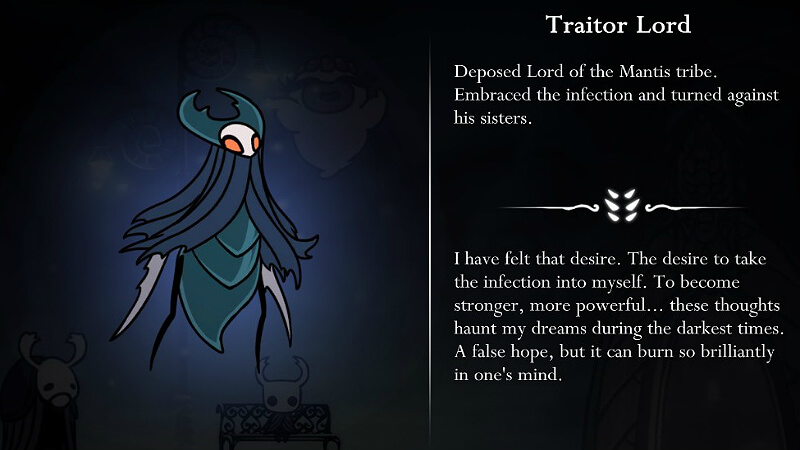
Location:

Requirements to access: Shade Cloak
Required to beat game: No
Boss Attacks:
- Vertical jump up followed by diagonal down slash (2 damage)
- Charge with slash (2 damage)
- Two discs that bob up and down while moving outwards (one slower than the other)
- Ground pound which produces tall, slowly moving shockwaves outwards (2 damage)
Dodging Strategies:
- Jump up and away from current location
- Double jump and dash over him; alternatively, time a Shade Cloak dash through him
- Position yourself so that the discs bob over you
- Shade dash through the shockwave
Best Attack Opportunities:
- After the Traitor Lord finishes each attack, you can get a few hits in
Best Healing Opportunities:
- When he’s on the opposite side of the room from you
Rewards:
- White Lady (lore)
- White Fragment -> half of Kingsoul charm -> required for alternate endings
Achievement: Execution
Notes:
- If you find Cloth in the Ancient Basin left tramway room by killing everything in the top part of the room (thus “saving” her), she will help out in the Traitor Lord fight. Meeting Cloth in Fungal Wastes first is a prerequisite for her to show up in Ancient Basin.
Colosseum of Fools
Location:
Oblobble (Trial of the Conquerer)
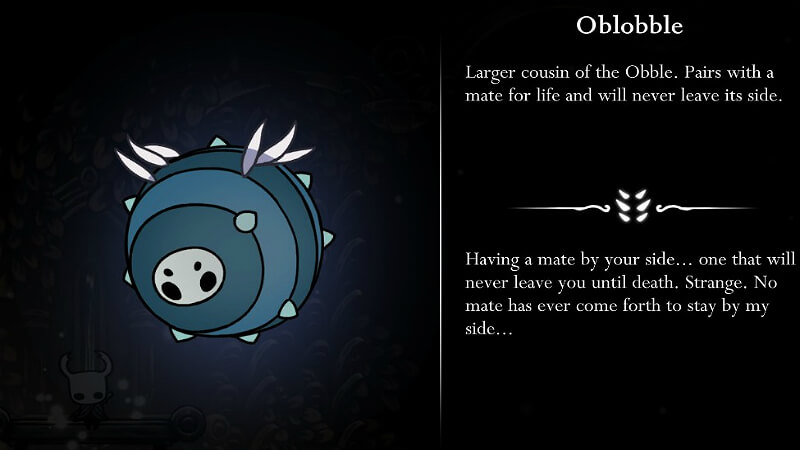
Requirements to access: Trial of the Warrior; 450 Geo
Required to beat game: No
Boss Attacks:
- Many radial blob shots at fixed alternating angles (becomes more rapid after one is killed)
Dodging Strategies:
- Walk/dash to gaps in the shots
Best Attack Opportunities:
- While floating around
- While shooting blobs from spot near ground
Best Healing Opportunities:
- While floating around
Rewards:
- Pale Ore
- 1800 Geo
Achievement: Conquerer
Notes:
- You always fight a pair of this boss. Once one of the pair is killed, the other becomes enraged (slight health boost & more rapid shots).
God Tamer (Trial of the Fool)
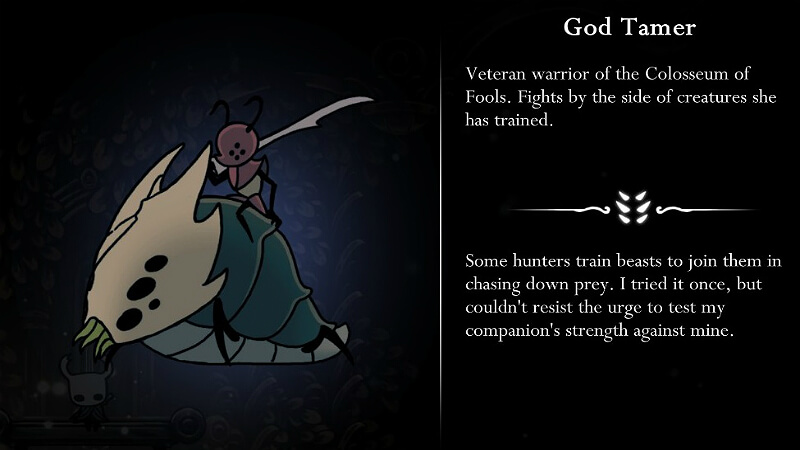
Requirements to access: Trial of the Conquerer; 800 Geo
Required to beat game: No
Boss Attacks:
- Tamer: High jump which ends with a down slash of weapon targeted at current location
- Beast: Rolls into ball which travels across room. Once it hits wall, bounces back and lands at your current spot
- Beast: Spits three clumps of acid that arc and land at regular intervals from itself; acid blobs stay on ground for a brief time
Dodging Strategies:
- Walk/dash away from your current position
- Jump over (or shade dash through) ball and when it bounces back dash away from current position
- Watch the arcing acid blobs and position yourself in one of the gaps (do not jump to avoid)
Best Attack Opportunities:
- After beast has performed a rolling attack
Best Healing Opportunities:
- After the beast has performed a rolling attack
- While the beast is performing an acid spit attack if you’ve positioned yourself in a gap
Rewards:
- 2700 Geo
Achievement: Fool
Notes:
- The tamer automatically dies if the beast is killed so attention should be focused on attacking the beast.
Black Egg Temple (Final Bosses)
Location:
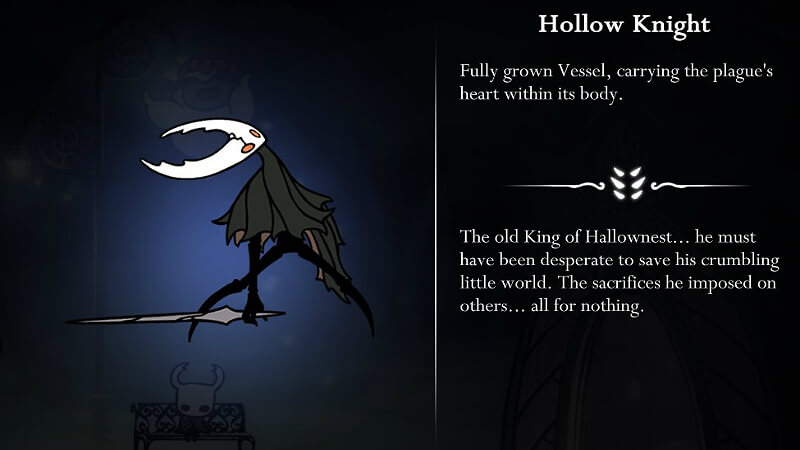
Hollow Knight
Requirements to access: Slay the 3 Dreamers (Lurien, Monomon, Herrah)
Required to beat game: Yes
Boss Attacks:
- Triple nail swipe
- Ground charge
- Dive to ground followed by randomly spaced columns of fire (< 3/4 health) [fire columns do 2 damage]
- Continuous shot of blobs whose arc slowly moves upwards (< 3/4 health)
- Blob spam from location in air (< 2/5 health)
- Slightly tracking series of slams from mid-air (< 2/5 health)
- Counter nail swipe after it blocks your nail hit during its defensive pose
Dodging Strategies:
- Parry or dash away before the swipes start
- Double jump over
- Find gap in the spots on the ground indicating where the columns will spawn
- Find gap between blobs to dash towards it (gaps will be wider if you’re farther away)
- Walk around and carefully watch the blob arcs
- Dash under it right before each time it’s going to slam down
- Don’t be over-zealous in attacking, or parry
Best Attack Opportunities:
- After jumping over its dash
- After its attacks involving blobs
- When it’s stabbing itself with its nail
Best Healing Opportunities:
- When it’s stabbing itself with its nail
- During its blob attacks if you stick near the edges of the room
- During stun
Rewards:
- Hollow Knight ending / Sealed Siblings ending (with Void Heart charm)
Achievement: Hollow Knight / Sealed Siblings (with Void Heart charm)
Notes:
- After a few staggers it starts to fight the infection by stabbing itself.
- While the Hollow Knight does get “stronger” when it starts doing blob attacks after a few staggers, its ability to attack you decreases when you deal increasing amounts of damage to it beyond that phase change.
- Shade Cloak (optional) allows for easy dodging of its triple swipe and ground charge if you time your shadow dash to go through it as it attacks.
- Lots of in-game lore exists regarding the Hollow Knight and its role in containing the plague. The main sources of the lore come from NPC dialogue, the City of Tears fountain, hidden rooms in the White Palace, and the scene before acquiring the Void Heart.
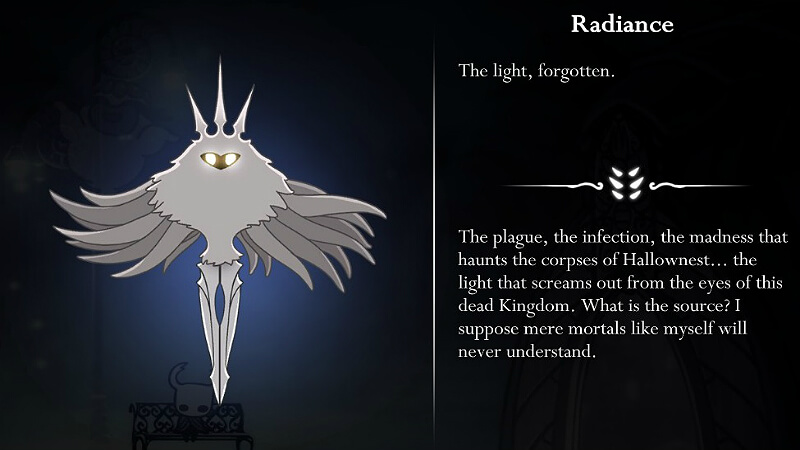
Radiance
Requirements to access: Void Heart charm
Required to beat game: No
Boss Attacks (all 2 damage except floor spikes):
- Series of 4 walls of randomly spaced spears (from left, right, or top)
- Circle of spears that spawn in around the Radiance and then move outwards with slight spiral
- Triple series of evenly spaced, randomly oriented radial beams of light centered on the Radiance
- Vertical beam of light that travels across the full screen (from left or right)
- 3 homing balls of light that spawn in one at a time at random locations in the room
- Phase 2 – Add spikes that cover alternating halves of the floor
- Phase 3 – Change to spikes that cover edges of the floor and only do randomly spaced walls of spears from top
- Phase 4 – Change from single large platform to several smaller platforms at multiple levels: Attacks are all the same except the walls of randomly spaced spears only come from left & right, and only in series of 2
- Phase 5 – Climb up series of platforms with only single beam of light from the Radiance every few seconds
Dodging Strategies:
- Double jump and dash to avoid the spears; Shade Cloak will allow you to dash through the spears if you can’t make the jump in time
- Find a gap in the circle
- Walk to gaps between the beams
- Shade Cloak dash
- Dash to get the balls to dissipate when they hit you while you’re invincible in the middle of your Shadow Dash or they hit the ground/platforms; alternatively, jump in a circling fashion so that the orbs curve around you and eventually dissipate.
(Warning: the balls have a short period of time after they spawn during which they can pass through the ground/platforms without dissipating, so you may need to dodge again if it curves back at you) - Stick to the side which doesn’t have spikes and wait until the boss teleports to that side
- Stay close to the center and watch for gaps in the spears coming down
- Same strategies as above, except more double jump use to get between platforms
- Walk out of the way of beams or use double jump to temporarily get off the platform when the beam’s going to hit
Best Attack Opportunities:
- Convenient gap in wall of spears from top near boss
- During homing ball attack
- During radial beams of light attack if gap in beams is under boss
- When boss teleports directly above a platform in Phase 4
Best Healing Opportunities:
- During radial beams of light attack
- Walls of spears from the top if two consecutive walls have overlapping gaps
- Between Phases 3 & 4 when the scene is playing
Rewards:
- Dream No More ending
Achievement: Dream No More
Notes:
- Enter this fight by using the Dream Nail on the Hollow Knight when Hornet holds it down and Dream effects start pouring out of the crack in its mask.
- You start off this fight with the maximum possible health automatically, but your soul meter will be at whatever level you were at when you entered the Dream realm from the Hollow Knight fight. As such, do not waste soul by healing when Hornet is holding down the Hollow Knight.
- This boss is the only one in the game which doesn’t do contact damage, so as long as the Radiance isn’t about to start another attack (which could potentially spawn on top of its body) you can jump directly at it to attack.
- Lore and references about the Radiance are scattered about Hallownest. The Seer’s ascension provides the most lore, but tablets in the Teacher’s Archive and White Palace also reference her existence. Furthermore, a statue of her exists at Hallownest’s Crown (with a Pale Ore).
Godhome variant: Absolute Radiance
Location: Godhome (Pantheon of Hallownest, Boss #42)
Requirements to access: All bosses, Pantheon of the Knight, Void Heart
Differences:
- Faster attacks
- Circle spear attack now has two circles (slightly offset of each other)
- Homing balls now come in sets of 4
- Phase 6 – Constant homing balls with only two small platforms
Rewards:
- Embrace the Void ending
Achievement: Embrace the Void
Grimm Troupe (Dirtmouth)
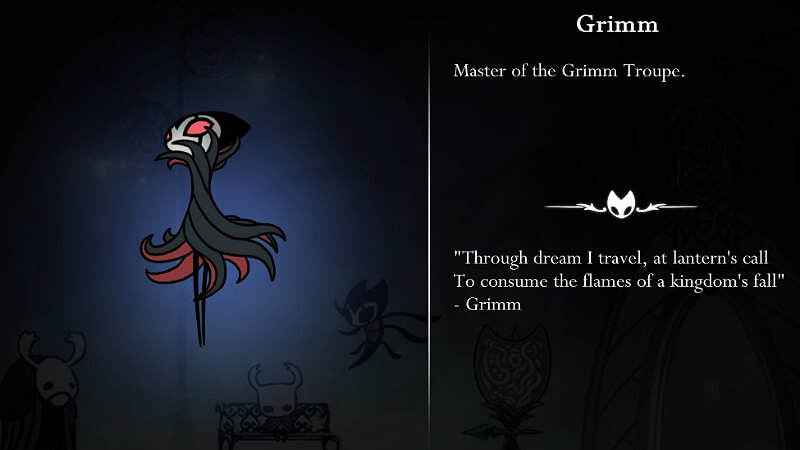
Grimm
Location:
Requirements to access: Dream Nail, Mantis Claw, Grimmchild charm with 6 flames (equipped)
Required to beat game: No
Boss Attacks:
- Ground swipe followed by uppercut into air that spawns several large fires that arc to the ground
- Straight-line charge from mid-air followed by ground charge
- Evenly spaced spikes from ground
- Bat projectiles that move horizontally and slightly home in (single, followed by two in quick succession), fire column at Grimm’s front with each projectile launch
- Many small fireballs moving horizontally from center of single or double stacks (attack occurs at fixed health increments: 75%, 50%, 25%)
Dodging Strategies:
- Shade cloak through Grimm during swipe and walk to where fire won’t land; alternatively, walk or dash away from him during swipe
- Jump (preferably double jump) and dash (or nail pogo) over him
- Walk to a gap between the spikes
- Jump and dash over (or shade cloak through) the projectiles coming at you from near the ground
- Stay near the edge and do small jumps over the ground-level fireballs as well as large jumps over the double-stacked fireballs
Best Attack Opportunities:
- Bat projectile attack
- Immediately following spike attack
Best Healing Opportunities:
- During spike attack once in safe spot
- During stagger (Grimm splits into many bats)
Rewards:
- Grimmchild charm upgrade
- Charm notch
Achievement: Grand Performance
Notes:
- To unlock Grimm, you must summon the Troupe by going to Howling Cliffs and find a breakable wall on the right side of the large room with the Whispering Root. Behind that wall is a corpse (with a Wanderer’s Journal) with another breakable wall next to it. Beyond that will be the ruins of the Nightmare Lantern as well as the corpse of a large bug behind a fake wall. The corpse must be Dream Nailed to restore the previous room, at which point you can hit the base of the Nightmare Lantern multiple times to light it. Return to Dirtmouth and you will find the Grimm Troupe left of Sly’s shop. Speaking to Grimm in the big tent gives you the Grimmchild charm. Two sets of 3 flames must be gathered with the Grimmchild charm equipped before you can fight Grimm (you must return to Grimm after collecting each set with the charm equipped).
- If you attack Grimm at the start of the fight when he bows, he will screech at you and immediately do the small fireball attack.
- If you attack Grimm too early while he’s preparing the ground swipe, he will dodge backwards and immediately follow-up with the same swipe. Similarly, if you attack Grimm while he prepares for the bat projectile attack, he will teleport to the other side of the room and launch a different pattern of bat projectiles (a pair – one high and one low).
Dream variant: Nightmare King

Location: (Same as above)
Requirements to access: Grimmchild charm with 9 flames (equipped)
Differences:
- Faster movement
- All attacks and contact deal 2 damage
- Mid-air charge followed by ground charge now leaves a trail of fire
- Grimm is not attackable during ground spike attack
- Different pattern of bat projectiles (high, low, high, low in quick succession)
- Set of 4 targeted fire columns attack that occur one at a time (dodge by walking across ground to stay ahead of the columns; can hit Grimm during this attack; can heal with Quick Focus if you start before the 4th column goes off)
Reward: Grimmchild charm upgrade
Achievement: Ritual
Notes:
- This is the only dream version of a boss which contributes completion percentage.
- Beating this dream boss completes the Grimm Troupe Ritual and causes Grimm to disappear (but not Divine). An alternative end to the Grimm Troupe quest is to find the flame in Deepnest and then visit the Nightmare Lantern to banish the Grimm Troupe (including Divine). Doing so results in you losing the Grimmchild charm, but a new NPC in Dirtmouth will give you the Carefree Melody charm as a replacement.
Godhome (Royal Waterways)
Location:
Nailmasters Oro & Mato (Pantheon of the Master)

Requirements to access: Vengefly King, Gruz Mother, False Knight, Massive Moss Charger, Hornet (Greenpath), Gorb, Dung Defender, Soul Warrior, Brooding Mawlek
Required to beat game: No
Boss Attacks:
- Jump into air followed by drop slash
- 2 Nail swipes
- Oro: Full room Dash Slash nail art
- Mato: Cyclone Slash nail art (starts on ground, rises into air, ends with drop slash)
Dodging Strategies:
- Dash away from the drop location
- Dash away or double jump over
- Double jump over
- Double jump over at start of attack, then dash/walk along ground in opposite direction Mato’s moving
Best Attack Opportunities:
- After each attack
Best Healing Opportunities:
- When both are on the opposite side of the room
- Immediately after Oro is defeated before Mato drops in
Rewards:
- Completion of Pantheon of the Master -> progress towards unlocking Pantheon of the Knight
Achievement: Brotherhood
Notes:
- Fight begins with only Oro, but after you defeat him and he collapses Mato drops in and you fight both at the same time.
- Each Nailmaster can only do their own respective Nail Art.
- Against the pair, it is recommended to defeat Nailmaster Oro first since Dash Slash has a greater coverage range of the room.
Paintmaster Sheo (Pantheon of the Artist)
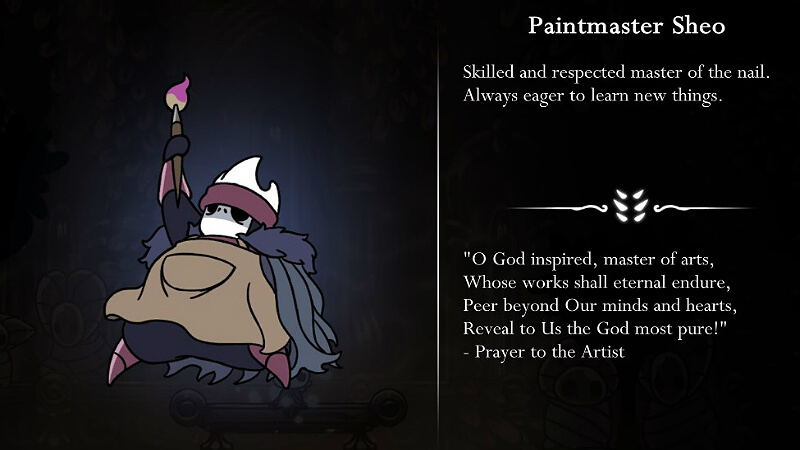
Requirements to access: Xero, Crystal Guardian, Soul Master, Oblobble, Mantis Lords, Marmu, Nosk, Flukemarm, Broken Vessel
Required to beat game: No
Boss Attacks:
- Red: Jump into air, throw arcing paint blobs (3 on each side) -> drop attack
- Blue: 3 arcing paint blobs in front (different arcs that land at different distances)
- Yellow: Full room Dash Slash nail art
- Pink: Great Slash nail art -> random paint blobs fall from ceiling
Dodging Strategies:
- Walk to gap in paint blob drop spots (dash to avoid Sheo’s drop)
- Walk/dash to gap in paint blob drop spots
- Time double jump
- Dash away from Great Slash -> walk to gap in paint blob drop spots
Best Attack Opportunities:
- After each attack
Best Healing Opportunities:
- During stun
- Immediately after attack if on opposite side of room (best after yellow attack)
Rewards:
- Completion of Pantheon of the Artist -> progress towards unlocking Pantheon of the Knight
Achievement: Inspiration
Notes:
- She can only consecutively chain his blue attack.
Great Nailsage Sly (Pantheon of the Sage)
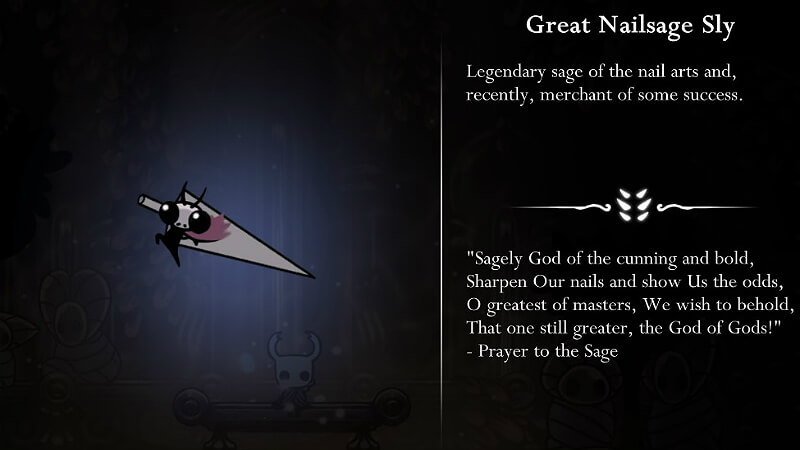
Requirements to access: Hive Knight, Elder Hu, The Collector, God Tamer, Grimm, Galien, Uumuu, Hornet (Kingdom’s Edge)
Required to beat game: No
Boss Attacks:
- 3 nail swipes (3rd swipe becomes jump with circling disk)
- Jump into air followed by drop slash and upswipe
- Cyclone Slash nail art: starts in mid-air, then goes along ground
- Great Slash nail art (does 2 damage)
- Full room Dash Slash nail art
- Phase 2 – Random bouncing around the room before approaching and doing circling disk attack
Dodging Strategies:
- Walk/dash away
- Walk/dash away
- Dash to wall and wall jump until attack ends
- Dash away (or Shade Dash through to cancel attack)
- Double jump above and over
- When he approaches, walk away and immediately turn around after attack ends to land a few hits
Best Attack Opportunities:
- After each attack
Best Healing Opportunities:
- During stun
Rewards:
- Completion of Pantheon of the Sage -> progress towards unlocking Pantheon of the Knight
Achievement: Focus
Pure Vessel (Pantheon of the Knight)
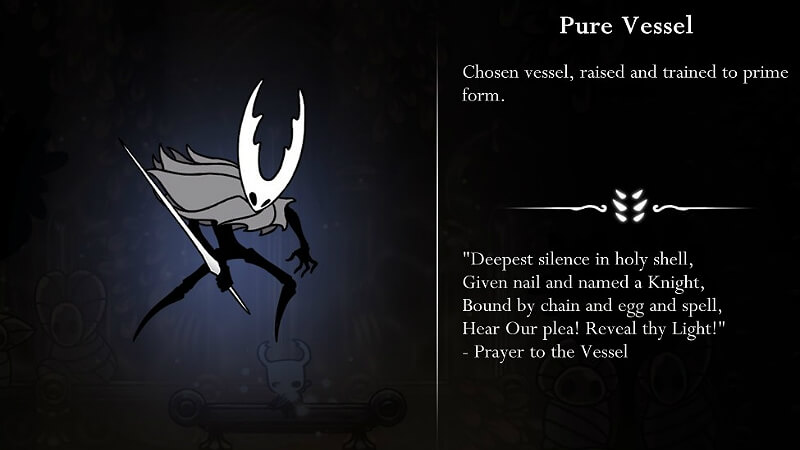
Requirements to access: Pantheons of the Master, Artist, and Sage; Enraged Guardian, Lost Kin, No Eyes, Traitor Lord, White Defender, Failed Champion, Markoth, Watcher Knight, Soul Tyrant
Required to beat game: No
Boss Attacks (all 2 damage):
- Triple nail swipe
- Ground nail charge
- Spears shoot out of chest in straight lines (starts aiming at ground near self then angles upward)
- Jump into air with dive -> equally spaced spears pop out of ground
- Large white circle around self -> smaller white circles over full room (< 1/2 health)
- Void tendrils from chest across full room (< 1/4 health)
Dodging Strategies:
- Double jump over or shade dash through
- Double jump over or shade dash through
- Shade dash at start of attack towards boss (less consistently: double jump or walk to gap)
- Dash away from drop location -> walk to gap in spears
- Dash away from boss -> position yourself to avoid white circles
- Time double jump over tendrils
Best Attack Opportunities:
- After each attack
Best Healing Opportunities:
- During stun
- During flashing white circle attack after in safe location
Rewards:
- Completion of Pantheon of the Knight -> unlock Pantheon of Hallownest
Achievement: Soul & Shade
Missable Bosses
Grey Prince Zote
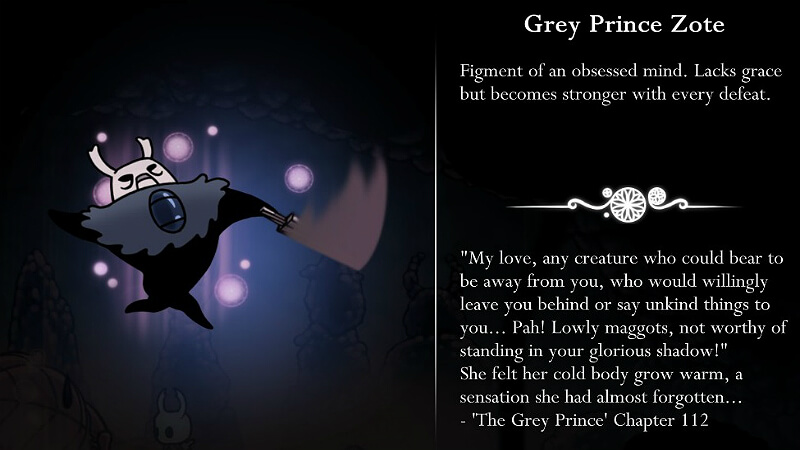
Location: Basement of Bretta’s House
Requirements to access: Dream Nail, rescue Zote at both places he’s trapped (Vengefly King in Greenpath & past a Corpse Creeper enemy gauntlet in Deepnest) and fight Zote in the Trial of the Warrior at the Colosseum of Fools, rescue Bretta from Fungal Wastes
Required to beat game: No
Boss Attacks:
- Leap with nail slash that causes tall shockwave in direction of leap and short shockwave in opposite direction
- Series of small jumps with short shockwaves in both directions
- Jump into the air followed by dive that lands at your current position producing tall shockwaves in both directions
- Nail waving while charging at you, followed by a trip
- Spawns flying mini-versions of himself (jumping versions added starting from fight #2)
- Spawns exploding floating mini-versions of himself (starting from fight #3)
Dodging Strategies:
- Dash away and follow up by jumping over the shockwave
- Jump over the shockwaves
- Wait until you hear his grunting after he disappears and dash away from your current location. Jump over the shockwave
- Nail pogo on him
- Use your nail to kill them as soon as possible
- Use spell shot to remove some of them and then manuever yourself to the clear part of the room.
Best Attack Opportunities:
- Nail pogoing when he’s charging at you waving his nail
- During his occasional trips that follow several of his attacks.
- When he’s spawning mini flying/jumping versions of himself.
Best Healing Opportunities:
- During stun
Rewards:
- 300 essence (first clear only)
Achievement: Dark Romance
Notes:
- Getting this boss requires you to take the “Rivalry” route with Zote. The point at which this choice occurs is when Zote is captured by the Vengefly King in Greenpath. You have approximately until when you acquire Mantis Claw in Fungal Wastes to go back and rescue him before he dies. (Note: Zote cannot die when he’s trapped in Deepnest)
- You can fight this boss an infinite number of times.
- Starting from fight #4, attacks do one extra damage compared to each previous fight.
- Starting from fight #9, the mini-versions that are spawned also increase by one extra damage compared to each previous fight.
- For the first 4 times you successfully defeat him, each success causes a candle to light up in Bretta’s basement. After 4 successes, something happens to Bretta. After 10 successes, Zote’s statue turns gold.
- The Godhome version of this boss is fight #3 (all minion variations, attacks only do 1 hp damage).
Original Link – Continuation of discussion


Add comment