This is a detailed guide about Charms in Hollow Knight: Where and how to acquire all Charms and Charm Notches, what they do exactly (including very specific values), listing strong and secret combinations and explaining what ‘overcharming’ is. This guide is updated for the »Godmaster« content patch.
Introduction

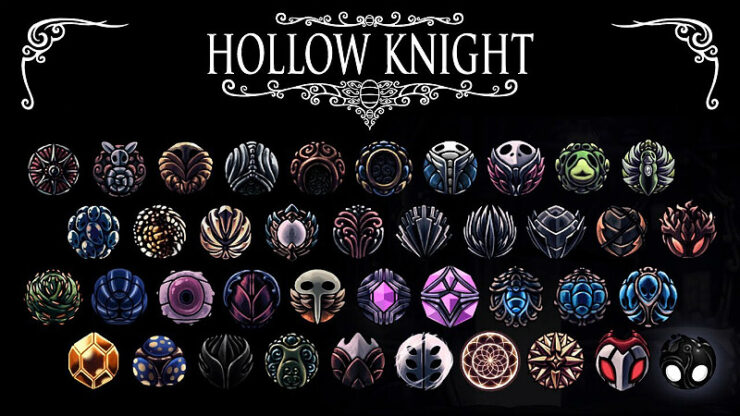
The Charm Collection section is split into five parts, due to Steam guide limitations – but sorted accordingly to the four rows shown in the Charm Collection menu within the game.
Important note: All Charm effects, as explained below, only work when having the associated Charm equipped – with only one(?) explicitly mentioned exception.
There’s a total of 42 different Charms and 11 Charm Notches to find and buy in Hollow Knight. One of them – the last slot in the Charm Collection menu and typically also the last Charm to acquire – is split into three parts, requires some effort to get and is needed for secret alternate endings to the story. Collecting all Charms enables buying Salubra’s Blessing from Charm Lover Salubra inside her shop in the bottom right/south-east corner of Forgotten Crossroads. This adds completely refilling your Vessel with Soul over a short time when resting at a bench long enough.
Definitions & Symbol Explanation:
For easier visualization and comprehending information faster I’ll be using ⊚ for empty and ⦿ for filled Charm Notches and Charm Notch costs, so it’s fairly easy and fast to check if certain Charms could combine into a (good) build.


Masks = The character’s life, also known as hearts or health (points)
Soul = The character’s mana, acquired by hitting enemies, used for Focusing and casting spells
Focus / Focusing = Channeling Soul for healing
Charms 01-10

This list will number and name every Charm of the Charm Collection menu’s first row, it’s Charm Notch cost, effect and where or how to receive it from top left (01.) to bottom right (10.)
01. Wayward Compass
Shows the character’s location on the map, even without the particular map of that region / Dirtmouth – Iselda’s & Cornifer’s Mapmaker Shop – bought from Iselda for 220 Geo inside, after meeting her husband Cornifer in Forgotten Crossroads
Automatically collects Geo on the floor, even from spikes / Dirtmouth – Sly’s Merchant Store – bought from Sly inside for 300 Geo, after rescuing him in the bottom right/south-east corner of Forgotten Crossroads
Increases the invincibility duration after taking damage to 2 seconds / Dirtmouth – Sly’s Merchant Store – bought from Sly inside for 200 Geo, after rescuing him in the bottom right/south-east corner of Forgotten Crossroads
Increases the Soul gained from hitting enemies by ~27%¹ / Forgotten Crossroads – Ancestral Mound – found on an altar to the left after fighting the Elder Baldur inside
Increases the damage and size of spells by ~33% / Forgotten Crossroads – Charm Lover Salubra’s Shop – bought from Charm Lover Salubra in the bottom right/south-east corner for 220 Geo
Increases the Soul gained from hitting enemies by ~45%¹ / Resting Grounds – Secret tunnels below the breakable stone coffin at the bottom of the Spirit tower(?) – in the bottom right/most south-east corner, behind a secret/breakable(?) wall
Decreases the cooldown for dashing continuously by 50% and enables dashing downwards / Fungal Wastes – Dashmaster statue – outside and bellow/south-east of the Mantis Village, in front of the entrance to the Royal Waterways
Increases the character’s movement speed by ~20,5% / Dirtmouth – inside Sly’s Merchant Store – bought from Sly for 400 Geo, after rescuing him in the bottom right/south-east corner of Forgotten Crossroads and bringing him the Storeroom Key, found in Crystal Peak in the top right/north-east corner of the first long upwards shaft
Gives 15% Soul when taking damage / Forgotten Crossroads – Grubfather – given as reward for rescuing 10 Grubs and returning to him in the top left/north-west corner
When being at full health: Adds shooting a medium range beam of energy to regular Nail attacks, dealing 50% of the Nail’s damage / Forgotten Crossroads – Grubfather – given as reward for rescuing all 46 Grubs and returning to him in the top left/north-west corner
¹ Soul Catcher and Soul Eater stack additively(?), increasing Soul gained by ~72%(?)
Charms 11-20

This list will number and openly name every Charm of the Charm Collection menu’s second row, it’s Charm Notch cost, effect and where or how to receive it from top left (11.) to bottom right (20.)
Gives 2 additional Masks – but the Charm breaks when dying, making it unequippable until being repaired / Fungal Wastes – Leg Eater ‘Shop’ – bought from Leg Eater for 350 Geo, in a room right/east of the first long shaft just below Forgotten Crossroads / (The Charm can be repaired by Leg Eater for 200 Geo)
Gives 2 additional Masks / Dirtmouth – Divine’s tent – bought from Divine for 12.000 Geo, after finishing her dialogue when giving the fragile version to her by equipping it and talking to her / (As the name implies, this version no longer breaks when the character dies)
Increases the Geo dropped from enemies by 60%² – but the Charm breaks when dying, making it unequippable until being repaired / Fungal Wastes – Leg Eater ‘Shop’ – bought from Leg Eater for 250 Geo, in a room right/east of the first long shaft just below Forgotten Crossroads / (The Charm can be repaired by Leg Eater for 150 Geo)
Increases the Geo dropped from enemies by 60%² / Dirtmouth – Divine’s tent – bought from Divine for 9.000 Geo, after finishing her dialogue when giving the fragile version to her by equipping it and talking to her / (As the name implies, this version no longer breaks when the character dies)
Increases the Nail’s damage by 50%³ – but the Charm breaks when dying, making it unequippable until being repaired / Fungal Wastes – Leg Eater ‘Shop’ – bought from Leg Eater for 600 Geo, in a room right/east of the first long shaft just below Forgotten Crossroads / (The Charm can be repaired by Leg Eater for 350 Geo)
Increases the Nail’s damage by 50%³ / Dirtmouth – Divine’s tent – bought from Divine for 15.000 Geo, after finishing her dialogue when giving the fragile version to her by equipping it and talking to her / (As the name implies, this version no longer breaks when the character dies)
Decreases the Soul cost for casting spells by ~29% / Soul Sanctum – in a secret room at the very top – on a secret attic atop the center, right before a screen transition the left/west
Nullifies the knockback from hitting anything with the Nail / Forgotten Crossroads – Charm Lover Salubra’s Shop – bought from Charm Lover Salubra in the bottom right/south-east corner for 120 Geo
Increases how far enemies are knocked back when hitting them with the Nail by ~50%(?) / Dirtmouth – Sly’s Merchant Store – bought from Sly inside for 350 Geo, after rescuing him in the bottom right corner of Forgotten Crossroads and bringing him the Storeroom Key, found in Crystal Peak in the top right corner of the first long shaft
Increases the attack speed with the Nail by ~35% / Kingdom’s Edge – in the bottom right/south-east corner, on an altar in front of an ancient Nail Smith(?)
Increases the range for regular Nail attacks by ~24%⁵ / Forgotten Crossroads – Charm Lover Salubra’s Shop – bought from Charm Lover Salubra in the bottom right/south-east corner for 300 Geo
Increases the range for regular Nail attacks by ~36%⁵ / Fungal Wastes – Mantis Village – to the right/east of the central room, inside a chest in a locked room that opens up after defeating the Mantis Lords
When having only 1 Mask left: Increases your Nail’s damage by 75%³ / Howling Cliffs – King’s Pass – in the bottom right corner/south-east – in a hidden cave on the right side, next to the starting point
² Fragile Greed / Unbreakable Greed does not affect mining Geo from caches, finding it in chests or getting it as a reward for certain fights(?)
³ Fragile Strength / Unbreakable Strength and Fury of the Fallen stack multiplicatively, increasing the Nail’s damage by 162,5%
⁴ The Charm Notch cost of Quick Slash was increased from ⦿⦿ to ⦿⦿⦿ in update 1.0.1.1 – this change does not affect older save files
⁵ Longnail and Mark of Pride stack additively(?), increasing the range of regular Nail attacks by ~60% – both do neither affect Nail Arts, nor Grubberfly’s Elegy
Charms 21-30

This list will number and openly name every Charm of the Charm Collection menu’s third row, it’s Charm Notch cost, effect and where or how to receive it from top left (21.) to bottom right (30.)
Emit black thorns ~1 second after taking damage, dealing 200% of your Nail’s damage to enemies in a small area around the character / Greenpath – right from the rightmost ‘column’ in the center – at the end of a short tunnel containing thorns and Lumaflies
When Focusing: Gives a shell that protects from 4 hits before temporarily breaking / Howling Cliffs – Baldur cave – in the bottom-leftish corner, right next to Greenpath, below a chest with a hole in the floor that only gives 1 Geo
Changes Vengeful Spirit/Shade Soul spell into throwing a swarm of 9/16 maggots(?) that deal 4(?) damage each on impact – opens up additional dialogue with Fluke Hermit / Royal Waterways – Flukenest – in a secret area in the bottom-left corner, received after defeating Flukemarm
Permanently emits a small toxic mist of dung around the character that damages enemies in the area of effect, dealing 1-3 damage per tick every second(?) – lowers the cost of buying and repairing the fragile Charms in the Leg Eater shop by 20% – opens up additional dialogue with Elderbug, White Lady, Relic Seeker Lemm, Dung Defender, Leg Eater and Divine / Royal Waterways – Dung tunnel – in the top right/north-east corner, received for defeating Dung Defender
Automatically uses Soul to spawn up to 4 small hatchlings, that follow the character around, attack enemies on sight and die on impact, dealing 7 damage each / Forgotten Crossroads – Infected/Glowing Womb(?) – in the center, in a secret area behind a breakable wall right/east of the False Knight boss arena
Decreases the time it takes to fully Focus by 50%(?)⁷ / Forgotten Crossroads – Charm Lover Salubra’s Shop – bought from Charm Lover Salubra in the bottom right/south-east corner for 800 Geo
Focusing heals two Masks at once for the same Soul cost, but also increases the time to Focus by 100%⁷ / Crystal Peak – Crystal Core(?) – in the lower long funnel left/west from the central mining shaft, below the funnel that connects with Dirtmouth
Gives 2 additional non-rechargeable Lifeblood Masks / Forgotten Crossroads – Charm Lover Salubra’s Shop – bought from Charm Lover Salubra in the bottom right/south-east corner for 250 Geo
Gives 4 additional non-rechargeable Lifeblood Masks / The Abyss – Lifeblood Core(?) – in a hidden cave, behind a locked door with a blue crystal, that opens when having at least 15 Lifeblood Masks
Turns all Masks into non-rechargeable Lifeblood Masks (which effectively disables healing), while increasing their amount by 50% – makes Lifeseeds follow the player character instead of running away / Howling Cliffs – Joni’s Repose – in the center, at the dead end of a long tunnel that’s accessed from the left/west cliffside
⁶ The Charm Notch cost of Flukenest was increased from ⦿⦿ to ⦿⦿⦿ in the Lifeblood update – this change does not affect older save files
⁷ Quick Focus and Deep Focus combine when worn together and therefore enable healing two Masks at the regular duration
Charms 31-38

This list will number and openly name almost every Charm of the Charm Collection menu’s fourth row, it’s Charm Notch cost, effect and where or how to receive it from top left (31.) to bottom right (38.)
Turns all Masks into combs, automatically, but slowly healing only the last lost Mask over 10 seconds – makes all Hive enemies (bees) passive and even removes their contact damage, until being attacked themselves / The Hive – in the bottom right/south-east corner – on an altar(?) at a dead end behind the Hive Knight boss fight
When Focusing: Emits a large cloud of poisonous spores damaging enemies by dealing 1-2 damage per tick for X seconds – enables reading a certain inscription in the bottom right/south-east corner of Kingdom’s Edge and understanding Mr. Mushroom, therefore activating a secret post-credit scene, everywhere falsely referred to as the fourth ending / Fungal Wastes – in the bottom left/south-east corner, next to the secret ways into Deepnest and Queen’s Gardens
Damages enemies when dashing through them with the Shadow Cloak, dealing the same damage as a regular hit with the Nail / Deepnest – right next and underneath/south-west of the Tram Station – behind an Abyss(?) beam/black wall, that needs the Shadow Cloak
When Focusing: Turns the character into a slug(?), enabling crawling movement / Lake of Unn – behind/beneath the lake itself – in a dead end, given when interacting with Unn(?)
Decreases the time to charge a Nail Art by 50%⁷ – enables additional dialogue with all three Nailmasters / Dirtmouth – Sly’s Merchant Store – in the basement, after rescuing him in the bottom right/south-east corner of Forgotten Crossroads and obtaining all three Nail Arts – given by talking to Nailsage Sly
Spawns up to 3 weaverlings, that will crawl – and even jump – around the floor and attack enemies autonomously, dealing 3 damage per hit – opens up additional dialogue with Midwife / Deepnest – Weaver’s Den – found inside on a small platform next to some eggs on the top floor
Decreases the time to channel and strike with the Dream Nail by 62,5% (from 2,4 to 0,9 seconds) and increases the Soul gain from hitting enemies with it by 50% (from filling 33% to 66% of the Soul Vessel) – increases the chance to gain Essence from killing regular enemies by 100% / Resting Ground – Spirit Tower(?) – given to by The Seer after collecting 500 Essence with the Dream Nail
Conjures a golden shield that rotates around the character, spins faster when Focusing, pushes outwards a little bit when attacking with the Nail, blocks enemy projectiles and damages enemies on contact, doing the same damage as the character’s Nail, which results in the shield collapsing for a few seconds / Resting Grounds – found on an altar in a secret room below the Seer, hidden behind a breakable wall
⁷ Information on Nail Arts: Great Slash and Dash Slash deal 250% and Cyclone Slash deals 3-7 hits of the Nails regular damage.
Charms 39-40

This list will number and openly name the last two Charms 39. and 40. of the Charm Collection menu’s fourth row, their Charm Notch cost, effect and where or how to receive them.
Spawns a Grimm familiar that follows the character – absorbs Scarlet Flames and shows them on the map – allows talking to Troupe Master Grimm after collecting 3 Scarlet Flames – opens up additional dialogue with White Lady / Dirtmouth – inside the Grimme Troupe’s tent – given by Troupe Master Grimm after talking to him for the first time, after lighting the Nightmare Lantern in the south-east corner of Howling Cliffs
Spawns a Grimm familiar that follows the character, attacks enemies autonomously – absorbs Scarlet Flames and shows them on the map – allows talking to and fighting Troupe Master Grimm after collecting another 3 Scarlet Flames – opens up additional dialogue with White Lady / Dirtmouth – inside the Grimme Troupe’s tent – given by Troupe Master Grimm when talking to him after collecting 3 Scarlet Flames
Spawns a Grimm familiar that follows the character, attacks enemies autonomously dealing more damage – absorbs Scarlet Flames and shows them on the map – enables fighting Nightmare King Grimm after collecting at least another 3 of 4 Scarlet Flames – opens up even more additional dialogue with White Lady / Dirtmouth – inside the Grimme Troupe’s tent – given by Troupe Master Grimm after defeating him
Spawns a Grimm familiar that follows the character and attacks enemies autonomously dealing even more damage / Dirtmouth – inside the Grimme Troupe’s tent – acquired after defeating Nightmare King Grimm / (Choosing this path grants the final form of the Grimmchild Charm, but makes acquiring Carefree Melody impossible)
Grants a chance of negating all damage from an incoming attack – the probability depends on the number of hits taken, the more hits taken, the higher the chance, starting at 0% and raising the chance by ~10% per hit / Dirtmouth – given by Nymm after talking to him – Nymm only appears in Dirtmouth after banishing the Grimm Troupe by destroying the Nightmare Lantern in Howling Cliffs instead of fighting Nightmare King Grimm, after collecting all Scarlet Flames and talking to Brumm in Distant Village / (The Grimmchild Charm is completely lost and replaced with Carefree Melody, when choosing this path)
Not equipable – Starts a hidden/secret quest / Queen’s Gardens – inside the Queen’s temple(?)/refuge – in a secret area in the top left/north-east corner, the rooms before are behind an Abyss(?) beam/black wall, that needs the Shadow Cloak and are accessed from the top center
Automatically, but slowly replenishes Soul (fills 2% of the Soul Vessel per second) and enables quest progression / Ancient Basin – Palace Grounds – inside the White Palace, accessed by hitting the body of the Pale Knight with an awakened Dream Nail, at the very end/top, dropped when hitting the Pale King on his throne
Permanently equipped, not unequippable, has no Charm Notch cost – Final quest progression: Enables hitting the Hollow Knight with the Dream Nail, therefore fighting The Radiance and getting a different ending – turns all Shades/Siblings (including your own) friendly and let the character consume them in one hit – opens up additional dialogue with Hornet, The White Lady, Confessor Jiji, Bardoon and Steel Soul Jinn / The Abyss – in a secret area – while wearing the Kingsoul: Accessed by smashing the crackling floor in the center of the bottom of the pit – at the very end of this secret cave, in the bottom right/south-east corner, gained by hitting your own reflection in the cracked black orb with the awakened Dream Nail
»Hidden Dreams« – Content Update 01
This section will feature all changes regarding Charms that were made in the »Hidden Dreams« patch.
- Charm Notch cost increased from ⦿⦿ to ⦿⦿⦿
»The Grimm Troupe« – Content Update 02
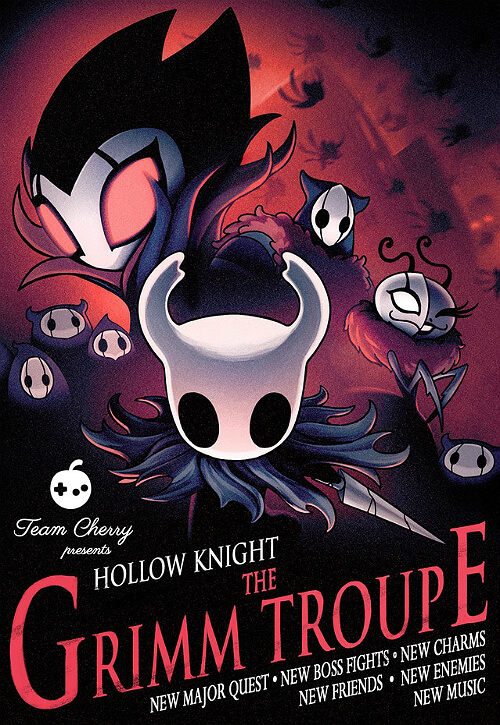
This list will number and openly name every Charm that was added in the »The Grimm Troupe« update, it’s Charm Notch cost, effect and where or how to receive it.
Increases the character’s movement speed by ~20,5% / Dirtmouth – inside Sly’s Merchant Store – bought from Sly for 400 Geo, after rescuing him in the bottom right/south-east corner of Forgotten Crossroads and bringing him the Storeroom Key, found in Crystal Peak in the top right/north-east corner of the first long upwards shaft
Spawns up to 4 weaverlings, that will crawl around the floor and attack enemies autonomously– opens up additional dialogue with Midwife / Deepnest – Weaver’s Den – found inside on a small platform next to some eggs on the top floor
Conjures a golden shield that rotates around the character, spins faster when Focusing, pushes outwards a little bit when attacking with the Nail, blocks enemy projectiles and damages enemies on contact, which results in the shield collapsing for a few seconds / Resting Grounds – found on an altar in a secret room below the Seer, hidden behind a breakable wall
Spawns a Grimm familiar that follows the character – absorbs Scarlet Flames and shows them on the map – allows talking to Troupe Master Grimm after collecting 3 Scarlet Flames – opens up additional dialogue with White Lady / Dirtmouth – inside the Grimme Troupe’s tent – given by Troupe Master Grimm after talking to him for the first time, after lighting the Nightmare Lantern in the south-east corner of Howling Cliffs
Spawns a Grimm familiar that follows the character, attacks enemies autonomously – absorbs Scarlet Flames and shows them on the map – allows talking to and fighting Troupe Master Grimm after collecting another 3 Scarlet Flames – opens up additional dialogue with White Lady / Dirtmouth – inside the Grimme Troupe’s tent – given by Troupe Master Grimm when talking to him after collecting 3 Scarlet Flames
Spawns a Grimm familiar that follows the character, attacks enemies autonomously dealing more damage – absorbs Scarlet Flames and shows them on the map – enables fighting Nightmare King Grimm after collecting at least another 3 of 4 Scarlet Flames – opens up even more additional dialogue with White Lady / Dirtmouth – inside the Grimme Troupe’s tent – given by Troupe Master Grimm after defeating him
Spawns a Grimm familiar that follows the character and attacks enemies autonomously dealing even more damage / Dirtmouth – inside the Grimme Troupe’s tent – acquired after defeating Nightmare King Grimm / (Choosing this path grants the final form of the Grimmchild Charm, but makes acquiring Carefree Melody impossible)
Grants a chance of negating all damage from an incoming attack – the probability depends on the number of hits taken, the more hits taken, the higher the chance, starting at 0% and raising the chance by ~10% per hit / Dirtmouth – given by Nymm after talking to him – Nymm only appears in Dirtmouth after banishing the Grimm Troupe by destroying the Nightmare Lantern in Howling Cliffs instead of fighting Nightmare King Grimm, after collecting all Scarlet Flames and talking to Brumm in Distant Village / (The Grimmchild Charm is completely lost and replaced with Carefree Melody, when choosing this path)
Gives 2 additional Masks / Dirtmouth – Divine’s tent – bought from Divine for 12.000 Geo, after finishing her dialogue when giving the fragile version to her by equipping it and talking to her / (As the name implies, this version no longer breaks when the character dies)
Increases the Geo dropped from enemies by 60%² / Dirtmouth – Divine’s tent – bought from Divine for 9.000 Geo, after finishing her dialogue when giving the fragile version to her by equipping it and talking to her / (As the name implies, this version no longer breaks when the character dies)
Increases the Nail’s damage by 50%³ / Dirtmouth – Divine’s tent – bought from Divine for 15.000 Geo, after finishing her dialogue when giving the fragile version to her by equipping it and talking to her / (As the name implies, this version no longer breaks when the character dies)
»Lifeblood« – Content Update 03

This section features all changes regarding Charms that were made in the »Lifeblood« patch.
Charm changes
- Increased weaverlings damage from 2 to 3, including a new attack animation
- Reduced the amount of weaverlings spawned from 4 to 3
- Weaverlings can now both jump and stagger bosses
- Charm Notch cost increased from ⦿⦿ to ⦿⦿⦿
- Flukenest: Damage decreased from 5(?) to 4(?) per maggot
- Reduced Mask amount increase from +50% (rounded down) and +1 full Mask to only +50% (rounded down)
- Enables additional dialogue with Divine
New secret Charm combinations added
Weaversong ⦿⦿ + Sprintmaster ⦿ =
Increases the weaverlings’ speed by X
Weaversong ⦿⦿ + Grubsong ⦿ =
Makes weaverlings collect X Soul on hit
»Godmaster« – Content Update 04

This section features all changes regarding Charms that were made in the »Godmaster« patch.
»Gods & Glory« was renamed to »Godmaster« to avoid legal problems with a claimed trademark for a mobile game with the same name.
The Glorify Charms feature was sadly cut from this update and is not included in the game.
Charm changes
- opens up additional dialogue with Fluke Hermit
The following text is the official announcement for Gods & Glory on team cherry’s homepage:
New Character and Quest – The Godseeker arrives (and your romance options expand). Track down this disturbing yet alluring being, break her chains and aid her in an ancient duty.
New Boss Fights – Hallownest’s greatest warriors raise their blades. Prepare yourself for giant new boss fights against the ultimate foes. Each new battle intertwines with the Godseeker’s quest. No specifics on how that’ll happen, but it may not be as you expect!
New Game Mode – Hollow Knight receives a third game mode. This ones been long requested and is a classic for the genre. Complete the Gods & Glory story to unlock the new mode.
New Music – Christopher Larkin is going all out for Hollow Knight’s final free pack, with new soaring boss tracks and giant remixes of some beloved classics.
Glorify Charms – Prove yourself and uncover a whole new depth to your charm collection.Of course, other surprises will be hiding about the place, but we can’t spoil all the fun!
Charm Notches

This section of the guide will list the location and method of obtaining all 11 Charm Notches and number them accordingly in the easiest, most common order of acquiring. The first 3 Charm Notches ⊚⊚⊚ are already present when starting the game and are unlocked after finding your first Charm.
Sold by Charm Lover Salubra inside her shop in the bottom right/south-east corner of Forgotten Crossroads for 120 Geo – available after collecting 5 Charms
Sold by Charm Lover Salubra inside her shop in the bottom right/south-east corner of Forgotten Crossroads for 500 Geo – available after collecting 10 Charms
Obtained after defeating two big mushroom enemies (officially called ‘Shrumal Ogres’) in Fungal Wastes, in the room next to the bottom left/south-west exit of the first deep, column-like cave
Sold by from Charm Lover Salubra inside her shop in the bottom right/south-east corner of Forgotten Crossroads for 900 Geo – available after collecting 18 Charms
Found in a big cavern with a LOT of explosive jellyfish (officially called ‘Ooma’) and explosive eggs in Fog Canyon, the room is on the opposite side/next to the secret passage to Fungal Wastes
Sold by Charm Lover Salubra inside her shop in the bottom right/south-east corner of Forgotten Crossroads for 1400 Geo – available after collecting 25 Charms
Obtained after successfully completing the first match, the Trial of the Warrior, in the Colosseum of Fools, in the top left/north-west corner of Kingdom’s Edge, next to the elevator connecting Resting Grounds with the eastern part of the City of Tears
Obtained after successfully defeating Troupe Master Grimm, who can be fought – after collecting the first 6 Scarlet Flames with the Grimmchild Charm equipped – in the Grimm Troupe’s tent in Dirtmouth, which appears after lighting the Nightmare Lantern in the bottom right/south-east corner of the Howling Cliffs
Overcharming

“It’s a bit of a sin to wear too many Charms at once, isn’t it? Sometimes less is more! Mmmm!
Yes, you shouldn’t try to cram on more Charms than you can handle. The effect could be positively overwhelming!”– Charm Lover Salubra
When having at least one, but fewer slots left, that a certain Charm requires to be equipped, mashing the button will equip it anyway. After 5 button presses and their corresponding attempts the Charm will be equipped, displaying a message that the character is now ‘overcharmed’. Being overcharmed doubles the damage the character takes. This is independent of how many more slots are filled.
Secret Charm Combinations I

There are a couple of secret effects when combining certain Charmes that enhance, alter or simply change the appearance of the affected abilities and/or spells.
“Do you wear a lot of Charms at once? It’s a lot of fun isn’t it, mixing and matching them to get the perfect combination? I don’t know whether you’ve noticed, but some Charms seem to like each other. Yes! Mmm! When Charms like each other, they shine even brighter and sing even more sweetly!
Even more reason to try all sorts of fun and surprising combinations of Charms!”– Charm Lover Salubra
Joni’s Blessing ⦿⦿⦿⦿ + Hiveblood ⦿⦿⦿⦿ =
Turns all Masks into Lifeblood combs, automatically, but slowly healing the last lost Lifeblood Mask over 10 seconds. (Combines with Fragile Heart ⦿⦿, but does not with Lifeblood Heart ⦿⦿ and Lifeblood Core ⦿⦿⦿. The later two simply add regular, non-healing Lifeblood Masks on top.)
Grubberfly’s Elegy ⦿⦿⦿ + Fury of the Fallen ⦿⦿ =
When having only 1 Mask left: Adds shooting a red medium range beam of energy, dealing increased (87,5% of your Nail’s) damage, to regular Nail attacks. (Stacks with Fragile Strength ⦿⦿⦿ in the same way as normal attacks, increasing the energy beam’s damage to 131,25%.)
Nailmaster’s Glory ⦿ + Fury of the Fallen ⦿⦿ =
When having only 1 Mask left: Increases the damage of Nail Arts by X%. (Does not stack with Fragile Strength ⦿⦿⦿ – as Nail Arts in general do not.)
Spore Shroom ⦿ + Defender’s Crest ⦿ =
When Focusing: Emits a huge toxic cloud of dung that does more damage to enemies in the area of effect over X seconds. Still does 1-2 damage per tick, but decreases the tick interval by 50%.
Spore Shroom ⦿ + Deep Focus ⦿⦿⦿⦿ = While Focusing: Roughly estimated doubles the radius of the toxic cloud that is emited.
Spore Shroom ⦿ + Defender’s Crest ⦿ + Deep Focus ⦿⦿⦿⦿ = When Focusing: Emits a gigantic toxic cloud of dung that does more damage to enemies in the area of effect over X seconds. Still does 1-2 damage per tick, but decreases the tick interval by 50%.
Flukenest ⦿⦿⦿ + Defender’s Crest ⦿ =
Changes the Vengeful Spirit/Shade Soul spell into throwing a big toxic maggot(?) that explodes on contact or after time, dealing 44-46 damage and emitting a poisonous cloud dealing 2/4 damage per tick for X seconds
Glowing Womb ⦿⦿ + Defender’s Crest ⦿ =
Automatically uses Soul to spawn up to 4 toxic hatchlings, that follow the character around, attack enemies on sight and explode on impact dealing 13 damage each, emitting a small, short lasting cloud of poisonous mist, dealing 1-2 damage per tick every second(?)
Glowing Womb ⦿⦿ + Fury of the Fallen ⦿⦿ =
When having only 1 Mask left: Automatically uses Soul to spawn up to 4 red glowing hatchlings, that follow the character around, attack enemies on sight and explode on impact dealing 15(?) damage each
Flukenest ⦿⦿⦿ + Shaman Stone ⦿⦿⦿ =
Increases the damage and size of the Vengeful Spirit/Shade Soul maggots
Secret Charm Combinations II

Sharp Shadow ⦿⦿ + Dashmaster ⦿⦿ =
Increases the damage of dashing through enemies by ~50%
and increases the distance traveled by ~33%.
Sprintmaster ⦿ + Dashmaster ⦿⦿ =
Further increases movement speed
Dreamshield ⦿⦿⦿ + Dream Wielder ⦿ =
Increases the size of the Dreamshield by ~20%
Grubsong ⦿ + Grubberfly’s Elegy ⦿⦿⦿ =
Increases the Soul gained when taking damage to 25%
Weaversong ⦿⦿ + Sprintmaster ⦿ =
Increases the weaverlings’ speed by X
Weaversong ⦿⦿ + Grubsong ⦿ =
Makes weaverlings collect X Soul on hit
Shape of Unn ⦿⦿ + Quick Focus ⦿⦿⦿ =
When Focusing: Crawling around as a maggot(?) is really fast.
Shape of Unn ⦿⦿ + Baldur Shell ⦿⦿ =
When Focusing: Crawl around as a snail with a blue shell.
(Purely cosmetic.)
Shape of Unn ⦿⦿ + Spore Shroom ⦿ =
When Focusing: Crawl around as a slug(?) with little mushrooms on the back. (Purely cosmetic.)
Shape of Unn ⦿⦿ + Baldur Shell ⦿⦿ + Spore Shroom ⦿ = When Focusing: Crawl around as a snail with a blue shell and little mushrooms on the back of it. (Purely cosmetic.)
Strong Charm Combinations I

Quick Slash ⦿⦿⦿ + Mark of Pride ⦿⦿⦿ + Quick Focus ⦿⦿⦿ + Soul Catcher ⦿⦿ = Long range, quick hits and therefore really high damage, especially with the Pure Nail upgrade, staying quite safe away from the enemies, collecting enough Soul and being able to heal fast. Good ‘quality’ build for many bosses and the Colosseum of Fools. Changing Quick Focus ⦿⦿⦿ to Fragile Strength ⦿⦿⦿ is an option to rely more on offense and dodging.
Mark of Pride ⦿⦿⦿ + Quick Slash ⦿⦿⦿ + Fragile/Unbreakable Strength ⦿⦿⦿ + Heavy Blow⦿⦿ = Melee Master. Long range, quick and strong hits – while pushing enemies away to stay safe. Heavy Blow can be replaced by Long Nail – when feeling safe enough with the enemies fought – to increase range and possible damage per second even further.
Joni’s Blessing ⦿⦿⦿⦿ + Quick Slash ⦿⦿⦿ + Fragile/Unbreakable Strength ⦿⦿⦿ + Steady Body ⦿ = Don’t heal at all, just face tank the enemy while dealing as much damage as quickly as possible. Works only on slow/not moving bosses and possibly needs the Pure Nail upgrade to deal enough damage.
Grubberfly’s Elegy ⦿⦿⦿ + Quick Slash ⦿⦿⦿ + Fragile/Unbreakable Strength ⦿⦿⦿ + Steady Body ⦿ = Really strong beams of light are fired very fast when attacking. (Does neither combine with Longnail, nor Mark of Pride on longer range for the beams, though both still affect the regular attacks.)
Dreamshield ⦿⦿⦿ Dream Wielder ⦿ + Grubberfly’s Elegy ⦿⦿⦿ + Grubsong ⦿ + Weaversong⦿⦿ + Sprintmaster ⦿ = Attack your enemies from afar with Spells, beams of light and really aggressive Weaverlings. A very defensive, quite passive build, focused on staying back and keeping your distance to all enemies. The included secret Charm combination “Insect Song” will always give you enough Soul to heal. Both Dreamshield or Grubberfly’s Elegy could either be replaced by Quick Focus, depending on personal preferences.
Soul Eater ⦿⦿⦿⦿ + Soul Catcher ⦿⦿ + Spell Twister ⦿⦿ + Shaman Stone ⦿⦿⦿ = Hitting any enemy once with your Nail gives enough Soul to cast a very strong spell.
Shaman Stone ⦿⦿⦿ + Spell Twister ⦿⦿ + Weaversong ⦿⦿ + Sprintmaster ⦿ + Grubsong ⦿ = The closest Charm build of playing as a mage, only using magic. Damage your enemies by shooting at them from range, while the included secret Charm combination “Insect Song” generates Soul for you.
Quick Focus ⦿⦿⦿ + Shape of Unn ⦿ + Grubsong ⦿ + Stalwart Shell ⦿⦿ + Baldur Shell ⦿⦿ = Focused on being protected during quick heals and even dogding while doing so for maximum safety. Can be combined with Spore Shroom or even the secret Charm combination Stink Bomb to deal damage while Focusing.
Fragile/Unbreakable Heart ⦿⦿ + Lifeblood Heart ⦿⦿ + Lifeblood Core ⦿⦿⦿ + Joni’s Blessing⦿⦿⦿⦿ = 22 Lifeblood Masks – don’t let your memes be dreams!
Strong Charm Combinations II
Sharp Shadow ⦿⦿ + Dashmaster ⦿⦿ + Sprintmaster ⦿ + Thorns of Agony ⦿ + Quick Focus⦿⦿⦿ + Defender’s Crest ⦿ + Spore Shroom ⦿ = Deal damage to enemies by dashing through them, even more when you fail to and at last when you’re healing. You’re a ninja, you live in the shadows and fight with all the tricks that you’ve got. (Only works with the Shade Cloak upgrade.)
Quick Focus ⦿⦿⦿ + Stalwart Shell ⦿⦿ + Grubsong ⦿ + Thorns of Agony ⦿ + Spore Shroom⦿ = Simultaneously gain Soul and damage enemies in a small area around the character when taking damage, immediately Focus afterwards to deal even more damage in a large area of effect while being invincible long enough to heal uninterupted.
Can be combined with the secret Charm combination Stink Bomb to deal even more damage while Focusing.
Deep Focus ⦿⦿⦿⦿ + Quick Focus ⦿⦿⦿ + Grubsong ⦿ + Grubberfly’s Elegy ⦿⦿⦿ = Focusing heals 2 Masks without taking more time, while taking damage gives more Soul than needed for a single Focus. An extremely safe build focusing completely on healing, that a player named Prismwind came up with.
Spore Shroom ⦿ + Baldur Shell ⦿⦿ +
Quick Focus ⦿⦿⦿ = Being safe while slowly chipping away the enemies health by Focusing quickly. Can be combined with the secret Charm combination Stink Bomb to deal even more damage while Focusing.
Grimmchild ⦿⦿ + Weaversong ⦿⦿ + Sprintmaster ⦿ + Grubsong ⦿ + Glowing Womb ⦿⦿ + Defender’s Crest ⦿ + Spore Shroom = Decimate your fows by attacking them with a whole army of minions. This is a bad meme build! While the included secret Charm combination Insect Song will generate Soul the whole time, all your Soul will always be drained by Glowing Womb, which makes Focusing to heal extremely difficult. This is a general problem with the latter Charm.
Original Link – Continuation of discussion



Add comment