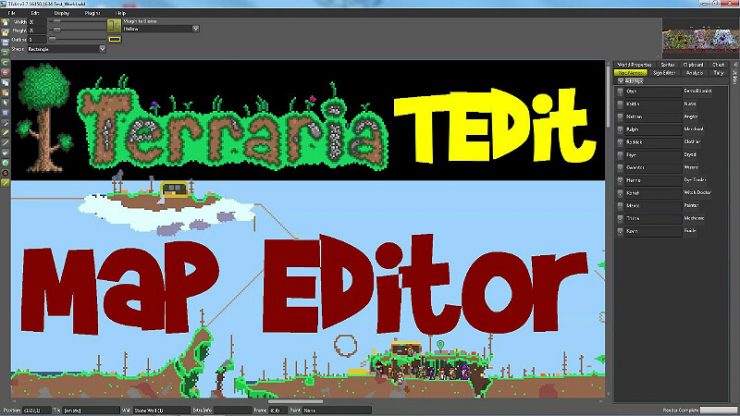
This guide will explain the Terraria Map Editor. DO NOT use this during Multiplayer Mode.
System Requirements

Required:
For Sprite Viewing:
- Terraria must be installed using Steam. If not, the data files must be in your steam folder, normally
- 64bit, program files (x86)\Steam\steamapps\common\Terraria\content folder.
- 32bit, program files\Steam\steamapps\common\Terraria\content folder.
Non-steam versions of Terraria will not be supported
If you don’t have Terraria installed on the PC you are using there will be no sprite visualization, but the application should still work if you meet the other requirements.
Note: Some older integrated graphics chipsets (old netbooks/laptops) may not work with XNA. TEdit may or may not work with these older integrated graphics chipsets.
Getting Started
Warning: Back-up your files before you edit anything!
Downloading TEdit: Link
Loading up the Editor:
To load up the editor, if using Windows you can find it under All Programs in the Start Menu, under TEdit. You can also start the program from the folder it was installed in, it should be named TEditXna.
Moving around in the Editor:
To pan (move around) the view of your world use the scrollbars located at the bottom and side, or hold down the middle mouse button and move your mouse around, or use the arrow keys Shortcuts and Keybindings.
To zoom in or out of the map roll you mouse wheel. You can also use Ctrl+= and Ctrl+- (these are the keys above and to the right of “P” on a Qwerty keyboard). The zooming will occur at the position of your cursor and won’t occur at all if the cursor is not within the bounds of the world display.
Next Steps:
Now that you have the editor up, you will probably want to check out The Building Blocks of Terraria, the Menubar, the Toolbar, and Information Bar pages. At some point you will also want to check out the World Properties page and learn what can be done there to help shape your world. The Clipboard page will help you out if you want to learn how to use schematics.
The Building Blocks of Terraria
Background Walls:
Background walls are the walls that are present in the background of a house, dungeon, in the dirt layer above the surface (>0ft), etc. For a house to be considered a house (for NPCs to move in, to stop mob spawns, and to set a bed) player-placed background walls must be present. Background walls are on their own layer and interfere with nothing else.
Tiles:
Tiles are the blocks that make up the world. They differ from sprites in that they are always of size 1×1 (the brush tool can paint multiple tiles at a time though) and are usually “solid”, completely inhibiting movement. However, actuators can be used to make tiles non-solid too by toggling the tile to an “inactive” state.
Liquids:
Liquids partially inhibit movement by slowing down the player when moving through them. Note that lava can destroys many sprites and is dangerous to the player.
As mentioned in the intro, in the editor you can place liquids in places they normally would not be and they will stay there. However, once you load up the map in the game they will adhere to gravity and fall down if they can, as well as destroying things if lava (where applicable). If you want them to stay where you placed them in the editor you must also contain them there as you would in game.
As mentioned, liquids can only be painted where there are no tiles. You can not overwrite tiles with liquids in the editor – you must erase the tiles first. However, liquids will draw over other liquids.
Sprites:
Sprites take on the roles of objects in the game rather than pieces of the terrain; tables, chairs, trees, flowers, etc. This means they tend to act like they are in the background and do not inhibit movement.
Mechanically they exist on the same layer as tiles and liquids, meaning they can not “share” space with tiles (or indeed, other sprites), but unlike tiles they can share space with a liquid.
Wire:
There are (currently!) three differently coloured wires; red, blue, green. Each type of wire is on its own layer and does not interfere with each other (although they can visually obscure each other). They can be placed anywhere without restrictions both in the editor and Terraria and they do not adhere to gravity.
Wires have distance limitations when connecting things, so keep that in mind. (limitations of 2000 units)
Actuators:
Actuators can be used to toggle the state of a tile (but not sprites). This makes the tile they are placed on non-solid when toggled (using wire and a switch of some form). They exist on a separate layer to anything else and can be placed with no restrictions, just like wires.
Points:
Points are a little different than the rest. You won’t see points in Terraria because they are invisible. Nevertheless, points are just as important and they can be used to shape your world in different ways.
Points refer to the location on the map that something happens. This may be the point where the nurse sleeps. It may be the point where the dungeon starts. It could even be the point where your friends enter the world for the first time to fall to their death, er, start off their adventures.
Menubar

The menubar is located at the top left of the editor.
File:
The file menu has your usual file related functions; New, Open, Save, Save As, and Exit. Some of these functions are also on the Toolbar and have Shortcuts and Keybindings.
New Function:
The New function creates a new .wld file. You have the option to name the world, select the seed (it is selected at random each time you use the New function), the height and width of the map, and the depth at which the surface and cavern levels start.
The seed is not used at the current time but will likely in the future be used for map generation (rather than the bland map that is currently created). The height and width simply determine how big your world is. Surface level is the height at which 0ft is determined, this being important for plant related properties and creatures. Bedrock level is the height at which the dirt background changes into the stony background and carries with it related properties as well (enemies etc).
Currently the New function is most useful if you are going to completely customise your map; it is synonymous of a blank canvas. However, it can also be helpful with troubleshooting as the new map will be of the same version as TEdit which may differ to a new map created in Terraria itself.
Other Functions:
Open is like it sounds, it opens a map to edit. You can open .wld, .bak, and .TEdit files. The .wld files Terraria creates are located in your My Documents/My Games/Terraria folder (if using Windows).
Save saves the changes you have made (if any). If you do not have the autosave option enabled make sure to regularly save your map.
Save As is a more specialised save function that allows you to save as a different file, useful for making different versions of the same map.
Enable Autosave is as it sounds; it turns on the autosave option. The editor should automatically save every so often, like every 5 minutes or something similar.
On Startup Check Updates does what it says (it checks for updates on startup…), while the Check For Updates option can be used to manually check for updates.
Exit quits the program.
Edit:
The Edit menu is full of basic functions like Undo, Redo, Copy, Paste, Delete. These functions are also on the toolbar and have shortcuts.
Undo reverts last change you made (or the last redo). The undo function can be used multiple times in a row to revert multiple changes. Useful.
Redo reverts the undo.
Copy temporarily saves the selection you have (using the Selection Tool) to the Clipboard. You can then paste from the clipboard or using the paste function. You can make a permanent copy by exporting the selection as a schematic to use in other maps or even to send to other people. Check the clipboard page for more information on this.
Paste will paste the copied selection/schematic. There is an option for pasting empty tiles/walls/wires/liquids located in the clipboard for some control over what is pasted.
Delete will delete EVERYTHING in the selection. This is much faster than manually erasing each layer (tile/sprite, wall, liquid, wire). Check out The Building Blocks of Terraria for more information on tiles, sprites, points, etc.
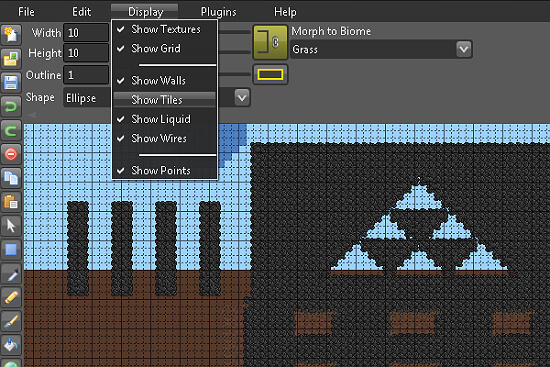
Display:
This menu has the “Show..” functions; Show Textures, Show Grid, Show Walls, Show Tiles, Show Liquids, Show Wires, and Show Points.
Show Textures can be toggled to go between Terraria textures and TEdit solid colour textures at high zoom.
Show Grid can be toggled to display or hide the grid that is shown when at high zoom. This is helpful when building projects that require precise measurements.
Show Walls, Tiles, Liquids, and Wires functions can be toggled to display or hide walls, tiles, liquids or wires. This is useful for taking building projects a layer at a time or simply making sure you are nor missing things out (walls in particular!).
Show Points can be toggled to show or hide points. Points are explained on The Building Blocks of Terraria page.
Plugins:
The plugins menu will likely grow over time as new plugins are developed. Currently, the plugins that come with the program are the Settle Sand plugin and the Simple Ore Generator plugin.
The Settle Sand plugin will basically settle sand. That is, the plugin will make sand “fall” to the lowest unit of empty space below it, as it would normally in Terraria.
The Simple Ore Generator plugin creates rings of whatever tile is currently selected (use the picky or pencil/brush tool to select the tile type) pretty abundantly throughout your world below the surface level. Its pretty simple and ugly, but it does generate ore! That is, if you have ore selected as your tile… and not dirt.
Help:
The help menu has links for various things – including this wiki! The log can be helpful in troubleshooting issues, so be sure to copy and paste it into said issues to help BinaryConstruct.
Toolbar
The tool section is located on the left of the editor.
Arrow Tool:
Shortcuts and Keybindings: A
With the arrow tool selected it is impossible to make any accidental changes to the map and it should only display a 1×1 template. This make the arrow tool useful for getting information from individual tiles via the Information Bar, which is displayed in the bottom left corner.
With the arrow tool selected you can also right-click on chests and signs to see what is inside and edit them. See the Chest Editor page for more details.
Selection Tool:
Shortcuts and Keybindings: S
When using this tool you can select a section of the map (as a rectangle) by holding down left-click. If you want to clear the rectangle you can do so by right-clicking somewhere on the map while the selection tool is selected or using Ctrl+D.
Picker Tool:
This tool “picks” things you click on. Things include tiles, walls, and liquids. Oddly, you can “pick” sprites too but they won’t be placable with the sprite tool but instead with the pencil or brush! Probably a bug to be squashed.
If you right-click on things it will pick them for the mask.
The picker tool uses the Paint Mode Tray to show what you have picked.
Pencil Tool:
Shortcuts and Keybindings: E
The pencil tool paints only one tile at a time. This makes it exceptionally useful for painting fine details or irregular shapes.
If you hold down left click you will have free drawing; i.e. you can draw in any way you like. If you hold down right click you can draw a straight horizontal line, perfect for bridges, tunnels, buildings, etc. If you hold down left and right click at the same time you can draw vertical straight lines.
The pencil tool uses the Paint Mode Tray to select what you paint.
Brush Tool:
Shortcuts and Keybindings: B
The brush tool can paint a wide area of blocks.
Like the pencil tool, straight lines can be drawn horizontally (right click)
and vertically (left click + right click). The brush tool uses the Paint Mode Tray to select what you paint and the Size Tray to select the size and shape of your brush strokes.
Fill Tool
Shortcuts and Keybindings: F
The fill tool replaces tiles/walls/liquids/empty space with other tiles/walls/liquids. Currently, you can do a contiguous fill. This means that all tiles/walls/liquids/whatever of the type you have clicked on will be replaced as long as there is a connection to the original.
You can also use the selection tool to contain a fill action.
The fill tool use the Paint Mode Tray to select what to paint.
Point Tool:
Shortcuts and Keybindings: P
This tool places points on the map by chooses the point from the drop down menu and left-clicking on the map where you want it. The points that the tool places look like this on the map:
The spawn point is where people first load up (if they have not set a bed). This tool is useful if your town is not near the default spawn point, or if you are doing a custom map and want them to start in a particular place. Make sure it is not placed on/near any tiles you wish to keep however, since the game destroys any tiles (but not sprites or walls) that are located at the spawn point when someone enters the game there.
The dungeon point is where the dungeon is located. I am not sure what exactly that does (the terrain determines the enemy type but perhaps for dungeons you also need the dungeon point?). I know it used to mean where the Old Man patrolled but he seemingly has his own point now. Best put this point at the start of the dungeon (if you have one).
The NPC points are the points where those NPCs sleeps at night and tends to patrol during the day. The NPC points will appear in the dropdown menu only as appropriate, i.e., if you have no nurse there isn’t much point in having her point in the menu (no pun intended).
The Old Man point is particularly useful as you can have him spawn in or near an arena you have built especially to fight his alter ego. He could even have his own room in your base if you so choose, but I wouldn’t recommend talking to him at night!
Sprite Placer Tool:
Shortcuts and Keybindings: T
The sprite placer tool is used with the //needs link// on the right of the editor to place sprites.
Morph Tool:
The morph tool will change whatever it is used on into the biome that is selected in the dropdown menu. It will only paint over existing tiles/walls and not empty spaces. It will only change certain types of types of tiles/walls, leaving things like ore untouched. Edge tiles will be converted into grass if applicable.
The tool will work differently at different heights. Try it out! Note that if you create enough of a biome the music will change to that biome type and monsters of that biome will spawn.
The morph tool uses the Size Tray to select the size and shape of your brush strokes.
Active Tray

The active tray is what appears at the top when you select a tool. Most tools will use the Paint Mode Tray and some will also use the Size Tray. The sprites tool will use the Sprites Tray.
Paint Mode Tray:
In the top left of the tray is the eraser toggle. When this is toggled on (gold background) you will erase whatever paint mode type you currently have selected instead of painting.
Below the eraser is the Paint Mode dropdown menu. This is where you can select between painting tiles, walls, tiles and walls at the same time, wire, or liquids.
To the right of the tray you will see the current Tile/Wall boxes if appropriate, or the liquid options.
Size Tray:
As you can probably tell, this tray determines the size of the painting template. This is used for the brush and morph tools.
The Width row is for determining the horizontal size, or the magnitude of the x-axis for those familiar with such things. The numbers refer to the number of blocks. A single dirt block would have a width of 1. Twenty dirt blocks side-by-side would have a width of 20. You can either type the number in and click somewhere else on the tray (enter doesn’t work), or use the slider.
The Height row is for determining the vertical size, or the magnitude of the y-axis. The numbers work the same way as they do for the width.
At the end of both of these rows is the “Square Width and Height” toggle. This toggle is defaulted to on (gold background) and will make the height and the width always be the same number, thus producing a square template. If you turn it off you can change the width and height independently of each other.
The Outline row turns your solid shape into a hollowed-out shape, with the thickness of the solid border being the number shown. The box at the end of the row is the toggle for turning this feature on/off.
Other:
The point tool uses just a simple dropdown menu. There isn’t much to say about this other than that the dropdown menu for the point tool will show only what makes sense at that time – i.e., No nurse? No option to move the nurse. See the World Properties page for adding NPCs.
The morph tool does use the Size tray but it does not use the Paint Mode tray. Instead it has a dropdown menu to choose from what you want to paint.
Information Bar

Starting from the left, the Information Bar comprises of the Position Box, the Tile Box, the Wall Box, the Extra Box, and the Frame Box.
Position Box:
This box gives information on the current position of the cursor on the map. The first number is the x-axis co-ordinate and the second number is the y-axis co-ordinate. The top-left is 0,0.
Tile Box:
The Tile Box gives you information on which tile type is located underneath the cursor.
Wall Box:
The Wall Box gives you information on which wall type is located underneath the cursor.
Extra box:
The Extra Box gives you information on whether there is a liquid and/or wire located underneath the cursor. The number next to a liquid is the amount of liquid in that block, where 255 represents a full block of liquid.
Frame Box:
The Frame Box gives information about the framing of the tile beneath the cursor. This is useful for the developers but not so much for the users of the editor.
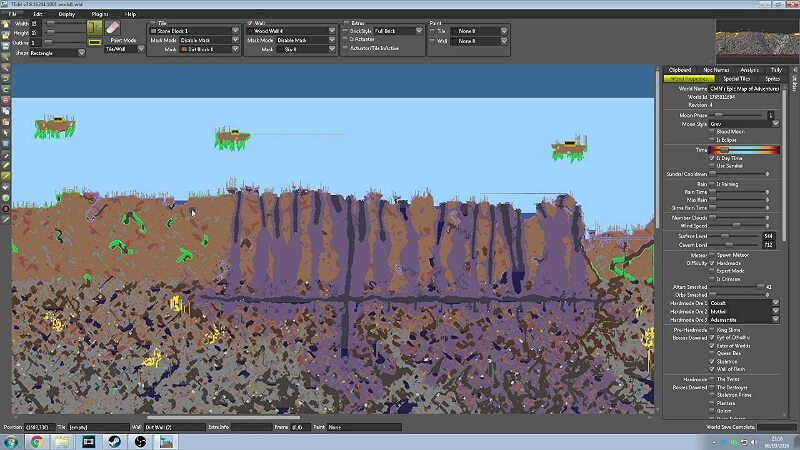
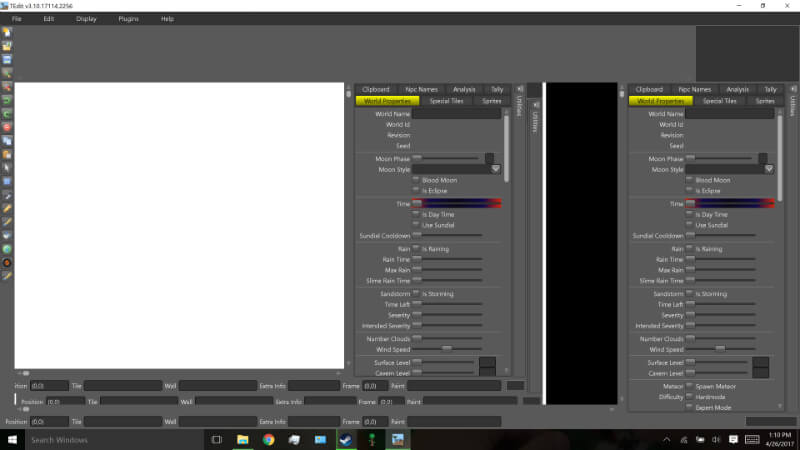
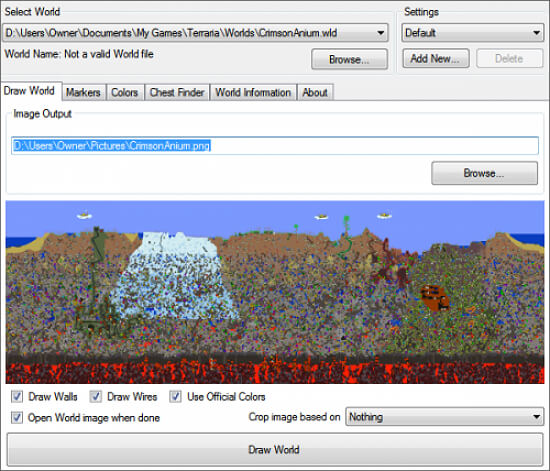
World Properties
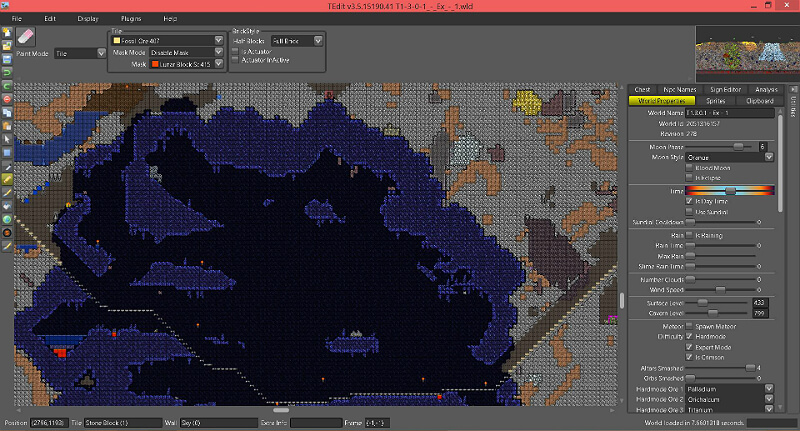
If you do not see the world properties panel (located on the right-hand side of the editor) you may have to click the utilities button (also located on the right) to make it ‘pop out’.
World Name and ID:
The world name is simply whatever you called your world. It used to be the case that just editing this would allow you change your world name and it would stay that way. However, in one of the Terraria patches this changed.
To change the world name now, change this world name in TEdit and then use Save As and save the file with the exact same new name. This works for most people.
For some people for some reason it can be more complex and involves deleting (or editing if you know how) the .map file for that character-world combination as well. What may be happening is that when you load the new-named world with a character that has already been in that world the game gets confused because that character’s .map file says the world should be called what it originally was – it then does you a “favour” and changes the world name back. Regardless of reason, it seems if you delete the .map file it will fix the problem, however, you will lose the associated discovered area of that world with that character. If you wish to do this you will find the .map file at Documents\My Games\Terraria\Players\”CharacterName” – it will have a name like 2027392058, although there may be multiple .map files for that character if that character has been to multiple worlds. Remember to do this for all characters who have already been to that world.
Regarding the world id, this is purely informative. It is not editable because we’re not entirely sure what it does… although it is possibly the seed that was used to create the original terrain (and thus changing it now would be useless anyhow since the map generation is already complete).
Moon Phase:
If you look carefully you will notice the in game moon changes each night from new moon to full moon and back! This option changes the current moon; maybe your custom map is werewolf themed?
Additionally, if you check the Blood Moon checkbox the next night you are in game will be a blood moon.
The “Is Eclipse” option starts a solar eclipse once you enter the game in Terraria (it may need to be day or wait for the next day, not tested).
Time
This scale represents the time of day/night it is in game. Move it to where you desire. The Is Day Time checkbox allows you to switch between whether the slider represents day or night, and the slider background will change to show this. The slider basically represents a 12-hour period; that period could be the day period or it could be the night period, based on whether the checkbox is ticked or not.
Rain
This scale represents the length of time rain will go on for.
Note: Currently, it seems checking or unchecking the box does not start or stop the rain. You can stop the rain by reducing its time, but there does not seem to be a way to start it; even if you adjust the scale accordingly.
Clouds
Can be used in conjunction with rain. Consists of two scales, one for the number of clouds seen in the background (possibly affecting brightness from the background); and another scale for the wind speed/direction (direction needs to be confirmed).
Smashed Orbs:
When 3 Shadow Orbs are smashed the Eater of Worlds comes after you, apparently he prefers to eat pesky heroes instead of worlds these days! Also, some events require a shadow orb to have been smashed.
Spawn Meteor:
Like the blood moon, next night you are in game say goodbye to your house. No no that will never happen. Spawn that meteor, go ahead.
Surface and Bedrock Level:
This setting lets you choose the y-coordinate (that is, the vertical height) where the world layers begin. The Surface Level is “Level” height in the game; above it is the surface world. Between the surface and bedrock is the Underground layer; it is the brown background area with inset stones that can not be removed (normally). The Bedrock is the top of the Cavern layer; it is the grey background area with inset stones that also can not be removed.
This setting could be useful in a totally underground map, or for one that had little underground, or for anything else that a creative soul can come up with!
Bosses Downed:
These options tell the game if that boss has been killed or not. Some in game events are based on this, like certain NPCs moving in, chance for Cthulhu to show up, etc. Also, if Skeletron is dead the Old Man won’t show up at the dungeon point and you can’t fight him again… unless you revive him with the editor!
NPC’s Saved:
Like the Bosses Downed options, these tell the game if you have “saved” the NPCs listed. If they are not currently saved they will appear in the world in the appropriate places. If they are saved then this will not happen. You can add the NPCs individually from the //need link// NPC Names panel.
Goblin Invasion:
The Invasion options are for goblin related mischief. The Invasion Type can be set to 0 or 1 and represents if there is an invasion or not.
The Invasion Size can range from 0 to 1000 in the editor. This represents how many goblins are left in the invasion. Set it to the number of goblins you wish to fight. Note that because of the way the game handles goblin invasions this number won’t be exact, and you’ll probably end up with a small minus number after the invasion is finished. This is normal and nothing to be worried about.
Invasion Position specifies the x-coordinate (the horizontal point) at which the invasion will focus on. Usually this is set at the original spawn point. This can be useful to change because this is usually where you will build a house with your NPCs in, and may want to fight the invasion at an arena you have prepared somewhere else.
Clipboard
Note: If you do not see the clipboard (located on the right-hand side of the editor) you may have to click the utilities button (also located on the right) to make it ‘pop out’.
Empty Clipboard:
This button removes all loaded schematics. Handy!
Import Schematic:
By clicking the Import Schematic button you can load up schematics you have made permanent copies of. Once you have clicked the button just navigate to where you put the .TEditSch file(s). You can load multiple schematics into the clipboard at the same time if you want.
Schematic packs can be found all over the Terraria Online forums.
Schematic Viewing Area:
Schematics are stored here temporarily when you press Ctrl+C while using the selection tool.
You can export the schematics to make permanent saves of them (and share them with others) by clicking on the Export button located underneath the schematic portrait.
You can paste the schematic by clicking the Paste button underneath the schematic, or using Ctrl+V to paste the last schematic in the copy history.
If you want to paste multiple copies of the same schematic you can use Ctrl+V to do this rapidly. If using Ctrl+V brings up the wrong schematic try clicking the paste button for the right schematic; the one you want paste. This will place it as the last item in the copy history making Ctrl+V paste that instead.
You can also remove individual schematics from the clipboard by clicking the remove button.
False Color Schematics
False Color Schematics:
File Format: 24 bit PNG Image
False color png uses color channels to store tile data, so you can add liquid, walls, wires etc. Note, the importer will ignored sprite tile ids and other tile ids that require UV coordinates.
Channel Data:
Red: Tile ID (0 = dirt, etc) – accepts 0-149
Green: Wall ID – accepts 0-32
Blue: Liquid Level – accepts 0-255
Alpha: Flags
Alpha Channel:
Alpha channel is used to store tile flags, e.g. is active (there is a brick here), is lava, and has wire.
The bitmask for the alpha byte is as follows:
0x80 (10000000) = Always on, so you can see stuff
0x40 (01000000) = IsActive (tile has a brick)
0x20 (00100000) = IsLava
0x10 (00010000) = Has Wire
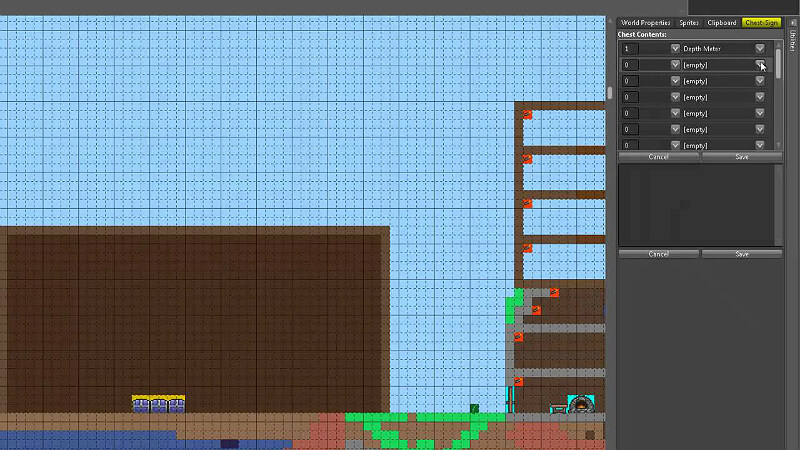
Chest Editor
The Chest utility tab is used for editing the contents of storage containers.
The first column is the quantity, the second column is the prefix and the third column is the item.
Ambiguous prefixes are differentiated as (A)ccessory, (C)ommon weapon or (R)anged weapon prefixes.
Save saves any changes you’ve made to the contents of the chest, but it does not save the world! Cancel discards any changes you’ve made.
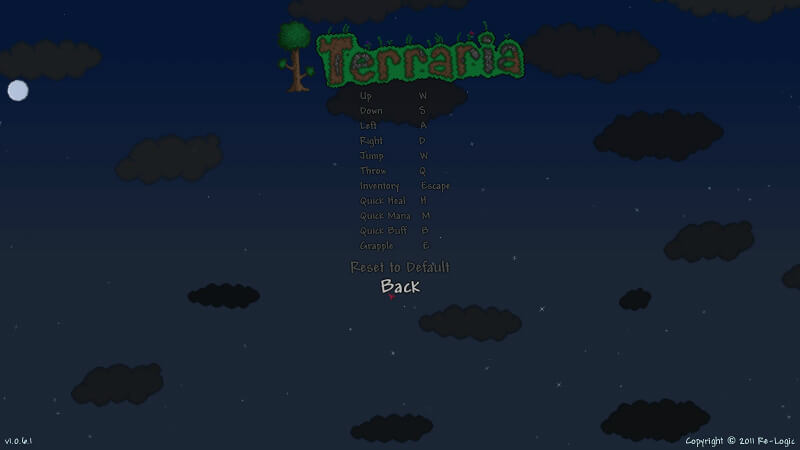
Shortcuts and Keybindings
General shortcuts (may be adding to settings in a later release, for now are fixed)
- Ctrl+A: Select All
- Ctrl+D: Clear Selection
- DEL: Delete everything in the selection
- Ctrl+C: Copy
- Ctrl+V: Paste
- Ctrl+Z: Undo
- Ctrl+Y: Redo
- Ctrl+S: Save
- Ctrl+O: Open
- Esc: Clear current paste buffer or clear selection
- Up Arrow: Pans Up
- Down Arrow: Pans Down
- Left Arrow: Pans Left
- Right Arrow: Pans Right
- Ctrl+=: Zoom In
- Ctrl+-: Zoom Out
Tool keybindings (can be changed in settings.xml):
- A: Arrow (Chest and Sign Editing)
- B: Brush (Painting tiles, walls, wires and liquid)
- F: Fill (Bucket fill tiles and/or walls)
- E: Pencil (Painting tiles, walls, wires and liquid)
- R: Picker (Left click picks tile/wall, right click picks tile mask/wall mask)
- P: Point (Places spawn, dungeon and NPC homes)
- S: Selection (Select and area for editing or copying)
- T: Sprite (Place a sprite from the sprite list)
- Z: Toggle Eraser (Toggles erase mode for bucket, pencil and brush)
- X: Swap (Swaps Tiles/Walls & Masks, Liquids based on current Paint Mode;
also Shift-X when in Tile & Wall mode)
These keybindings may be changed by editing your settings.xml file.
Settings
You may customize the default settings of TEdit by editing the settings.xml file.
Shortcut Keys:
The default keys for shortcuts are defined in the lines between <ShortCutKeys>…</ShortCutKeys>.
For example:
<Shortcut Key=”A” Tool=”Arrow” />
By changing the “A” in the example above, you can change the shortcut key for the Arrow tool to another key.
Tools:
The default settings for different Tools are defined in the lines between <Tools>…</Tools>
Paint Mode:
<Tool Name=”Paint” Mode=”Tile” />
Valid Paint Modes are Tile, Wall, TileAndWall, Wire, and Liquid.
Tiles, Walls, Masks
<Tool Name=”Tile” Tile=”0″ Mask=”0″ Mode=”Off” />
<Tool Name=”Wall” Wall=”0″ Mask=”0″ Mode=”Off” />
You can change the default Tiles, Walls and Masks by changing the bolded values above. You can get those values by looking at the dropdowns within the tool.
For example, Tile 0 is Dirt Block and Wall 0 is the Sky. You can change the Tile to Stone Block by changing the Tile value from to 1, and the Wall to Wood Wall by changing the Wall value to 4.
Mask Mode:
By default, Tile and Wall Masks are disabled. You can change the setting by changing the Mode:
<Tool Name=”Tile” Tile=”0″ Mask=”0″ Mode=”Off” />
<Tool Name=”Wall” Wall=”0″ Mask=”0″ Mode=”Off” />
The values can be Off (Disable Mask), Empty (Edit Empty Tiles) or Tile (Edit Matching Tiles).
Brush:
<Tool Name=”Brush” Width=”20″ Height=”20″ Outline=”1″ Shape=”Square” />
You can change the default brush size by editing the bolded values above.
<Tool Name=”Brush” Width=”20″ Height=”20″ Outline=”1″ Shape=”Square” />
You can change the default brush shape by editing the Shape value. Valid values are Square and Round.
How TEdit manages Saving and Backups
Saving and Backups:
This page is for those that want information on how TEdit manages saving and backups.
When using TEdit to save there should always be some version of your world available that has not been touched by TEdit (since you last played the map in Terraria). This means that if for some reason TEdit corrupted the map so it won’t load in Terraria you should still have a usable backup. The .bak files are Terraria’s backups and the .TEdit files are TEdit’s backups – therefore if you think TEdit has done something so your map will not start try replacing your .wld file with your .bak file.
When you save from TEdit, before overwriting any files, it copies the existing worldname.wld file to worldname.TEdit. Once the TEdit backup has been made it will then overwrite the original.
Terraria’s own backup files, worldname.wld.bak, are not modified in any way by TEdit (unless you explicitly go about doing so by loading up the .bak in TEdit and saving).
Here are some steps showing the process.
Key:
- Italic indicates a non-edited file
- Bold indicates an edited file
- Underline indicates a file re-saved via Terraria
Before Editing
- .wld, .bak (all files should be valid)
Open in TEdit
- .wld, .bak (all files should be valid)
Save in TEdit
- .wld, .bak, .TEdit (.bak saved from Terraria and .TEdit should be valid for the rest of the steps unless you save again)
Save a second time, or more, in TEdit
- .wld, .bak, .TEdit (.bak saved from Terraria should be valid)
Open in Terraria
- .wld, .bak, .TEdit (If you are able open the .wld file it is valid, .bak should be valid either way)
Save in Terraria (Terraria will overwrite the .bak with the pre-save .wld file)
- .wld, .bak, .TEdit (.wld saved from Terraria should be valid, .bak should be valid as well since the pre-save .wld must have been valid)
The new .wld file made when Terraria saves should be a new valid version of your world (unless Terraria itself screwed up), thus re-starting the saving/backup loop. If you want to restore the world to the very original before you made any edits (in TEdit or Terraria), I recommend making a copy of the file before doing any editing and putting it in a separate directory.
Note: If the world fails to open, the .bak should still be valid. The above assumes that all saves written by Terraria (game) are valid saves. To restore a backup, simply rename the file extension to .wld.
Original Link – Continuation of discussion

Add comment