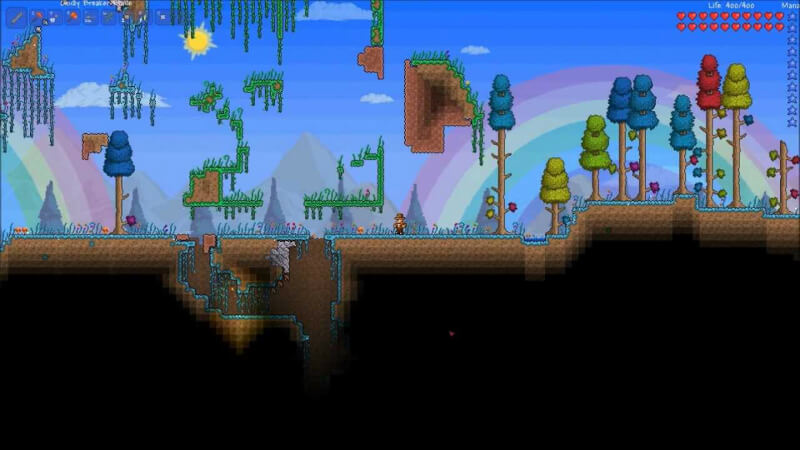
This guide will escort you through the basics of Terraria Pre-Hardmode.
It will also include how to beat all the Vanilla Bosses.
I hope this guide will help you.
(Please, if you find any grammar errors or errors in the guide itself, please just leave a nice comment and tell me which chapter it is in. Thank you!)
Basic Controls

It’s very odd that you don’t know how to control the game because you can find the controls anyway in the game itself.
(From the Main Menu, Settings > Controls > Keybindings
Playing Singleplayer or Multiplayer, Settings > Controls)
- A – Move Left
- D – Move Right
- E – Use Grapple Hook
- R – Toggle Mount
- W – Go Up (Only can be used when in a flying mount or when on a rope)
- S – Go Down (Same thing here.)
- Left Click – Use Item (Weapons, Tools, etc.)
- Right Click – Interact with an Object (Open chests, Remove torch, etc.)
- H – Drink Healing Potion (Shortcut)
- B – Drink Buff Potions (Shortcut)
- J – Drink Mana Restoration Potions (Shortcut)
- LeftControl (Ctrl) – Toggle Smart Cursor*
- LeftShift (↑ Shift) – Will (most likely) Switch to a Torch or Pickaxe/Axe in the inventory while being held down
- Escape (Esc) – Open Inventory
- +/= – Zoom In
- -/_ – Zoom Out
Smart Cursor is a feature where when it is turned on, you can place the walls of a house** much easier than when you are not using Smart Cursor.
Thank you SathraxDeprawn for giving me more uses for the Smart Cursor including:
- Being able to mine an area big enough to fit the player
- Building platforms to stairs when building diagonally without the need of a hammer
- Cutting trees without any hassle and being able to plant acorns so that they can grow properly
(Tip: Instead of playing Fullscreen, play in Borderless Window mode.)
And that is the end of this chapter.
First Steps
Okay, now that you know the controls, what should you do?
Crafting a Workbench
First, switch to the axe (by using the Scroll Wheel, clicking the axe icon or pressing 3).
Next, cut down a tree by holding down left click on a tree near you. Keep doing this until you have a decent amount of wood.
(Optional step: As you see, you have some acorns from the trees. Plant them at least 3 blocks apart from each other and wait until they grow!)
After that, craft a workbench by opening your inventory and scrolling down until you see the workbench on the left of the screen.
Your First Enemy
When you spawned, you probably saw a slime. With your workbench, craft a Wooden Sword with, that’s right, wood. Now, approach whatever slime you see, and hit it with the sword by left clicking while facing it. If it’s a green slime, it takes about 2-3 hits to kill it. If it’s blue, it would take about 3-4 hits. After killing the slime, you will get gel. This will mainly be used for crafting torches. Craft one right now, they will be useful. (They also don’t need a workbench!)
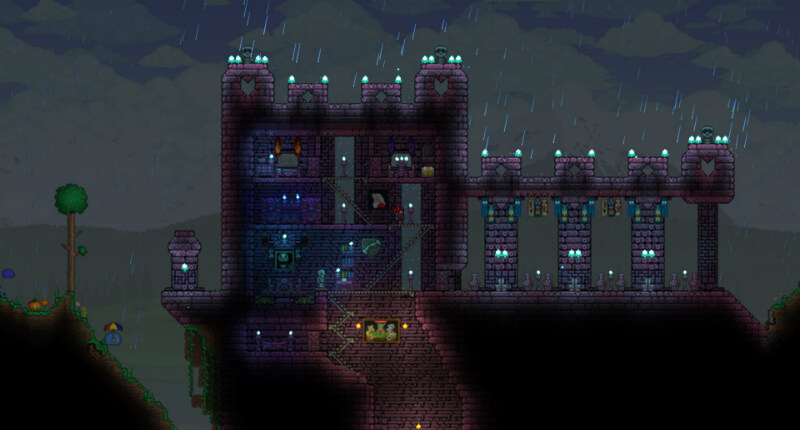
Building a House
All right, It’s time to build a valid house.
First, with your collected wood, build a “box” that is at least 9 (width) x 7 (height).
Next, break a three block high “hole” in one of the walls.
After that, craft some wooden backgrounds, a door, a table and a chair at your workbench using wood. Place the door in the three block “hole” that you put in the wall, and *turn on your smart cursor!* place all the backgrounds by just holding down left click until the “box” is filled. Place the table and chair beside each other and your house is almost finished. Just place a torch (or some other light source that you somehow found this early in the game) anywhere in the house that is aesthetically pleasing for you. That is a valid house!
The Guide
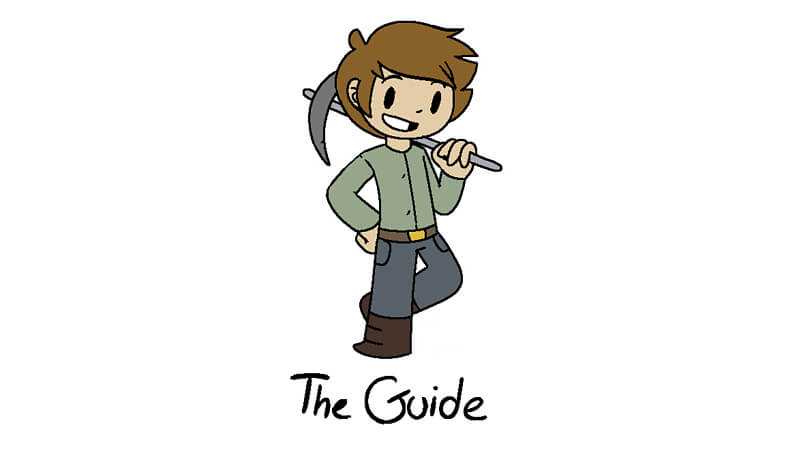
You may notice some dude with you at spawn. Don’t worry about him, he’s not gonna be much help until a few hours into the game. He will move into the house that you built if he didn’t die from a slime. (The Guide: Part 2 will come a bit later.)
Exploration
You have a sword, why not go exploring?
Well this is a pretty big problem, because back in 1.2, the Desert had no other mobs than Vultures and Antlions, which are two very easy enemies to beat. Now that we have 1.3(.5), there are Antlion Chargers and Antlion Swarmers which are both HARD enemies (Both of them are pretty quick and do about 30 damage). Deserts can be found on either side of the world, so you probably couldn’t explore that far. Later, if you get better weapons, you could fight these Antlion things. (Exploration: Part 2 will come out soon too!)
Pots
While exploring a bit, you might have found pots. Break them with your axe, pickaxe or sword and you will get different items that will be useful. Ropes can help you get up or down places without taking much fall damage. Shurikens are pretty strong weapons (which can be used to fight the first boss!) but they have no knockback at all so you also have to run away from stronger enemies. Torches do exactly what you think they do. Lesser Healing Potions will heal 50 of your health but they do have a 1-minute cooldown. Other items that can be obtained from Pots can be found here.
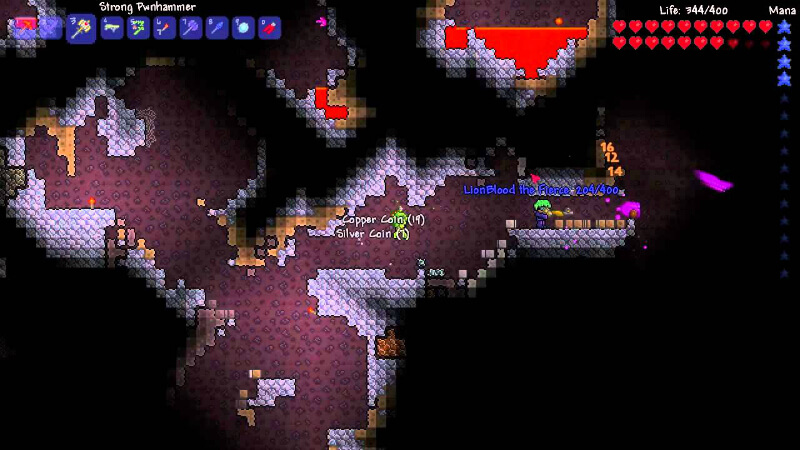
Caving
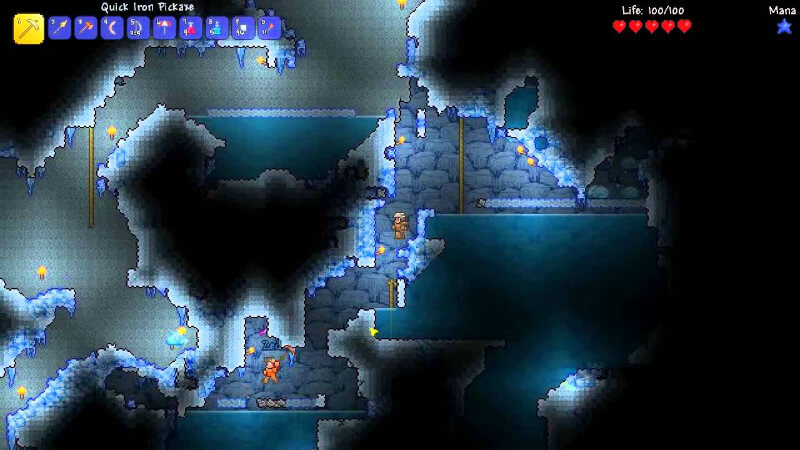
It’s time for one of the most essential things in the game.
Finding a Cave
If you explored a bit, you probably would’ve found a cave. If you don’t have a cave anywhere near, dig a hole straight down with Smart Cursor on. If you dig down enough, you might find a cave (or an Underground Cabin 😉 )
Cave Survival
Before the cave exploration, I will talk you through surviving IN a cave. With your pickaxe, break and collect some dirt and stone. I swear, they will be useful. When you get into a **FIGHT** with an enemy that’s better than you, just surround yourself with blocks. If you want to get to an area that’s far away, just place ropes leading to that place and use those ropes.
Cave EXPLORATION
It’s finally time for the part you were waiting for!
This part will be really short because it’s not really that hard to understand. Just walk around and mine stuff that catches your eye. Kill enemies blah blah. (Just make sure you don’t get Tin or Copper, those are useless.) You will MOST LIKELY die. You will find chests which contain loot. Some of this loot contains the Wand of Sparking, the Boomerang, and the Blowpipe. (I only suggest using the Wand of Sparking, which needs mana. You will also find Life Crystals underground. They give you more maximum health.
Cave Exploration Subcategory: Underground Cabins
While caving, you might find a “house” of some sort. These are Underground Cabins. They contain chests which contain loot.
You could find:
- Hermes Boots, which will give you the ability to run really fast
- Cloud in a Bottle, which will give you the ability to double jump
- Magic Mirror, which will allow you to get back to your spawn area without hassle
- Flare Gun, which acts like a torch but instead of placing torches, it shoots out flares which work underwater!
- Shoe Spikes/Climbing Claws, which help you climb walls (or jump off and back onto them while going up)
- Band of Regeneration, which regenerates your health faster (proves to be pretty useless mid to late-game.)
- Enchanted Boomerang, which is a slightly good weapon. It does 13 damage which is good early game.
- Extractinator, which you can place and put Silt, Slush, and Desert Fossils and get ores, gems, and coins in exchange.
Traps
Dart Traps and Boulders and Geysers could kill you. Very easily. Boulders take away 60-150 of your health, Dart Traps take away only 20 of your health but give you a Poison debuff and Geysers will take away 80 of your health and give you a On Fire! debuff. I recommend always looking at the ground for pressure plates, which could be hard to find.
Underground Biomes (?)
Underground, you can find the GLOWING MUSHROOM BIOME which has a lot of traps. A LOT. The pro here is that They could be easier to find because of the ground being made of Glowing Mushroom Mud and not Stone. From this biome, you could get Glowing Mushrooms which will be useful in Hardmode. You have to kill a boss to get into Hardmode.
You will also find Glowing Mushroom TREES! You have to use your axe to break them. They give you Glowing Mushrooms though, not Mushroom Wood. (Glowing Mushrooms can also make some SNAZZY Furniture.)
HELL, or the Underworld
If you dig down deep enough, you will find lava. Dig down even more, you will eventually find the UNDERWORLD. It’s sorta like the Nether from Minecraft. You will fight a boss here later. For now, don’t mind it, you won’t survive.
Town NPCs (Pre Hardmode)
After going through some caves, you probably found:
- Bombs, Grenades or Dynamite. Hold on to these.
- A Purple or Red Biome with scary monsters. You will find out about this in another Chapter.
- Monsters which gave you Coins.
- Life Crystals. If you use these, you will have more maximum health.
These 4 things will help you get some Town NPCs.
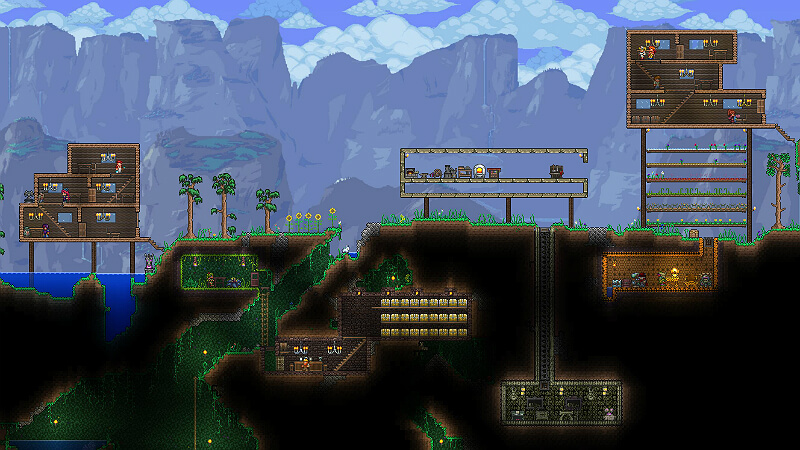
But before getting these “Villagers”. You have to build houses.
Useful Pre-Hardmode NPCs
- Demolitionist: He will sell to you anything that has to do with explosions like Bombs, Grenades, and Dynamite.
- Nurse: She will heal you for exchange of some Copper or Silver Coins.
- Merchant: He will sell to you Shurikens, Glowsticks, Torches, Arrows, and other USEFUL items.
- Arms Dealer: He will sell to you a Minishark (Good Gun), A Flintlock Pistol and other gun-related items.
- Dryad: She will sell to you seeds and planter boxes.
- Tavernkeep: 😉 Read what he has to say (;
- Goblin Tinkerer: He will sell to you a Grapple Hook, Rocket Boots and a Workshop which you can use for combining accessories.
- Witch Doctor: ??? will sell to you an Imbuing Stations which will help you make flasks that will buff up Melee weapons.
- Mechanic: She will sell to you anything wiring-related, which is useful for people who want to make traps for killing enemies.
Getting the Pre-Hardmode NPCs
- Demolitionist: He will come to you if you have any grenades, bombs or dynamite in your inventory
- Nurse: She will come to you if you have more than 100 health
- Merchant: He will come to you if you have at least 50 silver coins
- Arms Dealer: He will come to you if you have any gun (which you can get later)
- Dryad: She will come if you killed any boss
- Tavernkeep: You can find him unconscious anywhere
- Goblin Tinkerer: You can find him underground after beating the Goblin Invasion
- Witch Doctor: ?? will come to you after you beat Queen Bee
- Mechanic: You can find her in the Dungeon after beating Skeletron
Equipables
Now that you have ores and gems from Caving, you need to make stuff from them.
Craft a Furnace using 20 stone, 3 torches, 4 wood, and craft some Ore Bars. Buy an anvil from the Merchant and if you have enough, try to make an armor set out of one bar. If you have any spare bars, craft a bow, a sword and a pickaxe with those bars. (Also craft arrows using Wood and Stone, and then turn them into Flaming Arrows, using normal arrows and torches.) If you have 15 of a type of gem, you can craft a grappling hook. This will help you a lot with caving.
Now you can equip the armor by Right Clicking on it or moving them to the armor part of your inventory. Also, equip some accessories like the Band of Regeneration and Climbing Claws.
Further into the game, you can get other different equipables, like mounts and grappling hooks.
Exploration Part 2: Biomes

Now you have armor and some weapons. It’s time to explore. While exploring this world, you will find these biomes.
- Forest – This is the normal biome. The spawning area is usually in this biome. You can get normal wood from the trees.
- Snow – You can also spawn here. You can get snow and ice from here. you get Boreal Wood from the trees.
- Desert – You can get sand and cacti here. There is a little chasm which leads to underground areas somewhere in the middle of the desert.
- Jungle – The ground is made of mud here. It is the 2nd most dangerous place in Pre-Hardmode. You can get Rich Mahogany from the trees.
- Crimson/Corruption – This is actually less dangerous than the Jungle, but still dangerous. The stone here is unbreakable until you get a Nightmare/Deathbringer Pickaxe. It’s also breakable with Bombs and Dynamite. You can get Ebonwood/Shadewood from the trees. More details in another chapter.
- Surface Glowing Mushroom – This is actually an artificial biome. You have to plant Mushroom Seeds on mud on the surface and watch it grow…
- Ocean – This can be found at the very edges if the world. You will find Sharks which give you Shark Fins. You can make the Megashark with those. You can get Palm Wood from the trees.
Corruption/Crimson
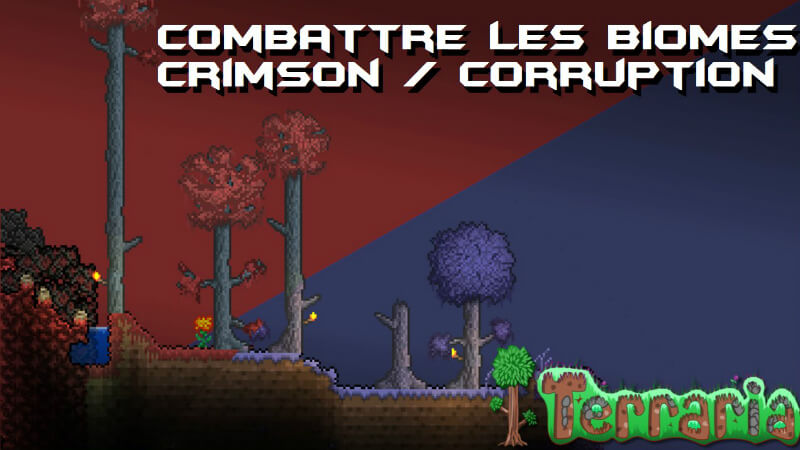
It’s time for the Corruption and the Crimson. Be sure to bring some bombs.
Corruption
You can find chasms here. Go down some of them and beware the Eaters and Devourers. You may notice some orbs under the end of the chasms. Use your bombs to get to them. Break them with a hammer. Make sure not to break 3 orbs. If you break 3, it will spawn a boss.
From the first orb, it is guaranteed you will get a Musket and some Musket Balls. This is a very high damage gun but it is very slow by means of firing speed.
From the second orb, you might get:
- Another Musket
- Vilethorn – will extend a projectile that can pass through blocks
- Ball o’ Hurt – a spiky ball connected to a very sturdy and elastic rope that harms enemies
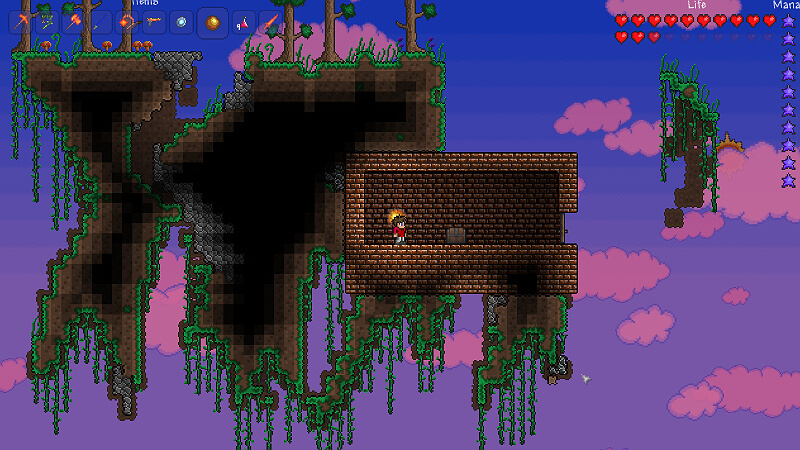
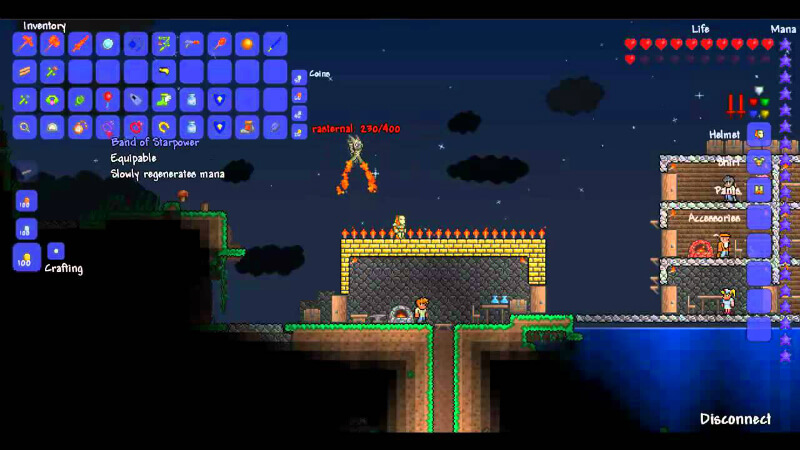
- Shadow Orb – a pet that gives very little light
- Band of Starpower – gives you an extra 20 mana
Crimson
You can find cave areas here. Go down some of them and beware the Spiders, Face Monsters and Crimeras. You may notice some hearts around the end of the cave. Use your bombs to get them. Break them with a hammer. Make sure not to break 3 orbs. If you break 3, it will spawn a boss.
From the first orb, it is guaranteed you will get The Undertaker and some Musket Balls. This is a slightly low damage gun but it is fas by means of firing speed.
From the second orb, you might get:
- Another Undertaker
- The Rotted Fork – a good Spear that will hit enemies multiple times
- Crimson Rod – will place a stationary cloud that will rain on enemies
- Crimson Heart – a pet that gives very little light
- Panic Necklace – an accessory which will improve movement speed after being hit
And that’s it.
Bosses
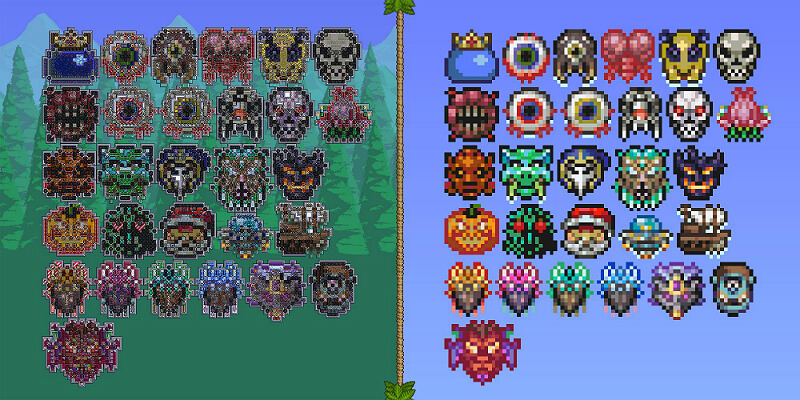
Note: Optional means that it is possible to progress the game easily without killing them.
King Slime – The King is a hard boss after the 1.3 update, as he can now teleport to you if you get too far. He summons blue slimes that also fight you. He is an optional boss.
Eye Of Cthulhu – The Eye is a slightly easy boss as his attacks can be easily dodged with enough skill. It summons Servants of Cthulhu that also fight you. To summon him, you have to use a Suspicious Looking Eye at night.
Eater Of Worlds – This is the boss of the Corruption. It is very easy to beat if you can get high enough so that he can’t touch you at all. It can be broken into different Eaters and get you all at once, so beware. To summon it, you have to break 3 shadow orbs.
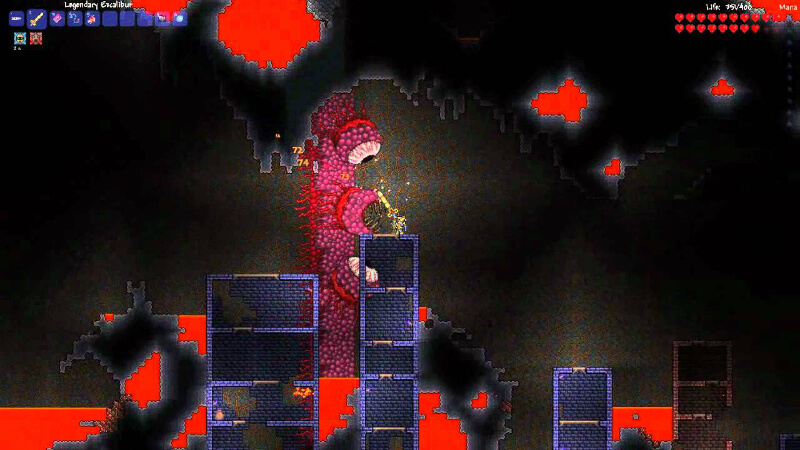
Brain Of Cthulhu – This is the boss of the Crimson. It is harder than the Eater but it’s still beatable. In the first phase, It is invincible and spawns Creepers which float and are pretty quick. After killing the creepers, he changes to phase 2. In the second phase, he teleports around and charges at you. Now he is vulnerable to damage. To summon it, you have to break 3 crimson hearts.
Queen Bee – She is a tough one to beat. To spawn her, you have to find hives in the Jungle, and break the larva. In an enclosed space, you have very little space to dodge her. You need to have some skill to kill her. She summons bees that can attack you too. She is an optional boss.
Skeletron – Skeletron will not be much of a problem with armor from the Eater of Worlds or Brain of Cthulhu. He has 2 hands which both charge at you and a head which spins at you. To summon him, you have to talk to the Old Man at the dungeon at night. After killing him, he will open up the Dungeon and you will be able to get the loot in it. He is an optional boss, but if you want to make the game easier, the loot from the Dungeon can do that, therefore I will consider him mandatory.
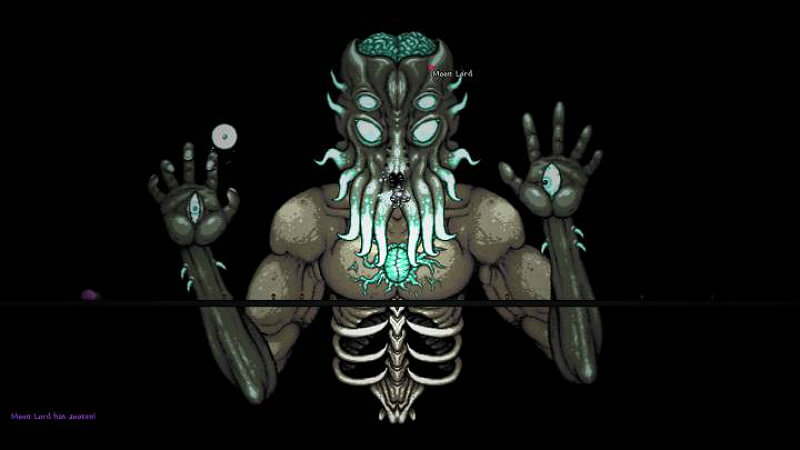
Wall Of Flesh – It is a hard one to beat. It’s simply a Wall with 2 eyes and a mouth. It summons Hungries and Leeches which both give hearts, which is pretty generous. To summon it, you have to throw a Guide Voodoo Doll into lava in the Underworld. You HAVE to beat this boss in order to progress.
Boss Guide
It’s time to beat the bosses.
Combat Potions: Ironskin, Swiftness, Regeneration, Endurance, etc.
Slime King – 200 Health, Lead/Iron Armor or better, Hermes boots, Combat Potions
At least Lead/Iron bow with Flaming Arrows.
Fight in a flat area.
Eye of Cthulhu – 200 Health, Silver/Tungsten Armor or better, Hermes Boots, Cloud in a Bottle or any Bottle, Combat Potions
At least Silver/Tungsten Bow with Flaming Arrows.
Fight in a flat area or a proper arena.
Eater of Worlds – 200 Health, Silver/Tungsten Armor or better, Hermes Boots, Cloud in a Bottle or any Bottle, Band of Regeneration, Combat Potions
Ball o’ Hurt, Vilethorn and Blade of Grass are 3 very strong weapons against it.
Fight on a platform not too high up from the ground.
Brain of Cthulhu – 200-300 Health, Silver/Tungsten Armor or better, Hermes Boots, Cloud in a Bottle or any Bottle, Band of Regeneration, Combat Potions
The Rotted Fork and the Blade of Grass are very good weapons against it.
Fight in a proper arena.
Queen Bee – 200-300 Health, Shadow/Crimson Armor or better, Hermes Boots, Any Bottle, Band of Regeneration (Other Accessories can be used too!), Combat Potions
The Blade of Grass is a good weapon to fend off the bees. The Demon/Tendon Bow with Flaming arrows could be used to kill the queen herself.
Fight in a proper arena.
Skeletron – 300-400 Health, Shadow/Crimson Armor or better, Hermes Boots or upgraded version, Any Bottle, Band of Regen (Other Accessories are Recommended), Combat Potions
If you obtained it, the Molten Fury is a god weapon to kill him. If not, a Demon/Tendon Bow with Jester Arrows can also be used.
Fight in a proper arena or a flat surface.
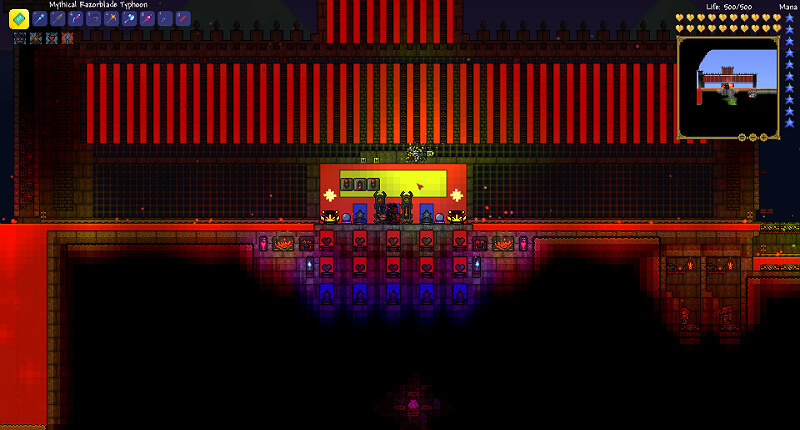
The Dungeon
After beating Skeletron… You will now be able to enter the Dungeon. If you don’t kill Skeletron first, you will be killed by a giant skull in one hit.
Enemies
The Dungeon is a dangerous place. You will find Angry Bones, Dark Casters, Cursed Skulls, and Dungeon Slimes. You will also find Spike Balls that spin around and if the ball hits you, you get hurt. Blazing Wheels travel among the walls and floors of the dungeon really quickly.
Survival
Surviving in the Dungeon is kinda hard. It is almost guaranteed you will die.
You will need a bunch of health if you want to survive. If you are a bad fighter, bring some Combat Potions. The Light’s Bane is a good weapon but I recommend you use a better weapon, like the Blade of Grass, Fiery Greatsword, or even the Night’s Edge.
The Tendon/Demon Bow is also good for getting enemies that are far away.
Two of the most needed accessories are Hermes Boots and any Bottle.
STRICTLY Crimson/Corruption Armor or better. Other armors will just guarantee you a death.
Loot
If you have a golden key from a Dungeon Slime, a random enemy, a Chest or a Pot, you will use it for opening Golden Chests in the Dungeon.
When you open a Dungeon Chest, you might find:
- Magic Missile – Magic Weapon that you can control with your cursor
- Muramasa – Speedy Sword which is sort of like an upgrade to the Katana
- Cobalt Shield – Blue Shield that gives you one defense and completely removes knockback
- Aqua Scepter – Wand that pees out water INDEFINITELY (if you have infinite mana)
- Blue Moon – A Ball on a Chain that is blue! Really Hurts
- Handgun – Just an ordinary gun. If you craft it with Hellstone, you will obtain a better gun, the Phoenix Blaster.
- Shadow Key – Opens chest in HELL or the Underworld.
- Valor – Yoyo that hits enemies. Strong?
The Supreme Sword
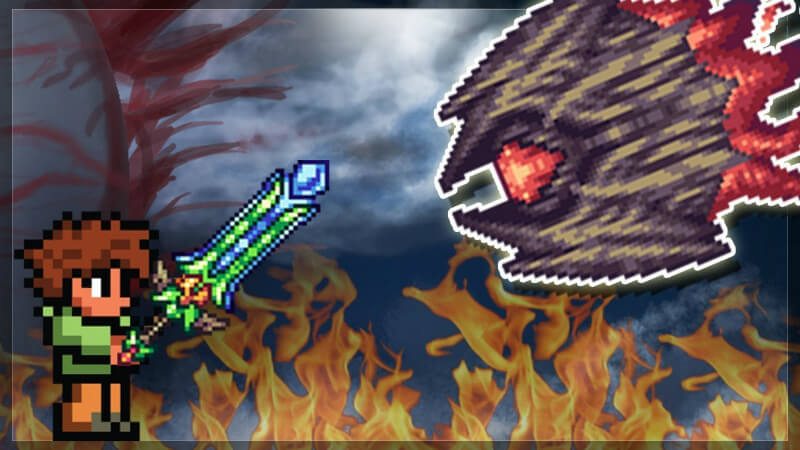
The Night’s Edge is the Supreme Sword of Pre-Hardmode, and this is a guide on how to get it, which is fairly simple.
Crafting Stations
The Night’s Edge requires 3 crafting stations. A Hellforge (which I will go over later), an Anvil, and a Demon/Crimson Altar.
Materials
The NIght’s Edge needs 4 main swords, which also need their own materials.
You will need: A Golden Key, 12 Jungle Spores, 15 Stingers, 30 Demonite/Crimtane Ore, 60 Hellstone, 20 Obsidian
Obtaining Materials
To get:
- The Golden Key – Drops from random enemies in the Dungeon or from a Dungeon Slime
- 12 Spores – You can find them around the Jungle, they look like flowers with a red stem and a glowing green ball on top.
- 15 Stingers – Stingers drop from Hornets
- 30 Demonite Ore – Can be obtained from the Eye of Cthulhu and the Eater of Worlds/Brain of Cthulhu
- 60 Hellstone – Can be mined in the Underworld with a Nightmare Pickaxe or better
- 20 Obsidian – When you mix Lava and Water together, you will make Obsidian
Crafting/Obtaining the Sword
(I had a hard time thinking of synonyms for craft here)
If you are lucky, you will get the Muramasa from a Golden Chest in the Dungeon.
Now, Craft the Blade of Grass with the Spores and Stingers at an Anvil.
Make the Light’s Bane/Blood Butcherer by smelting Demonite/Crimtane ore at a Hellforge or Furnace and crafting the sword itself at an Anvil.
Create the Fiery Greatsword by smelting Hellstone with Obsidian at a Hellforge ONLY and then create the sword at an anvil.
Now go to any Demon/Crimson Altar with all 4 Swords, and you may now craft the Night’s Edge…
Caving Part 2: The Underworld
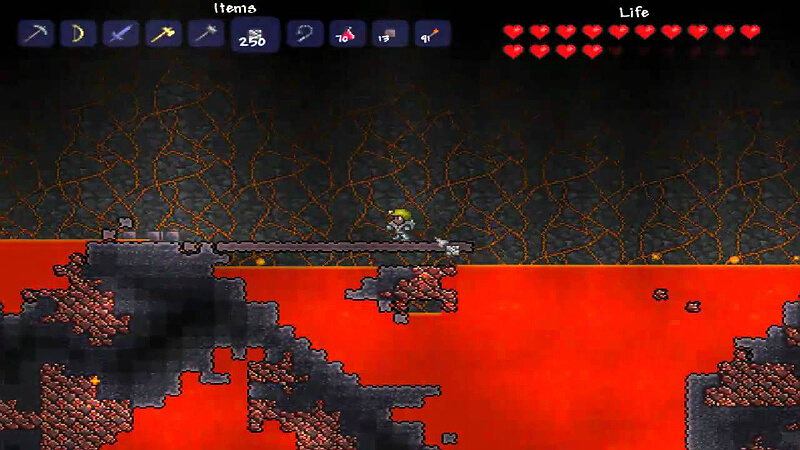
This… is Hell.
You will find here Demons, Voodoo Demons, Hell Bats, Fire Imps, Lava Slimes, and Bone Serpents.
Lava is everywhere.
Hellstone can be mined here, which will be very useful for making strong armor and weapons.
There are also houses here, which contains chests and Hellforges.
Hellforges are upgraded furnaces for smelting Hellstone. You have to mix Water and Lava together to make obsidian which will be used to make Hellstone Bars.
Try to make a long line made of useless blocks like Ash above all the Lava.
If you find a Voodoo Demon, kill it and you will gain a Guide Voodoo Doll. Hold onto this.
The Ultimate Fight
The Guide: Part 2
If you have a long enough “line” made of useless blocks, it’s time to kill the Wall of Flesh. To summon him, drop a Guide Voodoo Doll into lava. Make sure that the Guide NPC is alive and well.
Try to have 400 health, and the best accessories. If you want defense, wear the Molten Armor. For the Ranger, wear Necro Armor. First, use the Night’s Edge or Fiery Greatsword to kill all the Hungries. Next, use the Molten Fury, Minishark or Phoenix Blaster to damage the Wall itself. Fight the leeches with your Ranged weapon or with your Melee weapon, it doesn’t really matter. (Note: Try to hit the eyes because they have less defense than the mouth) Of course, you need combat potions. Fight him on the “line” that you built. Boom! It will spawn a box that will contain it’s good loot.
You’re now in hardmode.
Hardmode
Congratulations, you are now in Hardmode.
There is a new biome in your world that I will go over.
HAMMER TIME (or just new ores)
It is guaranteed that you will obtain a Pwnhammer from the WoF. This hammer will be used to SMASH the HECK out of those Demon/Crimson Altars. When you smash those Altars, a new ore will spawn in your world. There can be a maximum of 3 new ores.
The new thing about the new ores is that their armor have different type of headgear.
Some of them increase your Magical statistics, some increase Melee stats, and others increase Ranged stats.
Other WoF Drops
The Wall of Flesh also drops:
- Breaker Blade – A REALLY big but slow sword that is a reference to Cloud Strife’s Sword from Final Fantasy.
- Clockwork Assault Rifle – It fires in three-round bursts.
- Laser Rifle – It’s simply a rifle that uses mana to shoot lasers.
- Warrior/Sorcerer/Ranger/Summoner Emblem – Increases damage for Melee/Magic/Ranger/Summoner
Survival in Hardmode
Okay, the word “Hardmode” really speaks for itself. It makes the game harder, but you will also have access to new armors, weapons, and items.
Enemies
There are many new enemies, and most of them are fairly hard to beat with your Pre-Hardmode weapons. Make sure you have a pickaxe which has more, or equal amount of pickaxe power to obtain the new ores.
Ores
There are 3 new tiers of ore.
1. Cobalt/Palladium – These are the first tier ores in Hardmode (100 Pickaxe Power)
2. Mythril/Orichalcum – These are the second tier ores in Hardmode (110 Pickaxe Power)
3. Adamantite/Titanium – These are the third tier ores in Hardmode (150 Pickaxe Power)
Note: You couldn’t get two ores from the same tier in one world.
Obtaining the Ores
You need a Pwnhammer (which you got from the Wall Of Flesh) and some survival skills.
Go to the Corruption or Crimson, depending on your world. Break the altars with the Pwnhammer.
And there will now be new ores in your world. (Make sure to destroy at least three of them in order to have all three ores in your world!)
Post-Altar Smashing
After you smash the altars, you will notice a message pop up in the left-bottom corner of your screen that says “Your world has been blessed with (insert ore here)”. Something else happens after you smash these altars. Wraiths will start appearing, and they can go through solid blocks. The amount of Wraiths that appear depends on the number of altars you smashed.
These are sort of hard to deal with, so make sure you have a fairly good weapon. (I recommend the Breaker’s Blade, Night’s Edge or Fiery Greatsword. Range and Magic weapons at this stage in the game aren’t that ideal to fight crowds of Wraiths.) These suckers move fairly slowly, so they are easy to kill with swords, as long as they are long enough and deal good damage.
Other Enemies
There are many other enemies, and they are all hard.
Here are all the new enemies in Hardmode. I’m very sorry that I couldn’t add a description to each one of them as they are too many.
- Angler Fish
- Angry Trapper
- Arapaima
- Armored Skeleton
- Armored Viking
- Basilisk
- Black Recluse
- Blood Feeder
- Blood Jelly
- Blue Cultist Archer
- Blue Armored Bones
- Bone Lee
- Chaos Elemental
- Clinger
- Corrupt Mimic
- Corrupt Slime
- Corruptor
- Crimslime
- Crimson Axe
- Crimson Mimic
- Cursed Hammer
- Dark Mummy Derpling
- Desert Spirit
- Diabolist Digger Head Digger
- Dreamer Ghoul
- Dune Splicer
- Dungeon Spirit
- Enchanted Sword
- Floaty Gross
- Flying Snake
- Fungo Fish
- Gastropod
- Ghost
- Ghoul
- Giant Bat
- Giant Cursed Skull
- Giant Flying Fox
- Giant Fungi Bulb
- Giant Tortoise
- Green Jellyfish
- Hallowed Mimic
- Hell Armored Bones
- Herpling
- Hoppin’ Jack
- Ice Elemental
- Ice Mimic
- Ice Tortoise
- Ichor Sticker
- Icy Merman
- Illuminant Bat
- Illuminant Slime
- Jungle Creeper
- Lamia
- Lava Bat
- Light Mummy
- Lihzahrd
- Lunatic Devote
- Martian Probe
- Medusa
- Mimic
- Moss Hornet
- Moth
- Mummy
- Necromancer
- Paladin Pigron
- Pixie
- Possessed Armor
- Ragged Caster
- Red Devil
- Rune Wizard
- Rusty Armored Bones
- Sand Poacher
- Skeleton Archer
- Skeleton Commando
- Skeleton Sniper
- Slimeling
- Slimer
- Tactical Skeleton
- Tainted Ghoul
- Tortured Soul
- Toxic Sludge
- Unicorn
- Vile Ghoul
- Wandering Eye
- Werewolf
- Wolf
- World Feeder
- Wraith
- Wyvern
The New Biome
As you may notice, there’s a new biome in the map. It is what the Dryad calls the “good biome”.
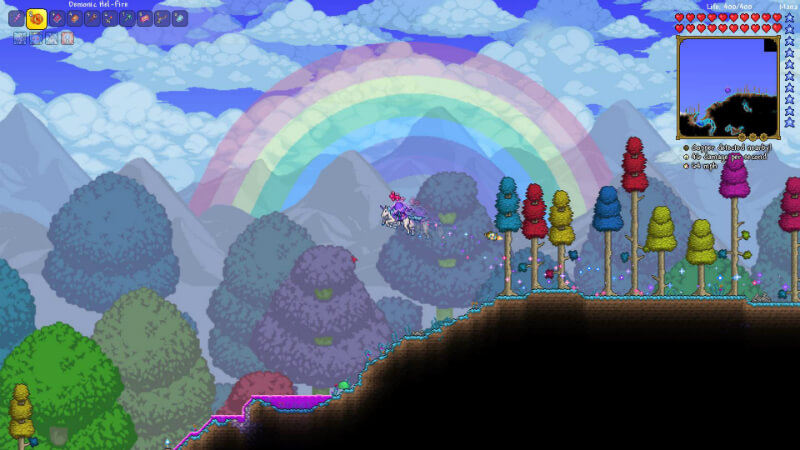
The Hallow
It appears a very pretty place, and it is. It has Unicorns and Pixies! (P.S. They want you dead)
There’s not much to say about this place. There are Crystal Shards underground which could be used to craft some pretty cool stuff. The trees give you Pearlwood, which is completely useless at this point in the game. Maybe it will remind you of how far you’ve gotten ever since you wore your first set of armor. Since you got your first weapon maybe. But this is a guide, not a book.
Caving Part 3: Underground Hallow and Others
There are new enemies underground too! (and in the Underworld, but that won’t come in handy for the rest of this game.)
The Hallow Again
In the underground hallow, once again, you could find Crystal Shards which could be used to make stuff like:
- Phasesabers – A color sword that probably references to Star Wars™
- Crystal Bullets – Bullets that explode into different fragments and damage the enemy even more!
- Crystal Darts – Darts that movie in a straight line and ricochet 6 times before disappearing
- Greater Healing Potion – A potion that heals 150 health, which you will find will be helpful for your first boss battle in Hardmode
- Super Mana Potion – A potion that heals 300 mana, or 15 stars on your GUI
- Crystal Storm – A magic weapon that shoots out a bunch of crystals
- Magical Harp – A harp that shoots out musical notes that penetrate through enemies
- Rainbow Rod – A rod that could control a projectile that does high damage
- Chik – A yoyo that does 39 damage
There are many enemies in the Underground Hallow also, such as:
- Illuminant Slimes
- Illuminant Bats
- Chaos Elementals (which could rarely drop the Rod of Discord, a tool that could teleport you around. It gives you a debuff that lasts for 6 seconds, which damages you if you ever use the Rod of Discord in that time period.)
- Enchanted Swords
- Hallowed Mimics
- Unicorns
- ? (and sometimes Pixies that somehow got from the surface of the world to the Underground area)
Underground Jungle
There are some new enemies in the Jungle too! (and one that I extremely hate, and you should despise too.)
- Jungle Creeper – A Spider
- Moth – A rare enemy
- Moss Hornet* – A hornet that wants you dead
- Angry Trapper – A level up from the Man Eater
- Arapaima – A fish
- Giant Tortoise** – A tortoise that jumps at you and kills you in about 2 hits (also wants you dead)
*The Second Most Annoying Enemy In the Whole Game™
**The Most Annoying Enemy in The Game™
There’s also a new ore, but you couldn’t get it until later.
Normal Underground
In the Underground Cavern Area, you will find:
- Diggers – An upgrade to the Giant Worm
- Giant Bats – An upgrade to the Bat
- Armored Skeleton – A skeleton that gives you a debuff that cuts your armor level in half
- Skeleton Archer – An archer that shoots flaming arrows (but he has bad aim)
- Rune Wizard – A rare enemy
Original Link – Continuation of discussion


Add comment