A spoiler-free guide to every weapon and Pod Program. Includes maps of locations and images for your convenience. Other miscellaneous info on tricky sidequests and useful tips can be found in the later sections of the guide.
Introduction

Hello, everyone!
This is data I’ve compiled from my time with both the PS4 and Steam versions of the Nier: Automata. I intend to keep this guide spoiler-free, so any name drops will be marked with a spoiler tag.
Just a heads up, gameplay difficulty does not restrict you from any equipment or achievements, so play at any difficulty you’re comfortable with. Also, do not freak out if you happen to miss a piece of equipment or quest. You can always return to previous sections of the game via Chapter Select which becomes available late into the game.
Weapons Section
There is a total of 40 weapons in the game. Each with varying stats and abilities gained upon upgrade. All weapons can be upgraded to level 4.
- 13 Short Swords
- 9 Large Swords
- 9 Spears
- 9 Combat Bracers
Note: Combo Lt # and Hv # is the maximum amount of hits you can do in a single combo chain with a specific weapon by itself. Lt = Light Attack, Hv = Heavy Attack
Level 4 Weapon Upgrades
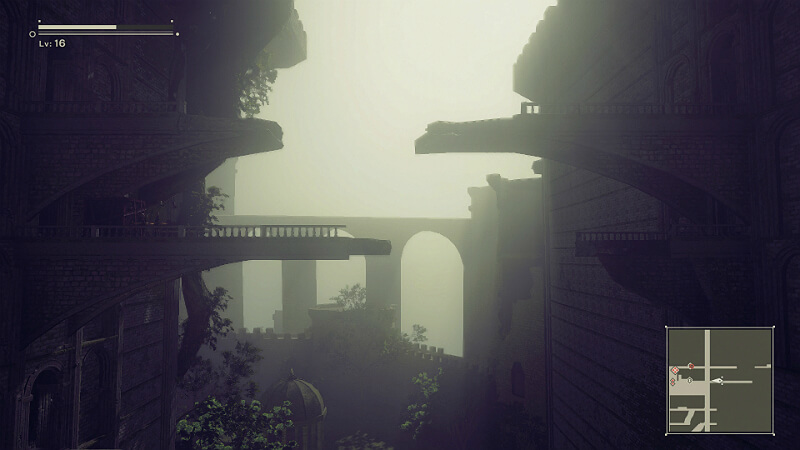
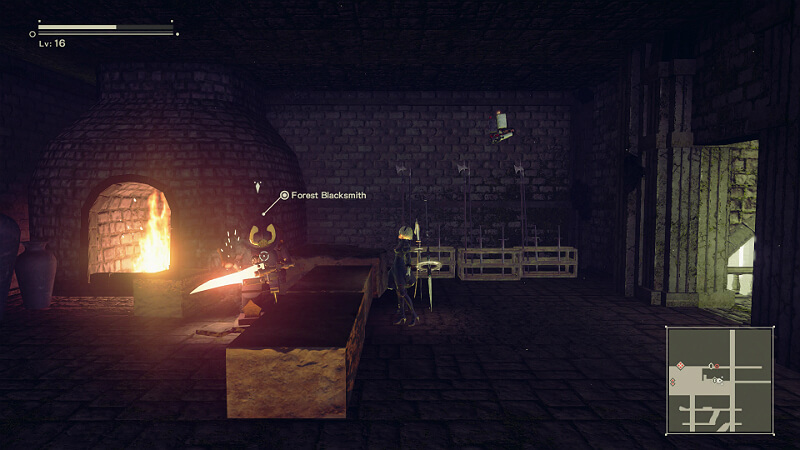
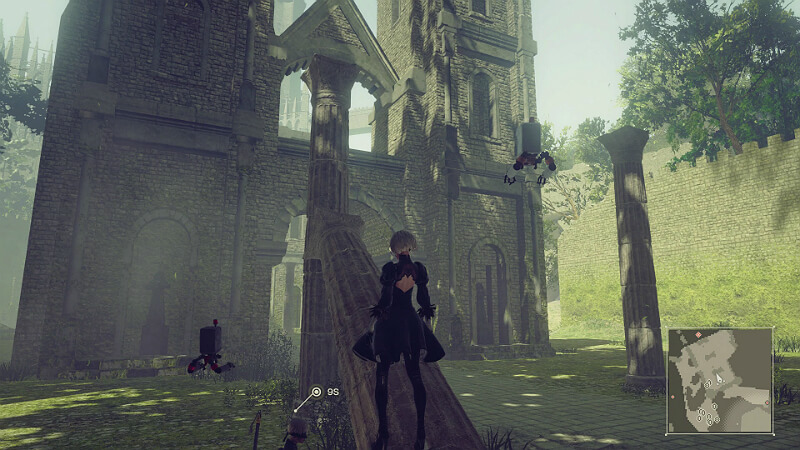
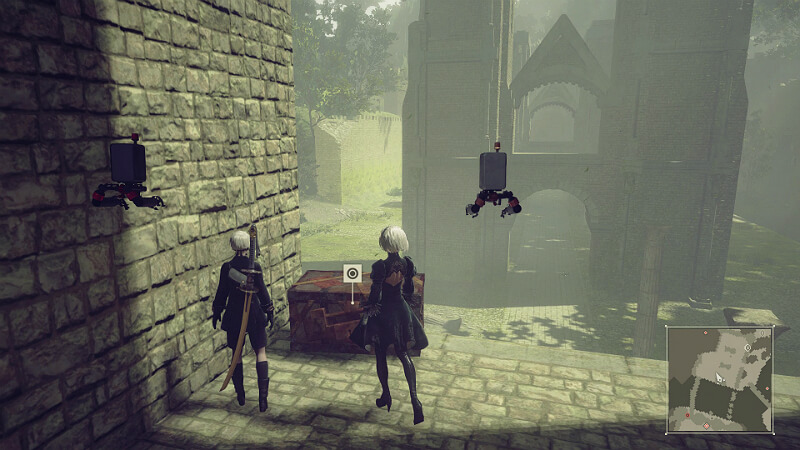
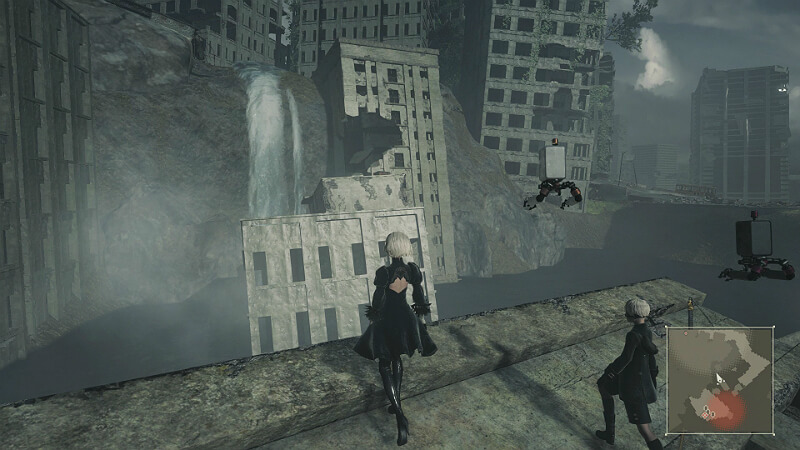
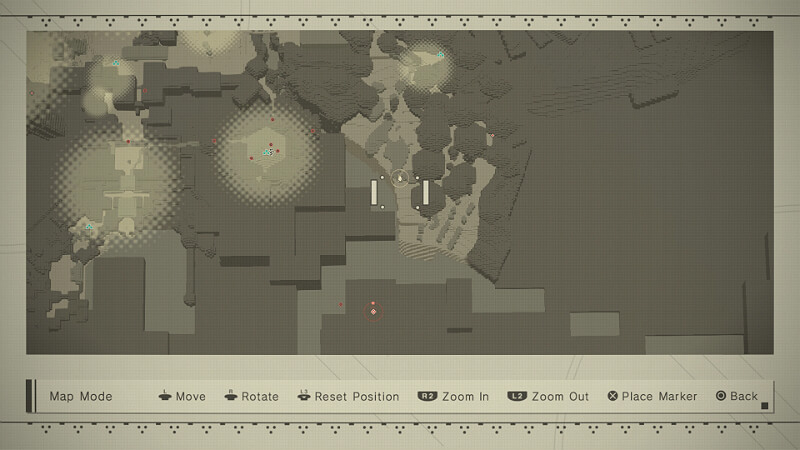
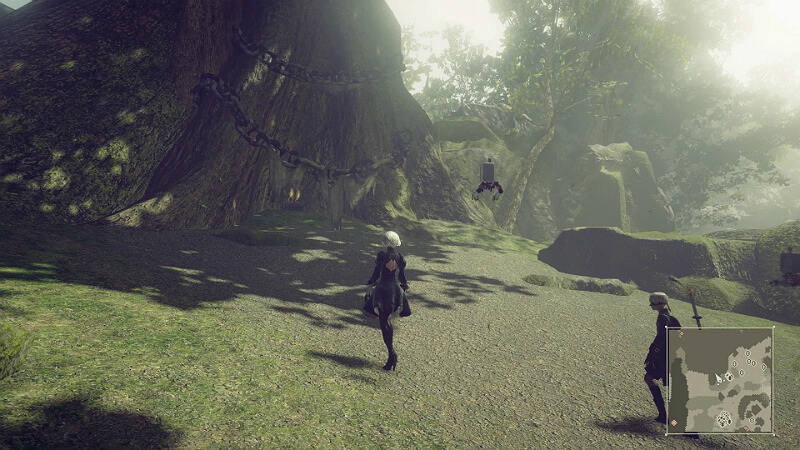
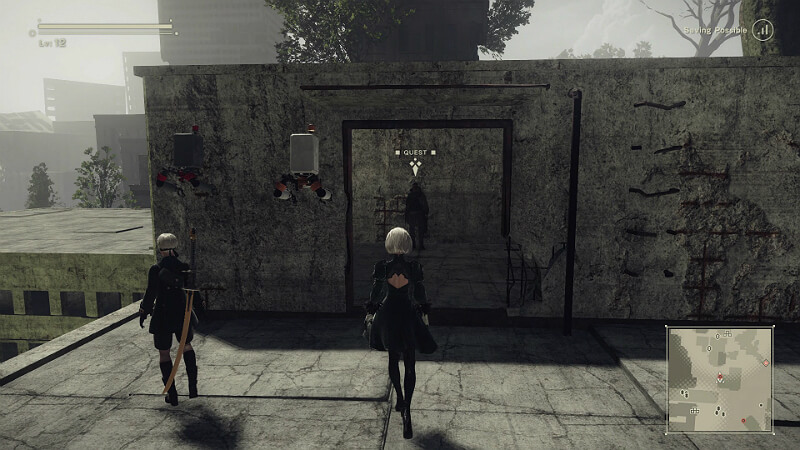
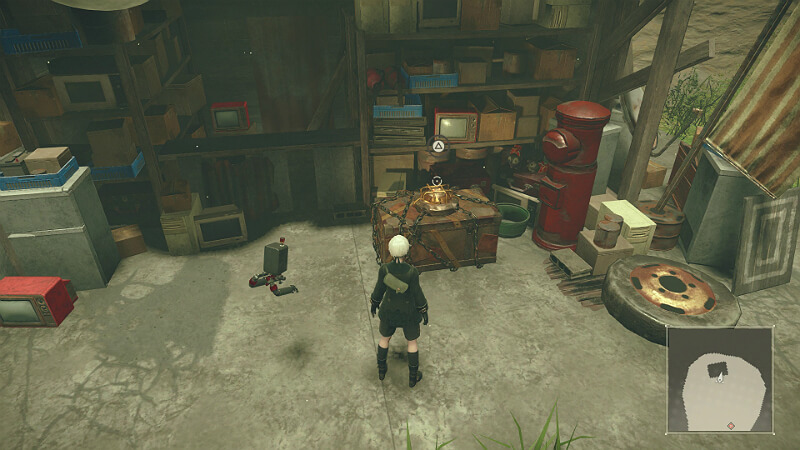
Blacksmith Masamune is the only NPC that can upgrade your weapons to level 4. He can be found in the Forest Castle Zone behind a pushable block pictured below.
Small Swords

Faith
MAX Attack: 608-722
MAX Combo: Lt 7 Hv 3
– Special Abilities –
Level 2: ATK Speed Up – Increases the speed of attacks.
Level 4: Bullet Absorb – Cutting through projectiles restores HP.
Location: Treasure chest found in the “Soul Box” Tower during Route C (3rd playthrough).
Iron Pipe
MAX Attack: 114-836
MAX Combo: Lt 5 Hv 2
– Special Abilities –
Level 2: Critical+ – Adds a critical-hit effect.
Level 4: High Stun – Adds a high probability of stunning enemies.
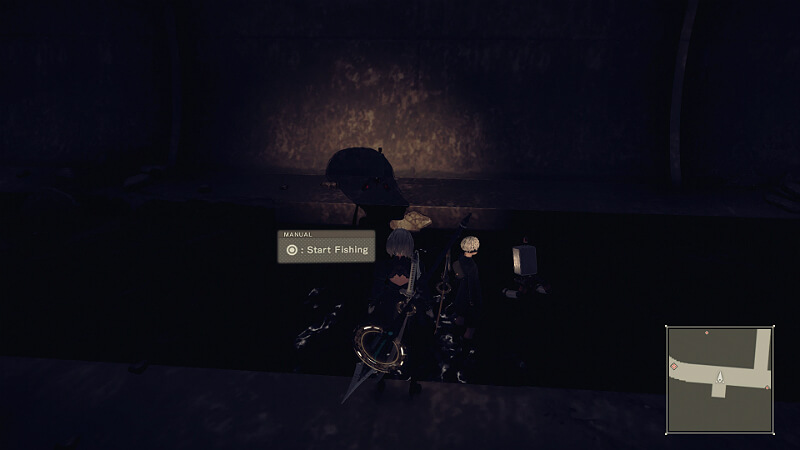
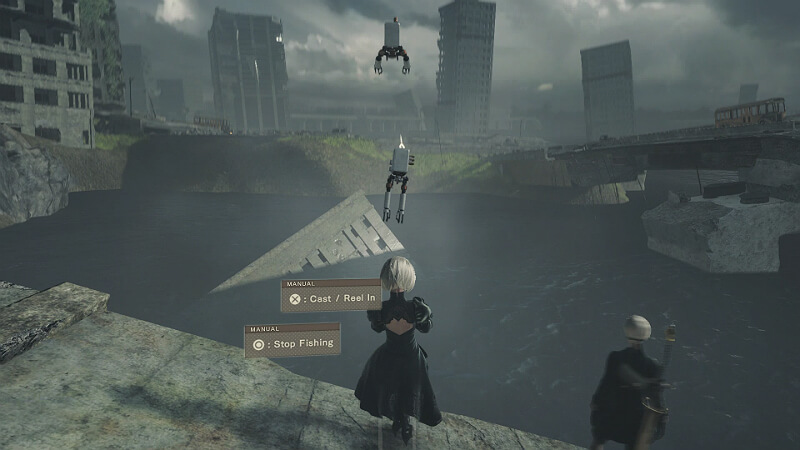
Location: Fished up from the sewers that lead into the Amusement Park.
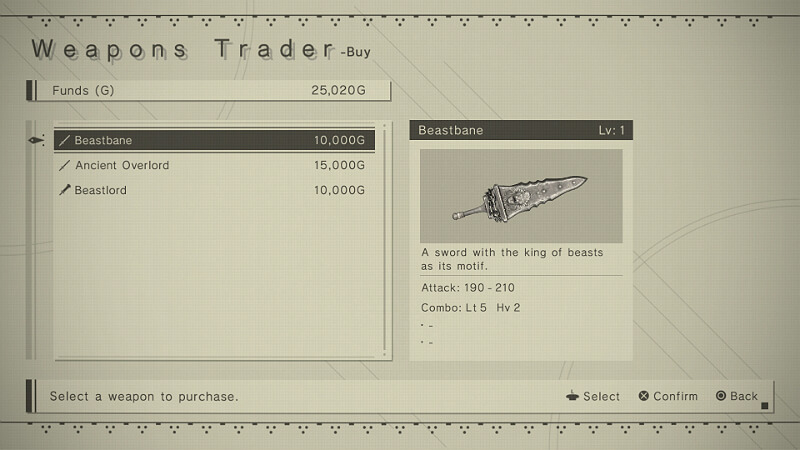
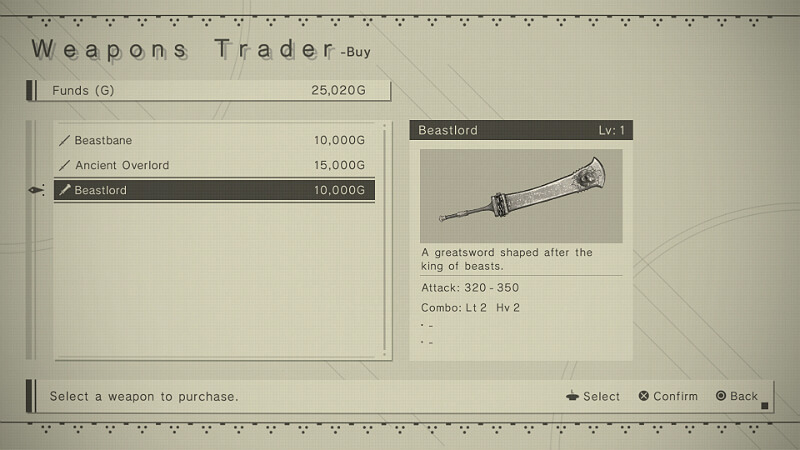
Beastbane
MAX Attack: 722 – 798
MAX Combo: Lt 7 Hv 3
– Special Abilities –
Level 2: Endurance Up – Increases defense.
Level 4: Beast’s Roar – Adds a beast effect to close-range attacks.
Location: Can be purchased early in the game at the Resistance Camp.
Phoenix Dagger
MAX Attack: 494 – 722
MAX Combo: Lt 7 Hv3
– Special Abilities –
Level 2: Attack Speed Up – Increases the speed of attacks.
Level 4: Phoenix Flash – Chance of restoring HP when damaging enemies.
Location: Treasure chest found at the bottom of the ravine between the Shopping District and City Ruins. Beware of level 30+ enemies.
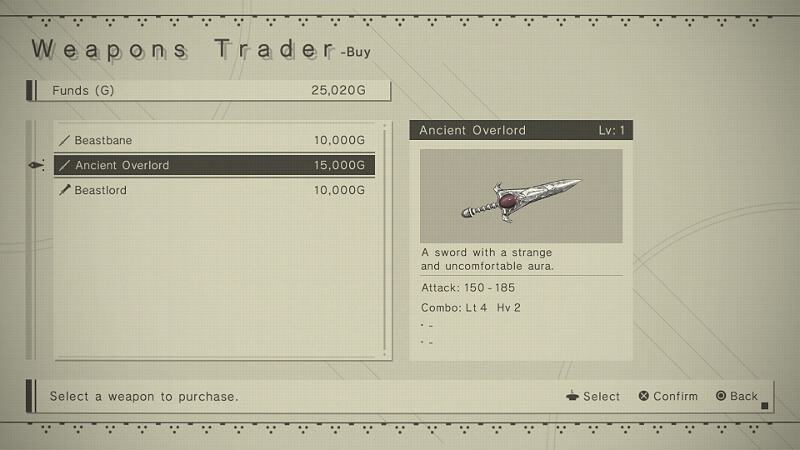
MAX Attack: 570 – 703
MAX Combo: Lt 7 Hv 3
– Special Abilities –
Level 2: Critical+ – Adds a critical-hit effect.
Level 4: Bullet Rupture – Adds a shock wave when striking enemy projectiles.
Location: Can be purchased early in the game at the Resistance Camp.
MAX Attack: 646 – 684
MAX Combo: Lt 7 Hv 3
– Special Abilities –
Level 2: Stun Up – increases stun value dealt to enemies.
Level 4: Energy Charge – Charges on standby. Increases attack for a limited time.
Location: Complete the “Find a Present” sidequest. Details on this sidequest can be found in the Quest Help section below.
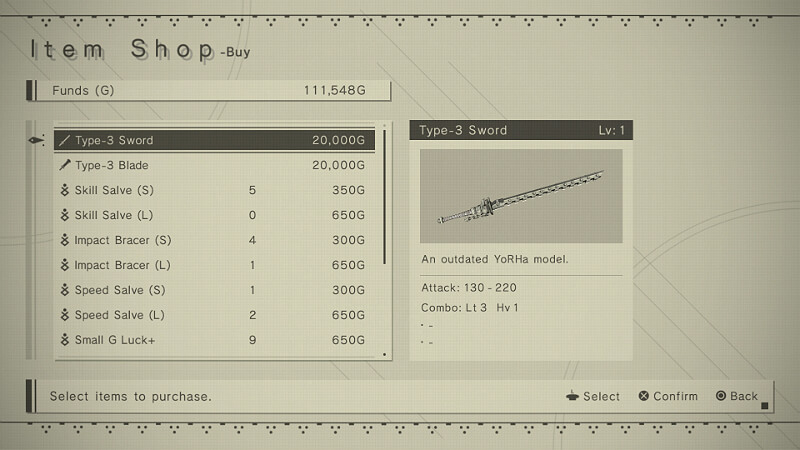
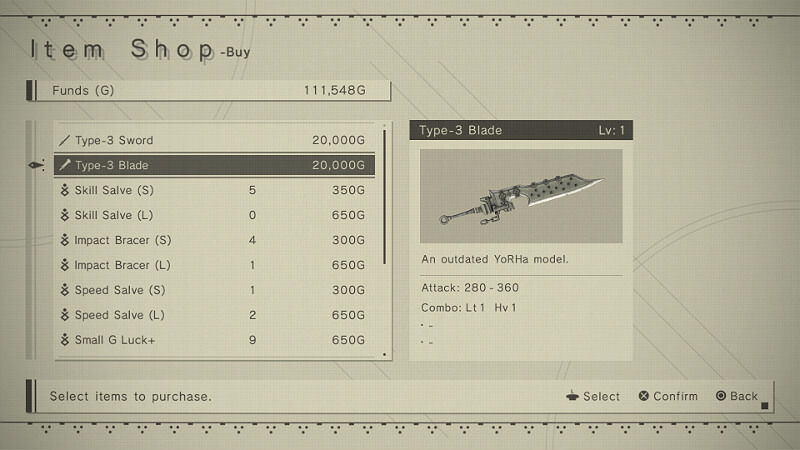
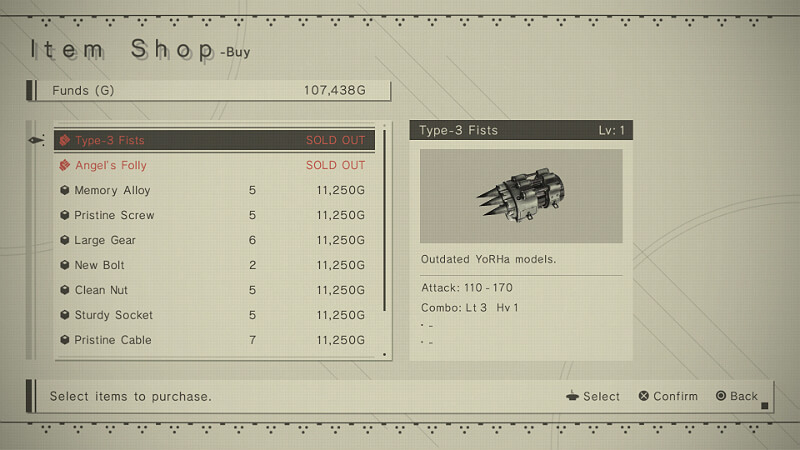
Type-3 Sword
MAX Attack: 494 – 836
MAX Combo: Lt 7 Hv 3
– Special Abilities –
Level 2: Endurance Up – Increases defense.
Level 4: Finish Blast – Detonates the final hit of close-range combos.
Location: Purchased from Devola or Popola once they appear at the Resistance Camp.
Virtuous Contract
MAX Attack: 570 – 684
MAX Combo: Lt 7 Hv 3
– Special Abilities –
Level 2: Attack Speed Up – Increases the speed of attacks.
Level 4: Holy Blessing – Increase attack power when HP is full.
Location: Unmissable. 2B’s default weapon.
MAX Attack: 570 – 684
MAX Combo: Lt 7 Hv 3
– Special Abilities –
Level 2: Attack Speed Up – Increases the speed of attacks.
Level 4: Dark Impulse – Increase attack power when HP is 30% or less.
Location: Unmissable. 9S’s default weapon.
YoRHa-Issue Blade
MAX Attack: 570 – 684
MAX Combo: Lt 7 Hv 3
– Special Abilities –
Level 2: Discount – Grants a discount at Resistance shops.
Level 4: Pod Charge – Lowers skill-gauge cooldown when attacking.
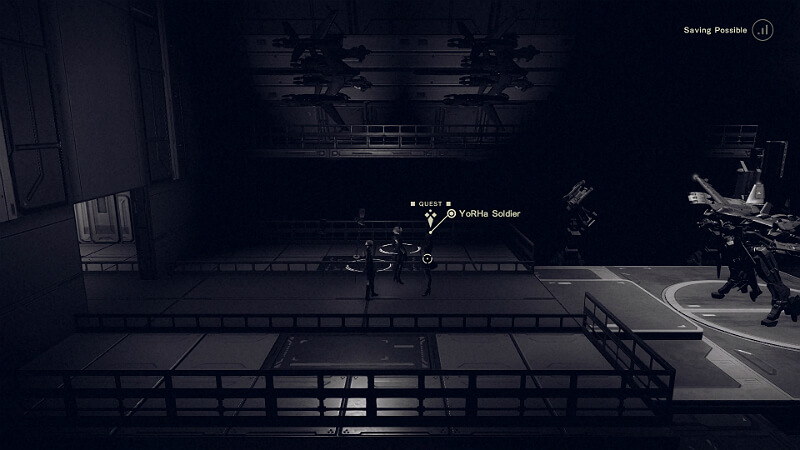
Location: Complete “11B’s Memento” sidequest. Speak with an NPC at the Bunker Hangar to pick up the quest. This quest is only available to 2B.
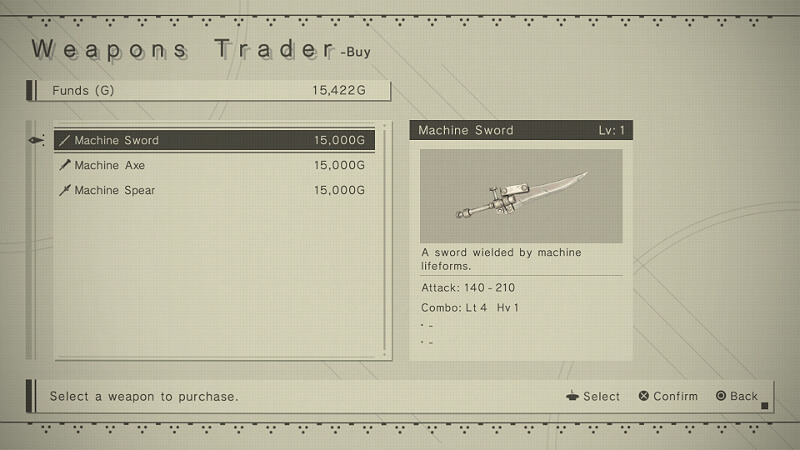
MAX Attack: 392 – 588
MAX Combo: Lt 6 Hv 3
– Special Abilities –
Level 2: Robot Discount – Grants a discount at machine shops.
Level 4: Machine Brand – Does more damage as you defeat enemies. (Max 500.)
Location: Can be purchased at Pascal’s Village.
Engine Blade
MAX Attack: 608 – 760
MAX Combo: Lt 7 Hv 3
– Special Abilities –
Level 2: Stun Up – Increases stun value dealt to enemies.
Level 4: Shift Avoid – Changes damage value and your evade maneuver.
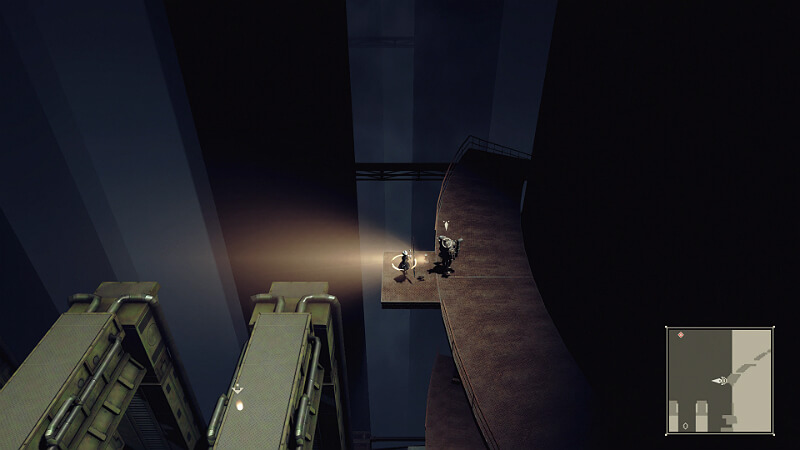
Location: Treasure chest found in the Abandoned Factory’s underground area near the end of Route A. After riding the elevator down, keep going and make your way pass some pancake machines. You will eventually reach an area similar to the screens below. Hop left across the pancake machines to reach the chest.
Cypress Stick
MAX Attack: 228 – 304
MAX Combo: Lt 7 Hv 3
– Special Abilities –
Level 2: Critical+ – Adds a critical-hit effect.
Level 4: Hero Sigil – Changes damage values and treasure chests.
Location: Treasure chest in the Forest Area. Found near the gate that separates the Forest Area and Pascal’s Village. Jump across pillars to reach it.
Large Swords

MAX Attack: 950 – 1,520
MAX Combo: Lt 3 Hv 3
– Special Abilities –
Level 2: Endurance Up – Increases defense.
Level 4: Steel Spine – Decreases chance of staggering from attacks.
Location: Found in the Flooded City by using the Scanner program.
MAX Attack: 1,178 – 1,216
MAX Combo: Lt 4 Hv 3
– Special Abilities –
Level 2: Critical+ – Adds a critical-hit effect.
Level 4: Bullet Rupture – Adds a shock wave when striking enemy projectiles.
Location: Treasure chest in the Desert Complex Housing area on top of some stairs, close to the save point.
MAX Attack: 1,216 – 1,330
MAX Combo: Lt 4 Hv 3
– Special Abilities –
Level 2: Endurance Up – Increases defense.
Level 4: Beast’s Roar – Adds a beast effect to close-range attacks.
Location: Can be purchased early in the game at the Resistance Camp.
MAX Attack: 1,026 – 1,292
MAX Combo: Lt 4 Hv 3
– Special Abilities –
Level 2: Attack Speed Up – Increases the speed of attacks.
Level 4: Phoenix Flash – Chance of restoring HP when damaging enemies.
Location: Locked treasure chest on the roof of the building where you first initially land on Earth. Can be obtained during or after Route B (second playthrough) as 9S.
MAX Attack: 1,216 – 1,254
MAX Combo: Lt 4 Hv 3
– Special Abilities –
Level 2: Stun Up – increases stun value dealt to enemies.
Level 4: Energy Charge – Charges on standby. Increases attack for a limited time.
Location: Complete the “Data Analysis Freak 2” sidequest available during Route B as 9S. This quest will appear in your inbox at some point after you complete the Data Analysis Freak 1.
MAX Attack: 1,064 – 1,368
MAX Combo: Lt 4 Hv 3
– Special Abilities –
Level 2: Endurance Up – Increases defense.
Level 4: Finish Blast – Detonates the final hit of close-range combos.
Location: Purchased from Devola or Popola once they appear at the Resistance Camp.
MAX Attack: 1,140 – 1,254
MAX Combo: Lt 4 Hv 3
– Special Abilities –
Level 2: Attack Speed Up – Increases the speed of attacks.
Level 4: Holy Blessing – Increase attack power when HP is full.
Location: Can be retrieved near the Abandoned Factory entrance where you fought the Goliath at the end of the prologue.
MAX Attack: 1,140 – 1,254
MAX Combo: Lt 4 Hv 3
– Special Abilities –
Level 2: Attack Speed Up – Increases the speed of attacks.
Level 4: Dark Impulse – Increase attack power when HP is 30% or less.
Location: Hidden behind a locked door in the underground area of the first Desert Zone. Door must be hacked with 9S.
MAX Attack: 784 – 980
MAX Combo: Lt 3 Hv 3
– Special Abilities –
Level 2: Robot Discount – Grants a discount at machine shops.
Level 4: Does more damage as you defeat enemies. (Max 500.)
Location: Can be purchased at Pascal’s Village.

Spears

MAX Attack: 798 – 950
MAX Combo: Lt 6 Hv 3
– Special Abilities –
Level 2: Attack Speed Up – Increases the speed of attacks.
Level 4: Phoenix Flash – Chance of restoring HP when damaging enemies.
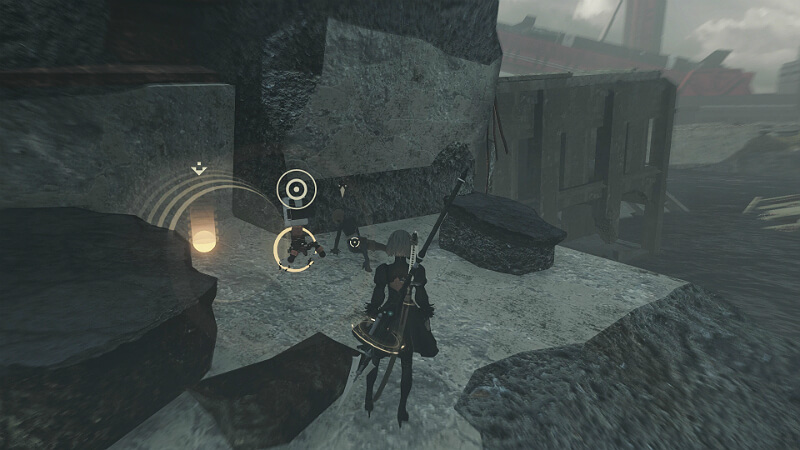
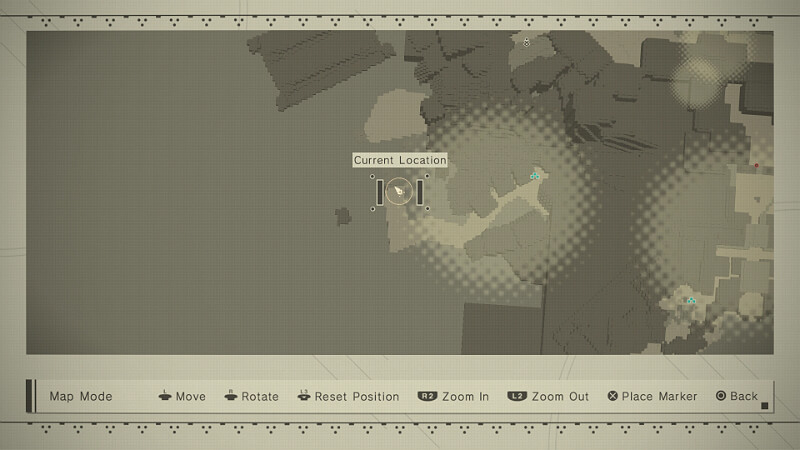
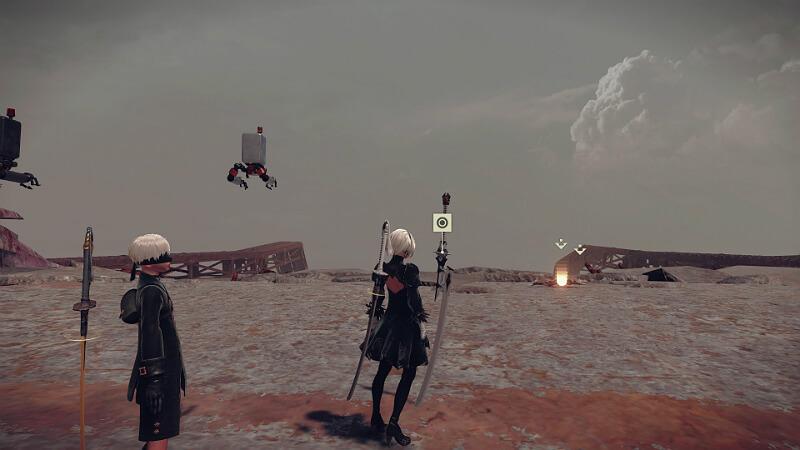
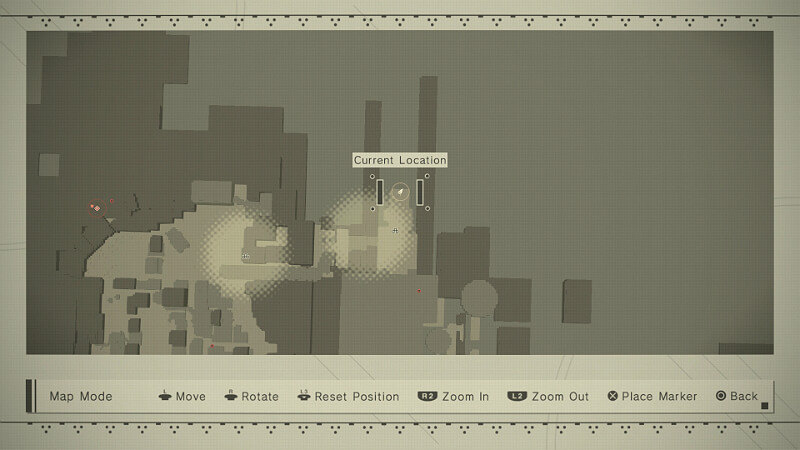
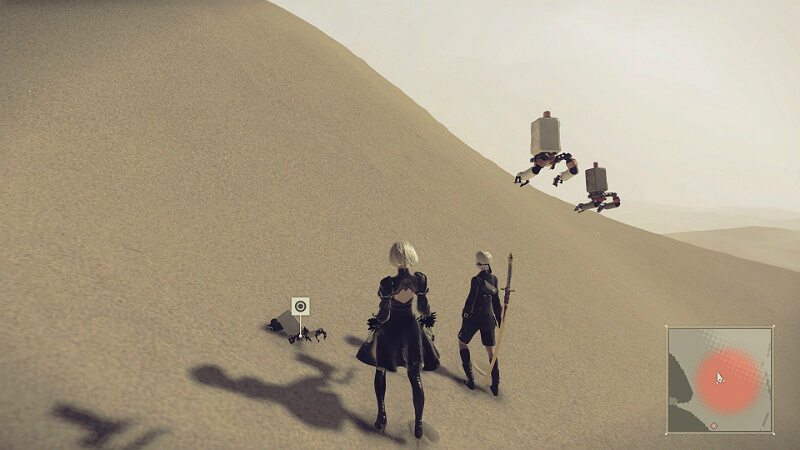
Location: Found in the Desert Zone at the marked location below. Requires the Scanner program to discover.

MAX Attack: 912 – 1007
MAX Combo: Lt 6 Hv 3
– Special Abilities –
Level 2: Endurance Up – Increases defense.
Level 4: Beast’s Roar – Adds a beast effect to close-range attacks.
Location: A locked treasure chest at the top floor of the Forest Castle. Requires 9S to hack open.
MAX Attack: 950 – 988
MAX Combo: Lt 6 Hv 3
– Special Abilities –
Level 2: Endurance Up – Increases defense.
Level 4: Dragon Wings – Increases power of mid-air attacks.
Location: Treasure chest hidden in a cave located in the Forest Area.
MAX Attack: 836 – 1,026
MAX Combo: Lt 6 Hv 3
– Special Abilities –
Level 2: Critical+ – Adds a critical-hit effect.
Level 4: Turncoat – Chance to subjugate foes when attacking them.
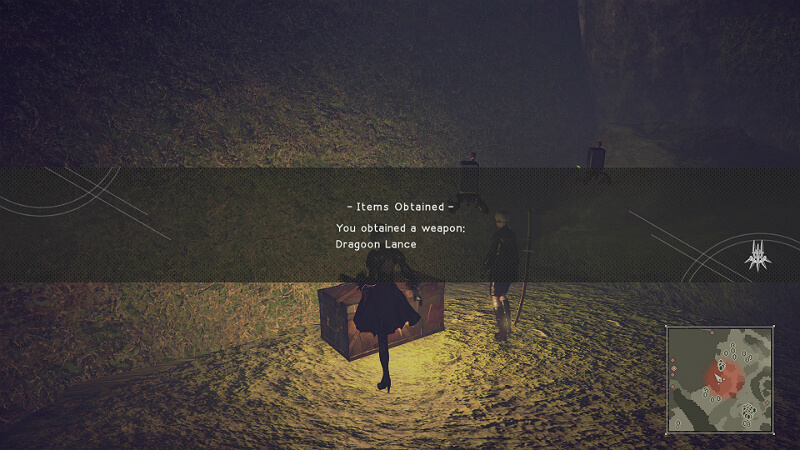
Location: Obtained from the “Heritage of the Past” sidequest in the Desert Zone during Route B as 9S. More details on this sidequest in the Quest Help section below.
MAX Attack: 912 – 950
MAX Combo: Lt 6 Hv 3
– Special Abilities –
Level 2: Stun Up – increases stun value dealt to enemies.
Level 4: Energy Charge – Charges on standby. Increases attack for a time.
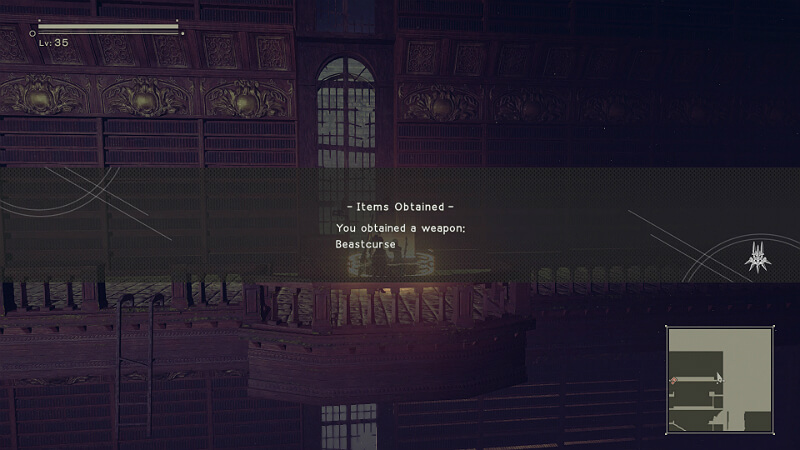
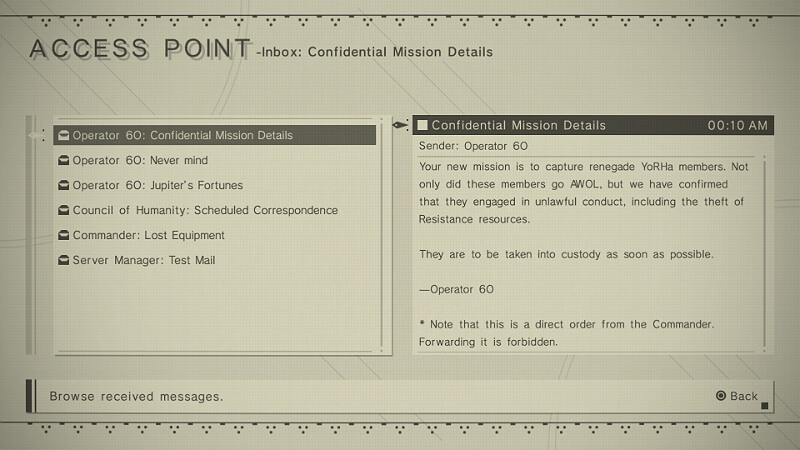
Location: Complete the “YoRHa Betrayers” sidequest. This quest is received through your inbox after the City Ruins Goliath event.
MAX Attack: 760 – 1,064
MAX Combo: Lt 6 Hv 3
– Special Abilities –
Level 2: Endurance Up – Increases defense.
Level 4: Finish Blast – Detonates the final hit of close-range combos
Location: Treasure chest found on the roof of a distant isolated building in the Flooded City Area. Perform the following commands to reach the building:
Jumping Glide –> Light Attack during glide –> Jumping Glide –> Light Attack during glide
Note: If you’re having trouble with this method, you may use 9S to remote control one of the small flyers near the building to make it across. You can remote control them via hacking if they’re not alerted to you.
MAX Attack: 836 – 912
MAX Combo: Lt 6 Hv 3
– Special Abilities –
Level 2: Attack Speed Up – Increases the speed of attacks.
Level 4: Holy Blessing – Increase attack power when HP is full.
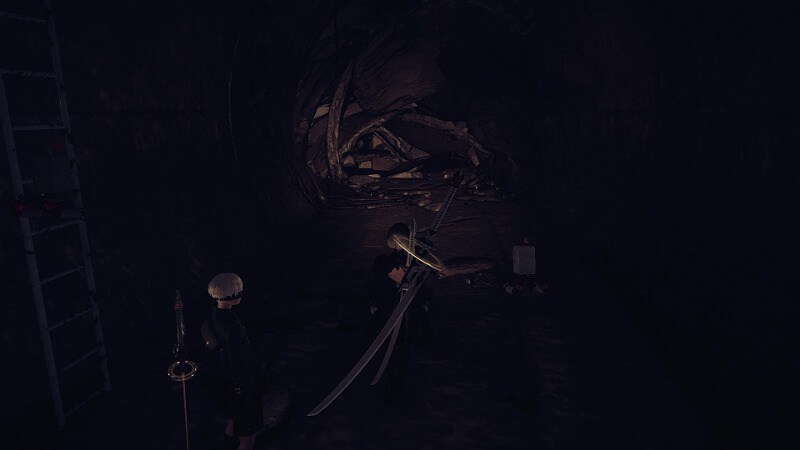
Location: In the sewers leading to the Amusement Park. Climb up a ladder hidden behind the debris pictured below (ignore the Amusement Park ladder.)
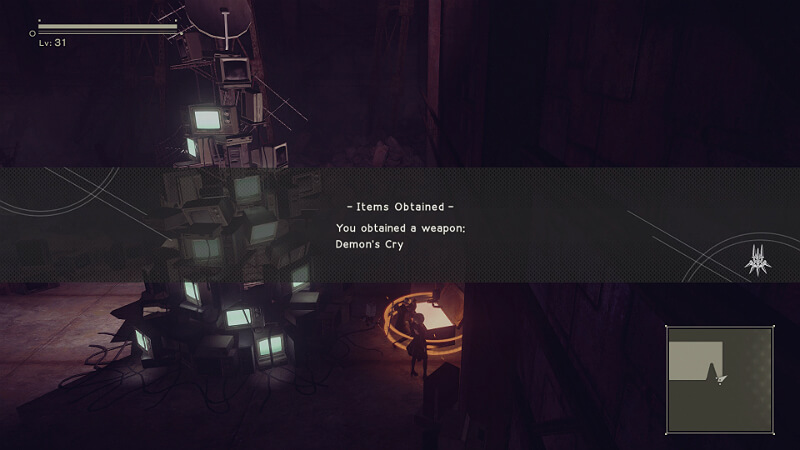
MAX Attack: 836 – 912
MAX Combo: Lt 6 Hv 3
– Special Abilities –
Level 2: Attack Speed Up – Increases the speed of attacks.
Level 4: Dark Impulse – Increase attack power when HP is 30% or less.
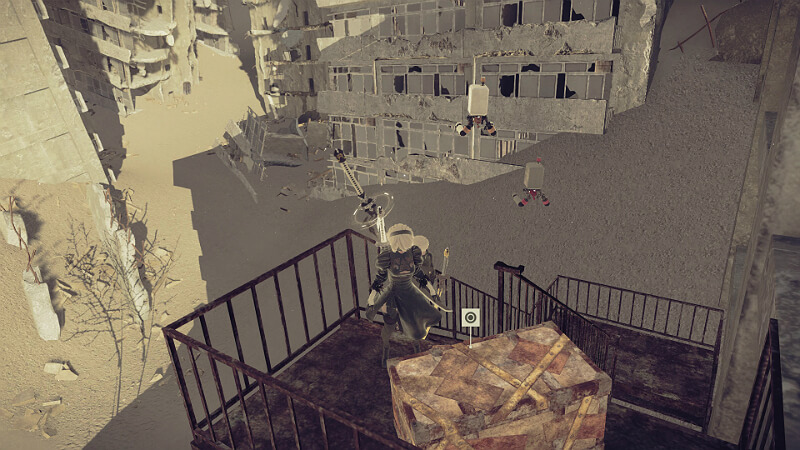
Location: Return to the Abandoned Factory’s underground area during Route C as 9S. Make your way through the area until you pass by an offline conveyer belt. Climb up the ladder and you should be in a similar spot in the screenshot below. Head left and hack open a door. Approach the weapon with caution, the enemies in this room will turn hostile once you get close.
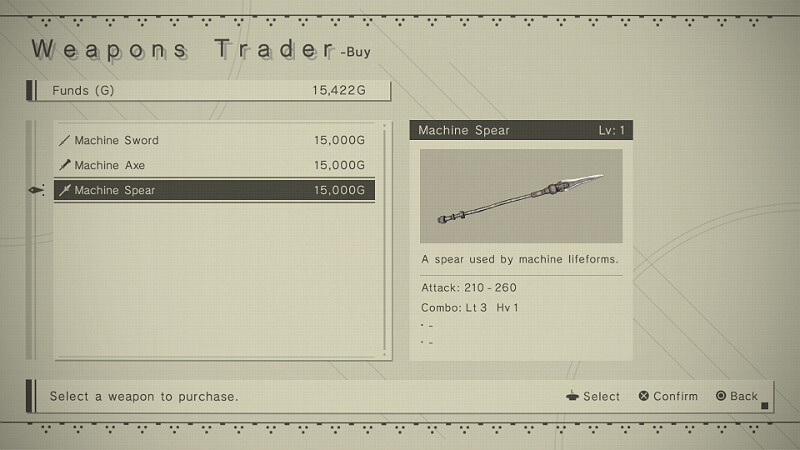
MAX Attack: 588 – 728
MAX Combo: Lt 6 Hv 3
– Special Abilities –
Level 2: Robot Discount – Grants a discount at machine shops.
Level 4: Does more damage as you defeat enemies. (Max 500.)
Location: Can be purchased at Pascal’s Village.
Combat Bracers
MAX Attack: 100 – 100
MAX Combo: Lt 4 Hv 1
– Special Abilities –
Level 2: None
Level 4: None
Location: Default Equipment.
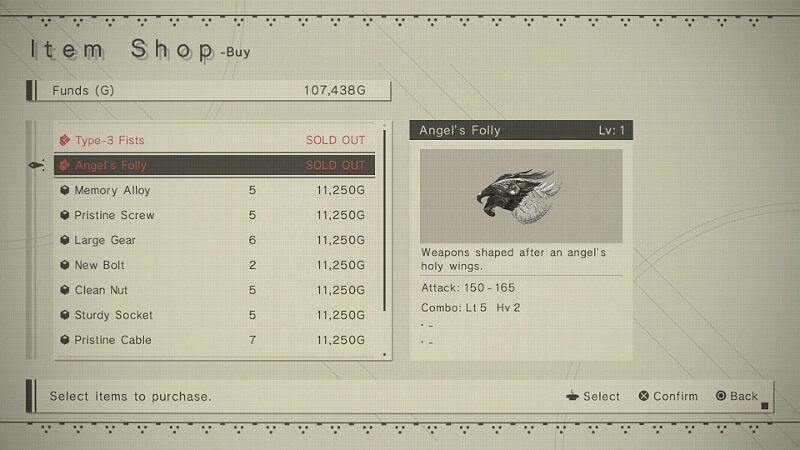
MAX Attack: 570 – 627
MAX Combo: Lt 8 Hv 3
– Special Abilities –
Level 2: Attack Speed Up – Increases the speed of attacks.
Level 4: Angel’s Mercy – Restores HP when finishing off enemies.
Location: Random chance to purchase this from Emil’s Shop. He must be riding near the Resistance Camp (he’ll be riding faster than usual.) If he does not have them in stock or isn’t near the Resistance Camp, you must either reload your save or travel to a different area and back.
MAX Attack: 380 – 684
MAX Combo: Lt 8 Hv 3
– Special Abilities –
Level 2: Attack Speed Up – Increases the speed of attacks.
Level 4: Devil’s Hatred – Adds a shock wave when finishing off enemies.
Location: A locked treasure chest In the building where you fought the Amusement Park Boss. Accessible during and after Route B. Go down the elevator and head left until you reach the chest. You must be using 9S to hack it open.
MAX Attack: 532 – 570
MAX Combo: Lt 8 Hv 3
– Special Abilities –
Level 2: Stun Up – increases stun value dealt to enemies.
Level 4: Energy Charge – Charges on standby. Increases attack for a time.
Location: A locked treasure chest behind the save point at the Resistance Camp. Can be hacked open with 9S during and after Route B.
MAX Attack: 418 – 646
MAX Combo: Lt 8 Hv 3
– Special Abilities –
Level 2: Endurance Up – Increases defense.
Level 4: Finish Blast – Detonates the final hit of close-range combos.
Location: Random chance to purchase this from Emil’s Shop. He must be riding near the Resistance Camp (he’ll be riding faster than usual.) If he does not have them in stock or isn’t near the camp, you must either reload your save or travel to a different area and back.
MAX Attack: 456 – 570
MAX Combo: Lt 8 Hv 3
– Special Abilities –
Level 2: Attack Speed Up – Increases the speed of attacks.
Level 4: Holy Blessing – Increase attack power when HP is full.
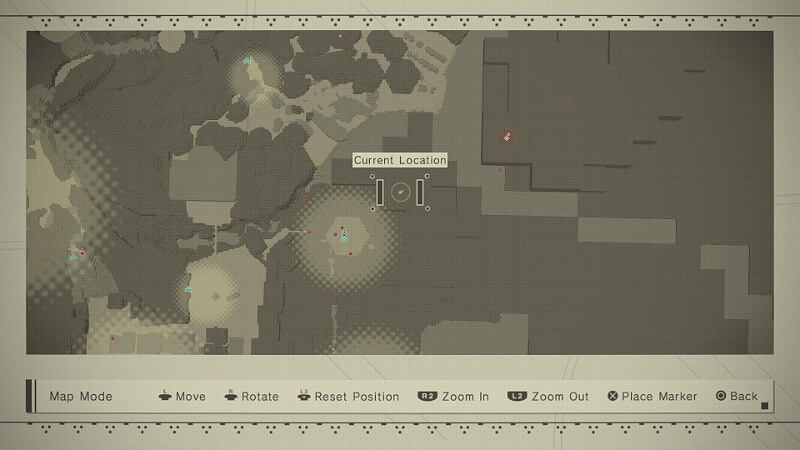
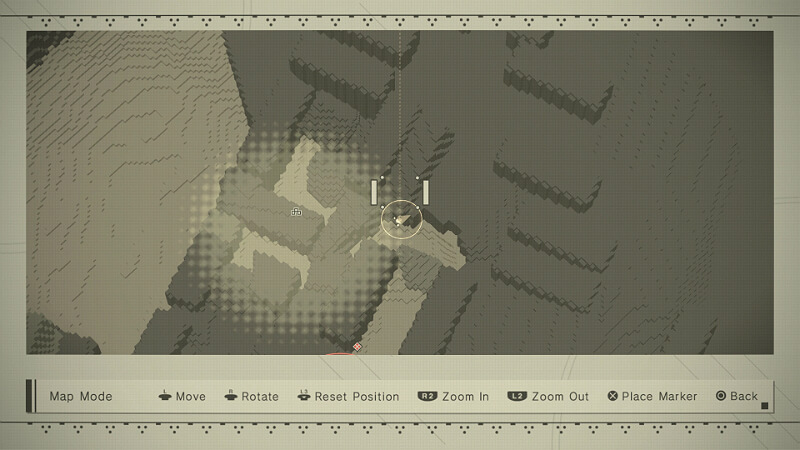
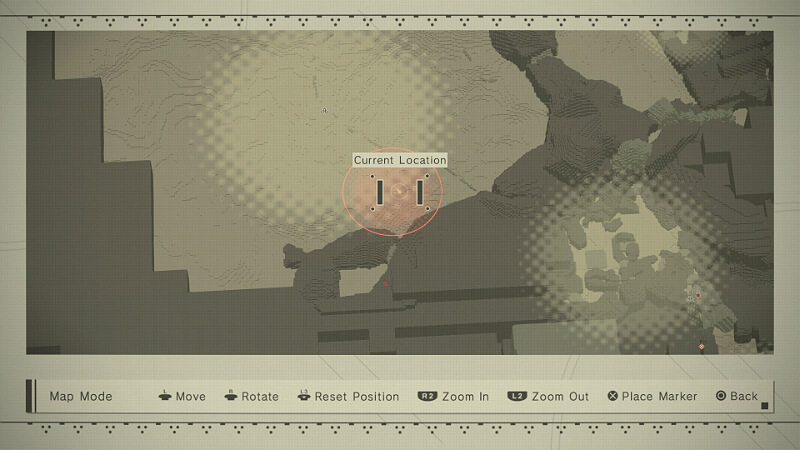
Location: Located at a hidden shrine in the Forest Area. Head up a hill to reach the spot on the map below. Jump across the gaps ahead of you to reach the shrine.
MAX Attack: 456 – 570
MAX Combo: Lt 8 Hv 3
– Special Abilities –
Level 2: Attack Speed Up – Increases the speed of attacks.
Level 4: Dark Impulse – Increase attack power when HP is 30% or less.
Location: A gift from Masamune after using his service to upgrade a few weapons to level 4. He is located in the Forest Castle behind a pushable block.
MAX Attack: 308 – 448
MAX Combo: Lt 7 Hv 3
– Special Abilities –
Level 2: Grants a discount at machine shops.
Level 4: Does more damage as you defeat enemies. (Max 500.)
Location: Can be purchased from Pascal near the end of Route C. Note: If you’re in post-game and Pascal isn’t appearing, go to Chapter Select and replay Chapter 14-05.
Emil Heads
MAX Attack: 456 – 570
MAX Combo: Lt 8 Hv 3
– Special Abilities –
Level 2: Stun Up – increases stun value dealt to enemies.
Level 4: Insanity – Swing these weapons to hear Emil’s voice.
Location: Defeat the secret Emil boss. Must have completed Emil’s Memories beforehand. I will go into detail on this quest chain in the Quest Help section.
Pods Section

There 3 Pods and 17 Pod Programs in the game. Pods can be freely swapped during battle for more combat options. Holding down the fire button will charge up a shot- the charged shot will fire upon releasing the fire button. Below are the 3 available Pods.
Information: Gatling pod that shoots bullets at targets.
Upgraded: Increased damage. First shot fired is a slightly stronger shot, can be tapped. Can charge up a grenade round that deals area damage.
Location: Default Pod.
Information: Shoots a continuous laser that can penetrate multiple fores
Upgraded: Increased damage. Larger laser size. Charged shot launches projectiles that track and ricochet off enemies.
Location: Can be fished up randomly at the Flooded City.
Information: Shoots homing missiles after locking-on to targets.
Upgraded: Increased damage. Shorter lock-on time. Charged shot bombards the area around you with cluster bombs.
Location: Can be found in the Desert Zone at any time by following a high pitch noise (thank you, Wastrel for the confirmation!) Will be automatically marked on the map by an indicator after the City Ruins Goliath event.
Pod Programs
- Function: Fires a powerful laser in the direction that the Pod is facing.
- Location: Default Pod Program.
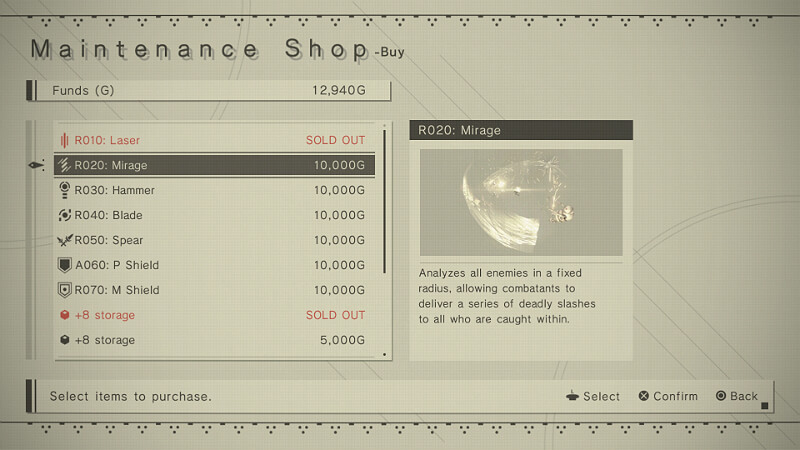
- Function: Analyzes all enemies in a fixed radius, allowing combatants to deliver a series of deadly slashes to all who are caught within.
- Location: Can be purchased early in the game at the Resistance Camp.
- Function: Summon a mass of energy that unleashes a devastating blow upon its target.
- Location: Can be purchased early in the game at the Resistance Camp.
- Function: Spin a Pod around the player at high speed, wreaking havok on any enemies it touches.
- Location: Can be purchased early in the game at the Resistance Camp.
- Function: Produces a mass of energy that sprouts from the ground in the shapes of deadly spears.
- Location: Can be purchased early in the game at the Resistance Camp.
- Function: Deploys a protective barrier that blocks melee attacks.
- Location: Can be purchased early in the game at the Resistance Camp.
- Function: Deploys a protective barrier that blocks projectile attacks.
- Location: Can be purchased early in the game at the Resistance Camp.
- Function: Generates a powerful shock wave by slamming a Pod to the ground from an elevated height.
- Location: Complete “The Wandering Couple” sidequest. Can be initiated at Pascal’s Village.
- Function: Fires a wire in the direction that the Pod is facing if it hits a foe, it launches the combatant right to the target for an up-close assault.
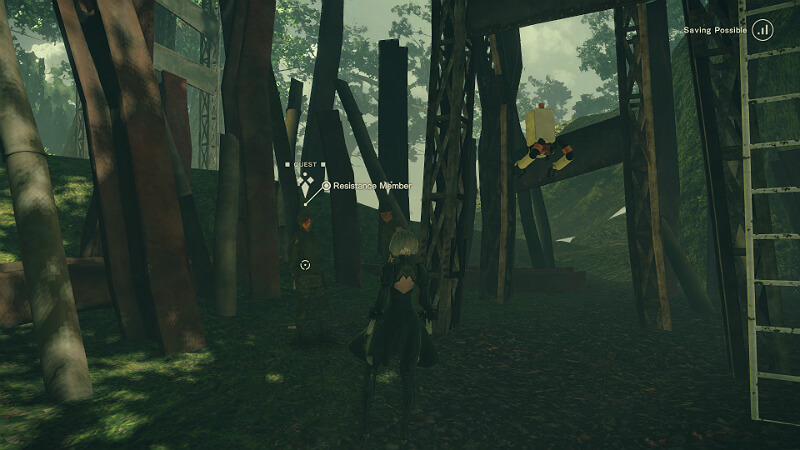
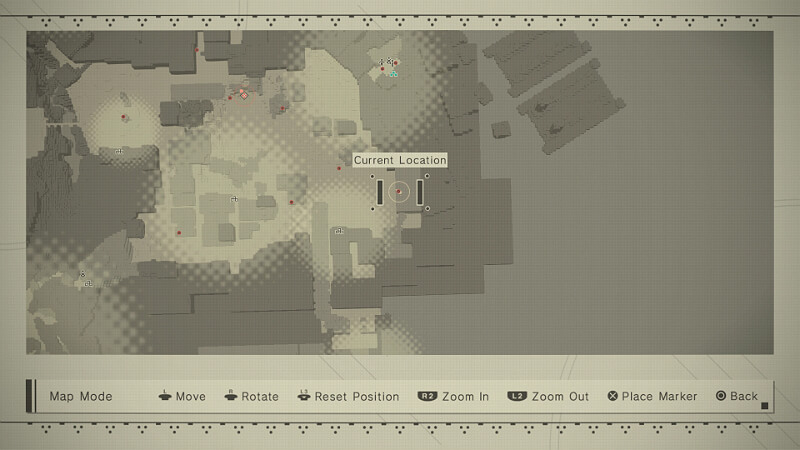
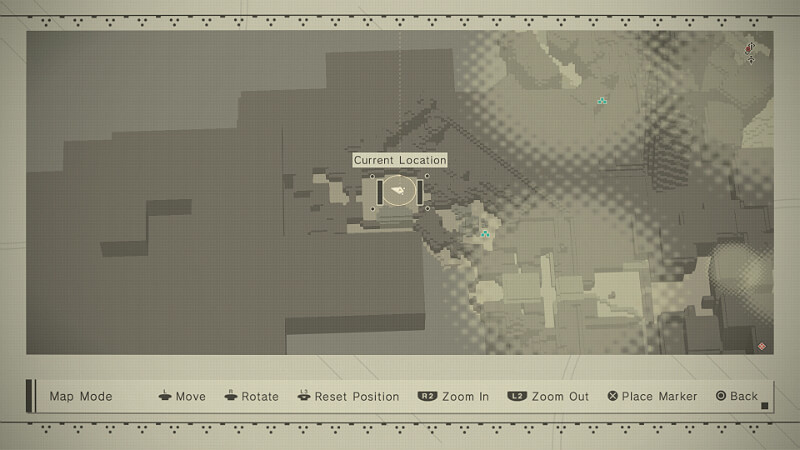
- Location: Complete the “Amnesia” sidequest at the City Ruins. The quest giver is located near a window on the second third floor of the building on the map below. She’ll appear after completing the Assault main quest during your second playthrough as 9S.
- Information: Creates an image of the user, drawing the attention of foes and firing upon them with Rod’s ranged attack.
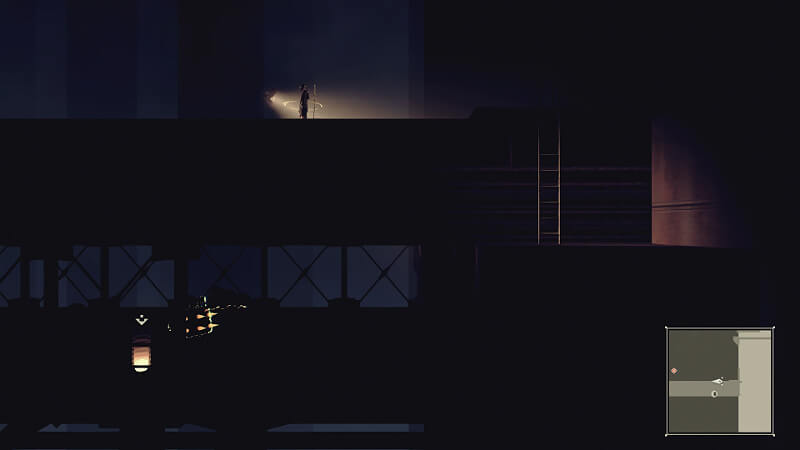
- Location: Found near a YoRHa member’s corpse on the roof of the building where you first land on Earth. Can only be obtained during Route C.
- Function: Creates a field that distorts time, slowing down all enemies that enter its vicinity.
- Location: Complete the “Data Analysis Freak 2” sidequest available during Route B as 9S. This quest will appear in your inbox at some point after you complete the first Data Analysis Freak 1.
- Function: Emits a temporary beam capable of healing the combatants as long as they remain within its radius.
- Location: Complete the “Sorting Trouble 3” sidequest during Route C. Sorting Trouble 1 can be initiated during Route A, and Sorting Trouble 2 during Route B.
- Function: Throws a volley of small explosive charges over a set period of time.
- Location: Complete the “Find a Present” sidequest. More detail on this sidequest will be in the Quest Help section below.
- Function: Unleashes a blast that sucks in any enemies in the vicinity.
- Location: Complete the “Retrieve the Confidential Intel” sidequest at the City Ruins.
- Function: Restraints and shocks one nearby enemy, causing continuous damage over a set period of time.
- Location: Found near a YoRHa member’s corpse in the area with the tank right before the roller-coaster at the Amusement Park. Can only be obtained during Route C.
- Function: Allows a combatant to ride atop a Pod- with a certain degree of directional control- as it rushes forward into the fray.
- Location: Found near a YoRHa member’s corpse on top of some containers at the Abandoned Factory prologue intro area (right after meeting 9S for the first time.) Can only be obtained during Route C.
- Function: Emits ultrasonic waves to scan the surroundings in search of hidden items.
- Location: Unmissable. Given to you during the story of Route A.
Quest Help

This section will focus on tricky sidequests that can prove difficult to complete. They’re mainly unmarked quests or quests with no specific waypoint.
Reminder: You can use Chapter Select to go back to previous chapters to complete any sidequests you may have missed. Chapter Select is unlocked after Route C (3rd playthrough.)
Notable Rewards: Type-4O Blade, A130: Bomb Pod Program
You must first complete the “Terminal Repairs” sidequest which can be done after the A2 Boss fight at the Forest Castle.
Note: The tricky thing about this sidequest is that it can initiated around the same time as a main quest which has you doing a similar task. If you’re unable to begin this quest, then you should first complete the main quest where you must destroy some enhanced (red/black) machines near a terminal in the City Ruin’s crater.
An easy way to initiate “Terminal Repairs” is to fast travel to the Desert Camp and then make your way into the City Ruins. Upon entering, Operator 60 will contact you about a terminal station that has gone offline. Head over to the marked location and destroy the machines. “Terminal Repairs” should now be completed, open your inbox and grab your reward.
For the next part, fast travel to the Resistance Camp and you should receive the “Find a Present” sidequest inside your inbox. From here it’s self-explanatory. Go to the Desert, complete the quest and enjoy your new Type-40 Sword along with the A130: Bomb Pod Program.
Lost Girl
Notable Rewards: Pink Ribbon, Blue Ribbon
This can be picked up at Pascal’s Village. It is notorious for a bug that sometimes prevent players from completing it. However, If you happen to run into this bug, there is a workaround for it.
During this quest, you will be forced to escort the “Little Sister” Machine while being ambushed by other hostile machines. Unfortunately, there are times where some of the enemies won’t spawn and Little Sister will stop in her tracks. There are two ways to fix this – attack the ground where the hostiles are supposed to spawn, or simply run a few feets away from Little Sister and come back. The enemies should now pop up out of the sand.
Data on the Old World
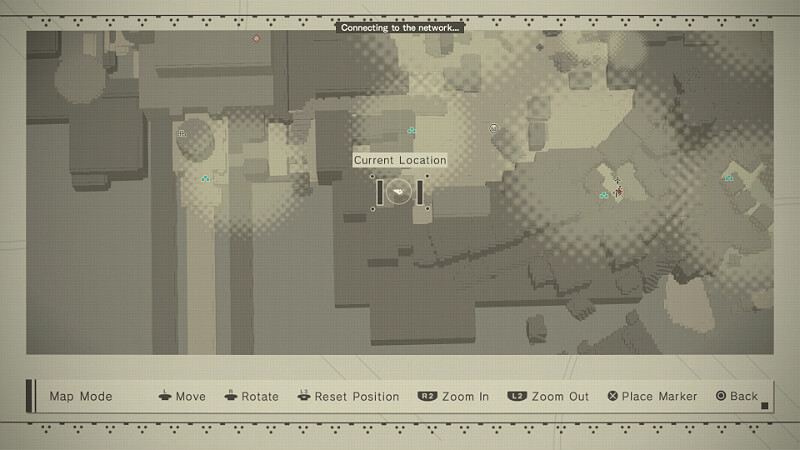
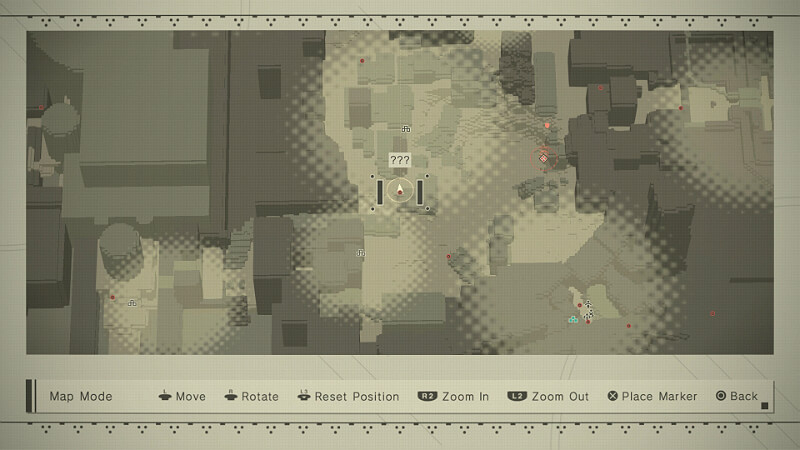
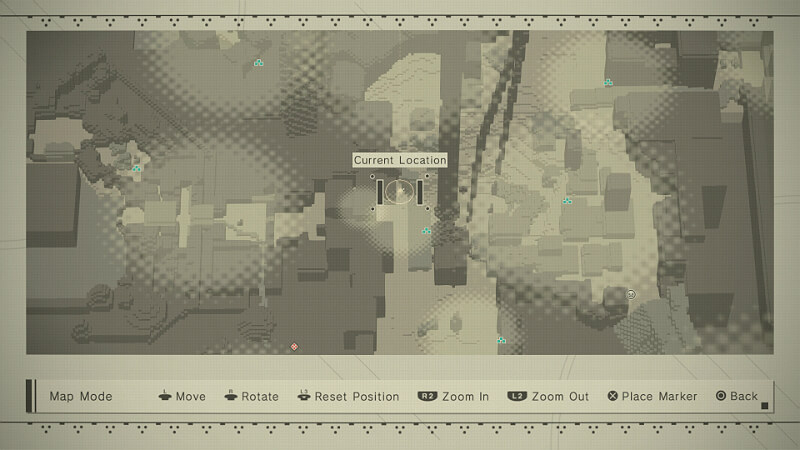
A quest with no waypoints. To complete this quest head to the location marked below in the City Ruins. There is a locked chest in the lower floor of this building. Use 9S to hack the chest. The object you’re looking for is inside.
Heritage of the Past
Notable Rewards: Spear of the Usurper
Another tricky quest with no waypoint. You are tasked with using the Scanner program to search for old world artifacts in the Desert Zone. This quest will first become available after obtaining the Scanner program.

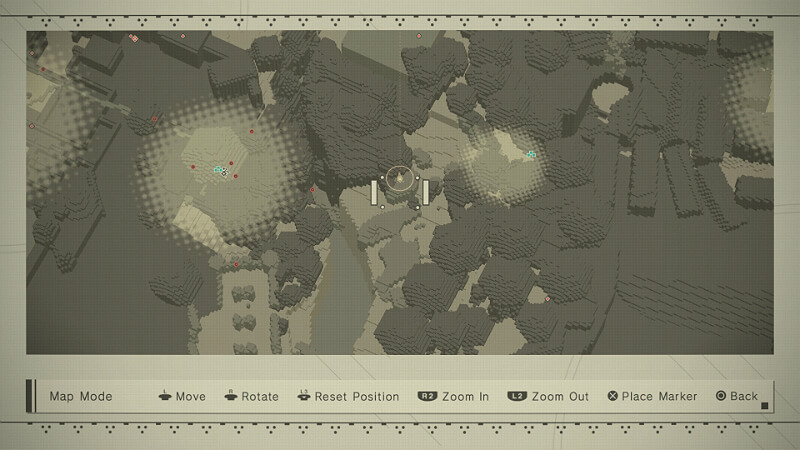
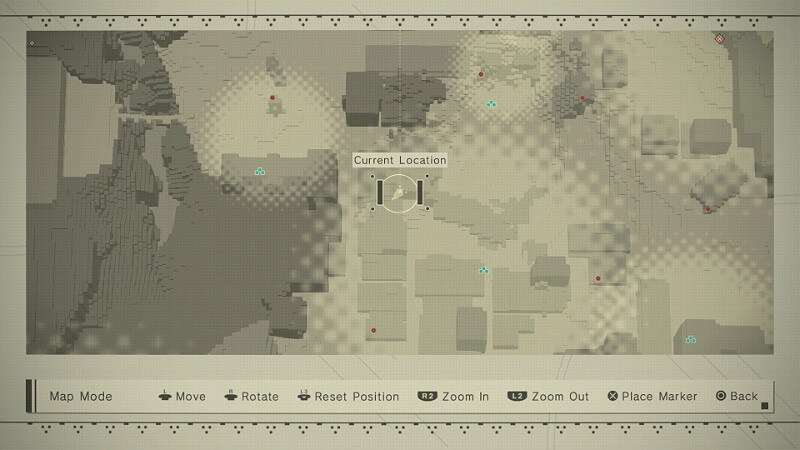
After picking up the quest, head to the following 3 locations and scan the area with your Pod Program for quest items.
Once all 3 objects are collected, return to the quest giver and turn them in. You have one more spot to go to. Head to the location below and be prepared for a fight. Once you retrieve the quest item, machines will ambush you. Destroy them, bring the quest object back to the quest giver and complete the quest.

Unmarked Secret Sidequest Part 1
Notable Rewards: Emil Heads (Combat Bracers)
This next bit will focus on the somewhat hidden quest chain available after completing Emil’s Memories. Must be able to defeat a level 99 boss.
Note: For this part, you’ll have to use 9S. If you’ve just used Chapter Select, be sure to speak to Emil at least once before attempting to continue.
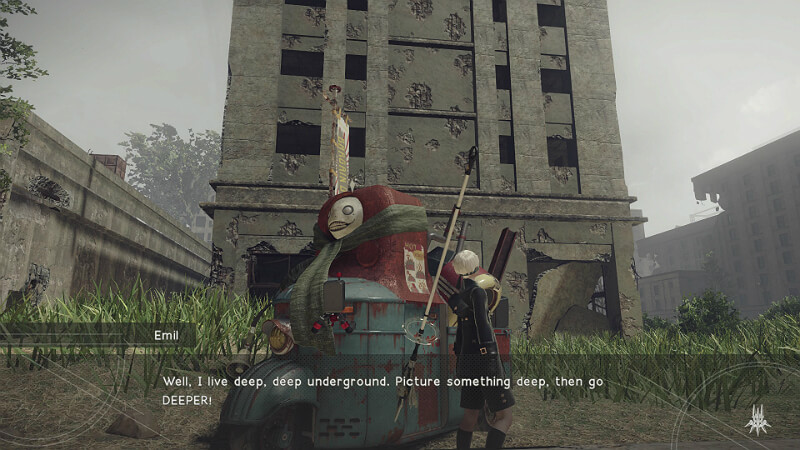
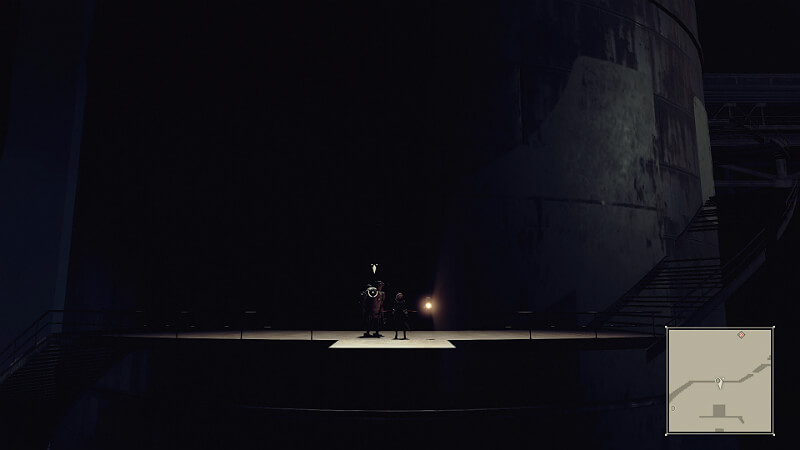
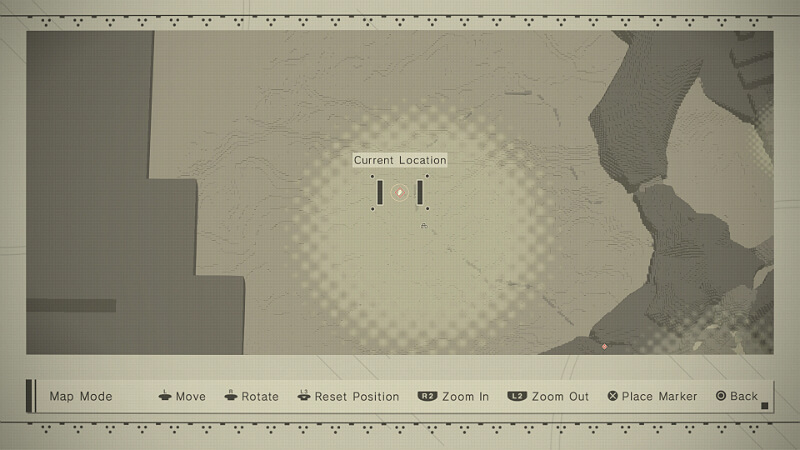
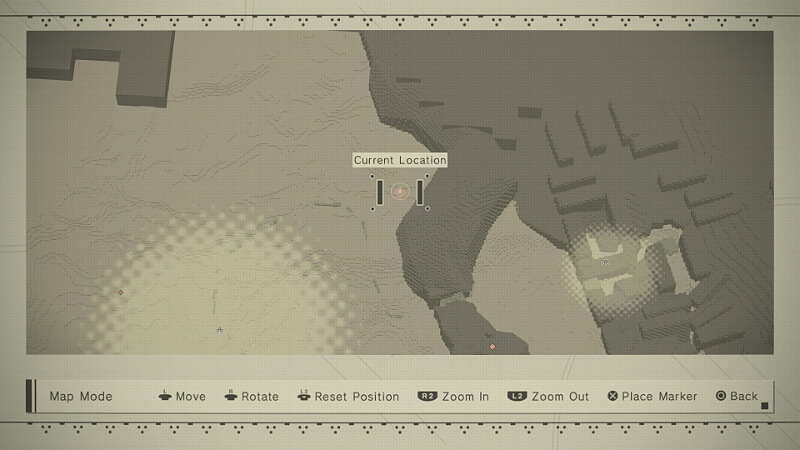
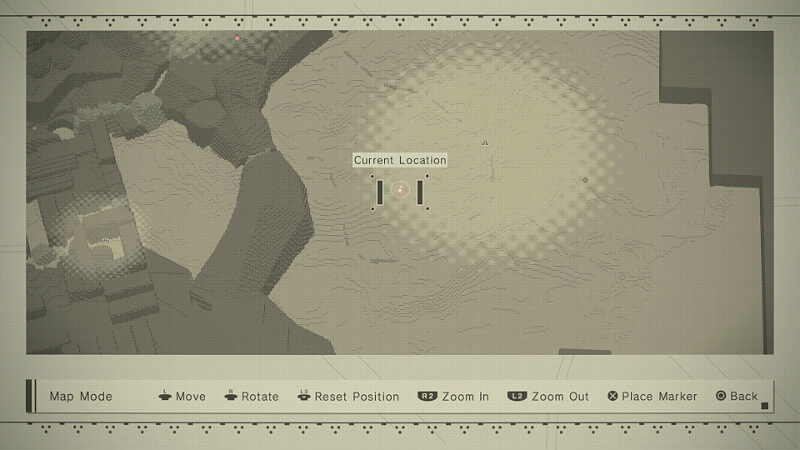
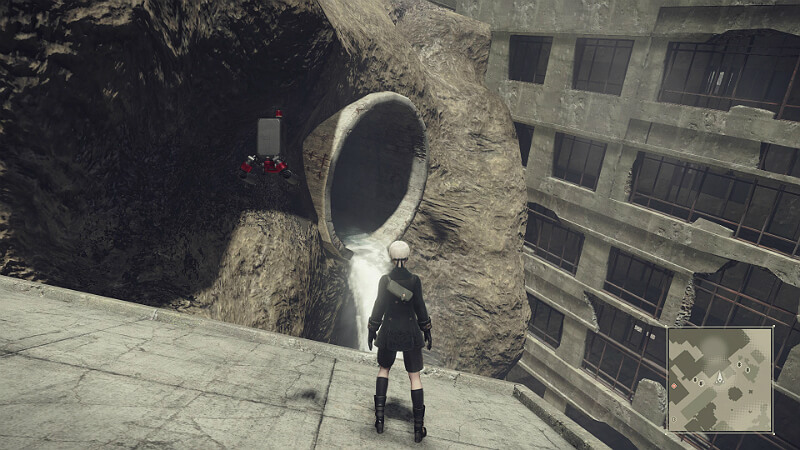
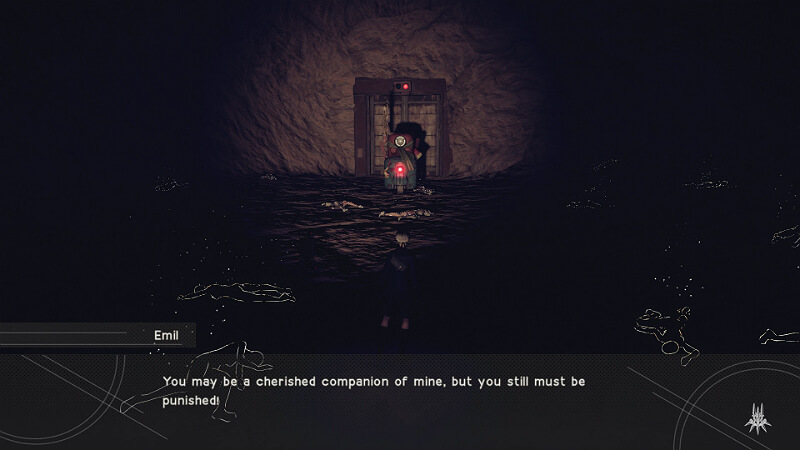
Track down Emil, wherever he is on the map. After speaking to him, he’ll mention that he lives “deep underground.” Head into the large sewer pipe shown below and take the elevator down.
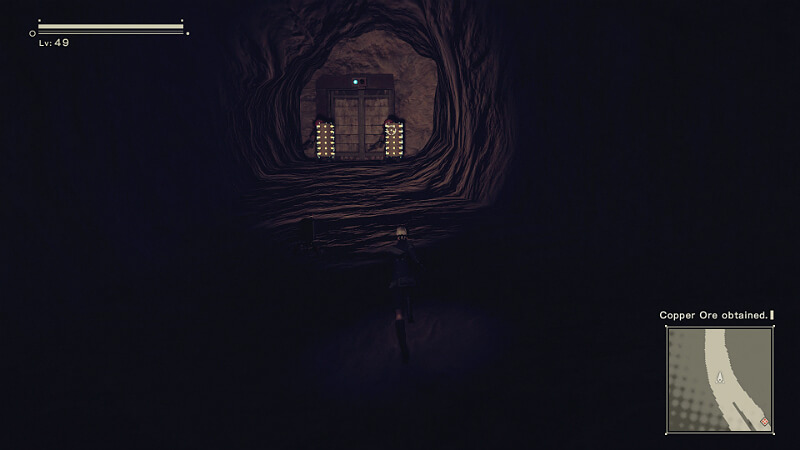
Once underground, descend to the lowest level and keep going until you reach a door with two shield enemies guarding it. It can be opened if you did the previous steps correctly.
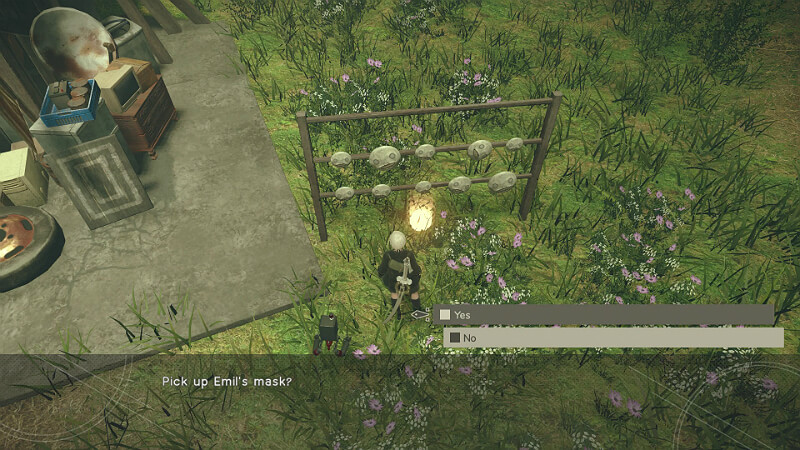
This is Emil’s home. Go inside and steal Emil’s mask.
After stealing the mask, return and speak with Emil. He’ll tell you about his new security safety measure.

Head back down underground and go into Emil’s home once more. There’ll be a locked chest. Hack it and you’ll receive an Emil’s head (fashion accessory.)
When you attempt to leave, be prepared for a fight. Emil will ambush you at the door. He’s level 99- if you manage to defeat him, he’ll drop the Emil Heads (Combat Bracer) on the ground.
This is the end of the first-half of the secret quest chain.
Unmarked Secret Sidequest Part 2
You can only initiate this quest after finding and upgrading every single weapon to level 4!! See under the Weapons section on how to upgrade weapons to level 4.
Note: You may use any character for this part. They’ll each have their own dialogue for the encounter.
Once you’ve completed the prerequisites, head to the Shopping Mall district. Emil will be waiting for you there with a new quest. He’ll speed off into the Desert Zone afterwards.
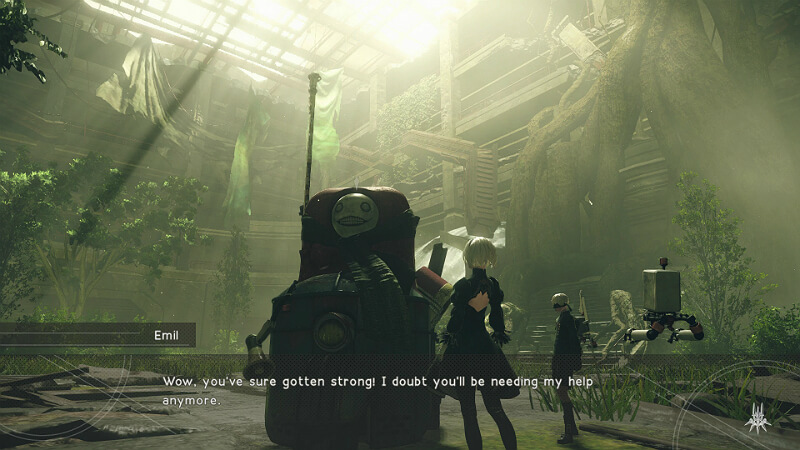
Follow him (you’ll have a waypoint marked on your map this time) for a fateful encounter and another level 99 boss battle!
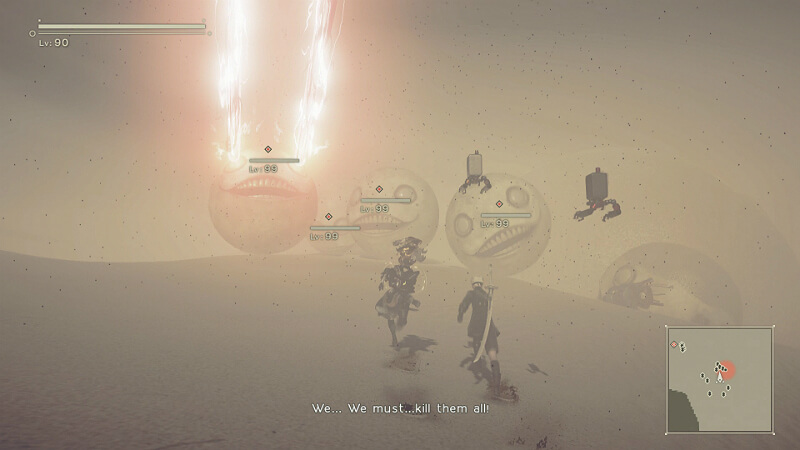
During the fight, the boss will attempt to self-destruct; if you allow him to do so, you’ll receive one of the alternate endings, Ending Y. Stopping him from self-destructing will end the boss encounter. This marks the end of the secret quest chain! Congratulations!!
I may add more to this section as time goes on, but this is it for now!
Closing Notes

Thank you for reading, I had a lot of fun making this guide; here’s hoping it’ll prove useful! If you have any questions, feel free to ask away in the comment section and I shall do my best to answer!
Have fun reclaiming Earth! GLORY TO MANKIND!
Original Link – Continuation of discussion


Add comment