A few tips and strategies to help keep your survival games less stressful and last longer, easier.
Preface

Hello! I hope this helps you for survival missions. I decided to write this as I have found a lot of people that, either due to bad info given to them by others or just lack of knowing/having info making simple mistakes in survival missions that make it overall more difficult for themself and others. Hopefully this guide will be able to help bypass some of that so that everyone can get more done, and more efficiency out of their survival missions.
That said, a few things to get out of the way, as I do not intent to repeat them/go over them later:
a) Failure: In survival, once you activate the starting alarm, a status bar will pop up on the top left corner of your screen, starting at 100% and ticking down towards 0%. When it hits 0%, the air will be cut off, and all warframes will take constant damage until they are left at 5 hp (you will never be downed as a result of running out of life support, but it does mean anything can and will down you on a hit). You can not regenerate shields or hp (though abilities can give back hp like Trinity’s Blessing, however your hp will immediately drop again) and must head to extraction immediately.
Note: every 20% life support is approx. 30s, so a full 100% is roughly 2 1/2 minutes of time
Another Note: If for whatever reason, you continue on for a set amount of time after life support runs out (around 10 minutes) by means of invulnerability, the game will apparently stop your movement.
b) Rewards: At every 5 minutes, (5, 10, 15, etc) you will receive a reward from the lone tenno operative that is currently raiding the ship. What you receive is based on the time interval, and the enemy you are fighting/area you are fighting at. for a list of the rewards against the three factions, see here: survival rewards, and for the void specific rewards, see here (scroll down and click on the ‘survival’ tab): survival void rewards, finally, the Orokin Derelict survival rewards can be found here (those listed next to the ‘survival’ mission type): Orokin Derelict survival rewards.
An important thing to notice is that for normal survival missions (those that you can find on the planetary mission map) at the 15 minute mark, and every 20 minutes thereafter (ie: 35, 55, 75, etc), you will receive a random key. If you look at the drop table rewards in the above link, it lists the % chances to get specific key types and tiers per faction and starting faction level. For Void and Derelict survival missions, you are guaranteed either a key, prime piece (weapon or warframe), or forma at every 20 minutes (20, 40, 60, etc).
c) As time goes on: As the total time in the survival mission increases, enemy spawn rate, variety, and levels also begin to increase. Spawn rate will steadily go up, until you reach the point where new enemies spawn the instant another dies (assuming you are at the total enemy cap at that point, otherwise they just spawn at a rediculous rate). Starting at around 5 minutes, you will start to see different and stronger enemies, including heavies and specialists (using grineer as an example, at 5 minutes you would see bombers, and soon napalms, scorpions, and scorchers). However enemy levels do not increase much at all until around the 20-25 minute mark. Once you reach the 25 minute mark, enemy levels will begin increasing at a set number of levels per minute or two. Also recently added, special units (those that have increased health, damage, and some sort of special ability along with a higher xp worth) will spawn at around a rate of 1 every 5 minutes.
Lastly, the frequency of life support capsules that Lotus will send you will decrease.
Ok, now on to the survival mission itself.
Before and as you enter: Information is key

Before I enter a survival mission, I do a checklist, where I will basically ask myself a few questions and then build/equip my frame accordingly. What enemy(s) am I fighting? Am I currently leveling a weapon(s)? What level am I and what level are they? What planet, and therefore what tileset should I expect?
Let’s go over these things one at a time:
What enemy(s) am I fighting?: Knowing who you’re fighting means you can have the appropriate weapon ready, or the configuration (ie: if you’re fighting infested, and your rifle has an ice, a fire, and an electric setting, you would want to go with fire to maximize your damage) to maximize your damage capabilities. Not sure what is best against which faction? Look in the warframe wikipedia under any of the damage or armor types to find out what gets damage bonus’, and which do less damage to enemies.
Feeling lazy? Here’s the damage type list, from the basics of all weapons (impact, slash, and puncture) and the elements along with their elemental combinations: Damage 2.0 + Elemental Combinations.
Am I currently leveling a weapon(s)?: Basically a double check of yourself to make sure you’re not taking unranked weapons to a level 30+ missions. My personal rule of thumb so that I don’t accidentally do this is that either my main or secondary will be the weapon I am leveling, and the other will be my maxed out weapon. In this way, even if I’m leveling a new frame/leveling a frame up after forma’ing, I still have a backup if say the Stalker, Harvester, or G3 attack and can cope with the gradually leveling enemies.
What level am I and what level are they?: Pretty straight foward. You shouldn’t be a rank 5 frame entering survival missions where they start at lvl 20 unless you’re reactor’d, and well modded. My suggestion is to go to Mercury if you’re unranked, and wait for lvl 10-15 survivals until you’re frame is level 7-12. Want materials from a particular area but too low to do survival? Mobile defenses are actually a very good way to level a base frame plus farm (or do one round in Mercury first and gain a few levels in order to do higher level ones).
What planet, and therefore what tileset should I expect?: All stages are built with preset tiles/rooms with a theme (also referred to as tilesets; for example the “forest tileset” will be all of the forest rooms) and arranged in a completely random way. Some particular rooms tend to go hand in hand with one another and you will very commonly see them connected to each other. Knowing how these tilesets work and where the life support capsules spawn ahead of time can help a player know where enemies are likely to come from (and therefore be ready ahead of time), or where to run to when in a hurry.
Despite the amount of text involved, in practice all told this takes roughly a minute or two. As you get more accustomed to it, you won’t even have to think about most of this, but simply do.
During the run itself
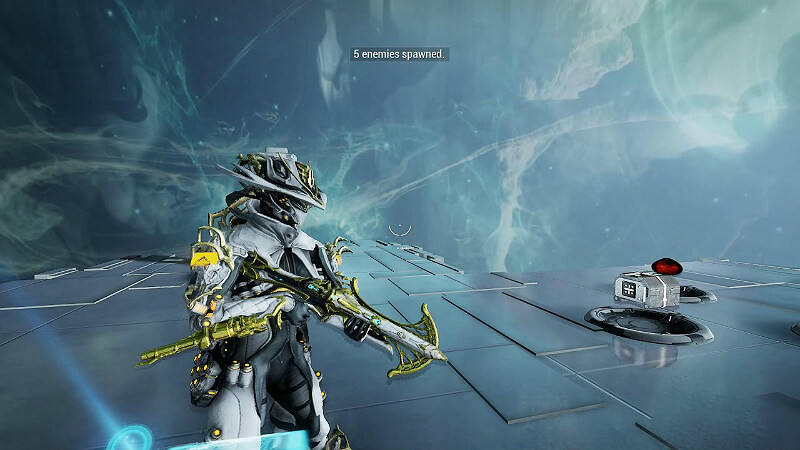
Ok, so now you’re in the survival mission, you’ve hit the alarm, Lotus has pointed you in the direction of the first Life Support Capsule (abbreviated as LS from here on) and you’re off. Enemies begin spawning and now it’s time to begin the killing so you can get those precious Life Support Packs (abbreviated as LP from here on) and keep your timer going.
Maximizing your time
- Generally you want to head to the LS room and hold it, letting enemies funnel to you at their pace, or exploring no more than one room out (reasons explained below). If you have used all of the LS in the room and you need to use more, you should as a group move to the next LS room, or if you have a room which has a high enemy volume/charge in rate, have one run to activate the LS and quickly come back.
- If it seems/feels like enemies are coming at you very slowly at first, don’t worry this is normal. The rate at which enemies spawn gradually increases over time, and if you have a good room that sees a lot of flow, more will pour to refill the number you just killed almost without pause.
- Your damage potential is very important at all times (both weapon and ability). The total amount of enemies that can be present ACROSS THE ENTIRE MAP IS CAPPED TO A SET AMOUNT!!
- Because of this, spreading out as a group is not advised. staying within one room or within a room of one another is best. Having this happen in pubs is going to be rare more than likely, but sticking together also has other benefits. More concentrated firepower, easier to cover your allies and vice versa, and reviving is more managable. Everyone can get all of the resource and mod drops as well, since they won’t need to be running all over the place, and also, (and probably less known) is that all experience is shared with one another (am I making that stick out enough?). That’s right, it doesn’t matter WHO gets the kill, as long as you are within a set range of the person making the kill shot, you will also receive full xp from that kill, regardless of if you did anything to that target at all or not.
- The faster you kill, the more chances at drops you get, like money, mods, etc, and most importantly LPs. Particularly later on, how long you can sustain the run will be based on the amount of LPs you are or are not able to get. You should think of LSs as a ‘safety buffer’ that you only want to use if you absolutely have to.
So as a quick review: stick together, kill things as fast as you can, profit.
When to use LS’…
This is a problem/issue that can halt a good run in it’s tracks in no time flat, and can be one of the most crucial aspects of a survival run along with the total groups damage dealing ability.
For some reason, many think that keeping the total life support as close as/at 100% as possible is the best/only way to do it, which is partially true. However they do this by using the LS the instant they hit 70% (explained better below), wasting a LS you could of saved for a later time, when you could of really used the boost.
Now, before I explain why you should be waiting till around 50% before activating a LS, first i must mention that using a LS restores 30% life support, and LPs restore 5% each.
So, if you were use the LS at 70%, you are now at 100% yes, but you can not go over 100%, no matter what you do or try. So if you/your allies are killing (as they should be), any LPs that drop are now, in effect, completely wasted as they are picked up, particularly if a large group die at once and quite a few drop. However, if you wait till around 50%, you will only go up to 80% life support, and have a 4 LP ‘buffer’ to 100%.
Sentinels

The thing about Sentinels is that no one is genuinely “superior” to the others. They all have their own quirks which are best used as a suppliment to your gameplay, though that said some, just like some weapons and frames, have stronger advantages than others. So for each sentinel, I’m going to list a few pro’s and con’s specific to survival only, not taking into consideration their uses outside of survival missions. Also, as weapons can be mix and matched now as well, they will have their own section after the sentinels themselves.
Carrier:
- Pro: Able to ‘suck in’ surrounding things that your frame wants/needs (ie: if your secondary ammo is full, but you are using a rifle and not full on ammo, it will pick up only rifle ammo, and ignore sniper, secondary, and shotgun ammo).
- Pro: This also includes LPs, resources, mods, and credits, allowing you to pay more attention to the fight instead of collection
- Con: Lacks strong offensive or defensive abilities (only the ability to fire it’s weapon)
Dethcube:
- Pro: Vaporize can easily one-shot lower level enemies, and does Radiation damage, which can temporarily cause enemies to attack their own faction, and can stun higher level enemies.
- Con: No defensive traits
Djinn
- Pro: Has the longest ranged attack precept of any sentinel, able to attack enemies from 60m away (10m further than the max range abilities can affect a target from you)
- Pro: Fatal Attraction will pull enemies into you and stun them dealing damage (though miniscule)
- Con: No defensive traits, sometimes you don’t want enemies right next to/on you, like toxin ancients
Shade:
- Pro: The ability to become invisible can be great for when you are knocked down (making enemies stop targeting/shooting you as you get up) or to simply get from point A to B unfettered (as long as you do not attack/use abilities while invisible).
- Con: For invisibility to activate, must be within a set distance of enemies, of which they can normally see and shoot you before the invisibilty will kick in
- Con: Very weak offensively
Wyrm:
- Pro: Crowd Dispersion is both a greath offensive and defensive ability at the same time. It deals some magnetic damage and can ragdoll (instead of the enemy just dropping to the floor, it can fling them far away) and will always stun. Better yet, it can work on any non-boss enemy, saving you the posibility of getting knocked down when you turn the corner into a heavy unit.
- Con: Crowd Dispersion has a 15s cooldown between uses, and it’s range maxes out at 10m.
- Sweeper: technically with the most ‘oomph’, but being a shotgun, scatter and distance will quickly drop it’s damage abilities
- Deth Machine Rifle: can be the highest dps sentinel weapon due to it’s gorgon-style attack (short charge up time to fully automatic but does not need to reload) and can get the most out of the Fired Up sentinel mod the easiest.
- Stinger: Decent power, though lower fire rate, the biggest strength of this weapon is it’s 100% toxin proc rate (even if you have changed it’s element to something else). Particularly good against a large amount of shielded enemies, as the poison damage ignores shields and does direct damage to health/armor
- Burst Laser: Ok damage, fires around 7 rounds in a burst before a short cooldown and firing again
- Laser Rifle: Much like the burst laser, however lower damage, with more shots per burst and with higher accuracy
Weapons: Bullets and Bringing the Boom
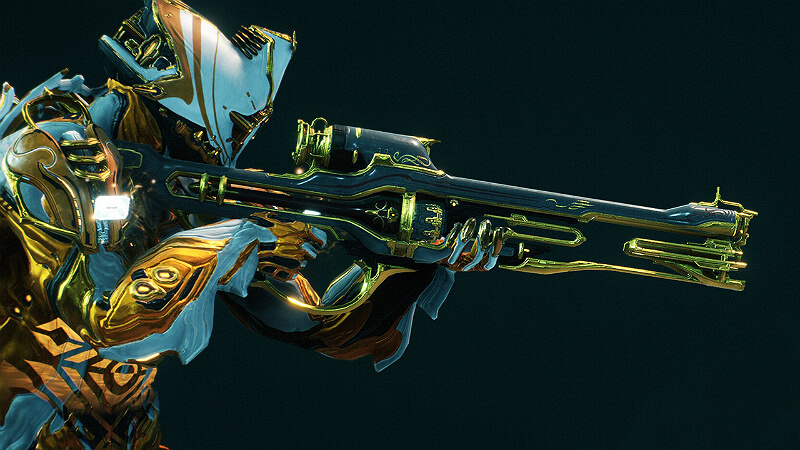
First off, I’m going to split this section into three parts. First about weapons you shoot normally, second will be explosive weapons, and lastly melee’ing.
Now in survival, having a weapon that can deal well with groups is key, but retaining a high damage capability so that it can plow through large masses quickly to greater maximize your drop potential while also reducing the number of things shooting at you quickly. I’m going to go over a few primaries and secondaries that I like bringing and why. <note: don’t view these as you MUST take one of these, but as a guide as a base guide of what to look for your weapon being able to do>
- Soma – A very popular weapon if for different reasons. While soma’s base dmg is low, it’s crit potential and power are unbelieable, and with a 100 round clip you do not need to frequently reload. What I like most about this weapon is the ability to be a marksman’s weapon, even at range. So I can pop off a few rounds at range, get multiple headshots, and be able to deal with stronger enemies and groups at the same time. The one thing to be careful for is that the soma can be a major ammo hog later on when it takes more bullets to kill things.
- Phage – A bit of an oddity, and takes some getting used to, but is one of the most ammo efficient weapons in the game and with a crazy amount of base damage. As long as you are able to work around getting it’s beams focused, you can, even at higher level enemies, sweep through rooms and destroy groups of enemies.
- Karak – In dealing with lower level enemies, I end up prefering the karak over the soma, due to a faster reload rate and slightly better ammo economy, which retaining the accuracy. However past mid game, the karak starts losing effectiveness.
- Brakk – I got this from the event long ago and have forever loved this sidearm. Throwing a lot of damage mods with punch through and it can go to down in short and medium range on single targets and groups.
- Boltor Prime – While a more difficult weapon to get (screw you T3MD…) the power of this can not be denied, along with it’s accuracy. The main drawback to this weapon however is traveling bullets, so you need to lead your moving targets.
Obviously, the aoe of explosive weapons is very handy and can quickly turn the tide in survivals, particularly if you have a vauban or a choke point in which to funnel enemies into a Micheal Bay fueled explosive paradise. However the ability to melt your face off with your own explosions makes it a double edged sword, so here are a few things to watch for when using said explosive weapons.
- Penta – The only explosive i personally take into survivals, because it’s the least likely weapon that I will kill myself with. The key to this is knowing your explosive difference: for me, after I fire, I have a mental countdown as to when i can detonate the grenade. This is something you will have to figure out on your own though, but done right, you can detonate it, and kill things attempting to melee you while remaining unscathed by the explosion itself. Also, being able to bounch the grenades off walls allows you to reach enemies around a corner without exposing yourself to their fire.
- Ogris – The fire and forget of ogris is nice, however you have to be very careful when you release the trigger. The greatest benefit of the ogris over penta however, is that multishot mods do not adversely affect you. For penta it’s a second grenade you have to watch out for and double the chances of a bad bounce killing you. For the ogris is double the damage in the same area you aimed.
- Torid – Difficult to use in survival unless you have a vauban or a choke point, however the ability to stack multiple gas clouds in a single area and thereby the damage, means it’s dps potential is greater than the other two.
An important note about your explosives:
When you detonate/your round impacts, the enemy takes dmg based on what area of their body enters the blast radius first. What does this mean? Well, if you detonate a penta round at somethings feet, it will take feet/body damage. Above it’s head? Your explosive now gets headshot bonus damage. See where I’m going with this?
With penta’s grenade lobbing and ability to chose when it detonates, it has the easiest time of headshoting enemies, but that doesn’t mean the others can’t either, it’s just more difficult. More difficult, but worth all of the bonus damage from getting headshots.
Since melee 2.0, meleeing overall has taken a drastic change, particularly due to stances and how they affect/add to melee weapons. While it’s damage potential is undeniably higher, I feel the need to warn that doing a melee only build has serious issues on higher level enemies in survival missions.
The primary concern/issue is it’s ability to deal with groups of enemies in a quick fashion. Yes, I’m aware that melee is markedly stronger, however the issue that I see often is that those that go the melee only route are stuck fighting, say a heavy gunner, for a minute or so trying to melee it down, when you can run up and shoot it with a few rounds in literally seconds. This difference in kill speed becomes even more apparently as enemies become stronger and more durable. When your success hinges on your ability to kill quickly and increase your LP drop chances, melee’ing like this harms your run more than helps.
All that said, I am not saying you “can’t” run around melee’ing everything in sight, what I am saying is you need to be mindful. There’s no issue with you wanting to melee, but when it starts taking longer and longer to kill, you should be considering switching to one of your other weapons in which to increase your kill speed time.
Group Setups and Strategies

So lastly, will be going over some basic and advanced tactics and warframe groupings for survival missions that you can use or adapt to your own playstlye and group setting.
Before going over specific frames, I would like to say there’s been a few comments about how people would use “this frame over that” or “instead of using that frame use this frame to do it that way instead”, which is fine. The point of this section is simply to give a general idea of what utility abilites can easily do, not an ironclad mold of what “must” or “must not” be done. If you were to look at Loki for example, simply the ways to use a single ability and for what purpose can be vastly varried.
Example: You have a large grouping of 60+ enemies, with a good amount of heavies in front of you, and you wish to
Radial Disarm them, you could:
a) Invisible, run in the middle of them, Radial Disarm
b) Decoy behind/above them, and when they turn their backs to you, run up and Radial Disarm
c) Switch Teleport immediately into Radial Disarm
d) Decoy behind them, Switch Teleport to it, Radial Disarm under less fire
And this is only looking at one frame, to use one ability. So as you can see, it’s easy to build your frame to fit your playstyle/ingenuity, and if it works well, go for it.
First, a list of some frames that do particularly well in survivals and why
- Nekros – this frame in particular is almost a must if you want to do high time runs successfully if modded correctly. A Nekros with maxed Desecrate, stretch, flow, and power efficiency can just spam it as quickly as enemies die, greatly increasing drop rates, and of course, LPs.
- Nyx – sadly, greatly overlooked. Chaos is an increadible tool that has no problem scaling with the level of the enemies coming at you, since it turns them against one another. Absorb can also be a lifesaver and powerful tool when used properly
- Nova – Molecular Prime is a very powerful tool, especially when enemies are reaching higher levels, and no, don’t let anyone tell you it’s “because of the explosions” because that’s not what M. Prime does. It debuffs all enemies so they take 200% extra damage, and reduces their move and attack speed up to 75% (based on ability level + power strength. Negative power strength instead makes them move/attack faster). This allows everyone to do more damage to enemies as well as reducing the rate at which your enemies are shooting/meleeing/dealing damage to you (M Prime a Heavy Gunner in full tilt, and the difference in firing speed is VERY noticable). This also gives you easier means to avoid melee combatants/get behind cover with less bullet flak in your face while doing so.
- Vauban – Particularly if you find a nice spot to hole up and just wait for them to come to you, Bastille and Vortex make clustering enemies for easy kills a snap.
- Mag – While more effective on corpus, and void enemies later on when shield drones are everywhere, Shield Polarize is still both an effective offensive and defensive tool, since it will strip shields/damage enemies while restoring the shields of allies.
- Trinity – Healers are always nice, and Blessing can be a lifesaver in obvious ways. Also, Energy Vampire, while restoring energy to all in the abilities radius, does damage to the target based on it’s % health. In other words, level means nothing to it, it will always do proportional damage to it.
- Zephyr – Zephyr’s ultimate ability can lift and ragdoll enemies, and even if it doesn’t kill them, they are still unable to attack you, making them easy targets. Zephyr’s rediculous mobility allows her to get from A to B (like to a LS) in little time and avoiding many enemies along the way.
- Loki – Invisibilty to revive/use a LS, decoy, and (depending on the enemy) the ability to permanently disable enemy weapons (even melee weapons will be disabled and they will use something weaker) makes Loki a very powerful support frame
- Frost – After Ice Globes changes and fixes, Forst is no longer just the sit still and orb protection frame. However, modded correctly it can still take a large amount of punishment before falling, and greatly reduce or slow down damage being done to you. Avalanche also has some decent power behind it for offense
- Rhino – Iron Skin is the name of the game. The inability to be knocked down makes Rhino great for getting to LSs and reviving fallen allies. Also, the ‘stasis’ effect of Rhino Stomp can buy breathing room for your party.
- Oberon – While his attack moves do not scale very well as enemy levels rise, Reckonings quick cast time and ability to temporarily hold in place/stun a large group of enemies while doing damage can help an ally in a bind or just stop attacks. Renewal will be his strongest asset, regenerating the hp of allies while, if Renewal is still active, instantly reviving them when they go down.
- Others – while every frame is unique, the rest mostly fall into a damage dealing, or offensive support frame, with little or no group benefit abilities. The basic stratagies of these frames is just to spam their damaging abilities and help kill everything faster.
Advanced Tactics:
- Knowing which rooms have enemies more likely to pour into and which ones they’re likey to get stuck in (the AI does NOT do well with elevators, and can get stuck/not move from floors only accessible by them easily) means you can pick where you want to try and make a stand and funnel these enemies to you.
- Being able to have your group with their backs protected (like an un-openable door) and focus all their firepower forward can make life much simplier, particularly if you have a vauban.
- Frame ability synergy will be a godsend on higher timed survival missions. A good position to funnel enemies into, with a Vauban’s Vortex, a Nova’s M. Prime, and then aoe weapons/abilities can quickly and effectively crush large groups of enemies while the Nekros Desecrates and keeps all drops in a nice, easy to reach package.
- Chaos plus M. Prime is also a great synergy, as enemies will attack themselves while additionally taking and dealing extra damage, helping kill themselves off en-masse.
- While these are just some of the more common/obvious examples, synergizing your abilities with the abilities of your allies can expedite and streamline the entire process, turning a frustrating run into an easily managable killing spree. Don’t be afraid to use each others abilities on top of/with each other!
Thank you for sticking through the whole wall of text, there was a lot to go over! With this information, you should be able to, bad tileset not-withstanding (some rooms do not spawn enemies well, or glitches occasionally happen, and spawn rate/number is vastly reduced) easily make it to the 15 minute mark minimum, and with even just an ok group, make it to 20-25 minutes every survival. Good luck out there!
If you have other helpful advice or wish to add something, feel free to post, and I’ll try to respond in a timely fashion.
Original Link – Continuation of discussion






Add comment