
You don’t have to be Mercedes Romero to mod your game. It’s so easy, even the collective intelligence of a group of presentients can do it!
Introduction
Don’t like it? Mod it! Really, it’s that easy. If you have one little thing that irks you, or you want to change something slightly more complex, this guide aims to be a clear and concise solution to help you make that mod you need.
This guide is meant to be simple, for people who have no coding experience, and will not have more complex topics added to it.
If you see an error or are confused by part of this guide, don’t hesitate to comment! I strive for accuracy and clarity.
Mod Setup
The first thing you’ll need to do is to get a blank mod template from Stellaris.
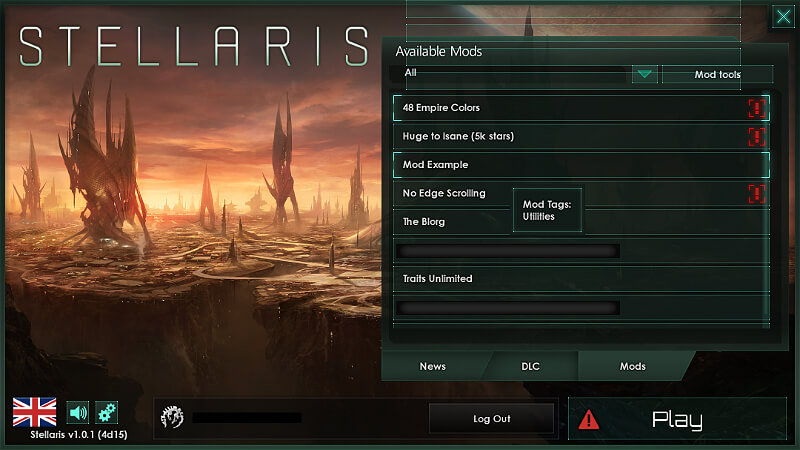
- Mod Tools Button
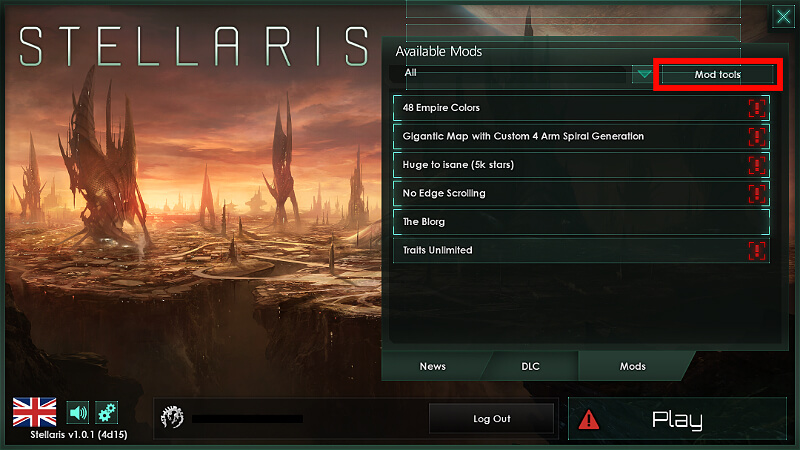
To do so, start the game launcher and click on the Mods tab, then the Mod tools button (highlighted in red).
- Create Mod Button
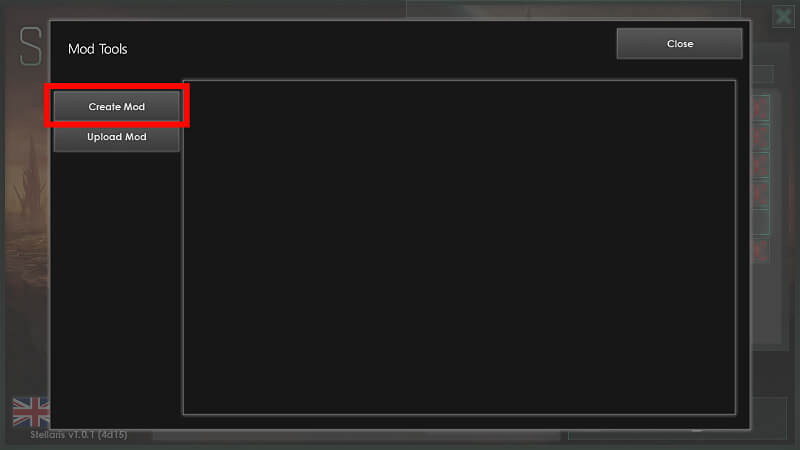
Click on the Create Mod button.
- Mod Creation Screen
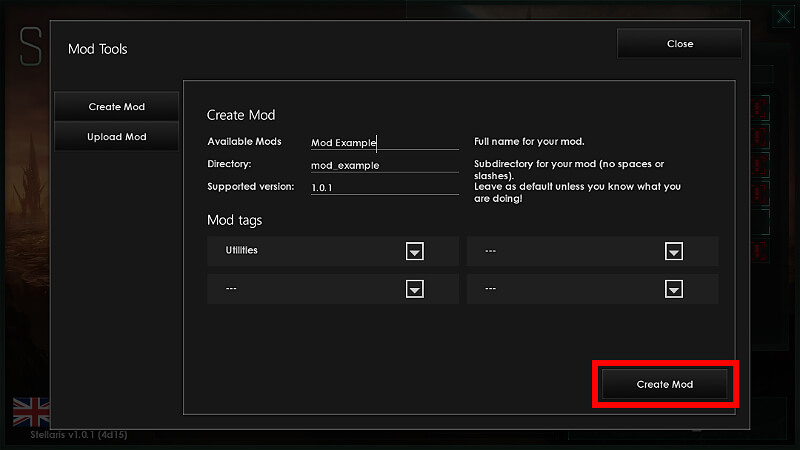
Available Mods is where you put the name of your mod.
Directory: is what the folder for your mod will be named (good practice is just to put the name of your mod, separating any words with underscores).
Leave the Supported version: number alone (it simply tells the user of your mod if the mod is out of date).
And finally, add any mod tags that apply using the drop-down menus.
When you’re done, click the Create Mod button in the bottom right.
- Voila!
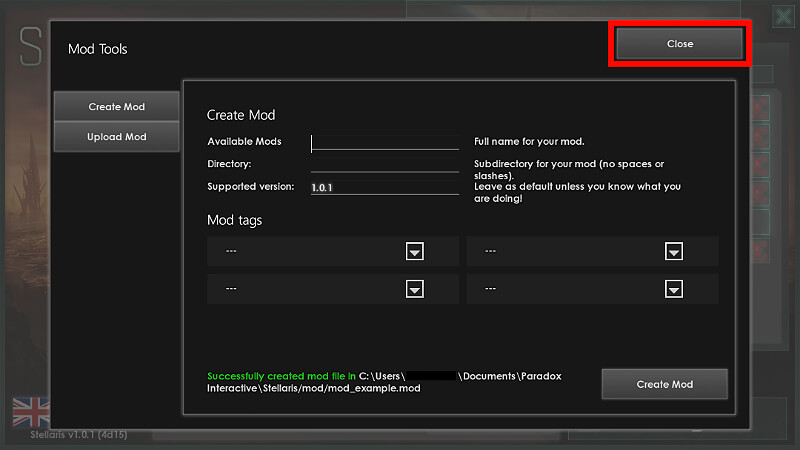
Your new mod now has its own directory! Click the Close button in the upper right and exit the Stellaris launcher. We have other things to do.
Files and Folders Setup
You’ll need to set up the proper files and folders before you can get started.
- The Common Folder

This is the Stellaris/common folder, where all the variables in Stellaris are stored. This is where you (most likely) want to look to get things done.
- The Defines Folder
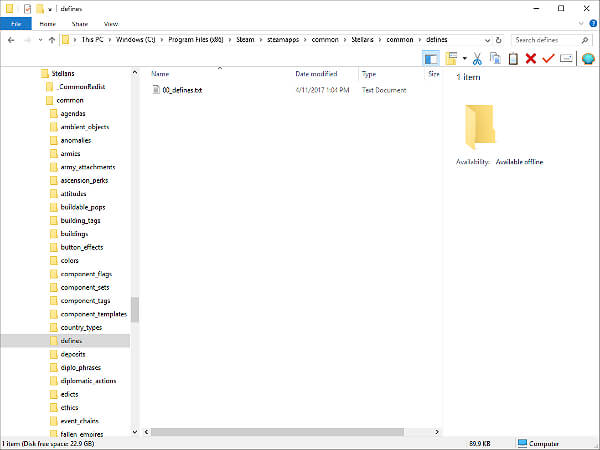
This is the Stellaris/common/defines folder, where the incredible, amazing 00_defines.txt file resides.
- The Mod Directory
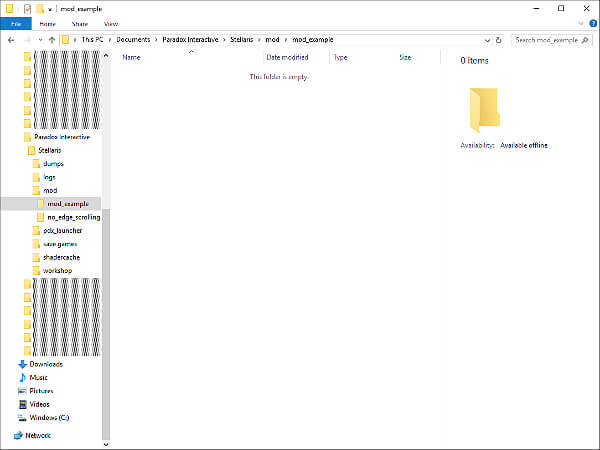
This is your mod’s directory, where all the necessary files and folders go to make your mod work. This folder acts like the main Stellaris folder for your mod. What we need to do now is put the common and common/defines folders into the mod directory.
- Subfolders Added
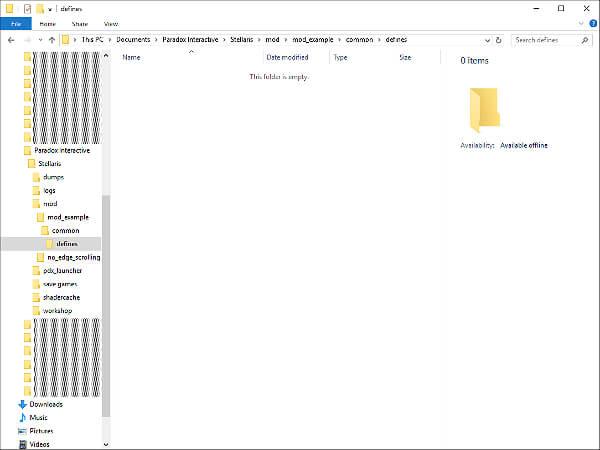
Once you’ve added your subfolders, it’s on to the next step – creating a .txt file.
- Rename a Text Document
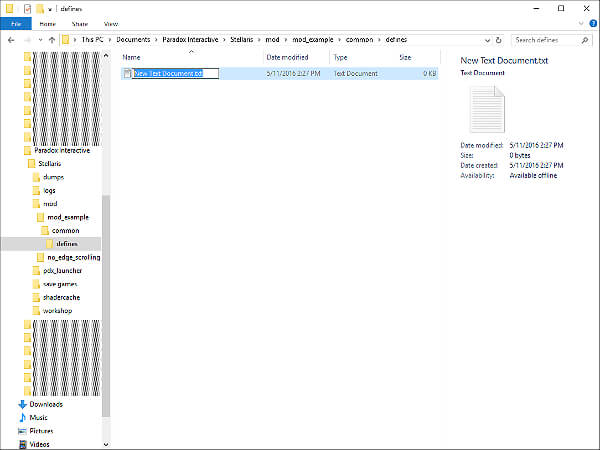
Create a new text document, and give it a name related to your mod.
- The TXT File
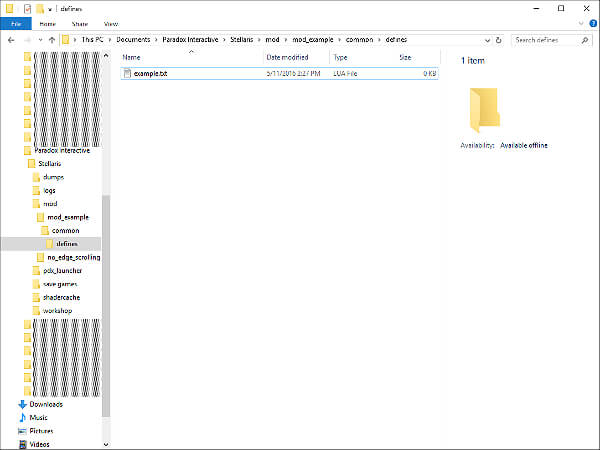
Your folder should now look like this.
(It’s important to name your file something related to your mod. If you name your mod’s .txt file the same thing as the normal Stellaris one, the game will use your mod’s .txt file as a replacement for the normal Stellaris one, breaking the game and causing Stellaris to crash to the desktop. It doesn’t matter what your mod’s .txt file is named, as long as it has the .txt extension and isn’t named 00_defines.txt (heck, you could even name it fredericktheamazingmagicalfrog.txt, if you wanted to).
Now that you have your .txt file, right-click on it, select Open With, and choose Notepad from the box that appears. Onward!
Modding Using 00_defines.txt
Let’s get to it!
- Back to 00_defines.txt
With your mod’s .txt file open in Notepad, it’s time to go back to Stellaris’s 00_defines.txt file we saw earlier. Open it in Notepad as well. (If it’s enabled, you might want to disable Word Wrap in the Format menu.)
- Deciphering 00_defines.txt

It might look confusing at first, but the organization of 00_defines.txt is pretty easy to understand.
In the beginning of the file, you’ll see NCamera = {. This basically groups sets of information into categories. NCamera encompasses all the bits of information that control the camera, and its counterparts NGraphics, NInterface, and so on contain the information for their respective categories.
When referring to a piece of information, such as FOV in the NCamera category, we write it like so:
NCamera = {
FOV = 60
}
Let’s do that now in our mod’s .txt file.
- Finally, We’re Actually Modding!

Go back to your mod’s .txt file, and type in:
NCamera = {
FOV = 60
}
This refers back to the bit of information called FOV in the NCamera category, and changes it to a value of 60. As you might suspect, this will change the game camera’s field of view to 60. Save your new and improved .txt, and start up Stellaris.
Testing, Uploading, and Updating Your Mod
And now, what we’ve all been waiting for…
- Testing Your Mod
Click on the Mods tab and be sure your mod is enabled, then click Play. The mod we’ve created should make the camera be much wider, like so:
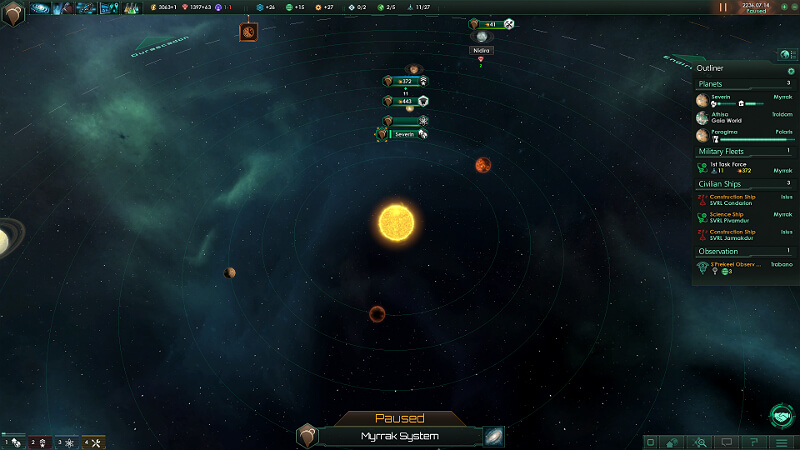
If your game looks like that, then you did it! You made a mod!
- Uploading Your Mod
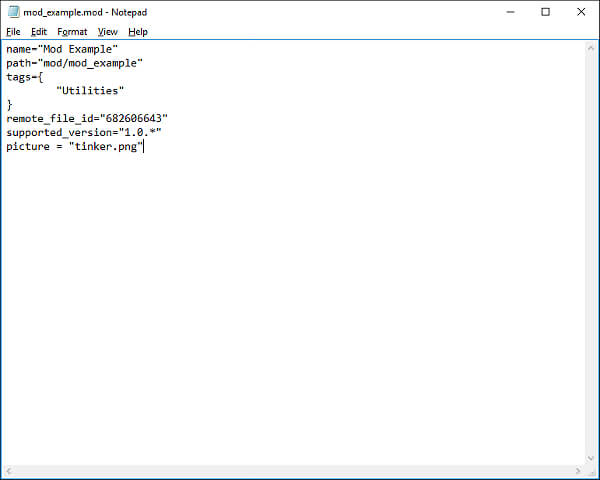
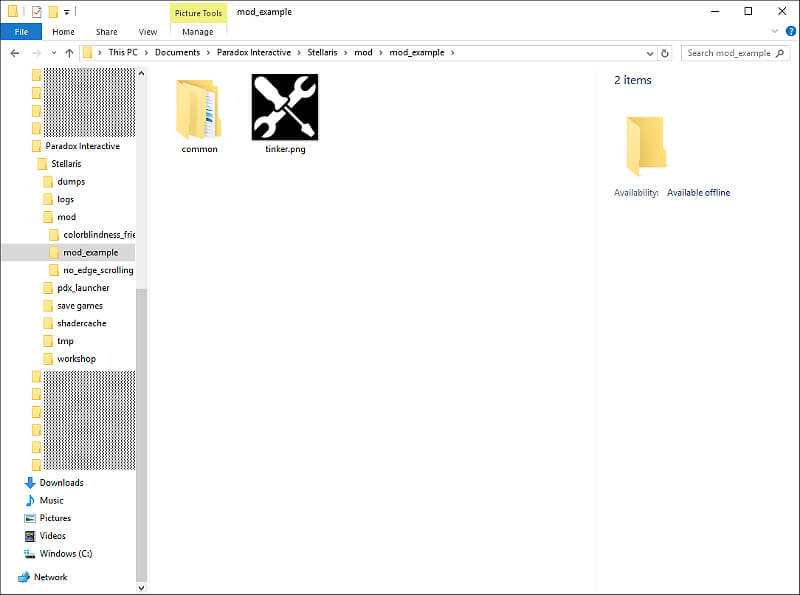
You’ll probably want to add a thumbnail first. To do so, go to your Documents folder, then /Paradox Interactive/Stellaris/mod and click on the .mod file that is named after your mod. At the end of the file, add picture = “[name of the thumbnail you want to add].png”. Now go into your mod’s folder (just the first one – not the common or defines folders), and put the image you want to have as a thumbnail into that folder (the thumbnail image must be under 1 MB in size). The image you just put into your mod’s folder will disappear from the directory after uploading.
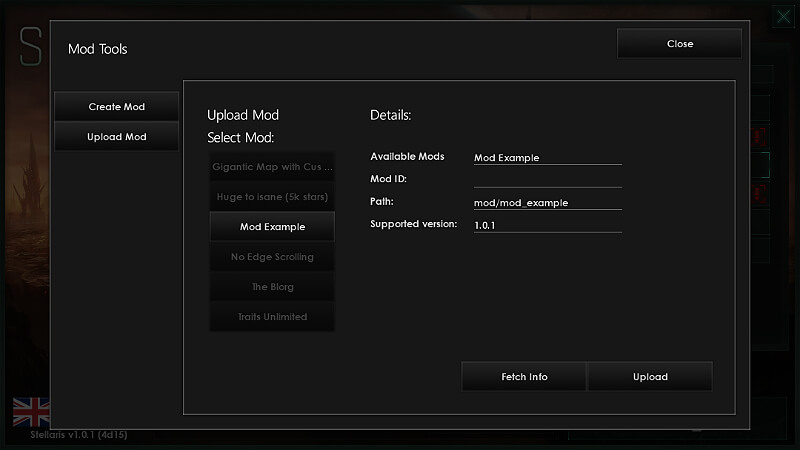
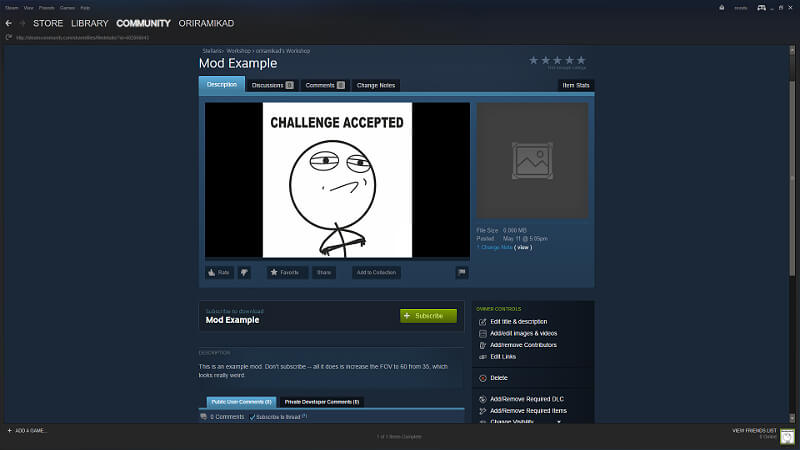
To upload a mod to the Steam Workshop, go to the Mods tab, click on the Mod Tools button, and then on the Upload Mod button. Select your mod from the list of installed mods. Your screen should now look something like the above. Click the Upload button in the bottom right, wait for it to upload, then click Close and exit Stellaris. Your mod is now on the Steam Workshop! Go to it and upload images and add a description, if you so choose.
- Updating Your Mod
First, check your supported version by going to your Documents folder, then /Paradox Interactive/Stellaris/mod and click on the .mod file that is named after your mod. Change the supported_version value to the latest version (such as 1.5.1). To make a simple mod be called obsolete less often, change the last digit of the version number to an asterisk (1.5.*).
To update your mod after changing the files inside it or changing the supported version, go back to the Upload Mod screen and click the Fetch Info button (which checks to see if your mod is already on Steam and, if so, gets its mod ID). Then click the Upload button. Your mod has been updated.
Conclusion
You’re done! You now know how to mod using the information stored in Stellaris’s 00_defines.txt, a powerful tool. Hopefully this guide serves as a stepping stone for your Stellaris modding endeavours, and I hope to see a mod from you in the future!
Original Link – Continuation of discussion


Add comment