This guide will cover the basics up to very advanced settlement related topics. This guide can help people who want nothing to do with settlements or want to spend a lot of time capitalizing on all the benefits the settlement system has to offer. How to create a basic settlement so you are not attacked every half hour or how to make plenty of caps and get tons of junk are topics you may not know some helpful facts about or how simple this stuff can really be.
Introduction
This guide will discuss the basic needs for your settlers including food, water, defense, and beds. The advanced section will focus on scavenging, base planning, and how settlements work. Expert topics are for those who want to pool points into Charisma and really take full advantage of what the Fallout 4 settlement system has to offer. My untested thought about the system are posted at the end. Some of this may be considered spoilers so please read at your own risk (nothing is mentioned outside of settlements and some perks).
Thank you for reading!
The Bare Bones Basics
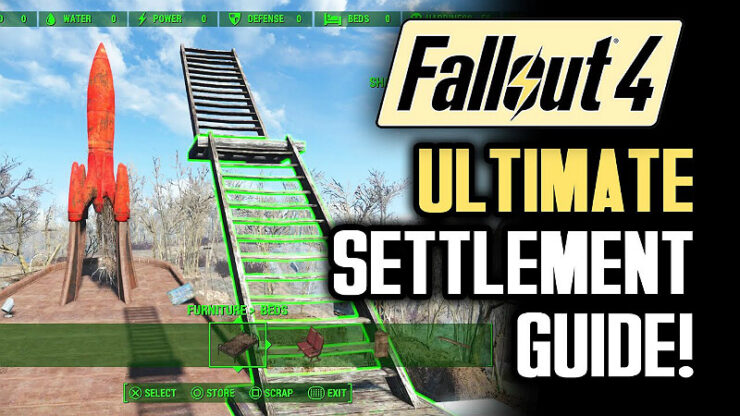
Once you have access to a settlement’s workshop you are able to build many different types of items for your settlers. You can access your settlement crafting window by holding ‘V’ (default) while within the boundaries of your settlement or by clicking ‘E’ while looking at your Workshop.
Workshop
Your Workshop is a large red workbench normally somewhere centrally located in your settlement. You have infinite storage in Workshops. You can use any crafting station at your settlement and it will use junk stored in your Workshop to be broken down for use in crafting. All junk stored in your Workshop is used when crafting things using the settlement crafting window. Workshop inventory IS NOT shared across settlements. Workshops only share JUNK via supply lines that are only able to be established by having the Local Leader perk form the Charisma perk tree (discussed below).
Summary: Infinite junk storage, not shared settlement to settlement, you can craft and build from junk stored in here.
Essentials
The below apply to everyone who will read this guide. If you plan on never touching a settlement after you handle Sanctuary Hills then you do not need to read past this section.
For each settler in your settlement you need one food, one water, and one bed. If you do not provide this for each settler then your settlement’s happiness level will begin to slowly fall. Food and Water are found under the resources tab in your settlement crafting window. Defenses are not required, but I recommend having defenses unless you want to run home every half hour and then fight off some raiders that may break you crops and defenses (and lower happiness).
Summary: 1 Settler needs 1 food, 1 water, and 1 bed. Make sure Defense = Water + Food.
Beds
Beds are the easiest thing to provide for your settlers. Go to your settlement crafting menu Furniture>Beds and then the far right bed is fairly cheap. Select the bed, look somewhere, and click ‘E’ to place the bed. If a settler lacks a bed they will automatically claim this newly placed bed.
Summary: 1 bed per settler no need to assign.
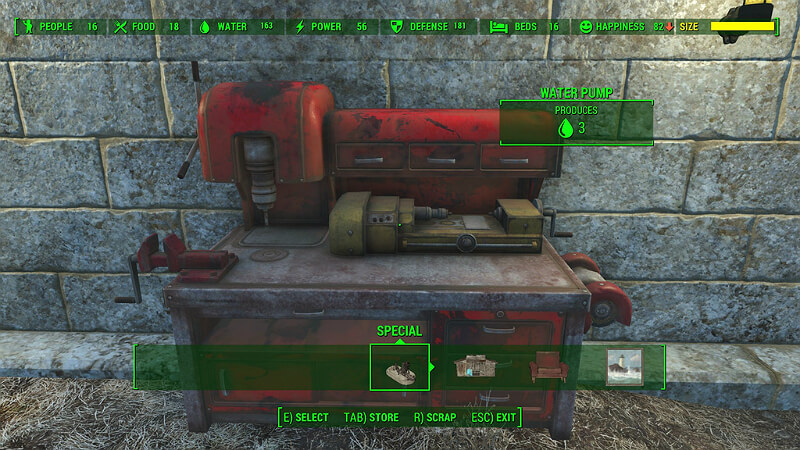
Water
Place a water pump in dirt by clicking ‘E’ with the water pump selected in the Resources>Water section of the settlement crafting menu. For each one of these placed your settlement gets 3 water.
Summary: 1 water per settler no need to assign, water pump = 3 water.
Food
Food is under the Resources>Food tab of the settlement crafting menu. You MUST have one of the crop you wish to plant. Sanctuary Hill comes with melons already growing. If you pick these melons you can then replant them, wait for them to grow, repeat. Many other crops can be found in the world, but if you are going for the basics you do not even need to leave Sanctuary Hills. Pick a plant from the menu, look at dirt, and then click ‘E’. Next you must assign a settler to this crop. Each settler can provide 6 food as long as there is 6 food worth of crops not yet being worked by someone else.
Summary: 1 food per settler, 1 settler can manage 6 food, must be assigned.
Assigning a Settler
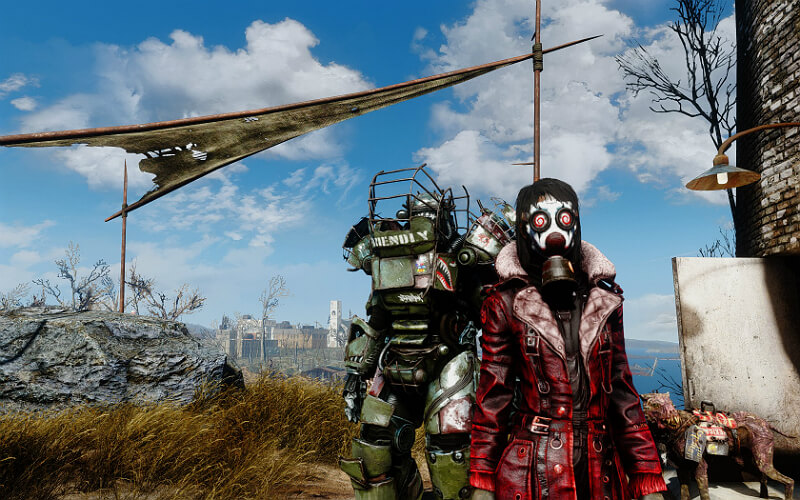
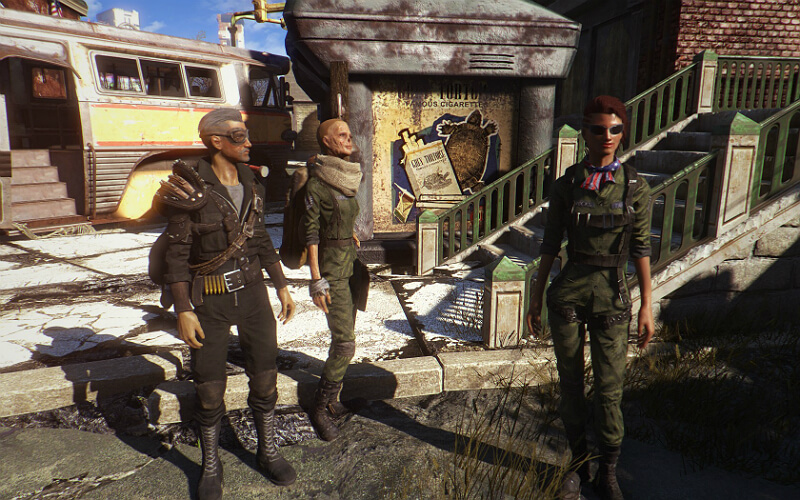
Settlers can be assigned to crops, guard posts, scavenging stations, stores, and two things unlocked later in the game (potential spoiler so I will mention it in a later section). With your settlement crafting menu open (I like to hold ‘V’) you need to look at a settler and then click ‘E’ (Command) and then look at a crop and click ‘E’ (Assign). This is how you assign any settler to anything you want them to work on. All of my shopkeeps wear suits, my farmers wear some type of hat or gas mask and everyone else I gear up in armor and weapons.
Summary: Hold ‘V’, look at a person, click ‘E’ on them, click ‘E’ on what you want them to do.
Defenses
To prevent attacks you will need to have your defense number equal to your water plus your food. Once your deal with power it is not a bad idea to include that number in your defense total as well. I recommend using turrets, not guard posts, if you plan on having stores and getting lots of junk from your settlers. I will go into this in more detail in later sections. If you go into your settlement crafting menu>Defenses>Turrets you can build a turret by selecting it and then clicking ‘E’ where you want to place it. Mouse clicks will rotate the turret; make sure it is facing where enemies will be coming from (anywhere there is a boundary shown by a large glowing green line). To use a guard post, which you may need to do until you have the resources to make turrets, select it from your settlement crafting menu Defenses>Guard Posts and rotate to your satisfaction, click ‘E’ to place, and then assign someone to it. Each settler can provide 6 defense if you have 3 open guard posts (of either size) for them to patrol to.
Summary: Build turrets, not guard posts, defenses must equal food + water or you will be attacked.
Building Layout, Attacks, and Workshop Menu

This section is still a work in progress (I skipped to the advanced sections, sorry!)
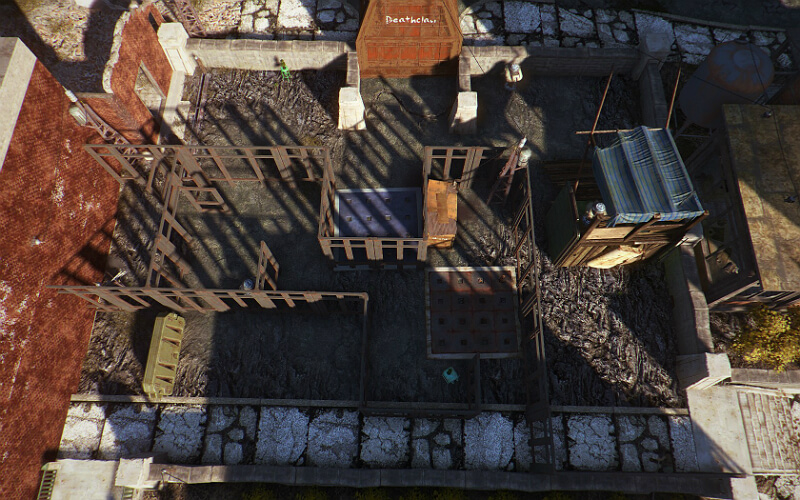
The basics of base layout is keep all of your crafting benches near to each other for convenience. Do not clutter your settlement with houses or else your turrets could be blocked. Make a wall at your border and point guns towards your border while making sure they are not blocked. If you are attacked you will get a notification in the top left of your screen and a miscellaneous quest will appear in your quest log called something like Defend Settlement X. Sometimes, even if you have enough defense, when you fast travel to a settlement it can be under attack.
Workshop Menu
If you go into your Pip-Boy menu>Data>Workshops you will be shown a list of all the settlements you have unlocked the workshop for. If any resource has an exclamation point next to it then you need to address a problem specific to that resource. For example, if the “Beds” resource has an exclamation point then that specific settlement needs more beds. I have seen many bugs with this screen including incorrect numbers (I once had 23 settlers, fast traveled there, and then only had 12 which was the right number) and I have had exclamation points show up when in reality I had the required resources. If you have an exclamation point next to Defense then you can be attacked. Happiness seems to cap at 80 and shows an exclamation point when at 80 or above. Happiness then drops to 79 then the exclamation point is gone. Back up to 80, repeat. This can go higher, this is just the first stall where stores and decorations are required to pass.
Equipping Settlers with Gear
Gearing up your settlers is fairly easy to do. Walk up to a settler and click ‘E’, you need the settlement crafting menu to BE CLOSED for this to work. Then they will trade with you or you will select the “Trade” prompt. Transfer the gear to their inventory with a left click or by clicking ‘E’ in order to give the weapon or armor to that settler. Once it is in their inventory, hover over it with the mouse and click ‘T’ to equip the item on that settler. Be sure to give them ammo for any guns you give them (only enough to equip the weapon, they should have infinite ammo – Darthchewee)!
Bell and Mat
In your settlement crafting menu under Resources>Miscellaneous there is a bell you can craft and a welcome home mat. If you place a bell and then ring it, all settlers in the area will pause their jobs (not becoming unassigned) and walk over to you. This is a great way to find your settlers if one has wandered off. The welcome home mat sets where you will appear when you fast travel to that particular settlement. I recommend you keep it indoors in case you fast travel into a gunfight!
Attacked by Your Own Settlers is Not a Bug
IT IS A SPOILER!
Synth Attacks
I would like to start this section by saying one of these attacks has not happened to me and none of my settlers are synths…as far as I know! From what I understand, a settler can have a synth make a clone of him/her and then that synth will join your settlement without adding to your population. I am not sure if they kill the settler or not initially. You can catch this happening if you see two identical settlers in your settlement. Once one synth has infiltrated, more and more will start to replace your settlers until you are told that a settlement is under attack and you get a quest to defend it. Upon arriving to defend your settlement you are attacked by what appears to be your own settlers, but you now know better, these are synths. I have also heard a rumor that they can sabotage defenses so they do not help you kill the synths when you arrive. Purifiers and Generators can be sabotaged and I assume defenses can be as well. I again say that this is all information I have found from various online resources that I have not personally experienced firsthand.
Recognizing a Synth
You will know you have a synth in your settlement if you see a clone of an existing settler. You can tell which one is the synth by attempting to trade with it or assign it to something. You will not be allowed to do these things if you are talking to a synth! You can also just save and shoot one of the two and hope for the best!
Settlement Growth and Why
This section is for people that know how to access the settlement crafting menu and ensure settlers do not die. You now have food, water, beds, and guns; why did you do this for all these people? Besides the fact that you are a swell person, you will get junk, materials, purified water, vegetable starch adhesives, caps, cheap supplies, starch, and artillery support.
More People
The maximum number of settlers you can have per settlement is 10 + your charisma. You can get 22 settlers if you have 10 Charisma and then get the Charisma bobblehead (totaling 11 Charisma). To get to 12 Charisma you must have your Charisma at 10 or 11 and then lower it using drugs/food/drinks and then read the You’re S.P.E.C.I.A.L. book in Sanctuary and that will boost your Charisma to 12 max. If you want more than 22 settlers you can wear outfits that increase your charisma and take chems that increase your Charisma as well. You will need a generator and a recruitment radio tower to have anyone join your settlement. To craft a generator, go to Power>Generators. Pick whichever generator you can afford to make and slap it down wherever you want. As long as this generator is turned on it will infinitely generate the power level that it said next to the generator you chose. Under Power>Miscellaneous is the recruitment radio tower. Place this somewhere near your generator (or far away you rebel). To connect your tower to your generator have your settlement crafting menu open, look at the generator, click ‘Space’ and then look at your tower and click ‘Space’ again. By default the recruitment radio tower is turned on. If you switch this off then settlers will not join your settlement (green light means on, red light means off).
Free Junk
Any settler not assigned to a job – crops, guard post, stores, or other assignable stations – will slowly but surely add some junk/materials to your Workshop. If you assign your settler to a scavenging station found in Resources>Miscellaneous then that settler will find more/better junk/materials. Being assigned to a scavenging station does not prevent caps being gained from a settler assigned to it. I have not tested to see what settlers are actually gathering for me. I have so many different materials and types of junk it is hard to tell when things are added. Settlers assigned to these stations tend to wander with their guns out for a speedy defense reaction time (info thanks to Mr. Ripper)!
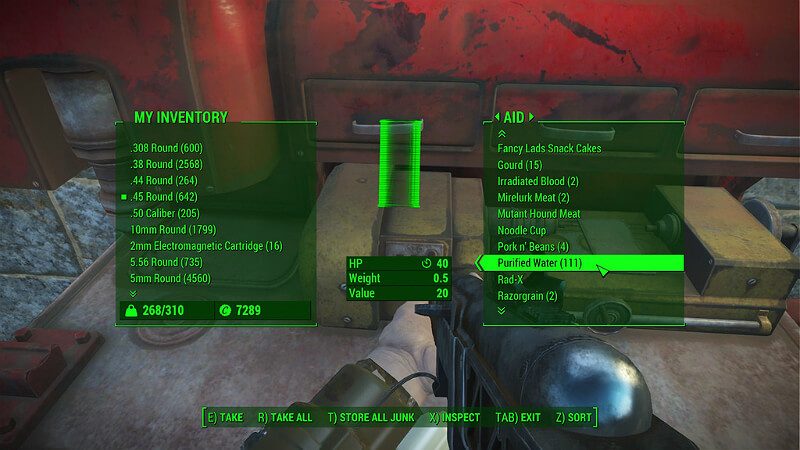
Purified Water
Purified water is placed in your Workshop’s aid tab every once in a while in settlements with more water than is needed. These waters can then be brought with you to be used for healing, you can use them with crops to make vegetable starch for adhesives, ORRRR you can sell these for good money! It is a little silly, but this a major way to make caps using settlements. I go into more detail on this in the next section.
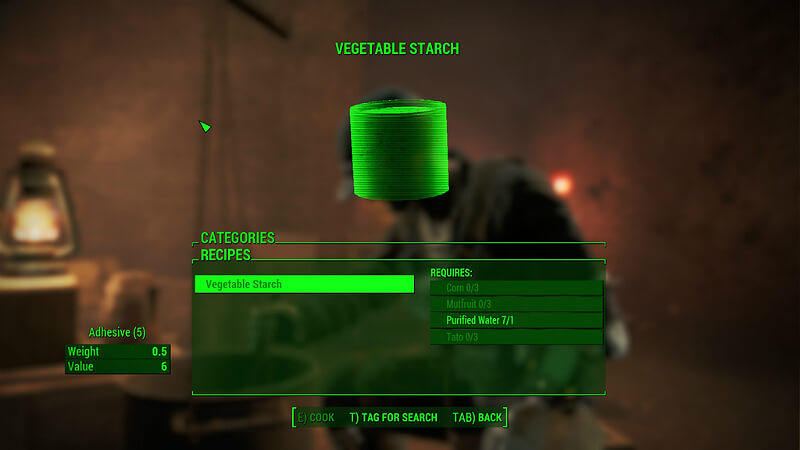
Vegetable Starch (5 Adhesive)
If you manually harvest fruits/vegetables from your plants and then store them in your Workbench (or have them on your person) you can go to your settlement’s cooking station (Sanctuary’s is near the bridge entrance by default) and you can cook up some vegetable starch.
The requirements are:
- Three pieces of mutfruit
- Three pieces of tato
- Three pieces of corn
- One bottle of purified water (which you can get bulk of as mentioned above)
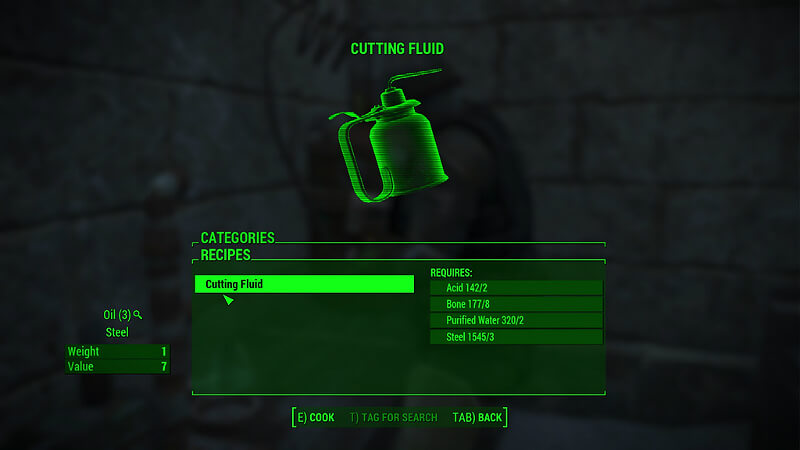
Cutting Fluid (3 Oil 1 Steel)
When setting up new settlements I always seemed to be shot of oil for my turrets. I wondered why that would be the component that I needed the most of all the time. I finally realized the amount in the world is so limited because you can CRAFT OIL!
The requirements are:
- 2 Acid
- 8 Bone
- 2 Purified Water (helpful yet again!)
- 3 steel
The Cutting Fluid gives you a 1 steel return on your 3 invested along with 3 oil.
Supply Lines
When a supply line connection is made between two settlements the junk and plantable crops stored in both Workshops are available at both settlements. According to [Dolt] Ewokz, excess food and water from one settlement is used to supply other settlements that lack that resource. This will turn the food or water icon green in the settlement lacking a resource and cause happiness to rise (or at least stop it from falling). If you have a supply line from settlement A to B then settlement B to C then settlements A, B, and C all have A, B, and C’s junk available for building and crafting. In order to make a supply line you need to have your Charisma to level 6 and then put one point into the Local Leader perk.
READ THIS BEFORE TRYING TO MAKE A SUPPLY LINE: once you give someone a destination they are a pain to make into a settler again and they count as one of your settlers at the ORIGIN settlement. Some named settlers cannot be assigned to a supply line. Be sure to not make the main settlement quest giver into a Provisioner or you will be chasing them around the map in order to return settlement quests (info from Mr. Ripper)! I have two ideas on how to do supply lines. Either make one settlement all supply line people (Provisioners) or take one person from each settlement and use them to connect to your supply line web. According to -TWI- Malakeh, “In order to unnassign a supply line you need to find the provisioner coming back to the settlement go in workshop mode and assign them to do another job.”
To make someone into a Provisioner you pull up the settlement crafting menu, look at a person, click ‘Q’, and then pick their destination.
Summary: Hold ‘V’, look at a settler, click ‘Q’, select destination. Two connected settlements can access the junk of both settlements. If you link A->B and B->C A, B, and C all share.
Caps and Cheap Supplies
In order to build stores you need to have your Charisma to level 6 and then put two points into the Local Leader perk. Under the Stores tab you can select from many stores to build. There are three tiers of each store type and in order to build the third tier you need to have the Cap Collector perk and 3000 caps (quite and investment).
The trader tier 1 is the cheapest store that starts at 300 caps and some supplies. The most expensive store is 3000 caps. The more expensive the store, the more money it generates. I have no exact numbers. To have a store function you must assign a settler to it. That settler will then sell items related to the type of store you built. Aid and Ammo are sold cheaply at your own stores especially with two points into Cap Collector which makes stores a very valuable resource.
Making caps over time is based on how many people you have NOT ASSIGNED to any job. This is why I so strongly recommended using any turrets in the earlier sections of my guide. At the end of my guide I go into detail about how to un-assign a settler. Long story short: remove everything they are assigned to. Happiness also plays some role in the amount of caps generated. Caps are placed in the Misc section of the Workshop at the settlement the store is in. You will need to go to EACH settlement individually to get caps. If you have stores in settlements A and B then A’s caps are not in B’s workshop EVEN IF you have a supply line between the two. Being assigned to a scavenging station does not prevent a settler from generating caps. I believe they are still considered un-assigned settlers.
How to MAXIMIZE Your Gain
I will often say there are two ways to do things. There are obviously more than two ways to do things, but I see two main ways that I considered for many things after mulling over all the possibilities.
16 Settlers or 20
I decided to only put my Charisma up to 6 in order to get local leader. I assume that this may be the case for many of you. If you went higher than 6 charisma then just slightly adjust what I discuss below.
Supply Lines
I feel that there are two main ways to handle your supply lines: sacrifice one settlement to have every settler be a supply line or have every settlement use one settler in order to connect to your web of supply lines. I chose to do 1 person from each settlement as the initial investment of sacrificing an entire settlement is not very enticing.
MAXIMIZING Profit
Purified Water and Auto-Generated caps combine to be a HUGE pool of money.
I am going to focus on the caps first. In theory (I have not yet tested this) you should assign 3 settlers to crops (18 food) and then have all of your other settlers on either stores or on nothing. You should have 3 people on crops, some on stores, and the rest on scavenging stations since these do not make settlers count as being “assigned.” I have not tested to find out what the best un-assigned settler to store running settler ratio is. It may be best to have 1 store and everyone else jobless, I really am not sure. For now, I have 1 of each store, 3 people on crops, and the rest of my people on scavenging stations.
So I have turned Castle into a water producing settlement. It seems that every time I go back there is 110-120 purified water in my Workshop. I tend to go back about once every real-time hour. Below are my resources that lead to that gain. Depending on your magazines and points into Cap Collector these should sell for 10-15 caps. Water purification and defenses are MUCH BETTER investments than the actual stores. Theoretically you could keep adding more water (powered water purifiers are great sources of water) and more turrets and then have a massive supply of purified water to then sell to your stores and then make lots of money.
My Speculations – What I Noticed but is NOT Proven

Cap Gain Amount
You will have to play many hours to get your money back, but having money being generated for doing nothing besides spending money is a nice thing. My non-tested numbers have been about 100 per hour from 3 tier 2 shops and about 150-200 per hour from a settlement with 4 tier two shops. My settlement with one tier 2 shop generates about 30 caps per hour. I am talking about real time hours, not game time hours. With many settlements all set up this will eventually be major revenue, but initially the payout is low especially since early on caps can be tight. This is not a way to get rich quick early on. It is a major time and cap investment.
Scavenging Station
I still get caps and in two settlements I have all people assigned to crops, stores, and scavenging stations (no unassigned settlers) I am currently testing to see whether or not a settler assigned to a scavenging station still adds to the cap amount generated automatically by stores.
Purified Water
Spare water is stored as purified water. There does not seem to be a cap on how many waters are produced. The ratio is not quite 1:1 but it is more than .5:1. I posted a screenshot with my resources and resulting water per ~1 hour.
Happiness
Happiness caps around 80 without decorations and shops.
Tips – Related to Settlements, but not Exclusively

Finding Junk
If you go to your inventory, go to your junk tab, click ‘C’ for component view and then Q to “tag for search” a magnifying glass is put next to every item you loot that contains that component. I tend to set oil, gears, crystal, and circuitry to be searched for. If you put two points into the Scrapper perk then any junk item loose in the world will glow green when you approach it if it contains a material you have tagged. Even containers (including master locked safes) will glow green if the contents include junk that is made of a component you desire.
How to Un-Assign a Settler
Un-assigning settlers can really be a pain. To un-assign my guards (I un-assigned all of mine at once) I just stored all of my guard posts. This somewhat backfired because I ended up having 5 people producing 18 food for my settlement. That should be done by 3 people. To fix this issue I picked 3 of my 5 farmers and told them to be farmers. I took the other two people and assigned them to scavenging stations. You could then store the scavenging station or leave them on them.
Finding What a Settler is Assigned to
In order to find out what a settler is assigned to open the settlement crafting window and look at a settler. In the background whatever they are assigned to will glow green. This can be multiple crops, up to 3 guard posts, a scavenging station, a store, or an artillery gun. If that item is not in your field of view then there is no way to know what your settler is working on.
So Much JUNK at Every Settlement
With the settlement crafting window open just click ‘R’ on anything to instantly scrap it and have the components sent to that settlement’s workshop. This is a great source of ceramic, steel, rubber, wood, and some other types of components.
Happiness to 100%

Below is a direct quote from Scarecrow:
“Being the first one to get the achievement Benevolent Leader on PC and Console, this Is what you need to do to get 100%:
1) Assign all your settlers to a shop, which can ONLY be:
A) Tier 2 – 3 Clinic
B) Tier 2 – 3 Restaurant
C) Tier 2 – 3 Clothing store
Tier 3 gains the most happiness, other shops don’t produce happiness at all.
And make sure that you have enough settlers assigned to food supplies, If you don’t have an ample amount of food, then your happiness will go down.
2) NEVER leave your settlement until you reach 100%.
Sleeping or Waiting Is fine.
3) If you get stuck at 97 – 100%, then try:
A) Placing Paintings down
B) Placing Jukeboxes or other entertainment objects down except Radios.”
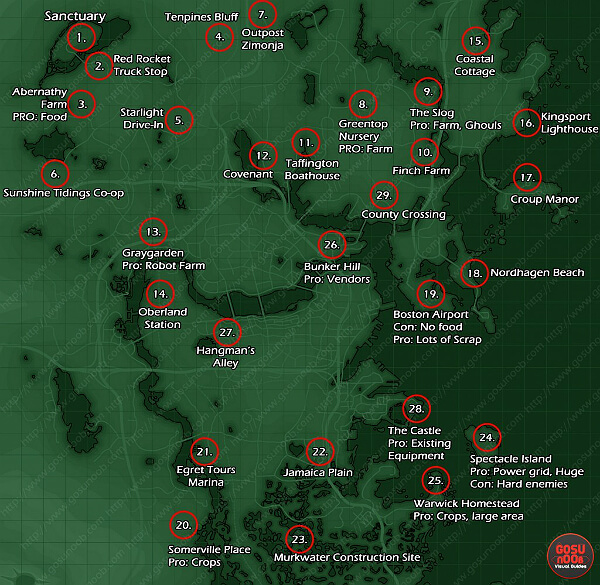
Map
Map of Settlement Locations
Special Store Vendors
Unique Vendors
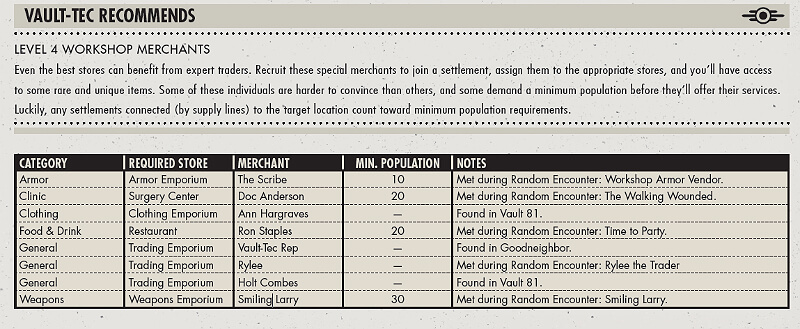
Imlysa says that Anne Hargraves is actually found at WRVR Broadcast Station, not Vault 81. I have heard this from multiple sources.
Anything I Missed?
I am more than willing to answer questions and would love to add to the guide based on comments that you leave here on this guide. If anything in here is incorrect, if you didn’t get your question answered, or you have something to add please leave a comment or feel free to add me on Steam.
Thank you for reading!
Original Link – Continuation of discussion


Add comment