This guide gives a general guide of useful things in Subnautica. It is updated regularly to each stable mode update and some larger experimental mode updates. The newly-updated guide will usually be completed about 1 month after a new stable update release. Warning: Spoilers below. I have covered up some of the larger spoilers (you can see them by hovering your mouse over the black boxes), but you may not want to read some of the sections, including these:
- The Playthrough Guide
- What to do, and in what order to do it.
- Common Mistakes
- Tips and Trick
- Precursor Structures
- Abandoned PDAs, Databoxes, Signals, and Alien Items
The Playthrough Guide

Okay. You just crash landed on an alien planet and (hopefully) put the fire out. First you need to know your controls:
- W, A, S, and D to move.
- Tab to open/close your inventory. This will let you eat, drink, medicate, drop items, and apply equipment to your person.
- LMB to pick thigs up (you did this with the fire extinguisher).
- RMB to use a tool that you are holding (i.e. cutting with a knife).
And now you need to know your way around your first home: The life pod: - A fabricator, which is used to make things from materials in your inventory.
- A storage box (the red thing, for storing items. Just drag and drop from your inventory to the storage and vice-versa).
- A medical kit fabricator, which gives you a medical kit every thirty minutes (I usually take them out as they come and store them even if I don’t immediately need one. Each one heals 50 health).
- 2 hatches: 1 that puts you on top of the pod, and one at your feet, which puts you straight into the water.
Everything else in the pod is broken. I’ll get to those later on.
And now for the area surrounding you. Go through the hatch at your feet. I can’t tell you exactly what surrounds you because it spawns your life pod at a semi-random spot in the first biome, called the safe shallows. It is relatively safe (as the name implies), but there are still a few dangers:
- Drowning. Just don’t do this. Assuming that you aren’t playing on hardcore mode, your PDA will give you a warning when you have both 30 and 10 seconds of oxygen left.
- Gasopods. These are the creatures that look like manatees with green dotted tails. If you get too close, green pods of gas will appear, and if you get trapped by the gas cloud they create, you will start losing health.
- Crashfish. These fish live inside crash plants, which are found inside caves. If you get too close the crashfish will dart out of the plant and explode in your face. This can take about 10 to 50% health if you don’t dodge, so be careful.
Now here are some of the resources in your immediate area:
- Fish. Eat them cooked or raw. Remember that a fish may be able to make more than food, so check all things in the fabricator before cooking them. Also note that eating to much at once will hurt you, just like in real life!
- Scrap metal. This can be found lying on the sea floor. Each can be fabricated into 4 titanium.
- Outcrops. Your first outcrops give you titanium, copper, or lead, while later on, outcroppings can give you things like gold and diamond.
- Quartz. This is found on the sea floor in crystals. It is used to make glass.
- Salt. This is found on the sea floor in crystals. It is used for mainly bleach (for clean water), the repair tool, and cured fish.
- Acid mushrooms. These are also on the sea floor, and are used to make batteries.
There are also some things that are required early in the game that are found in your second biome, the kelp forest. These are creepvine seed clusters (the yellow things on some of the kelp) and silver/gold (found in some outcroppings in the kelp forest).
To start out you absolutely need a few items:
- Oxygen Tank; gives +30 oxygen.
- Survival Knife; can cut things.
- Scanner; can give you info on life on the planet, or can be used to get more blueprints.
- Fins; make you swim faster.
- Repair Tool; can repair things.
The raw materials needed for these items are as follows:
- Titanium x6
- Quartz x2
- Creepvine seed cluster x2 (1 silicone rubber left over)
- Acid Mushroom x2
- Copper x1
- Cave sulphur x1 (found sometimes in the home of a crashfish)
- Salt x2
Now that you have these tools, you can first repair your pod with the repair tool (you will start getting messages from the comms device) and go anywhere in the safe shallows. You can find some wrecks to swim around with some blueprints to scan (blueprints will either be inside cargo crates or in what looks like white boxes. They can also just look like a piece of the thing it is a fragment for-the seamoth fragment looks like a piece of a seamoth).
After a little while, you should have these, as well as the items above:
- Habitat Builder; makes seabases.
- Flashlight; lights things up.
- Seaglide; makes you swim even faster!
Here are the raw materials for these items:
- Acid mushroom x6
- Copper x7
- Gold x1
- Quartz x2
- Table coral sample x2 (slash table coral with a knife; they look like tables hanging off the rocks)
- Creepvine seed cluster x1
- Titanium x1
You also need to scan the seaglide blueprint in order to make the seaglide.
Now, you should build your first base, right under or just next to the pod. Your pod will still be your source of fabrication and signals, and your base will just be used for storage. You can make whatever sort of base you want, but I usually just put two foundations, one or two “x” corridors attached to each other, a hatch on one end or top, and 1 or 2 solar panels on top. Now, just put some lockers inside for storage and you’re done!
Now, you need more blueprints, however we won’t go wreck diving just yet. First, we need to go to Floater Island. I won’t tell you exactly where it is, but I will say that when you look behind you when you reach the island, you’ll see the Aurora’s engines just slightly to your right. There are three abandoned bases on the island. Explore all of them and scan everything that you can. You can usually get things for the stasis rifle or the propulsion cannon. There are three things for your seabase that you absolutely must scan: The multipurpose room, the plant pot, and the exterior growbed. Also, slice some marblemelons to get seeds while you’re there. You can plant these in plant pots and interior growbeds, and they become the main food source in your game. Also pick a lantern fruit, but don’t eat it. You can plant these in pots too and they become your main source of bioreactor fuel. After doing what you need to, come back home.
Now, you need a new base. Take down the old one completely (except for foundations) and build lockers outside if you have to. After taking the old base down completely, put one multipurpose room with a hatch in its place. If you already have a bioreactor, build a second multipurpose room attached to the first. Place the solar panels back on (and build a couple more) and voila! Your new base is done! Go ahead and place all of the storage lockers back in your place. At this point, you should also build a fabricator inside your base, although you don’t have to. Build a plant pot inside the main room and put the marblemelon seeds in it. Keep slicing marblemelons until you have three pots full of them. They make great food. If you have the bioreactor, build it in the other room and put a pot with the lantern fruit inside next to it. When the lantern tree grows, put lantern fruit inside of the bioreactor. Make sure to check on it once in a while to make sure that you don’t run out of fuel. Also put an exterior growbed outside and fill it with creepvine seed clusters. More things will go in other growbeds once they are discovered.
You’re probably wondering when we are going to start going wreck hunting. Well, not just yet. First, we need two things: A seamoth and a laser cutter. We’ll get the seamoth first. First, we need the mobile vehicle bay. It’s pretty easy to find the blueprints in the safe shallows wrecks. Build it if you haven’t already. Now for the actual submarine. If you have the blueprints already, great! Build it. If not, swim around the grassy plateaus for a while. You’ll find it. Now, stock up on food and water and some extra batteries. Now, go to Mountain Island, with the seaglide. I know that you want to test out your new seamoth, but don’t take it with you. Reaper leviathans live at the island, and they will not hesitate to destroy your seamoth. The island is in the complete opposite direction of Floater Island. Good luck!
The Playthrough Guide, Continued
Once you’re at the island, you should see two things: A mountain and the Quarantine Enforcement Platform. You can explore it, but you need some purple tablets (or artifacts) first. There are a few on the island alone (including the ones inside the array). If you see one and can’t pick it up, scan it. You can make them too. When you have a few artifacts, put one in the artifact terminal and watch the force field disappear. There are a few more of these force fields inside the array. Now just explore.
Remember to scan anything that you can, collect any data that you can, and pick up the green crystals (ion crystals) that are scattered around inside. They come in handy later.
After exploring the array, leave through the entrance from which you came. Now, on to our laser cutter goal. Just underwater, between 0 and 100 meters deep, you’ll find basalt outcroppings. They can drop diamonds or gold. We want the diamonds. After collecting a few diamonds, head home and make the laser cutter (to do this you also need another cave sulfur along with those diamonds).
Now you can go wreck diving! I’ll leave your own game up to you from here. Explore as much as you want, explore wrecks, explore alien structures, build new and bigger bases, and explore the Aurora. You now have all the tools, but I’ll give some helpful hints in the “Tips and Tricks” section of this guide.
What to do and in what order to do it

Note: This section is sort of like the playthrough guide, but does not give as much information and goes much farther into the plotline.
- Get basic tools and equipment: Oxygen tank, fins, radiation suit, knife, repair tool, habitat builder, scanner, etc.
- Repair lifepod and build a small base, right under the lifepod, without a fabricator or anything. Just a place for air.
- Island time! It’s time for you to go to the floating island. There are three bases there, don’t miss one!
- First tiny wreck: Go to some wrecks in the Grassy Plateaus. Try to find the battery charger, seamoth, and mobile vehicle bay, and get lots of silver and gold!
- Bigger and better: Now make a seamoth (and the vehicle bay of course) and make a multipurpose room attached to your base. Inside the room, place a fabricator, a bioreactor, and a battery charger. Remember to give room for storage and put lots of solar panels on top!
- Mountain island: Collect diamonds, gold, and lithium, but don’t forget to explore the giant structure on the island! Afterward, make a laser cutter.
- Bigger wrecks! With your seamoth, find and explore the two large wrecks in the Grassy Plateaus.
- Aurora: Find the entrance and explore the Aurora. Make sure that you have found the three most important things in there-The pressure compensator, the PRAWN fragments, and the cyclops engine fragments.
- Jellyshroom: Now that your seamoth can go to 300 meters with the pressure compensator, find the entrance to the jellyshroom caves, and go inside. Try to find the abandoned base there. Amazing goodies await you (power cell charger, moonpool, modification station and more).
- Mushrooms: While you’re out and about, head down to the mushroom forest and try to find all the cyclops fragments. Watch out for bone sharks!
- Even bigger, even better: Now you’ll have to go through your biggest recourse gathering trip yet. Add the power cell charger, modification station, scanner room, and moonpool to your base (assuming you have the blueprints). You’ll want to gather surplus materials to make the cyclops and PRAWN later.
- Vehicle modification station: Now you have to find the vehicle modification station. It can be found in the Dunes, Mountains, or Crash Zone. You’ll have to take your seamoth with you. Be prepared for your seamoth to get shattered and you to die, at least once or twice.
- Deeper, deeper, deeper! Make the vehicle modification station and get a mk3 pressure compensator for your seamoth. Now, go to the Lost River, collect gel sacks and aluminum oxide for the PRAWN, collect some of any other minerals that you find, and explore the second alien base.
- Cyclops + PRAWN = Awesomeness: Now, make both the cyclops and PRAWN suit. Try to get another mk3 pressure compensator for the PRAWN!
- More, more, more wrecks! Now, just take the old seamoth for a long trip. Explore any wrecks that you can find. The two most important things to get are the drill arm and grappling arm for the PRAWN.
- Deeper still: Put your PRAWN suit inside the cyclops, and take them down into the Lost River. Then, go to the lava zone and find the third alien base. Remember to take the drill and grappling arms, and grab some kyanite, although the most important thing to get is what you’ll find inside the third base.
Note: The rest of this section is about unfinished things. They may still be updated. - Final steps: Go to the fourth alien base, also in the lava zone. Make sure to take some hatching enzymes and ion crystals with you, and don’t leave without a bunch of enzyme 42!
- Unfinished: This will probably be the end sequence, but who knows. There could be much more to do.
The Flora Guide
Here is list of all useful plants and the amount that I put in a growbed or pot, along with their uses:
- [Plant]; [amount in growbed/pot]; [what the plant gives].
- Acid Mushroom; 0; used in batteries.
- Blood Root; implantable; gives blood oil.
- Bloodvine; 3 (exterior growbed); gives blood oil.
- Bulbo Tree; 0; gives bulbo tree samples (edible).
- Chinese Potato Plant; 0; gives Chinese potatoes (edible).
- Crashfish plant; implantable; gives crash powder or a crash egg.
- Creepvine; 6 (exterior growbed); gives creepvine seed clusters and creepvine samples.
- Don’t plant the samples, only the seeds.
- Deep Shroom; 8 (exterior growbed); used in hydrochloric acid.
- Remember that harvesting seeds hurts you a bit. Bring a health pack while doing so.
- Gel Sack: 4 (exterior growbed); used in aerogel.
- Remember not to eat them. Because you can eat them. And they’re the second rarest plant in the game.
- Koosh Bush: 0; gives koosh samples (edible).
- Lantern Tree: 1 (plant pot); gives lantern fruit (edible).
- I don’t grow these for food, just for fuel for my bioreactors.
- Marblemelon Plant: 24 (interior growbed)/8 (2 plant pots, in cyclops); gives marblemelons (edible).
- These are probably the best food source in the game. Remember to cut one or two with the knife when you’re finished eating so that you don’t run out of marblemelons.
- Purple Pinecone: implantable; gives salt deposit.
- Table Coral: implantable; gives table coral samples.
- Giant Coral Tube: implantable; gives common coral samples.
- Purple Brain Coral: 0; provides bubbles of oxygen.
Here are the prettiest plants and the best places to find them, so you can add some décor to your base:
- [Plant Name]: [biome most found in].
- Eye Stalk: Sparse Reef.
- Furled Papyrus: Dunes, Grassy Plateaus, Sparse Reef.
- Jellyshroom: Jelly Shroom Caves.
- Koosh Bush: Koosh Zone.
- Membrain Tree: Grand Reef, Sea Treader’s Path.
- Regress Shell: Sparse Reef, Grassy Plateaus.
- Rouge Cradle: Blood Kelp Zone, Grassy Plateaus.
- Sea Crown: Koosh Zone.
- These are the rarest plants in the game. Don’t be discouraged if you think that you scoured the entire Koosh Zone and didn’t find one.
- Spiked Horn Grass: Sea Treader’s Path, Sparse Reef.
- Spotted Dockleaf: Koosh Zone, Underwater Islands.
- Veined Nettle: Safe Shallows.
- Violet Beau: Grassy Plateaus, Sparse Reef.
- Voxel Shrub: Floating Island (place in interior growbed or plant pot).
- Writhing Weed: Safe Shallows.
In-development flora:
- Spike Trap
The Fauna Guide
This section will give you a list of different fauna, and tell you where best to find them.
Aggressive Fauna:
- Ampeel: Blood Kelp Zone, Koosh Zone.
- Biter: Dunes, Grassy Plateaus, Mountains.
- Bleeder: Kelp Forest, Aurora.
- Blighter: Blood Kelp Zone, Lost River.
- Blood Crawler: Blood Kelp Zone.
- Bone Shark: Crag Field, Koosh Zone, Underwater Islands.
- Cave Crawler: Aurora, Floating Island, Mountain Island.
- Crabsnake: Jelly Shroom Caves.
- Crabsquid: Blood Kelp Zone, Deep Grand Reef.
- Lava Lizard: Active Lava Zone, Inactive Lava Zone Corridor, Inactive Lava Zone.
- Reaper Leviathan: Crash Zone, Mountains, Dunes.
- River Prowler: Lost River.
- Sand Shark: Crash Zone, Dunes, Grassy Plateaus.
- Sea Dragon Leviathan: Active Lava Zone, Inactive Lava Zone.
- Stalker: Kelp Forest, Crash Zone.
- Warper: Almost anywhere, except safe shallows.
- Warpers are only aggressive toward entities (including the player) that have Carar.
Defensive Fauna:
- Crashfish: Safe Shallows Caves.
- Gasopod: Safe Shallows.
- Mesmer: Kelp Forest Caves, Crag Field, Koosh Zone.
- Sea Treader: Sea Treader’s Path.
Passive Fauna:
All other in-game fauna not listed above are passive, but here are some tips:
Bladderfish can give water and can be used to make air bladders.
Reginalds are the best for food.
Lava Larva can suck energy out of vehicles, so slice them off with a knife.
Floaters make amazing bioreactor fuel.
In-development or talked about fauna:
- Cutefish
- Sea Emperor: Primary Containment Facility.
- Sea Emperor Juvenile
- Ghost Leviathan: Possibly Lost River or Void.
- Rock Puncher
Tools, Equipment, and Vehicles
Tools:
- Air Bladder: The air bladder is a necessity when wreck diving or cave diving without a submarine. It allows for a very fast ascent to the surface when in need of oxygen.
- Dive Reel: The dive reel is a necessity when diving into small crevices or cave diving without a submarine. It marks a passageway out of a cave or wreck or whatever else you need to explore.
- Flare: A flare provides light, but a flashlight is much better and much easier to make.
- Flashlight: Provides light in dark places or at night.
- Habitat Builder: This is a necessity throughout the game, as it allows for easy construction and deconstruction of seabases.
- Hardened Knife: This can be made with a modification station. It requires blueprints to unlock and is exactly what it sounds like.
- Survival Knife: A necessity for cutting things. Pretty self-explanatory.
- Laser Cutter: Can cut open sealed doors. A necessity when exploring wrecks and the Aurora.
- Light Stick: A light source. Requires blueprints to unlock.
- Propulsion Cannon: Can pick up and/or throw small objects or creatures. Requires blueprints to unlock.
- Repair Tool: A necessity when exploring wrecks or that Aurora, but can also repair your life pod and seabase.
- Repulsion Cannon: Can be made with a modification station. It can’t pick objects up, but it can throw them with much more force than the propulsion cannon. Requires blueprints to unlock.
- Scanner: Probably the most necessary thing to progress in the game. It can scan entities so you can learn more about them, but it also lets you gather blueprints.
- Stasis Rifle: Freezes entities for a limited amount of time when entities are caught in the bubble that the rifle shoots. Requires blueprints to unlock.
- Thermoblade: A heated knife that cooks fish on impact. It can be made in the modification station and requires blueprints to unlock.
- Transfuser: This is an in-development tool that will allow the player to sample DNA from organisms.
Equipment:
- Compass: This can tell you which direction you are going. Requires blueprints to unlock.
- Fins: Allow for faster swimming.
- Fire Extinguisher: This puts out fires. It is necessary to put out the fire in your pod and when exploring the Aurora.
- First Aid Kit: Heals 50% health.
- Floating Air Pump: Pumps air into pipes. Useful for cave diving, but not necessary by any means.
- High Capacity Tank: An oxygen tank with extra air capacity.
- Oxygen Tank: A necessity. It gives you 30 extra seconds of oxygen.
- Extra High Capacity Tank: An oxygen tank that gives even more oxygen. It can be made with the modification station.
- Plasteel Tank: This oxygen tank is lighter, so you swim faster while using it. Is made using the modification station and requires blueprints to unlock.
- Radiation Suit: This protects from the radiation that the Aurora starts spewing. You have to wear all three pieces to be protected.
- Rebreather: This does not give more oxygen, but rather makes each point of oxygen last longer at great depths. Useful for wreck diving.
- Pipe: Can be attached to a floating air pump or seabase to supply bubbles of oxygen underwater.
- Reinforced Dive Suit: While wearing it, you take 50% less damage. It is made in the modification station and requires blueprints to unlock.
- Stillsuit: Gives a water source that provides 20 water every half in-game day or so. Made in the modification station and requires blueprints to unlock.
- Swim Charge Fins: These fins charge any battery-powered device in your hand while you swim. It is made in the modification station and requires blueprints to unlock. It is particularly awesome because if you’re using a seaglide while wearing these fins, the seaglide’s power will never run out (provided you don’t keep the lights on).
- Thermometer: The thermometer tells you the temperature. It’s pretty much useless and requires blueprints to unlock.
- Ultra Glide Fins: These fins double your swim speed (versus using normal fins). It is made in the modification station and requires blueprints to unlock.
Vehicles:
- Seaglide: The seaglide is your first vehicle. It makes you move a lot faster underwater and runs on batteries. Requires blueprints to unlock.
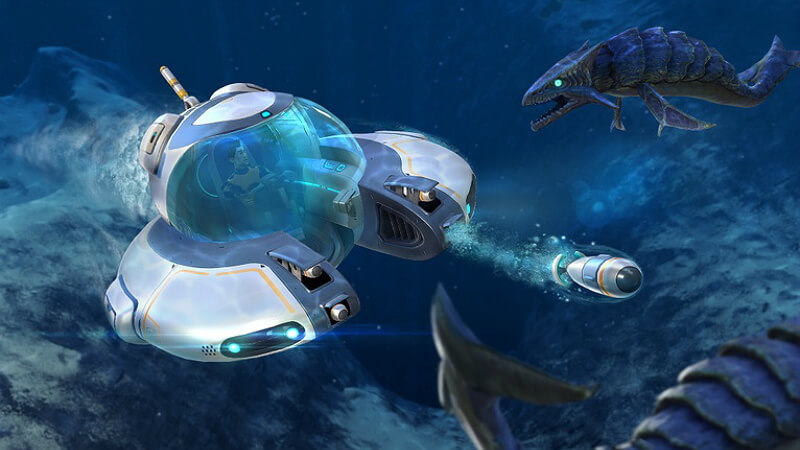
- Seamoth: This is your first submarine. It runs off of a power cell, and can be made to fit 4 different upgrades. Requires blueprints to unlock.
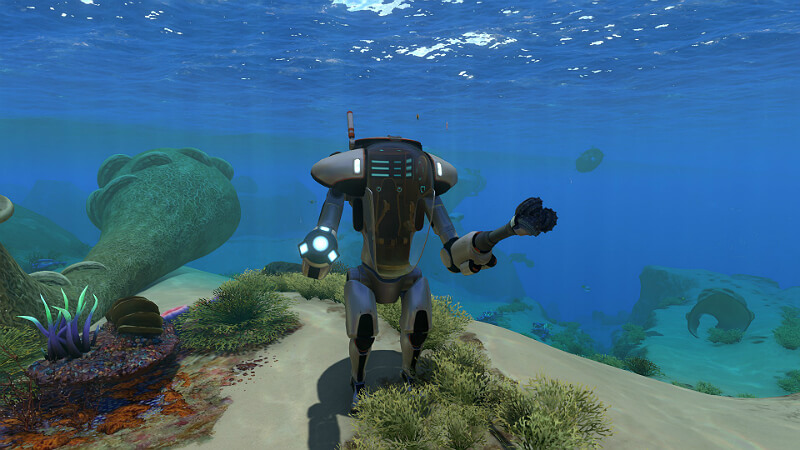
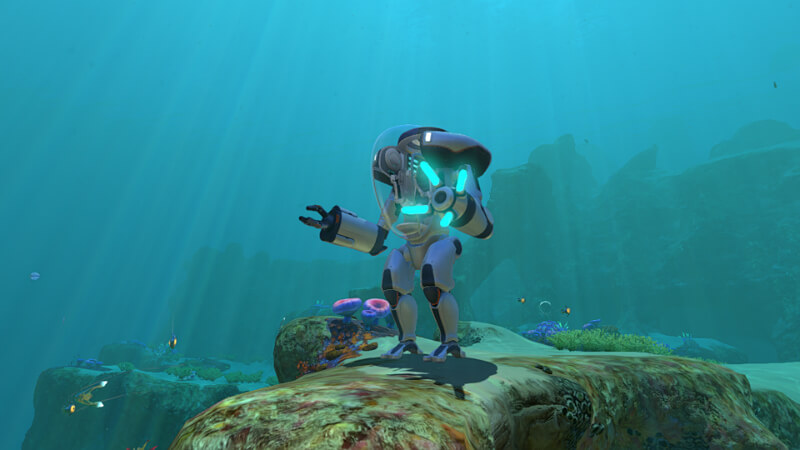
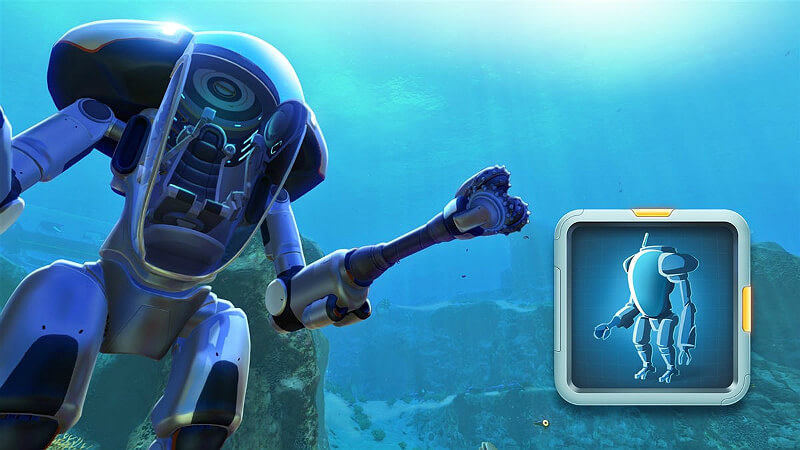
- PRAWN (Pressure Re-Active Waterproof Nano) Suit: This is a suit that allows you to walk across the sea floor and drill for resources. It runs off of two power cells and can be made to fit 4 upgrades and 2 arm upgrades. Requires blueprints to unlock.
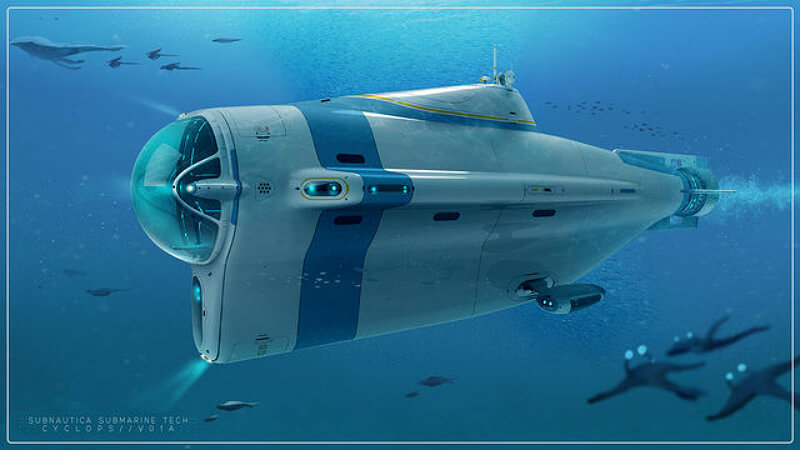
- Cyclops: This is the big daddy of all submarines. It can fit either the seamoth or PRAWN suit inside it, and can be used as a mobile base. It runs off of 6 power cells and can be made to fit 4 upgrades. Requires blueprints to unlock.
Tools, Equipment, and Vehicles, Continued
Vehicle Upgrades:
- Storage: Can add a storage container to the seamoth or PRAWN.
- Sonar: Can be attached to the seamoth and used for finding caves.
- Perimeter Defense System: Can be attached to the seamoth and used to give a shock to predators, making you and your seamoth safer.
- Torpedo System: Can be attached to the seamoth and loaded with either gas or vortex torpedoes to scare off predators (or kill small fish-don’t do this, please).
- Pressure Compensator Mk1: Can be attached to the seamoth or PRAWN. It lets the seamoth go to 300m and the PRAWN go to 1050m.
- Pressure Compensator Mk2: Can be attached to the seamoth or PRAWN. It lets the seamoth go to 500m and the PRAWN go to 1300m.
- Pressure Compensator Mk3: Can be attached to the seamoth or PRAWN. It lets the seamoth go to 900m and the PRAWN go to 1700m.
- Hull Reinforcement: Can be attached to the seamoth or PRAWN. It makes vehicles take less damage.
- Power Efficiency: Can be attached to the seamoth or PRAWN. Less power is used by these vehicles when this module is installed.
- Solar Charger: Can be attached to the seamoth. It lets the seamoth charge when in the sun (so you don’t need a moonpool to charge it).
- Thermal Reactor: Can be attached to the PRAWN. It lets the PRAWN charge when in hot places.
- Jump Jet Upgrade: Can be attached to the PRAWN. It lets the PRAWN Suit’s jets propel it farther.
- PRAWN Suit Propulsion Cannon: Can be attached to the PRAWN. It gives the PRAWN a propulsion cannon arm.
- PRAWN Suit Grappling Arm: Can be attached to the PRAWN. It gives the PRAWN a grappling arm for easier travel.
- PRAWN Suit Drill Arm: Can be attached to the PRAWN. It gives the PRAWN a drill arm, allowing for the mining of resources.
- PRAWN Suit Torpedo Arm: Can be attached to the PRAWN. It gives the PRAWN a torpedo arm, allowing it to load and shoot torpedoes.
- Hull Module Mk1: Can be attached to the cyclops. It increases the cyclops’ crush depth to 900m.
- Hull Module Mk2: Can be attached to the cyclops. It increases the cyclops’ crush depth to 1500m.
- Cyclops Power Efficiency: Can be attached to the cyclops. Less power is used by the cyclops when this module is installed.
- Shield Generator: Can be attached to the cyclops. Generates a temporary shield around the cyclops.
- Cyclops Sonar: Can be attached to the cyclops. Can be used for finding caves.
- Docking Bay Repair: Can be attached to the cyclops. It repairs things that are docked inside the cyclops.
- Decoy Tube: Can be attached to the cyclops. This increases the decoy tube’s holding capacity.
- Fire Suppression System: Can be attached to the cyclops. It basically turns on some sprinklers when there’s a fire in the cyclops.
- Scanner Room Range: Increases the “finding range” of the scanner room.
- Scanner Room Speed: Decreases the time that the scanner room takes to find resources.
Note that most seamoth and PRAWN upgrades are made in a vehicle upgrade console in a moonpool, but the pressure compensators mk2 and 3 are made in the modification station. If you can’t find an upgrade where you think it should be, look in the modification station.
Here is what I put in each vehicle (if you couldn’t decide for yourself):
Seamoth: Perimeter Defense System, Pressure Compensator Mk3, Hull Reinforcement, and Power Efficiency.
PRAWN: Storage, Pressure Compensator Mk3, Hull Reinforcement, Jump Jet, Drill Arm (one arm slot empty, so that I can grab the things that I drilled). Note that I also keep the other arms inside the storage in case I need them.
Cyclops: Hull Module Mk2, Shield Generator, Decoy Tube, Fire Suppression System.
In-development vehicles:
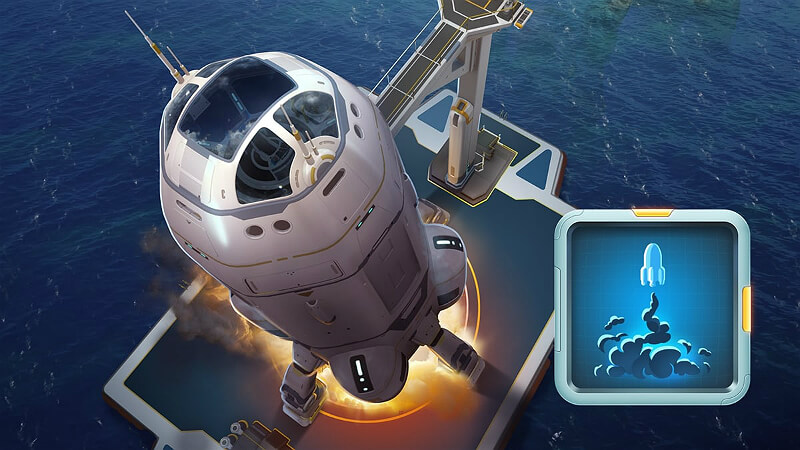
- Rocket Base
- Rocket
Minerals: Where to Find?
- {mineral}; {where inside the biomes}; {biomes most common in}.
- Aluminum Oxide Crystal; Seabed; Grand Reef, Deep Grand Reef, Lost River.
- Blood Oil; Bloodvine or Bloodroot; Blood Kelp Zone.
- Copper Ore; Limestone Outcrop; Safe Shallows, Kelp Forest, Grassy Plateaus.
- Crashfish Powder; Crash Plants; Safe Shallows Caves.
- Creepvine Seed Cluster; Creepvines; Kelp Forest.
- Diamond; Basalt Outcrop/Seabed; Mountains, Grand Reef.
- Gas Pod; Gasopod; Safe Shallows.
- Gold; Basalt/Sandstone/Shale Outcrop; Grassy Plateaus, Mountains, Mushroom Forest, Kelp Forest.
- Kyanite; Large Resource Deposit; Inactive/Active Lava Zone.
- Kyanite can only be gotten with the PRAWN Suit Drill Arm.
- Lead; Limestone Outcrop; Safe Shallows, Kelp Forest, Grassy Plateaus.
- Lithium; Shale Outcrop/Seabed; Mushroom Forest, Mountains.
- Magnetite; Seabed; Mountains, Jelly Shroom Caves.
- Mercury; Seabed; Deep Grand Reef, Grand Reef, Sparse Reef.
- Metal Salvage/Titanium; Seabed/Limestone Outcrop; Almost anywhere.
- Nickel; Seabed; Lost River
- Quartz; Seabed; Almost anywhere.
- Salt; Seabed; Almost anywhere.
- Sea Treader Feces; Seabed; Sea Treader’s Path.
- Silver Ore; Sandstone Outcrop; Kelp Forest, Grassy Plateaus.
- Stalker Tooth; Seabed; Kelp Forest
- Sulfur; Seabed; Lost River, Inactive/Active Lava Zone.
- Uraninite Crystal; Seabed; Lost River, Blood Kelp Zone, Mountains.
In-development:
- Enzyme 42 (Baby Leviathan Enzymes).
The Basics: Your Seabase
Building a good seabase can be tricky, especially when you have to worry about resources. There are usually 3 stages of bases:
Your first ever base: Your first base should be pretty small. I usually build it right below the escape pod, with a hatch facing upwards for easy access. I usually have 2 foundations with two “x” corridors on top. I then put 2 solar panels on top, a hatch on top, and some lockers inside. I still use the pod for fabrication needs.
The double room: By now you’ve gone to Floater Island. Place another foundation down to put growbeds on. Now, put down two multipurpose rooms attached to each other. The first, which you place the hatch on is what I call the “doing” room. All of your lockers will go in here, as well as a fabricator, which you now have enough resources for. Add a medkit fabricator and/or a comms unit if you want. The second room is “bio room.” By now you’ve gotten a bioreactor, so put that in there, as well as the plants from Floater Island. You should also add a few more solar panels, making your panel count 4.
The “I’ve got this now” base: By now you have enough resources to move away from your pod entirely. You probably have alien containment too. This base consists of 5 multipurpose rooms in total. Your first should still be the “doing” room, but with more things in it. The second should actually be 2, with 2 “bio rooms” stacked on top of each other (so now you have 2 bioreactors in total). The next set of rooms should hold your alien containment system. Again, put two on top of each other so you can grow creepvine in it. Put as many solar panels as need be (if you’re close enough to the surface). Now, just add more to this base: Moonpools as necessary, and maybe a nuclear reactor or another “bio room” for more power. Just remember to keep an eye on your hull integrity so that your base doesn’t fall apart and make sure that there is enough power to keep your base running well.
Biomes: Threats and Rewards
- The Safe Shallows: The Safe Shallows is the starter biome. There are no big dangers (although you can die in it), and the area is very resource rich.
- The Creepvine Forest: This is the second biome that you will find. It is next to the Safe Shallows, but has a few threats:
-Stalkers. Stalkers will literally stalk you if you get in its way. It will become passive for a short time if you feed it or give it metal salvage. It will run away if you hit it with a knife. It deals thirty damage.
-Bleeders. Bleeders are hard to see and will latch onto your arm, dealing 5 damage per second and lowering your food bar. Hit it with a tool or your fist to get it off.
The Creepvine Forest is not super resource rich, but does have some resources that are not found in the Safe Shallows. - The Grassy Plateaus: The Grassy Plateaus is the third biome. The only real danger here is sandsharks, which are very slow and lose interest quickly, but deal 30 damage. It is rich in copper, gold, and silver, and also has many wrecks in it, where you can scan many things. It also holds the entrances to the Jellyshroom Caves.
- The Jellyshroom Caves: These caves do not hold many rewards, but only have one danger-the crabsnake. It does hold the Jellyshroom Caves base, which holds many rewards inside.
- The Crash Zone: This is the area surrounding the Aurora, and is very dangerous:
-Stalkers live here.
-Sandsharks live here.
-Reaper Leviathans are here as well. They are huge and deal 80 damage.
You have to cross the Crash Zone to enter the Aurora. - The Mushroom Forest: There are a few bonesharks here, but only on the edges. This is the best place to find Cyclops fragments and lithium.
- The Grand Reef: The Grand Reef’s dangers include the warper and crabsquid, but the rewards are great too-Aluminum oxide and diamonds are abundant, and there is a wreck as well as an abandoned seabase and an entrance to the Lost River here. The Floating Island is above this biome.
- The Mountains: The Mountains themselves are very dangerous as there are warpers and reapers there, but Mountain Island, which is in this biome, is not very dangerous and contains the QEP. It is the best place to get gold, and some Cyclops fragments.
- Sea Treader’s Path/Sparse Reef: These two biome are not very dangerous, and the Sea Treader’s Path has a wreck.
- Blood Kelp/Blood Kelp Floating Islands: The dangers in these biomes include crabsquids and ampeels. The Blood Kelp zone has a wreck, while the Blood Kelp Floating Islands contain an entrance to the Lost River.
- The Lost River: The Lost River is the best place to get sulphur, nickel, mercury, aluminum oxide, and gel sacks. The only danger here is the spine eel. It contains the DRF and an entrance to the Lava Zones.
- The Lava Zones: The Lava Zones contain many dangers, including the warper, the lava lizard, and the sea dragon, which can do anywhere from 40 to 100 damage. The Lava Zones contain the Thermal Plant and the PCF.
- The Underwater Islands: This biome contains one wreck and a ton of bone sharks. It’s very dangerous.
- The Crag Field: About the same as the Underwater Islands except without a large wreck.
- The Dunes: There are many reapers and sandsharks patrolling the area. It has one large wreck.
- The Koosh Zone: This biome has ampeels everywhere and contains one large wreck.
Common Mistakes
Mistake 1: My base always gives me oxygen!
Answer: Not unless it’s sufficiently powered. I saw my friend die in his base once when he forgot to put solar panels on and drowned inside. It was hilarious. This can be helpful though, because you can grow plants without oxygen so you can have “snack-time waypoint bases,” or bases without power that you can pop into to grab food or supplies.
Mistake 2: I have enough time to catch fish and cook them before I starve or get dehydrated to death.
Answer: Sometimes you don’t. I made this mistake on my first play-through when I was at 3% water. I decided to catch 4 bladderfish instead of just 1. I didn’t make it to the fabricator in time. If you are at very low water like this, just catch 1 fish, drink/eat, and then go out for more to fill you up. Also don’t fabricate a bunch of water or food if you’re this low. Just do one, eat/drink, and then fabricate the rest.
Mistake 3: Anything that looks harmless is harmless.
Answer: Mesmers look beautiful and peaceful. When you get close to it, it will try to kill you. If you see a creature that you’ve never seen, assume that it’s dangerous.
Mistake 4: I can stay close to my life pod in the start, and still get what I need.
Answer: Once you have a knife and a scanner, you can go anywhere in the safe shallows (except closer to the Aurora), and once you have these and a seaglide, you can go anywhere (except closer to the Aurora). Just explore, no matter how far into the game you are.
Mistake 5: The cyclops is invincible.
Answer: This used to be the case, but now it can be easily destroyed. Make sure to be careful.
Tips and Tricks
- Keep these tools with you at all times: Survival knife, scanner, fins, repair tool, and laser cutter, rebreather/radiation suit/reinforced dive suit.
- Once you have the blueprint, build a chair in your base. It allows you to browse your PDA while not losing hunger or thirst.
- When exploring the Aurora:
- Don’t bring extra power cells, batteries, food, or water. There’s a ton of it just lying in the Aurora.
- Be sure to look for more entrances than just the one in the front. You might miss a room or two.
- Be sure to check all data from the PDAs that you find. They might tell you something important.
- Watch out for bleeders. They’re all over the place inside the Aurora.
- Always carry a beacon or two while exploring. You never know what you might find.
- Use the cyclops as a portable waypoint or base, not an exploration device. Put the cyclops directly over the biome you want to explore then turn the engine and lights off and deploy the seamoth or prawn suit. If you need to get food, put things in storage, get some tools, or leave, just go back up to the cyclops. Of course, you’ll almost have to bring it to the lava zone in order to get anywhere in there…
- Base power systems go by a pattern: Your seabase will use the power from the first power generator that you put on your base, then the second, then the third, and so on. I place my solar panels first and then use a bioreactor as reserve power for nighttime.
- There are two main entrances into the Lost River, each with their upsides and downsides:
- The entrance in the Grand Reef is harder to find and get into, but there are more rewards nearby.
- The entrance in the Blood Kelp Floating Islands is easier to find and travel through, but is a bit more dangerous, if only slightly.
- If you see a giant dropoff into pitch blackness only, don’t go any further. It is the end of your in-game world, and is called the void. Large things live there. Very large things.
Alien Structures
WARNING: Major Spoilers Below
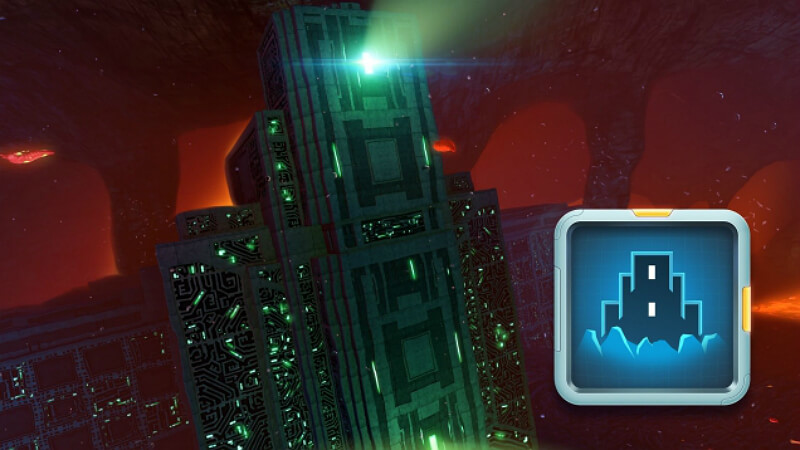
The Quarantine Enforcement Platform, also called the Precursor Array:
This is the first of the precursor structures that you will enter. It will shoot down anything that enters or leaves the planet, to prevent the spread of the disease designated “carar.” This includes the Sunbeam, which tries to rescue you. The first entrance to the facility is on Mountain Island. It requires you to place a purple artifact inside the artifact terminal. You can now enter the first room. This room will have 2 data downloads, as well as 2 ion crystals. From the main room you will find more rooms, some of which require a purple artifact to enter.
Here is a list of the other rooms:
Gravity elevator, to move you from the bottom to top or top to bottom.
Alien moonpool. You can dock a cyclops here or leave the facility from here.
Teleporter room. Here you will find a teleporter.
Control room. This lets you try to disable the facility. If you have the carar, it will not disable it.
There are other rooms that will have either ion crystals, purple artifacts, or data downloads within them.
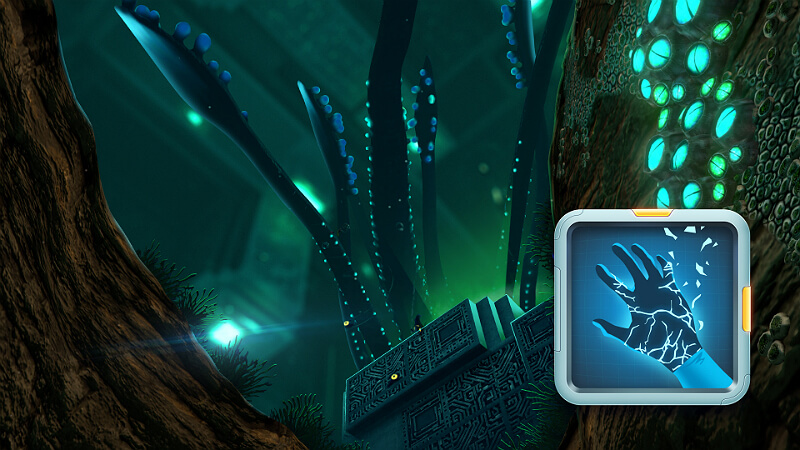
The Disease Research Facility:
This facility is found in the lost river, and is the only destroyed and water-filled precursor structure. Its purpose was to infect creatures with the carar bacterium to see if they survive, and to see if they could provide a cure. After finding the entrance, you can go inside, where there is a place to put a purple artifact, opening a force field. Behind the force field is a data download. If you continue inside the facility, you will find a room with an egg and some dead creatures in a case, as well as a room with many warper parts. After entering this room and performing a self-scan, the carar will spread to your hands.
The Primary Containment Facility:
This facility’s purpose was to contain survivors of the carar bacterium, to try to synthesize a cure. It is located in the active lava zone. It requires the blue artifact, which is found in the Thermal Power Generator (below). Currently, the first room that you walk into is the antechamber which leads to all of the other rooms and contains alien artifacts, which you can scan. From there, there are four teleporter rooms (leading to two precursor caches), the pipe room (which explain systems inside the PCF), the egg room (which contains all the different eggs), and the dissection room (where there is a dissected sea emperor baby). Finally, there is the aquarium, where the sea emperor and her eggs are held and where the sequence that can provide you with a cure can play out.
The Thermal Power Generator:
This is a precursor base found inside the Lava Castle, a formation inside the inactive lava zone. Its purpose is to supply the other precursor facilities with power. There are two force fields inside, requiring purple artifacts to unlock. Behind one of the two is the blue artifact. Behind the other is a series of data downloads, one of which unlocks two blueprints: The ion battery and the ion power cell. There are alien droids located within the facility, which will attack you. There is also a teleporter inside.
Mountain-to-Floating Island Teleporters:
There are teleporters located on Mountain Island and Floating Island. These teleporters require an ion crystal to be placed in a terminal to function. They allow easy access to both islands from each other.
Precursor Caches:
There are currently 6 different precursor caches:
- The Sparse Reef, Blood Kelp, and Dunes Caches are also called sanctuaries. They are opened with a purple artifact and contain ion crystals and data downloads.
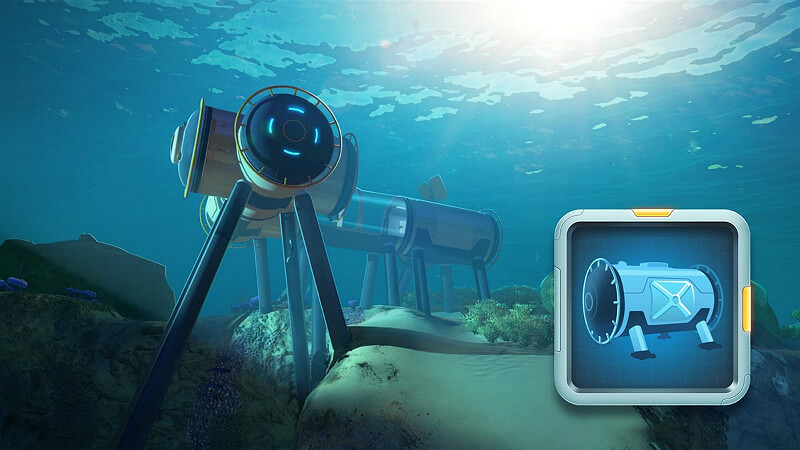
- The Lost River Cache is also called the laboratory cache. It requires an orange artifact to enter. There is lab equipment and specimens inside, as well as ion crystals and data downloads.
- The Mushroom Forest and Crag Field Caches are teleporter caches. They each contain a teleporter leading to the Primary Containment Facility antechamber.
There are other caches in development:
- The Koosh Zone and Grand Reef teleporter caches also lead to the Primary Containment Facility antechamber.
- The Mountains teleporter cache leads to the Primary Containment Facility aquarium.
Abandoned PDAs, Databoxes, Signals, and Alien Items
Abandoned PDAs: Abandoned PDAs are found mainly in lifepods, abandoned seabases, and the Aurora. When they are picked up, they will not go into your inventory. Instead they will download into your PDA’s files. They will have information on them containing information about the person that had them, logs that the person kept, or notes that the person kept. They mainly give story elements, but can have some helpful hints as well. They glow blue, making them easy to see.
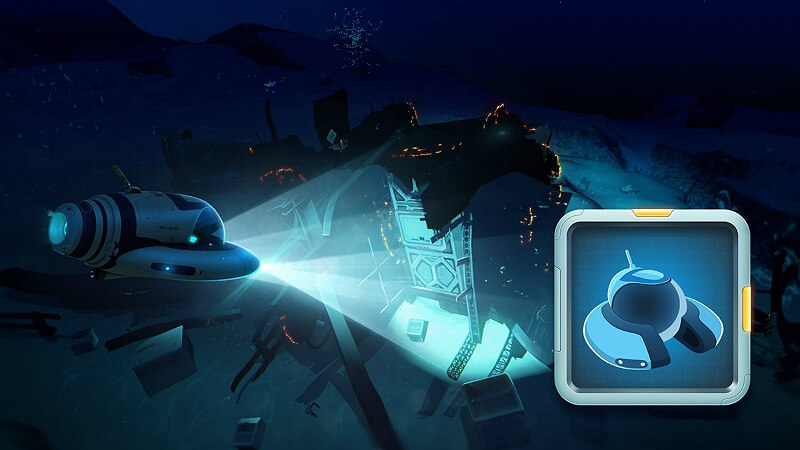
Databoxes: Databoxes give blueprints, without the need to scan them. They look like orange and white rectangles (with the corners smoothed). They are found in or around lifepods, some abandoned seabases, and some wrecks. Here is a list of all blueprints that you can get from databoxes: Compass, cyclops hull module mk1, high capacity tank, plasteel tank, repulsion cannon, creature decoy, ultra glide fins, cyclops shield generator, cyclops sonar upgrade, cyclops fire suppression system.
Signals: You get signals from the communications relay and some data downloads. These include lifepod locations, heat signatures, energy releases, etc. They will show up in your inventory if your signal slots (the slots on either side of your headgear slot) are full or show up in a previously unfilled signal slot (you can also put things like the scanner room HUD chip in these slots). When one is in your signal slot, it will show the location on the map as a blue circle and a sign above the circle saying what the circle is showing and how many meters away you are from it.
Alien artifacts: There are currently 5 different types (colors) of artifacts in the game, 2 of which (red and white) can only be spawned with commands and do nothing. There are currently a few purple artifacts in the game to be found, but they can also be fabricated after one is scanned. Three of them are used in the quarantine enforcement platform, and more are used to unlock some precursor caches and some doors in the disease research facility and the thermal power generator. There are also orange and blue artifacts. There is only one orange artifact in the game, found in an abandoned seabase (that’s your hint). It is used to unlock the laboratory cache. The blue artifact is found in the precursor thermal power generator and will be used to unlock the primary containment facility.
Alien data downloads: These will look like green or orange holograms, and when clicked on, will give the PDA a data download to progress the player further through the story.
Ion Crystals: Ion Crystals are large green crystals that can be found and gathered throughout precursor structures and caches. They can be currently made into ion batteries or power cells (which last twice as long as normal ones), once the blueprint for ion batteries is gathered (it is obtained when the player finds a specific data download within the precursor thermal power generator). They will also be used in the recipe for the end-game item, the rocket/rocket base.
Abandoned Seabases, and what you can expect to find
Floating Island Bases: There are three abandoned seabases on the floating island:
The first base is in the middle. This is the most important. From this, you can collect these blueprints:
- Multipurpose Room
- Living Wall
- Bulkhead
- Exterior Growbed
You can also get a purple artifact, and open a databox inside this base.
The second and third bases are on top of the mountains that are on the floating island. They are somewhat the same, so I will combine what you can get from them. From these, you can collect these blueprints:
- Observatory
- Chair
- Plant Pot
- Interior Growbed
- Scanner Room
- Stasis Rifle
- Propulsion Cannon
- You can also find fragments for one of the dive suits, but I forget if it is the reinforced dive suit or still suit.
Jellyshroom Caves Base: There is one abandoned seabase in the jellyshroom caves. It is bigger than any of the ones on the floating island. The things that you can get in the jellyshroom base are probably more important than the floating island bases, with the exception of the multipurpose room, exterior growbed, and plant pots. These are the blueprints that you can find in the jellyshroom caves base:
- Power cell charger
- Nuclear reactor
- Modification station
- Moonpool
Grand Reef Base: The last abandoned seabase is in the grand reef. It is the biggest of the other bases. I do not know exactly what blueprints you can find there (other than scanner room), because I have never been inside (I know that there are scanner room fragments there because I saw them on the outside of the base as I was going to the lost river), as this base is not as important to the story. I do however know that the orange artifact can be found there.
Maps of 4546b
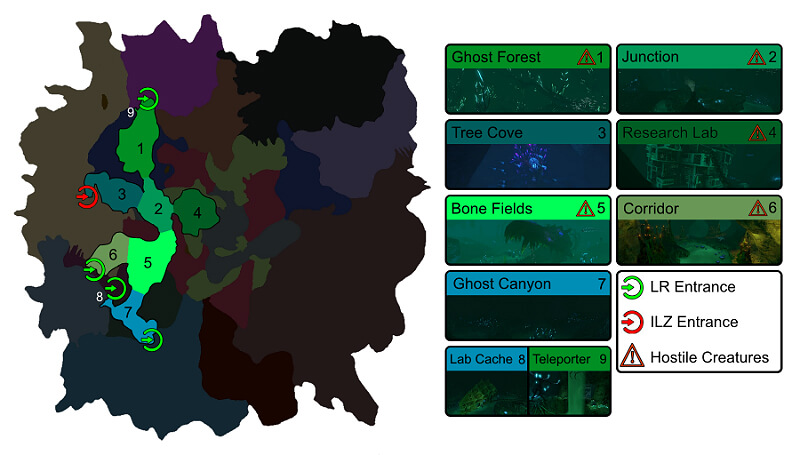
Here is a map of the lost river:
Here is a map of the lava zone:
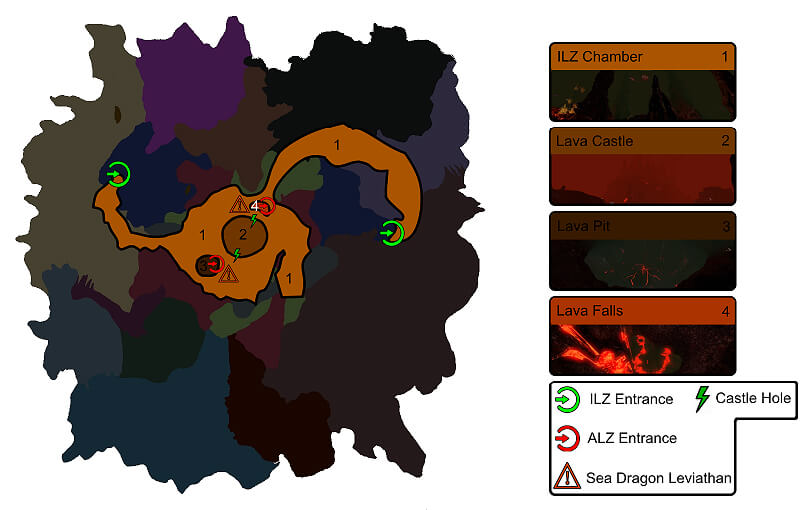
Note that the lava falls contains the entrance to the lava lakes where the Primary Containment Facility is.
Here is a map of the above-ground world:
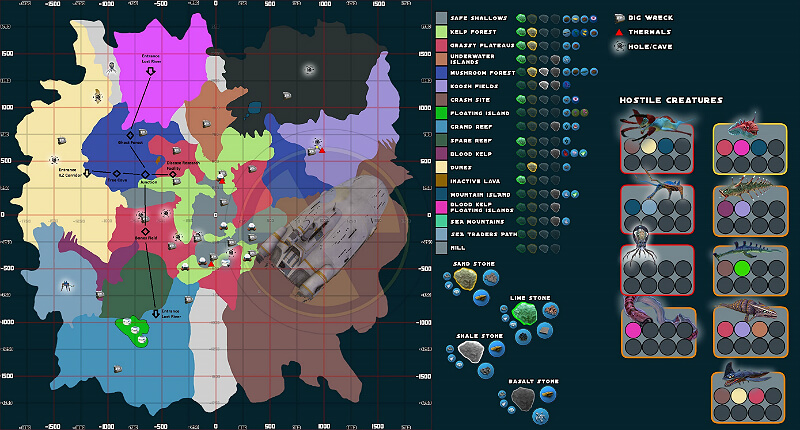
Note that this map is slightly outdated (the crag field is not there).
A guide to the Sea Emperor and the PCF
(this entire section is a spoiler)
As you approach end-game, you’ll want to go down into the lava zone once more and get to the PCF, in order to get the cure to the carar. But what do you need with you? What should you have? This section is dedicated to making sure you don’t have to take more than one trip down to the PCF.
Vehicles: You should have both the cyclops and prawn suit with you. For the prawn suit, you’ll absolutely need the grappling arm and drill arm. If you do not have these, you are not prepared. The prawn should have mk3 pressure compensator and a storage module, and the cyclops should have the mk2 cyclops hull reinforcement, along with some defenses.
Items: Obviously, you should bring all of the basic tools. This includes a habitat builder. Don’t forget it. As far as materials go, you’ll need a lot. You need:
- Enough materials to make a small base. You need a multipurpose room, a hatch, a bioreactor, and a fabricator.
- You’ll also need a sea crown seed, an eyes plant seed, a ghost weed seed, a bulb plant sample, and a fungal sample. Bring some lantern fruits (or something), to power the bioreactor.
- You also need two ion crystals, but, as long as you have the drill arm, you can get ion crystals while you’re at the PCF. You also, of course, need the blue artifact to enter the PCF (bring more than one just in case).
Now what to do with all this: When you get to the PCF, you should enter the facility in your prawn suit. Remember how I said you needed some storage modules on your prawn? Well, you should take everything you need from the cyclops. You’re going to leave it in the lava zone, for now. You can always make another one. At least take all the items that are listed above. Once you go into the aquarium, go right down to the incubator (you should still be in the prawn) and put an ion crystal in the incubator. The emperor will make her way to the teleporter, and blow the sand off of it. Activate the teleporter, and she will give you the hatching enzymes blueprint. Now make the multipurpose room, and go inside. Now build the bioreactor, and power your base. Build the fabricator too. Remember all those seeds from above? Those make the hatching enzymes (in the fabricator). Make the hatching enzymes, leave your base, and put them in the incubator. The eggs will hatch, the babies will leave, and then cure will be dropped.
Getting back home: Now cure yourself, and take the prawn, with you in it, out of the aquarium teleporter into the mountains biome. You can now disable the QEP, and build the rocket and beat the game (once the devs add that).
Original Link – Continuation of discussion

Add comment