
Hi there! I recently finished a summoner playthrough, and I really enjoyed the challenge and different playstyle of this class. Since I enjoyed it so so much, and since some people asked me to in my last guide, here is a guide to being a summoner.
General Strategy

The first thing to understand about being a summoner, is that IT IS NOT SUPPOSED TO BE PLAYED PURE. Don’t get me wrong, you CAN play pure summoner if you want to, but this makes the class ten times more challenging. Summoner is designed to be more of a multi-class class. It is probably the closest thing to a non-class playthrough that you can get. Since none of the armors or accessories boost any class except for summon, this gives you the freedom to choose which weapons to use.
This gives some really nice combo potential. In the early game, you can use your favorite weapon. In early hardcode, you can use the golden shower to add 60 DPS to your spiders. In mid-hardcode, you can use vampire knives to do high damage with your summons, but still get the nice healing of the knives, and post Moon Lord, you can pick and choose your favorite of the ML drops. In that interest, this guide will recommend strategies and weapons that aren’t purely summoner, however, it should still help people who want to play as pure summoners.
The second thing is that, as a summoner, your minions can’t attack very far offscreen (except for the stardust dragon, but he (or she?) is special). Because of this, you will need to have bosses onscreen most of the time you fight them, so you will need to get good with dodging (especially with the low defense). To practice dodging, I would advise getting the shield of Cthulhu, and surviving the Duke as long as you can with no armor on a world you’ve already completed. Then, try it with no shield, just the UFO. Good luck
Something that can help you with this playthrough is minion targeting. If you right click with a minion summon staff in your hand, all the minions summoned from that staff will target the enemy/boss that you right clicked over other enemies.
Finally, something very, very useful, is that minions keep damage boosts. This is hard to explain, but I’ll try. Minions are considered projectiles. Basically, a minion is a chlorophyte bullet that lives forever. Now, if you shoot a chlorophyte bullet with full vortex armor, and then quickly change over to no armor, the bullet WILL KEEP THE DAMAGE BOOST from the vortex armor. It’s the same with minions. If you summon a minion with full stardust armor, then remove your armor, the minion will keep the damage boost.
This works with more than just armor though. It works with menacing accessories, wrath potions, emblems, nebula armor boosts and any damage or knockback boost in the game. Basically, this means that you can do switcheroos with damage vs. defense things in the game. A good example of this is spooky vs. tiki armor. Spooky armor gives a huge damage boost, whereas tiki armor gives 1 extra minion and way more defence. If we were any other class, we’d have to decide between the two armors, but as a summoner, you can summon as many minions as possible with the spooky armor, and then switch over to tiki armor to summon a final minion and get more defence.
Another good example is menacing equipment vs. warding equipment. Instead of deciding between +20% damage or +20 defence, or some combo, you can get both. You just summon your minions with the menacing stuff, and when you’re done, you switch to warding. You can also have two sets of accessories, so you summon your minions with the summoner, avenger and destroyer emblems, and then put on wings, a shield and lightning boots. It’s great. Because of the warding/menacing thing, you’re going to need a lot of money. You can either cheat, or use some of the money making strategies I’ll include.
P.S. If you didn’t understand that last ranty paragraph, reread it. It’s really important.
P.P.S. Ruthless is the best modifier for summons. It actually does a lot. Reforge to ruthless whenever you can.
Now that you can understand the basics of playing summoner, it’s time for…
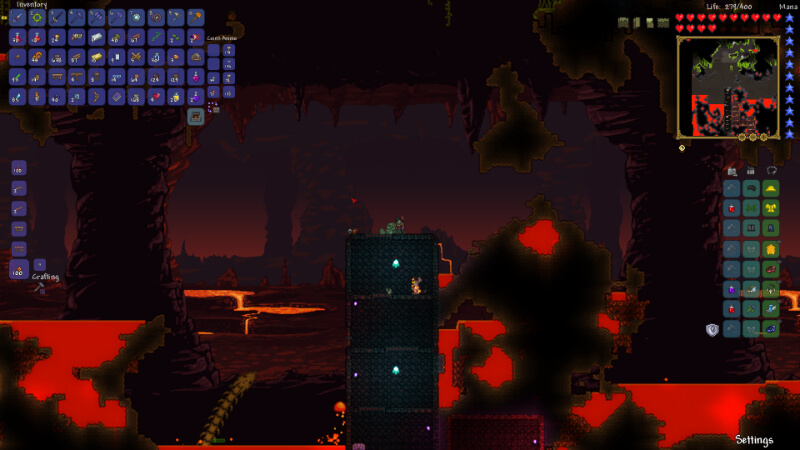
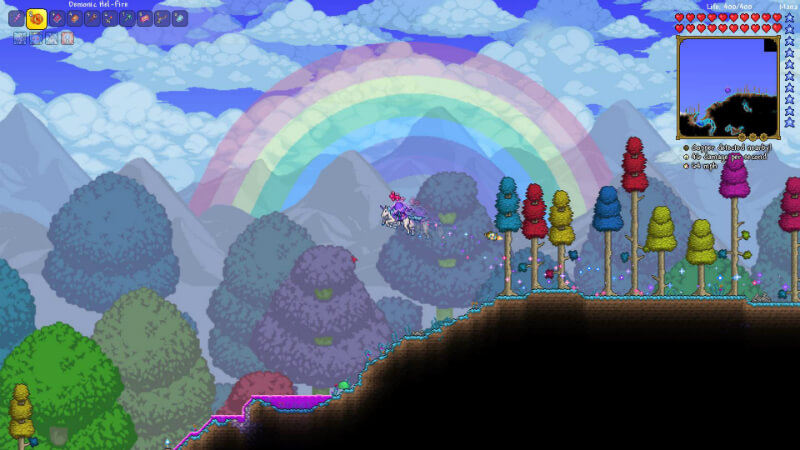
The Early Game!
![]()
![]()
There are three ways of starting as a summoner.
- Cheat, or be really lucky and get a slime staff.
- Fish up a reaver shark and go get some imps.
- Play as any class until you kill Queen Bee.
I will be describing how to play the third one, since the first one relies on luck/cheating and the second one skips pre-hardmode.
Ok, another choice you have is crimson vs. corruption. Usually, this isn’t too hard of a choice, but as a summoner, it’s incredibly difficult. You see, with a crimson world, you get:
- Crimtane armor (great)
- Flesh knuckles for extra defence
- The golden shower to get loads of extra DPS (probably the second best weapon for summoners)
- Vampire knives for free healing.
This stuff is so great, but it’s lacking some pretty important stuff from a corrupt world:
- Worm scarf (in expert. Outclasses the brain of confusion 100-1)
- Putrid scent, great for keeping things un-aggro
- Wrath potion, which actually affects summons with the 10% damage boost, and the damage boost stays! (Remember that rant at the beginning?)
So, it’s your choice. If you don’t mind world hopping, I’d advise doing so, since all this loot is great. Also, the crimson may seem like it has more use, but all of it’s bonuses get outclassed later, while the worm scarf and wrath potion stay useful until the end. The putrid scent also gets a buff while using stardust armor, since wearing it gives a higher chance of enemies targeting your guardian.
So, for those of you who have trouble with this part of the game, I will describe it to you. Get cactus armor, go mining, get hearts, get iron armor, get boomstick, beat the EoC, break orbs/hearts, get meteor armor/space gun, beat Queen Bee. Got it?
If you have trouble with QB, try using an abeemination aboveground instead of the larvae. The boomstick with musket balls or silver bullets helps a lot too.
You will have to beat Queen Bee twice to get enough beeswax to make the armor and staff, and QB is also a good source of income, so you may want to farm her for a while.
Ok, now that you finally have summons and summoning armor, it’s time for the EoW or the BoC. Now, at this point, it may actually be a good idea to get yourself a reaver shark. It’s not necessary, but the imps do really well against both the BoC and the EoW because of it’s piercing. This boss fight shouldn’t be too difficult, since you have the boomstick as well as your summons. Just make a standard arena with layers of platforms, campfires and heart lanterns, and just avoid the attacks.
Good job! You beat the EoW or the BoC! If you didn’t bother getting the reaver shark earlier, now you can craft the pick necessary to mine hellstone. Get imps. They shoot incredibly slowly, however they inflict on fire!, they pierce, and they do much more damage. In fact, their base damage is practically the same as spiders!
If you haven’t beaten a goblin army at this point, go to the edges of your world and farm goblin scouts. It would be an incredibly good idea to get the goblin tinkerer before fighting skeletron. Once you find the goblin tinkerer, begin reforging the things you will keep to warding, and other random accessories to menacing.
WHAT SHOULD BE WARDING:
- Lightning/frostspark boots
- Some kind of horseshoe balloon
- Worm scarf and shield of Cthulhu (in expert)
- Anything else you plan on wearing most of the time.
WHAT SHOULD BE MENACING:
At this point in time, you don’t actually have any accessories that boost damage, so just reforge random cheap accessories to menacing. Put the menacing stuff in the vanity slots, and right click them all when you want to summon, then right click the warding accessories to put them back in their spots.
Now, with imps, summoning potions, wrath potions, menacing/warding equipment, and bee armor, Skeletron should be pretty easy. Just run around on platforms with campfires and heart lanterns, and he shouldn’t hit you much, especially if you have the shield of Cthulhu. (Speaking of which, the shield of Cthulhu is a great summon accessory until post-Plantera, with the dash and few frames of invincibility.)
Once you beat Skeletron, go explore the dungeon. The weapons in the chests are good, but they can be passed as a summoner, since none of them specifically help summoners. The bewitching table however, a piece of furniture found in the dungeon, is essential. It gives a buff which allows you 1 extra minion for 9 minutes. You will carry this thing around with you, and keep that buff active at all times.
It may sound irritating, but taking 5 seconds every 9 minutes to renew a buff that gives loads more DPS is not a heavy price to pay. The fastest way I’ve found of renewing the buff is holding your pick, then going into your inventory, picking out the bewitching table, placing it, then right click, and left click. This will get the process over with in less than 5 seconds.
Go to Hell
Now, before you get into hardmode, make sure you have these things:
- Bee armor
- Imp staff
- A potion farm/lots of summoning/wrath potions
- 5 (6 in expert) menacing accessories
- Warding obsidian shield
- Warding lightning/frostspark boots
- Warding worm scarf (in expert)
- Warding some kind of horseshoe balloon
- 2 other things you want warding (shield of Cthulhu in expert)
- A LOOOOT of money (at least 2 plat)
- A located spider nest
Got all that? Good. Now we can proceed.
The WoF can be easily beaten if you choose beenades as your “backup” (non-summon) weapon. You should have a bunch of those anyways from killing Queen Bee to get your bee armor. However, this doesn’t really test your skill as a summoner. If you want to try to be a more “summonish” person, you can use any other weapon, and get you imps targeting one of the eyes. (The eyes have no defence). I’d advise keeping beenades in your inventory anyways, just as a failsafe. I had decided to use my boomstick with my imps, but I got to the edge of my bridge while he still had half health. I started spamming beednades, and managed to kill him before I ran into a wall I hadn’t cleared out. This is why beenades are important.
Now, before we jump into hardmode, you have to make sure you get the summoning emblem. This thing is great, because with it, and menacing, you get a free 19% damage boost, without even taking an accessory slot. If you’re playing in expert, get at least one other emblem as well, just for the avenger’s emblem.
Now, finally onto where summoner really picks up…
Hardmode
Now, as always, the first thing you should do as soon as you get to hardmode is rush to the Witch Doctor a night while he is housed in the jungle. Buy the leaf wings for one platinum. This may seem expensive, but these wings are useable until even Moon Lord, and I usually keep them until I get a UFO. Once you’ve done that, have fun spending billions of dollars reforging this to warding.
Now, your next step is to get spider armor and the spider staff. You can get the Queen spider staff too if you want, but I find sentries don’t help that much. Go down to the spider nest you located earlier, and start farming spiders. The most effective way I’ve found is to sit in a spider nest for 20 seconds, then run over to an open area, and let your imps kill the spiders while you hide behind a wall.
The nice thing is, your imps should do around 30 damage with your new summoner’s emblem and menacing accessories; enough to actually dent the health of hardmode enemies, including black recluses. Aim to get spider armor first. As well as boosting the damage of your imps significantly, it also increases you defence, making for longer and easier excursions into the spider nests. Once you have both spider armor and the spider staff, you’re basically set as a summoner until you beat the Twins.
This is my favorite part of being a summoner. You don’t have to do any of that tedious mining that all the other classes do. I actually beat Moon Lord as a summoner with no adamantite forge, no chlorophyte, and no more hardmode ores than it takes to make a mithril anvil.
Now, with your new summons, set off to find some mimics. Since you have less ability to run away from fights, because of that stopping your minions’ attacks, and you having less defence, the star veil is a gift from heaven, especially in expert mode, giving you valuable invulnerability frames. The stars aren’t that useful, but whatever, they’re a small boost.
With this, your setup should be:
- Spider armor
- Spider staff (ruthless modifier)
- Menacing summoner emblem
- Menacing 4 (5 in expert) other accessories
- Warding star veil
- Warding lightning/frostspark boots
- Warding leaf wings
- Warding obsidian shield
- Warding anything else (shield of Cthulhu in expert)
- Warding worm scarf (expert)
These will be what you use to fight the Twins and the Destroyer.
As a backup weapon, I advise using the golden shower. Not only does this add 60 DPS to your minion attacks, but it doesn’t run out (unlike the bullets, arrows, and flask). If you don’t have a crimson world, and you dislike world hopping to the point of never doing it, the deadalus stormbow with holy arrows is a good choice. (The only problem is that with the spiders latched on, doing continuous piercing damage, and therefore giving continuous immunity frames, the Twins will only ever be hit by the stormbow every 10 seconds or so).
TRIVIA: Anything that doesn’t disappear on contact with an enemy is considered piercing, including most minions, with certain exceptions (the raven staff is one of them). Any time a piercing attack hits an enemy, it gives that enemy invulnerability frames, making it possible to hit an enemy only 6 times per second. (The last prism is special. It can hit 12 times per second. Luminite bullets are also different, but I’m not sure how). This makes the xeno staff, the pygmy staff, the tempest staff, the hornet staff, and the stardust cell staff be the minions with the most possible hits at a time, and more useful.
Now, as your first challenge in hardmode, you must…
Fight the Mechs!
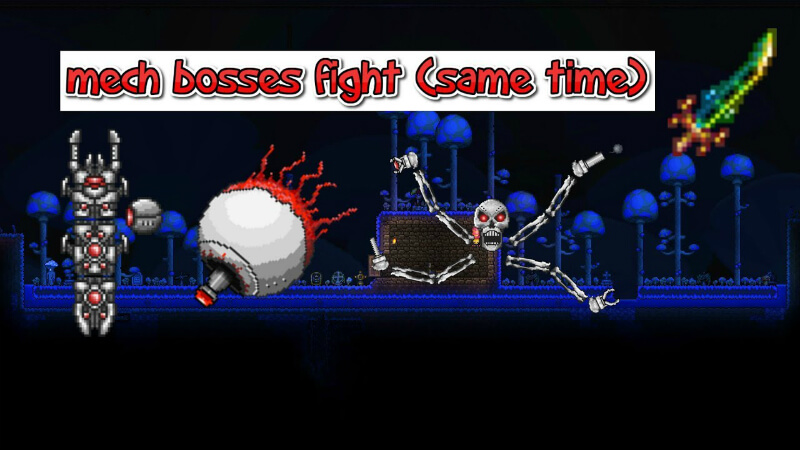
Now, the first mech you will take on will be the Twins. This is because the Destroyer gets destroyed (lol) by attacks that pierce through his segments. Since spiders latch onto an enemy, each spider would only hit one segment. With Skeletron Prime, lots of the spiders would get confused, and latch onto the arms instead of the head. The optic staff, crafted with drops from the Twins, is great against both of these bosses, as well as Plantera. Also, since the Twins are only 2 targets, they’re the only boss that doesn’t confuse the spiders.
So, get yourself some mechanical eyes, a good weapon, and prepare. The potions you will want are:
- Summoning
- Wrath
- Ironskin
- Regeneration
- Swiftness
All others are unnecessary, but certain potions, like the endurance, life-force, and mana region can make this fight even easier.
Now, make a long row of platforms, with heart lanterns and campfires spaced out along it. When you have your “arena”, summon the Twins and run. You will want to constantly run, flying upwards and dropping back down. Aggro your spiders onto Spazmatism (right click with staff, remember?) and spray him (her?) with the golden shower, or rain down your arrows.
Most of them won’t hit, but keep spraying until you get him/her ichored. All this time you should be running and flying back and forth. Try not to let Spazmatism off the screen too often, because this stops your spiders from attacking, although don’t sacrifice yourself to keep him/her on screen.
This will be tied for the hardest boss fight in your summoner run with the Moon Lord fight. Don’t be discouraged if you lose, just get as many buff potions as you can, and try again. It took me 2 tries. If you don’t get it in 10 tries with all buff potions though, summoner probably isn’t for you.
Congrats, you beat the Twins. Now, the first thing to do is go use your special new souls of sight, and craft them into the OPTIC STAFF, and reforge it to ruthless. This thing is great, summoning 2 minions for the price of one, you get double the number of minions you should. They also have very powerful piercing attacks, letting them beat the Destroyer, Plantera, and Skeletron Prime with no trouble. They tend to get stuck behind blocks, so they don’t work very well underground, but you shouldn’t really be going underground at this point, so it doesn’t matter.
Now, for the next mech, the Destroyer
He is actually really easy (like always). If you use the platforms you made for the Twins, and just run back and forth, spraying your golden shower like crazy, the Spazmaminis (no kidding, that’s the real name) should take him down no trouble. I didn’t even get past half health for this fight. Of course, the Retinaminis help, but the Spazmaminis, with their lunges that pierce endlessly help the most. HAHAHAHAHAHHAHAHAHAHAHAHHAHAHAHAHAHAHAHHAHAHA (that was for those of you who remember my mage guide…)
Good job! Just one mech to go, and I must say, with the avenger emblem you can now make out of the souls of might, and the extra emblem from the WoF, that you will reforge to menacing (replace one of the random menacing accessories you had from earlier on), that last mech is a breeze.
Using the same strategy you used for the Twins, except with the Twin minions instead of spiders, and aggroing your Twins onto the head of Skeletron Prime instead of Spazmatism, you should have absolutely no trouble killing him. If you do, use more potions.
Now, with the three mechs down, you can kill the boss that holds the key (or rather staff) to summoning. You must now fight…
Plantera!

Once again, my favorite part of being a summoner kicks in. Since your next armor upgrade is not in fact, chlorophyte based, you don’t have to do all that tedious chlorophyte mining. Because of this, you can jump right into Plantera once you’ve beaten the mechs.
The first thing to do is build an arena. A plantera arena should be near a Plantera bulb, have heart lanterns and campfires, and be around the size of your screen or bigger. I have recently learnt that sticky dynamite is a very useful way of emptying out big areas if your pickaxe is only at pickaxe axe speed. So, using sticky dynamite, make a cave around the size of the screen near a plantera bulb. Once you have that cave, place heart lanterns and campfires on platforms interspaced throughout the arena.
Most classes will find hollowing out this big area tedious, with the incredibly fast and dangerous jungle spawns, increased by the fact that you are hollowing out a perfect spawning area, however, as a summoner, your Twins will take care of most of these before they start hurting you, letting you continue your work. The funny thing is, with all the enemies spawning and dying, it makes for a great farm. I got over 5 platinum making my arena, as well as preposterous amounts of bezoars, armor polish, adhesive bandages, bla bla bla bla. Basically, if you ever need money or items that drop from things in the jungle, you now know what to do.
Ok, now, fighting Plantera should be similar to fighting Skeletron Prime. Just spray your golden shower (or megashark with chlorophyte bullets) at Plantera, and make sure you aggro your Twins onto her. Just flying circles around her with your leaf wings, staying high in the air to avoid the spiky balls, you shouldn’t get below 3/4 health for the first phase.
The second phase can be a bit more challenging, especially in expert, but the same strategy applies; fly circles around her avoiding the tentacles. In expert, dashing in between gaps in the tentacles can also help a lot. If you find it difficult, again, potions are your best friend.
Once you beat Plantera, check your inventory for the Pygmy staff. If you have it, great! If you don’t, go kill Plantera over and over until you get it. This is the one thing that will turn you into a true summoner.
The pygmy staff is a high damage (80 with appropriately tiered summon gear), summoning staff that summons little pygmies, each throwing, at around a fast speed, a single, non-piercing spear. The spear can inflict both poison and venom, and are the part of the minion that does the damage. Although this may seem underwhelming at first, the fact that you can get up to 10 of them summoned at once, all throwing their spears at a fast speed, makes spears spawn and hit enemies faster than the megashark can shoot.
Then, the fact that the spears don’t pierce let every one of those spears hit. The pygmies are the OP machine gun of summons. The only problem is that the spears take time to move, so they can miss quite often when attacking a fast moving target. Against Golem, however, they absolutely destroy him.
Now, the other good thing about the pygmy staff is that, while having it in your inventory, the witch doctor now sells tiki armor, the pygmy necklace if it’s night, and the hercules beetle if he’s in the jungle. Tiki armor has high defence (for a summoner), high minion damage, and lets you summon 4 extra minions, making for 5 in total. The pygmy necklace is the first in a series of minion boosting accessories. It lets you summon one extra minion. The hercules beetle is basically the celestial emblem of summoners. It increases your minion’s damage by 15% and their knockback.
I recommend buying the tiki armor first, as it has the biggest variety of stat increases. Next, buy 2 pygmy necklaces. Reforge one of them to menacing, and one to warding. Sadly, you can’t place a duplicate accessory in the vanity slots, so you will have to keep the second one in your inventory, but at least right clicking the pygmy necklace in your inventory will switch it with the one in your accessory slot, making it easier to switch from + damage to + defence.
Finally, get 3 hercules beetles. One of them should be reforged to menacing. This one will replace one. Of your random menacing accessories. (By now you should have a menacing summoner’s emblem, a menacing avenger’s emblem, a menacing hercules beetle, and a menacing pygmy necklace to switch in when you summon your minions) The other two hercules beetles will be combined at a tinkerer’s workshop with the necromantic scroll to create papyrus scarabs, the third minion # booster accessory.
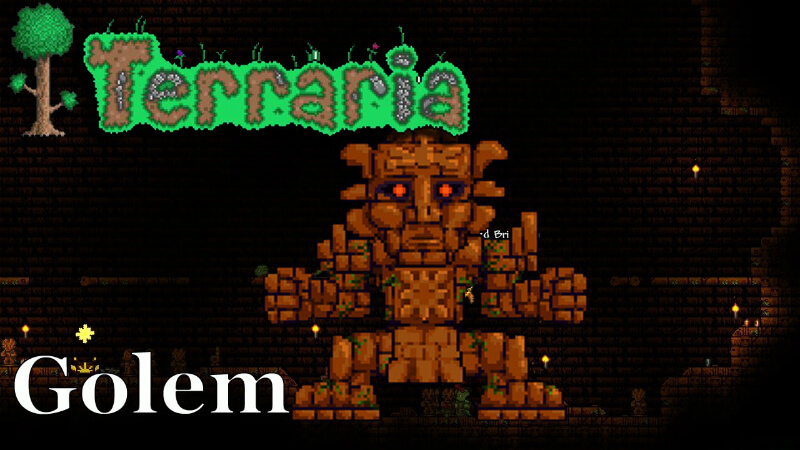
Now, with your new armor, accessories and machine gun minions, you can take out Golem. With his slow movement, he is the perfect test dummy for your new pygmies. Target the fists first, as the fight becomes more difficult if he still has them in the second and third phases. Once again, ichor is your best friend. If you have trouble, once again, use potions. If you have trouble with max damage pygmies, buffs, tiki armor and a nice platform/campfire/heart lantern filled arena, I bet you’ve never gotten past Skeletron, normal mode.
Post-Golem
Post-Golem is really fun. Like, really. It’s when you start experimenting with new ways of getting more damage, get the best minions, and fight Moon Lord. By the way, if you’ve made it all the way to here as a summoner, good job! You’re 1 boss, a bunch of mini-bosses, and 2 events away from killing Moon Lord! (2 bosses on expert). Now, where to start? There’s just so much stuff to do… I know! Let’s cheese the OP mini-boss that will give us a great new mount and the best pre-cultist summon weapon! Have you guessed what it is yet?
The…
MARTIAN MADNESS!
Now, for those of you who don’t know, to summon martian madness, you have to go to the outer thirds of the world and wait for a martian probe to spawn. To accelerate this process, you can use a battle potion, a water candle, and go to the outer space layer. Once one spawns, run over to it, let it turn red, and let it escape. Congrats, you let the martians know where you live. To get the madness to start, you have to go to your spawn point, or be near an NPC. Once you have this, start fighting the UFOs that spawn at an unfair rate.
What’s that? You can’t beat the martian saucers? Well, don’t worry, you’re not the only one. I doubt anything but a full damage stardust dragon, or someone wearing nebula armor could survive long against this mini-boss. (Maybe Yrimir) In it’s second phase, it spams the second most damaging attack in the entire game (second to the dungeon guardian) over and over and over. During it’s first phase, it spams multiple attacks at you. On top of this, it has high health, defence, and speed, making it difficult to hit strong attacks on it. Fortunately, you can cheese it, no problem.
You see, only one (two if you count explosions from missiles) attack in the martian madness event can go through blocks. The martian saucer can go through blocks itself, but it’s AI doesn’t let it if you stay near the roof of a structure. To this end, you can build a nice little room, about 9 blocks wide and 6 blocks tall. The size of this room should be enough to prevent the missile explosions from getting you, and nothing else except the drones (which won’t do much damage) can get you in there.
Now, for most classes the difficult part is being able to kill the UFO with either wall piercing or rain type attacks. For us minion wielders though, we can just summon the twins outside of our little box. Of course, your pygmies would be ideal for this stunt, with the machine gun damage, but unfortunately, they are too inaccurate to actually hit the UFO during the second phase. With the twins, it will take longer to kill the Saucer, but you will kill it.
Keep killing the Saucer until both the Cosmic car key and the xeno staff drop, then end the even as fast as possible. If the xeno staff drops first, use it to kill the Saucers. This will significantly increase the speed of kills.
Xeno staves are great. They summon little ruthless (remember kids, always reforge your minions to ruthless) UFOs that deal 36 damage, very quickly, although with all of your summon equipment at this point, the damage should be in the 75-80 range. This may, like the pygmies, seem underwhelming at first, but, upon closer inspecting, we see that they have all the qualities of the pymies (non-piercing, rapid-fire, high-ish damage), but one more essential one.
XENOES (yes, that’s what I’m calling them from now on, xenoes. Get used to it.) NEVER MISS!
That’s right. No matter how fast, teleporty, erratic or dangerous an enemy, the xenoes will always hit their target. Also, they teleport instantly to their target, making for even faster kills.
Basically, xenoes are beautiful. They’re almost equal to the stardust minions, the only problem being that they don’t do as much damage. With these sweeties, any single high health enemy, or multiple low health enemies will melt under their fire. Anywho, enough with my rant about the xenoes, let’s move on to something else… What is a good thing to do next, out of the 5 other things?
The Pumpkin Moon

So, as I hope you know, as a summoner, two accessories and a summon staff come from the pumpkin moon. The summon, ravens, aren’t necessary, but you need 2 of each the necromantic scroll, and the papyrus scarab. Also, the spooky armor, which most people would assume is inferior to the tiki armor, also comes from the pumpkin moon.
The thing is, spooky armor has more damage boost for your minions, but lacks in defence and lets you summon 1 less minion than tiki armor. Usually, this means we would discard the armor, however, we are summoners, and so we can use the spooky armor for the first few summons, then switch to tiki armor.
So, now that you know the benefits of beating the pumpkin moon, let’s discuss how to actually fight. The most efficient way I’ve found of doing the pumpkin moon is with this arena:
- Make a flat area 175 blocks wide. Mark the exact center
- Build a floating platform made from solid blocks 2 blocks up from the ground. (There should be a 1 wide hole between the actual ground and your little floating block platform. The platform should be around 11 blocks wide. It should be at the exact center of your flat area.
- Count 37 blocks up from your platform, and place 5 bubble blocks, again, in the direct center.
- One block up, and in the direct center of these bubble blocks, place three platforms (actual platforms this time, the ones you can shoot through.
- On the sides of your platforms, build walls out of solid blocks, going anywhere from 3-5 blocks up.
- Attach heart lanterns and campfires around this area. Fill the bubble block area with honey until you can stand on the platforms and get the honey buff.
- Fill your flat area with lava.
- If you want, you can build a house out of platforms (yes, platforms count as walls, ground, entrance/exits, and roofs) and place a bed it there. You can also move the nurse in, although she’ll probably die in the later waves.
Now, you have a pumpkin moon arena. If you stand in the center of your honey healing area, all mob spawns will be forced onto that little block platform floating above the lava. This will let you place traps (I advise using flame traps, spear traps, and a dart trap battery attached to one or more 1 second timers, depending on how advanced you want to get. With all traps and stuff, I’ve gotten to round 15 before 10 PM. ), and spam piercing weapons and minions at the small monsters that spawn, all clumped together.
As for minions, you should probably use the Twins, the deadly sphere staff (this arena works just as well for solar eclipses), or, if you’ve already triggered the lunar events, the stardust dragon. Once you get it, the raven staff can work too. Because of their piercing, all of these can handle the high amounts of enemies.
** Warning! **
This arena does not prevent death. Although I almost guarantee that it will get you to round 15, the pumpkins from that round will kill you if you don’t move constantly with the UFO.
For accessories, I’d advise having a shield, and swapping out wins for something more useful (since you have the UFO).
The first necromantic scroll you get should go into a papyrus scarab, as this accessory gives bonus damage as well as an extra minion. After that, use the necromantic scroll outright. You will eventually want a menacing and awarding of both of these, but I’ll leave you the option of choosing if you want damage or defence first.
Now that you have your loot from the pumpkin moon, this should be your setup:
SUMMONING
- Spooky armor
- Menacing summoner emblem
- Menacing hercules beetle
- Menacing papyrus scarab
- Menacing necromantic scroll
- Menacing pygmy necklace
- (expert) Menacing avenger emblem
FIGHTS/NORMAL GAME
- Tiki armor (remember to summon the final bonus minion you get with this)
- Warding star veil
- Warding rocket boots/wings of some kind(for normal play) or ankh/paladin’s shield (for boss fights)
- Warding necromantic scroll
- Warding papyrus scarab
- Warding pygmy necklace
- (expert) Warding worm scarf
Got all that? Cool. This is going to be your setup until you get stardust armor. Now that’s over with, you have two more things to do.
Duke Fishron

Now, the thing is, he’s not actually necessary unless you’re on expert. His summon isn’t great, and you have the UFO, so you don’t need the wings. In expert mode though, having the shrimpy truffle is a great bonus. Actually though, he’s so easy as a summoner, why not just do it for fun?
So, chug some potions, summon your xenoes, and let’s go! Just dodge perpendicular to his lunges, and you shouldn’t really get hit. Using the golden show, and letting my xenoes do crazy damage, I actually beat expert duke fishron faster than I beat him as a mage in normal mode. Just goes to show how OP summoner can get.
THE LUNAR EVENTS AND THE MOON LORD!

For the Moon Lord fight, you should make 2 things. One, an arena for the fight, and two, a summoning station.
First, the summoning station:
Make a small house with a bed in it. This will be your spawn. Fill the bottom with water. This will activate the cute fishron buff, and give a 15% damage boost, as long as you remember to activate the cute fishron every time you want to summon stuff. It should also have a bewitching table, as well as a chest with summoning, well fed and wrath potions. Every time you want to summon something new, teleport to here using the magic mirror, activate the cute fishron, chug your potions, click the bewitching table, and then summon. Always remember to switch out your armor and accessories to the more damaging versions when summoning.
Now, the arena. It really depends on whether you’re in expert or normal mode. In expert mode, here is what to do:
Make long columns of bubble blocks filled with water (the bottomless water bucket is useful for this). You should be able to get from one to the other without the “wet” buff running out on your cute fishron.
Fill one of the middle ones with honey.
Place campfires and heart lanterns strategically around the bubbles, so you always have the buffs as long as you stay in the arena. This is basically it. Using this with the cute fishron mount, you should be able to dodge most attacks, and survive the fight. an extra bonus is having the rod of discord with you, to dodge the phantasmal deathray. It isn’t necessary, but it makes the fight a lot easier.
If you’re in normal mode, you should fill a long area with campfires and heart lanterns. Make sure you can fly with the UFO for at least 30 seconds to the right and to the left without leaving the campfire/heart lantern buffs. Once again, the R.O.D. is very useful for this fight.
Now then, with all this set up, bust out your xenoes, and take down the lunatic cultist. Sadly for those of you who decided to play pure summoner, you will have to use other types of weapon to kill the weird cultists at the dungeon entrance, as your minions will not target them. The cultist should be pretty easy with max damage xenoes, all your defence, a golden shower, and a UFO.
With the cultist down, the pillars will spawn. Rush to the stardust pillar. To fight this pillar, and every other pillar except the solar one, fly around in a sideways figure 8 in the UFO. This should allow you to avoid most attacks from all the enemies in most of the pillars. Let your xenoes kill all the enemies getting close to you, and kill that pillar. With the fragments from this pillar, you can now craft the endgame summon weapons: the stardust dragon staff and the stardust cell staff.
The stardust dragon is a minion that, instead of creating an army of it, increases in size and damage with each summon, ending up as basically a wyvern. Although it’s damage is actually lower than the stardust cell’s, summoning 11 of it with endgame max damage (I’ll get to that), you can get each segment to do over 1100 damage, 6 times per second, resulting in around 6600 DPS, annihilating bosses. Even with pre-ML tier equipment, you should be able to get somewhere between 600-800 damage per segment.
Pros: It does INSANE damage, piercing through multiple enemies, and pretty much insta-kills everything non-boss, and even most pre-HM bosses.
Cons: It can only target one enemy at a time, making it less effective against non-clumped enemies. With it’s ability to target offscreen and through blocks, it often just ditches you to go kill a green slime, leaving you defenceless in the face of a boss or event’s wrath.
Uses: Killing bosses, targeting things through the ground.
The stardust cell staff is a summon weapon that summons little stardust cells. They act very similar to the xenoes, with the teleporting and homing attacks. The main differences are the extra damage (highest base minion damage in the game) and the celled debuff. It attacks by teleporting over to it’s victim, and shooting a smaller version of itself at the enemy. The smaller version inflicts the damage of the minion, but then latches on, inflicting 10 damage per tick, and 10 of them can stack on a single enemy, making for 100 damage per tick.
Pros: Can target multiple different enemies at the same time. High damage. Great debuff. Non-piercing (so doesn’t prevent hits from friend’s weapons).
Cons: Cannot target through the ground. Not AS damaging as the stardust dragon.
Uses: Playing with friends, using other weapons with it, events where the enemies don’t group together (like the rest of the pillars…)
Good job! Now, try to beat the rest of the pillars. The next one I would advise taking on is the vortex pillar, because it’s easier than the solar pillar, and gives you a nice weapon (the vortex beater). The vortex beater with chlorophyte bullets, which you should have since you don’t have anything else to do with your chlorophyte, is a great weapon for the pillars and Moon Lord. This will be your side weapon for the Moon Lord fight, since it homes and does decent, non-piercing damage (important so that your dragon gets as many hits off as possible).
Using your vortex beater, as well as your stardust cells (which, by the way, should be doing damage in the high 100s), take out the solar pillar next. This pillar is by far the hardest of them all, with the enemies with the highest defences and attacks, as well as the crawltipedes, limiting your mobility.
Using the UFO, while staying near the ground, or, if you were lucky, using the scutlix mount (from the martian madness), will prevent the crawltipedes from targeting you. The is still a very hard pillar, even with stardust armor, so if you have to leave the pillar area in the middle of the fight, and remember that the shields on the pillars don’t reset when you leave their area.
Finally, the nebula pillar. Before engaging the enemies in this area, you should make sure you have one (or two) of every buff potion you think you will need in your inventory. This way you can buff up as soon as you kill it. This pillar is very similar to the stardust pillar. Just fly in figure eights until your cells have killed all the necessary enemies. As soon as you kill this pillar, collect the fragments, then turn on auto pause and teleport back home to get ready for…
The Final Fight
As soon as you get back to your summoning area, unsummon the cells. If you don’t know how to do this, just right click the buff in the buff bar. Now, open your inventory so time pauses, and switch over to your summoning set of armor and accessories. Un-pause for a second, right click the bewitching table, and press ”B”to drink all your buff potions. Activate the cute fishron mount while making sure you stay in the water. Finally, summon your stardust dragon 9 times. Switch over to tiki armor, summon him one last time, then make sure you switch back to your fighting accessories. Now, if you think you have time, craft some super healing potions out of the fragments from the pillars and some greater healing potions. Finally, fly over to your arena…
As soon as you get to your arena, dunk yourself in some honey if you have any, and stand still until your health is at full. Maybe equip a shiny stone in the place of your shield for a second if you’re in expert. Once you’ve full healed up, pull out your shrimpy truffle (if in expert) or UFO (if in normal) and prepare to fight.
The first thing to do when Moon Lord spawns is to target your stardust dragon on the head eyeball. This should ensure your dragon doesn’t go insane and try to kill a green slime, and to make sure that the head eyeball pops as soon as possible. Now, start running sideways with your mount. In both expert and normal mode, you will want to ALWAYS BE MOVING DIAGONALLY. This could make you move in a circle, or a diamond, I don’t care. As long as you keep moving diagonally, most attacks should miss (especially with the shrimpy truffle in the water arena). When the phantasmal deathray comes out, either use your R.O.D. to dodge, or run around his eyeball. DO NOT GET HIT BY IT it will take most of your health.
When all three eyeballs pop out, aggro your dragon onto his core. The dragon should take it out in less than 15 seconds. If you’re using the shrimpy truffle, you may want to slow down a bit to give your dragon a better chance of hitting the core. Once Moon Lord dies, remember to avoid the head and hands, as they can still kill you and prevent you forgetting your loot.
YAYAYAYAYYAYAYAYYAYAYAYAYYAYA!
You beat the final boss in Terraria as a summoner! It was a difficult, but rewarding playthrough. Now that you’ve beaten Moon Lord once, you should be able to do it again and again until you have full stardust armor and all the loot you want. The best endgame side weapons for you are probably the terrarian, the star wrath, the meowmere, the S.D.M.G., and yes, the golden shower (the only reason you didn’t use the shower for ML is because he’s immune).
Conclusion

Finally, the last thing I will show is how to get 1200 damage per segment on a stardust dragon, as well as boosting every other summon to insane levels (the slime staff gets 32 damage)
- First of all, you need to be in expert mode. Sorry you normal people.
- Next, you need a full set of nebula armor
- A bat statue
- Honey
- Cute fishron
- Full stardust armor
- Ruthless modifiers
- All those accessories I told you about earlier, reforged to menacing
- Wrath, well fed, bewitched and summoning buffs
- Auto-pause enabled
- A very fast mouse clicking finger
- Wires, timers and stuff
- Beenades (or some other kind of bee weapon)
Ok, so, place the bat statue somewhere near by, but still trapped in your summoning room. Replace the water at the bottom of your summoning station with honey (for healing, and to not kill the bees). Next, wire up the bat statue to a one second timer. Have the nebula armor in the vanity slot. OK, get ready.
- Start the 1 second timer. This will spawn bats.
- Get hit by bats until you get the feral bite debuff (Plus damage, minus defence, other random debuts can occur)
- Switch to nebula armor
- Spam beenades at the bats until you get tier 3 + damage nebula
- Switch to stardust armor
- Chug potions
- Activate shrimpy truffle
- Spam the left mouse to summon a full stardust dragon before your damage nebula runs out (8 seconds)
- Cheers!
Well, I hope you enjoyed reading this guide, all you summoners out there. I also hope that this guide will help you beat expert Moon Lord. Thank you for reading this WoT (Wall of Text), and if you read this whole thing, you’re probably crazy and kind of addicted to summoning. If you read this whole thing, and you don’t plan on playing summoner, you are definitely crazy, and should seek professional help, but thanks anyways. Also, I hope that if you read all the way to here, you liked it, and were doing it for fun. If your teacher/boss was making you do this, tell them that they have a problem. I should probably stop ranting and press post now.
Thanks! Bye!
Original Link – Continuation of discussion


Add comment